Star Wars Knights of the Old Republic II: The Sith Lords/Goto's Yacht
Table of Contents
- Difficulty Classes
- Force powers
- Prestige classes
- Achievements
- Autobalance
- Military Base Sub-Level
- HK Manufacturing Plant
- Administration Level
- Mining Tunnels
- Rescue T3-M4
- Asteroid Exterior
- Dormitories
- Command Deck
- Crew Quarters
- Engine Deck
- Residential 082 East
- Entertainment
- Czerka Offices
- Residential 082 West
- Dock Module
- Bumani Exchange Corp.
- Restoration Zone
- Czerka Site
- Underground Base
- Polar Plateau
- Secret Academy
- Turret encounters
- Swoop racing
- Refugee Landing Pad
- Entertainment Promenade
- Refugee Quad
- Landing Rights
- Jekk'Jekk Tarr
- Jekk'Jekk Tarr Tunnels
- Droid Warehouse
- Goto's Yacht
- Jungle Landing
- Mandalorian Ruins
- Battle Circle
- Iziz Spaceport
- Merchant Quarter
- Western Square
- Iziz Cantina
- Khoonda Plains
- Enclave Courtyard
- Enclave Sublevel
- Crystal Cave
- Defense of Khoonda
- Jungle Tomb
- Royal Palace
- Valley of Dark Lords
- Sith Academy
- Shyrack Cave
- Secret Tomb
- Rebuilt Jedi Enclave
- Suburban (082 West)
- Suburban (082 East)
- Entertainment Module 081
- Ravager - Command Deck
- Trayus Academy
- Trayus Crescent
- Trayus Proving Grounds
- Trayus Academy (Top)
- Trayus Core
- Light armor
- Medium armor
- Heavy armor
- Blaster pistols
- Blaster rifles
- Lightsabers
- Special weapons
- Upgrade items, armor
- Upgrade items, ranged
- Upgrade items, melee
- Upgrade items, lightsaber
- 1 Ebon Hawk
- 3 Audience Chamber
- 4 Torture Room & Lab Station
- 6 Maintenance Room & Workbench
- 7 Exterior Defense
- 8 Central Command
- 9 Interior Defense
- 11 Ebon Hawk
- 12.1 Lost Jedi
- 12.2 Seeking Passage
- 12.3 Will Work for Fuel
- 12.4 New Fuel Source
Sure enough, after T3-M4 escapes the Droid Warehouse and Tienn Tubb changes the Ebon Hawk's ID signature, Goto's yacht intercepts it after take off. Meanwhile, on the yacht you are in the Audience Chamber with a hologram:
In every case:

Ebon Hawk [ edit ]
The Ebon Hawk has docked with Goto's yacht on its starboard side: the Map screen shows that this is the top left side of the map, and that the Audience Chamber , where your main character is under guard, is on the center right side, at the stern of the yacht.
If your party tries to go back through the docking hatch behind them in the left wall:
There's a plasteel cylinder by the bottom wall, to the right of a utility droid:
There's a security console by the top wall:
If you enter the incorrect count then you have to log out before attempting to unlock the console, using a Computer Spike each time, to enter the count again. You can brute force the correct count in this way (there's no way of knowing that it starts at two) or you can destroy Goto guard droids, which can communicate the current count upon their destruction as a binary number:
They may not communicate this if debilitated by a Stun Droid power, but the count still increases with each kill.
Otherwise, you can bypass security to get limited access with some Computer Use , letting you view defense summaries and cameras:
Interrogation Chamber defenses have been reassigned and, sure enough, if you check its camera you'll see it's empty, so you shouldn't bother overloading the power conduit... yet:
Limited access also lets you download a program:
Full access is only granted after entering the correct count, slicing the computer after bypassing security for limited access, or a highly-skilled security bypass:
Other than experience received, the only reason to upgrade from limited to full access is if your party has a droid or two ( T3-M4 or HK-47 , or both):
If you have a Stealth character and want to sneak past as many droids (and defense turrets) as possible on your way to getting the Droid Controller access code from the Bridge , then you may want to enter Stealth mode now, and ensure your other character is out of sight, before opening the door in the bottom wall of the right corner. Beyond this door is a corridor containing five floating mines (you can never control them, but they can be useful later):
Once a floating mine detects you, it approaches and explodes, inflicting variable piercing damage which can be halved if a successful Reflex save is made against DC 15.
Cells [ edit ]
Beyond the door at the bottom end of the mined corridor is the Goto starboard commander:
There's a decorative diamond in the middle of the floor indicating the position of a hidden Average Gas Mine , and a command console by the bottom wall:
If you select Systems Control first then access is restricted, only allowing you to run the Basic Diagnostic program on each system:
Selecting Program Library allows you to upload any other programs you acquire:
Once uploaded, you can check what each program does.
However, you cannot run any uploaded programs on restricted systems. You can unlock a restricted system once you have its access code:
To escape from Goto's yacht you only really need the Shut Down program and Power Distribution access code to use on the Bridge Command Console, but acquiring other programs and access codes can be useful, and grant experience when run on unlocked systems:
For example, if you acquired the Containment Cells access code from the Goto starboard commander:
If you return to main menu and select Systems Control:
There are other command consoles throughout the yacht, any of which can be used to upload programs, unlock systems using access codes, and run programs on those systems. However, running programs on the Power Distribution system is restricted to the Bridge Command Console.
Beyond the door in the left wall at the bottom end of the commander's room is another room, containing a maintenance droid, a Goto guard droid, and a plasteel cylinder by its left wall, at the back. The maintenance droid repairs any damage inflicted on the guard droid, so destroy it first:
Once destroyed it explodes, inflicting variable piercing damage which can be halved if a successful Reflex save is made against DC 15.
Beyond the door in the right wall at the top end of the commander's room is another room, containing another maintenance droid and two Goto guard droid, one of which is shielded:
There's a security door in each wall of the bottom right corner of the room:
Beyond the right door is a long corridor with three containment cells in its top wall, sealed with force fields:
If Bao-Dur isn't in your party and you haven't used the command console to unlock and shut down the Containment Cells system, you can blast them instead. The left and right cells are empty, but the center cell contains a damaged utility droid:
Audience Chamber [ edit ]
Returning to the entrance of the starboard wing of the containment cells , beyond the security door in the bottom wall is another room, containing two Goto guard droids (one shielded), with a plasteel cylinder in its bottom right corner:
There's a door in each wall of the bottom left corner of the room. The bottom door leads to a corridor containing a maintenance droid and two Goto guard droids (one shielded).
There's another door at its bottom end, and another Command Console by the middle of its left wall. If you have the Turret Defense access code from the damaged utility droid in the starboard Containment Cells , then you can unlock the turret system and run programs:
If you run the Overload program:
This doesn't seem to have any actual effect on turret damage. However, if you run the Shut Down program:
If you return with the Reset program from the damaged utility droid in the port Containment Cells :
Running the Shut Down program causes any defense turrets to malfunction and target both hostile and friendly units, while running the Reset program affects their accuracy, adding Effect Bonus -50 to Attack Breakdowns, reducing them to minimum 5% chance to hit and 0% critical conversion. If both programs are run then turrets become much less of a threat to your party, but also to any other hostile or friendly units, which respond in kind when attacked.
There's a security door in the middle of the right wall:
The corridor beyond contains three Goto droid heavy guardians and six defense turrets: if you used the command console to unlock the turret system and then tried to shut it down, then they'll be attacking each other. If you get to the audience room door at the other end of this corridor before all turrets are killed:
Once all turrets are killed, you can open the audience room door and your main character joins the rest of your party here. There are two sentry droids at the back of the chamber, which had been flanking your main character:
If you get the Droid Controller access code from the Bridge then use any Command Console to unlock that system and run either the Overload or Shut Down programs, you can scavenge any remaining droids for components as well (maximum 450 (15 * 30) more). You can also do the following:
However, you only receive experience for the first droid. These sentry droids don't follow you out of the audience chamber, so this is of limited immediate use. There's an auxiliary console by the wall in the bottom right quadrant of the chamber:
After acquiring the Power Distribution access code and logging out, the following (optional) options won't be available until you get to the bridge:
If you return to use the command console at the other end of the corridor to the audience chamber, then you can now use this access code to unlock this system:
So you cannot run programs on the Power Distribution system until you get to the bridge: if you also have the Shut Down program from the utility droid in the Ebon Hawk 's docking bay then you have everything you need to go there directly via Exterior Defense , but you might as well explore the port side of the yacht (which isn't necessary, but can make breaching the defenses easier).
Torture Room & Lab Station [ edit ]
Beyond the door below the command console outside the Audience Chamber is a room containing three Goto guard droids: one is shielded, but only one of the remaining has a Molten Cannon .
The room beyond the door in the bottom wall is clearly an interrogation chamber or torture room due to the presence of a force cage and various other restraints, with a Lab Station by the top wall. There's also a plasteel cylinder in the top left corner, by this lab station.
Beyond the door in the right wall of the interrogation chamber is a long corridor with three containment cells in its bottom wall, sealed with force fields:
If Bao-Dur isn't in your party and you haven't used a Command Console to unlock and shut down the Containment Cells system, you can blast them instead. The left and center cells are empty, but the right cell contains a damaged utility droid:
Maintenance Room & Workbench [ edit ]
Beyond the door in the left wall of the interrogation chamber is a room with a decorative diamond in the middle of the floor indicating the position of a hidden Average Gas Mine , and a Command Console by its top wall. If you have the Reset program from the damaged utility droid in the port Containment Cells , then you can upload this to the Program Library and run it on any unlocked systems.
Beyond the door in the top left corner of the console room, there's a storage room with three plasteel cylinders at the back, by the left wall.
Beyond the high security door in the bottom wall of the console room is another high security door in the right wall, beyond which there's a maintenance room with a Workbench by its bottom wall and three plasteel cylinders in the back right corner.
Beyond the door in the bottom wall opposite the first high security door is the port docking bay, with a Security Console by its bottom wall, a plasteel cylinder by its top wall and a docking hatch in its left wall.
Exterior Defense [ edit ]
Go through the door above or below the command console outside the Audience Chamber and then through the door in the left wall, and either way you'll be in a room with a Security Console by its left wall and a hidden Average Gas Mine in the middle of its floor. Through the door in the top or bottom wall is the right side of Exterior Defense: on the left side there are eight defense turrets, like those guarding the Audience Chamber , and all but the two leftmost use their shields.
If you've used a command console to unlock the turret system and then run the Reset program after getting what's needed from the damaged utility droids in the starboard and port Containment Cells, then Effect Bonus -50 is added to the Attack Breakdowns of these turrets, reducing them to minimum 5% chance to hit and 0% critical conversion. Otherwise, use shields of your own, Damage Immunity or Damage Resistance vs Energy to withstand their focused fire, or position yourself carefully to limit the number firing on you while attacking with ranged weapons, grenades or Force powers.
You could also simply run or sneak past and go through the door in the top or bottom wall on the right side. Either way, there's a Goto droid heavy guardian just inside the door, a Command Console by the right wall and a fire suppression unit in the opposite corner on the left side of each room:
Central Command [ edit ]
As you approach the sealed hatch at the left end of either room beyond the Exterior Defense turrets:
If you're in Stealth mode then this cancels it. The semi-circular corridor linking the two sealed hatches is mined, five to either side of a junction guarded by the Goto central commander and two more Goto droid heavy guardians:
These mines are not part of the Minefield system.
There's another sealed hatch down the corridor left of this junction, beyond which is central command, a console hub with a circular corridor around its perimeter. If you enter the hub with your party, one of them can comment on it:
If you haven't used a Command Console to unlock and shut down the Containment Cells system, then there's a force field in the back wall of the hub:
If Bao-Dur isn't in your party then you can blast it instead. The hub's perimeter corridor also allows you to go around to the other side of the force field. However, if you take it down then what you see of Interior Defense may prompt you to use the command console in the middle of the hub's top wall to reset it, or use the Minefield access code from the Goto central commander to unlock that system and run programs:
If you run the Shut Down program:
If you run the Reset program:
Interior Defense [ edit ]
The corridor exiting the right side of Central Command is heavily mined:
If you used a Command Console to unlock and shut down the Minefield system then neither they nor the mines outside the high security doors to the Bridge can be triggered, but they can still be disabled or recovered for experience. However, the junction beyond the minefield is guarded by seven Goto droid heavy guardians. If you used a command console to overload the Minefield system then both you and the droids can now trigger them: since they're melee attackers, once they become aware of you they can run over the mines, triggering them and heavily damaging or killing themselves.
Bridge [ edit ]
The junction beyond the minefield is in the middle of a corridor between two high security doors in the left wall at its top and bottom end, which are mined (five a side):
If you used a Command Console to unlock and shut down the Minefield system then the mines cannot be triggered, but they can still be disabled or recovered for experience. There are also windows at the top and bottom of this corridor, and the back of the Ebon Hawk can be seen through the top window, to the right.
Beyond the doors is the bridge, a semi-circular room with a plasteel cylinder in its top right corner, by the door:
There are two consoles in the middle of the bridge. The Bridge Command Console is the top one, on your left. Like any command console it can be used to unlock and access the Droid Controller system to run programs although, in the likely event that you've already killed every droid on the yacht, this may only be good for experience:
If you run the Overload program after disabling the yacht's cloaking device:
However, if you ran or sneaked past droids then you can get them to defend you against any remaining turrets, and the bounty hunters that board once the yacht's cloaking device is disabled. You need to run the Overload program before you disable the cloaking device, otherwise any remaining droids will ignore turrets and bounty hunters, but still attack you: if you run it afterward by mistake then you can still run the Shut Down program to prevent droids attacking you, and scavenge them for components like the Sentry Droids back in the audience chamber, as well as examine each unit's behavior core to switch its defense protocol to include you and your companions. Afterward, you can run the Reset program to allow you to kill any surviving droids.
The primary power system console is the bottom console in the middle of the bridge, on your right, which can be used to switch the docking hatch seal (and containment cells) from the primary power system to the secondary:
Only the Bridge Command Console can be used to both access the Power Distribution system and run programs on it, to shut down the (secondary) power system:
Once you've switched the docking hatch seal to the secondary power system and shut it down, or vice versa:
After disabling the cloaking device using the Bridge Command Console, when you return through Central Command to the junction in the middle of the mined corridor, there's a pair of Duros bounty hunters to either side, and another pair in the rooms at each end of the corridor:
When you return to the Exterior Defense turrets, the Twi'lek Twin Suns await you. If Atton is in your party as you enter:
If any of the turrets remain then you can use the command console by the right wall of the room above or below to access the turret system, causing them to malfunction after trying to shut them down so that they can target the Twin Suns as well (although they'll be much less effective if you reset them as well). This isn't necessary, but it can be satisfying: since the Twin Suns' cantina encounter with Atton, each has lost a sword, but Atton can gain up to eight guns (and two party members).
All that remain of the boarders are four trios of Gand, each consisting of two Gand and a Gand Findsman. One trio is in the Interrogation Chamber , and you can now use one of the Security Consoles in either of the rooms at the right end of Exterior Defense to overload the power conduit there, killing them: the rest of the port wing remains unpopulated, so there's no need to go there unless you want to see if the Gand left any remains.
The remaining Gand are between you and the Ebon Hawk docking hatch: there's a trio in the room to the right of the top security console room, another in the room above (at the left end of the starboard Containment Cells corridor), and the last trio is in the corridor up to the docking hatch (if any floating mines remain, they can damage Gand when triggered or killed).
The off hand Ion Blaster adds no Ion vs. Droid .
Save game before going through the unsealed docking hatch to enter the Ebon Hawk. As you escape, Goto's yacht is attacked and destroyed. Aboard the Ebon Hawk, if Hanharr joined your party:
Otherwise, if Mira joined your party:
In either case:
Nar Shaddaa [ edit ]
Back on Nar Shaddaa, you return alone to the flophouse on the docks to meet Zez-Kai Ell...
Lost Jedi [ edit ]
If Alignment < 40:
Otherwise, if Alignment 40 or more:
Before Zez-Kai Ell leaves you, if you are a Jedi Consular , Jedi Master or Sith Lord then he teaches you a Force form , otherwise he teaches you a lightsaber form :
Otherwise, you engage in combat. The door in the left wall at the bottom end of the room remains locked until Zez-Kai Ell is defeated:
Once Zez-Kai Ell has been reduced to less than 50% Vitality, if you are a Jedi Consular , Jedi Master or Sith Lord then you learn the Force form he's using (despite him not having any Force powers to use), otherwise you learn the lightsaber form he's using:
Once Zez-Kai Ell is defeated (for which you receive no experience), you subconsciously drain Force power from him:
Now if you speak to a commoner on the refugee landing pad, or a Duros in the entertainment promenade's Cantina :
Seeking Passage [ edit ]
If you spoke to a woman named Kahranna in the refugee quad who told you her family are Seeking Passage off Nar Shaddaa, and you told her you'd help, then if you speak to the dockmaster Fassa at the Pylon 2 junction on the docks:
If you return to the refugee quad, then Kahranna is gone.
Will Work for Fuel [ edit ]
If you spoke to a man named Odis in the refugee quad who told you he's looking for work and Will Work for Fuel , and you've spoken to the Lunar Shadow crew in the flophouse on the docks about their Wayward Captain but not reunited them or told them about Odis, then if you speak to the dockmaster Fassa at the Pylon 2 junction on the docks:
If you return to the refugee quad, then Odis is gone.
New Fuel Source [ edit ]
If you return to Vogga's Enclave in the top left corner of the docks and speak to Vogga the Hutt again after saying you'll help deal with Goto in exchange for a New Fuel Source for Telos' Citadel Station:
- Pages with broken file links
Navigation menu
Gamer Walkthroughs
Gaming Walkthroughs and Reviews
Walkthrough
- Prologue (Ebon Hawk Adrift)
- Peragus II Mining Facility
- The Harbinger
- Citadel Station
Nar Shaddaa
- Master of the Palace
- Dantooine & Citadel Station Redux
- Trayus Academy
Most Popular Games
Ori and the Blind Forest
Please Don’t Touch Anything
Knights of the Old Republic 2
Hollow Knight
The Curse of Monkey Island
The Witcher
Monkey Island 2
Machinarium
New Walkthroughs
The Talos Principle
Heroes Chronicles
Axiom Verge
Cat Quest 2
Death’s Door
System Shock
Ender Lilies
Refugee Landing Pad
1) Landing Pad – You’ll touch down on one of the landing pads in the Refugee sector. Unfortunately this pad has been claimed. Once you step out Quello will demand payment. You can threaten him or pay him. Either way there will be trouble later on once the Red Eclipse gang arrive.
Head down the corridor to the east. As you turn around the corner you’ll bump into some Exchange thugs. You can take them out or let them taunt the guy for LS or DS points. There’s also a couple of refugees here who will ask for credits. If you help them Kreia will talk to you. Agree with her for more influence over her.
2) Workbench – There is a workbench here, but more importantly in a nearby container you’ll find the Airspeeder Navigation Interface . One of the items you need to repair a broken airspeeder belonging to the Serroco gang.
3) Tienn Tubb and TT-32 – You’ll first meet the droid TT-32 who asks you to help retrieve a droid that was sold to the droid parts merchant, Kodin at #9. If you do you’ll get a Renewable Droid Shield .
Tienn Tubb will help you later on once you have a Blank Transponder Card for the Ebon Hawk.
4) Ex Bounty Hunter, Vossk – Talk to Vossk and he’ll tell you about the different factions and some of the bounty hunters on Nar Shaddaa.
5) The Ebon Hawk Owner? – Yes, that’s right. A man by the name of Ratrin Vhek will claim to be the owner of the Ebon Hawk. He doesn’t have any actual proof of ownership except that he knows where the hidden compartments are located. Agree to hand over the Ebon Hawk for LS points or kill him for DS points. If you give him the ship or tell him to go away he’ll end up trying to steal the Ebon Hawk back anyway and he’ll get killed by the Red Eclipse gang.
6) Oondar the Bad Merchant – Oondar is in competition with Geeda on the other side of this area #8. They will ask you to get rid of the other merchant. You can tell either of them to leave, either Oondar or Geeda but you’ll no longer have access to their inventory.
7) Exchange Boss – A deal with an Exchange Boss has gone wrong. Once you enter the room they’ll turn on you. Killing them will give you notoriety with the Exchange.
8) Geeda the Good Merchant – Geeda will sell you some regular items for sale. If you come back to her later in the game she’ll have much better items for sale.
9) Kodin, Droid Parts Merchant – If you’ve been to see TT-32 at #3 then you’ll be able to buy the IT-31 droid for 500 credits which you may be able to Persuade down to 150 credits. Threaten Kodin for DS points and get the droid for free.
Once you’ve purchased IT-31 talk with it and send it back to TT-32. Follow the droid back and speak with TT-32 for your reward.
10) Swoop Racing – This room and the next room are the swoop racing area. Lupo has been cheating the swoop racers by using an unbeatable droid, C9-T9, to race against them.
Speak with Borna Lys and she’ll have a way to sabotage the droid, making the swoop racing fairer for everyone else. Persuade her for the Access Codes and then use Repair or Computer on the terminal next to the C9-T9 droid. You’ll be able to check it for oddities and sabotage it one way or another.
Talk to Lupo and convince him to sell the Swoop Racing to Borna. Head back to Borna and she’ll give you a reward. You can now take part in the Swoop Racing with a good chance of winning.
Once you’ve cleared this area head through one of the exits to one of the other three areas.
11) Exit to Entertainment Promenade
12) Exit to Docks
13) Exit to Refugee Quad
Entertainment Promenade
1) Exit to Refugee Landing Pad
2) Twik’gar and Kallah-Nah – As you enter the Entertainment Promenade there will be a couple of thugs on the left, Twik’gar and his friend. They’re asking about a Pazaak player called Geredi. You can convince Geredi to come out or just leave the thugs waiting. Geredi is one of three Pazaak players you need to beat in order to meet the Champion so this is one way to get rid of him if you don’t want to play him properly.
On the other side of the door is a little character called Kallah-Nar . If you speak with him after talking to the Pazaak Den guard you’ll be able to find out the password to enter the Pazaak Den. Secondly, you can find your current stading with the exchange. You need a certain amount of notoriety with the Exchange in order to be given a meeting with Visquis, the local Exchange boss. You can also pay Kallah-Nar 2,000 credits to improve your stading with the Exchange but if you do the other quests this shouldn’t be necessary.
3) Pazaak Den Door Guard – The guard won’t let you in unless you utter the password. Speak with Kallah-Nar at #2 to find out the password.
4) Pazaak Den – There are three Pazaak players in here that you need to beat in order to meet the Pazaak Champion. You will either need to win against them 3 times before they give up and admit you are better or use guile and tactics.
S4-C8 – This droid loves playing Pazaak. You can have a few games with it and try to beat it or convine the droid to let you take a look at its programming. Alter the programming so that it’s no longer addicted to Pazaak and you’ll have one less opponent to beat.
Dahnis – This pretty girl is just Atton’s type. If Atton is in your party she’ll let him win in order to flirt with him. That’s two down, one to go.
Geredi – If you’re sticking to the Light Side then you’ll have to beat him legitimately three times. Otherwise tell him his “friends” are waiting for him outside.
The Champion – Once all three players have been beaten or are no longer playing the Champion will arrive. If you really like playing Pazaak then try and beat him three times. Otherwise convince him that winning all the time isn’t fun. He’ll agree and give you one of the best Pazaak cards, the “Tiebreaker +/- 1” .
5) Bar – You’ll meet a few characters here including the bartender, some thugs and a dancing trainer. This is an optional area but you’ll need to come here if you want to get access to Vogga Hutt’s hoard (A quest given at the Docks).
Once you’ve been to the Docks and discovered how to get into Vogga’s hoard you can buy the Juma Juice from the bartender here. The Juice will put Vogga’s Kath Hounds to sleep.
Domo, the dancing trainer will complain about not having enough dancers. You can dance yourself, or the Handmaiden will dance as well if she is in your party. This is not necessary as the thugs in this room let you know how to speak with Vogga.
If you put your stealth field on and go near to Vogga’s thugs, in the southern partition, you’ll overhear them talking about how no-one can see Vogga unless they have something to say about Goto.
Refugee Quad
1) Exit to Refugee Landing Pad – As you step into this area you’ll be confronted by a couple of Exchange Thugs. You can intimidate them to let you through or kill them. Killing them will allow some of the Refugees in this area to escape once you find them later.
2) Geriel – This man is sick, showing symptoms of the plague but you can heal him if you have sufficient Treat Injury skill for Light Side points. Convincing him to kill himself will give you Dark Side points.
3) Refugee Center – this large area is where most of the Refugees hang out. The Exchange hold the area on the western side of the map and the Serroco gang own the eastern side of the map.
Hussef – Speak with Hussef to learn about the refugees and how they are hemmed in on either side by the Exchange and the Serroco gang. You can help them out by dealing with either or both of these groups. If you are going for DS points persuade Hussef that they are doomed and the Exchange boss, Saquesh, will give you a good reward.
Aaida – She is looking for her partner Lootra. If you have been to the docks you’ll know that he’s still alive. You’ll need to have killed the Exchange thugs guarding the exit to allow her to escape. If you have intimidated the thugs the only way to start a fight with them again is to kill their boss, Saquesh.
Naddaa – The Exchange has taken her daughter captive #4. For LS points try to help her out. Later you’ll be able to arrange for her to be freed. Once you’ve rescued Adara go back to Naddaa for LS points.
Kaul – If you give him 20 credits he’ll give you a tip to go into Stealth mode when looting containers so the guards won’t notice you.
Kahranna – She’s looking for a passage off this moon. You can pretend to by the pilot she’s looking for and collect the credits for DS points or tell her you’ll help find someone. You’ll find help for her at the Docks.
Odis – Is looking for work as a pilot but has no Freighter. You can speak with Fassa at the Docks to organize a Freighter for him or the Lunar Shadow Crewmen.
Twi’leks – These two will give you a mysterious message that Atton is not all he appears to be. You can try to talk to Atton about it but you’ll probably not get any information out of him until you have high influence over him.
4) Adana – This is the daughter of Naddaa. Kill the guards and tell her she to wait here. Later you can negotiate with Saquesh #5 and have her released. Go back to her and tell her she’s free to go. Follow her back to her mother, Naddaa, and speak to her for LS points.
5) Saquesh – The local Exchange representative. You can intimidate him and try to get him to release his grip on the refugees. This will result in a fight with him and all of his thugs. Once you kill him though you’ll receive LS points. You can negotiate with him to ease up on the refugees or if you follow the Dark Side agree to remove the refugees by convincing Hussef that they are all doomed.
6) Serroco Gang – This area belongs to the Serroco. To gain entrance into this area you’ll need to Persuade the guards posted at the entrances to let you in or begin a fight and kill them.
Speak with the Serroco gang leader and try to get him to ease up on the refugees. This won’t work and a fight will begin. It’s a fairly tough battle so get ready with your shields and force powers.
Once you’ve cleared the area you’ll be able to explore this section and pick up all the loot. There’s an Airspeeder here that is currently not operational. Once you find all the parts you’ll be able to fast travel between different locations on Nar Shaddaa.
The Airspeeder requires three items. The Maneuvering Flaps are found in a container in Pylon 3 at the Docks. The Airspeeder Navigation Interface is found in a container just outside of Tienn Tubb’s store at the Refugee Landing Pad. Lastly, the Cryogenic Power Cells are found at the Docks. Lassavou gives them to you as a reward. Speak to Fassa about releasing his debt. Perform the job that Fassa asks you to do and then ask him to release Lassavou’s debt. Go back to Lassavou and you’ll receive the Cryogenic Power Cells.
7) Serroco Storage Area – Lost of good loot here.
1) Exit to Refugee Landing Pad – After entering the Docks you’ll see a cutscene betwenn Vogga Hutt and Hanharr. Head towards Fassa (#2).
2) Fassa the Dock Manager – Fassa is quite an important character and will be able to help you solve two quests from the Refugee Quad as well as give you one himself.
Fassa’s Freighters – After speaking with Fassa he’ll put you to work identifying the freighters that are coming into the Docks. He wants you to organize the priority of the freighters. You can take the long path and divert the power to each Pylon while running to each one to see the ID of each freighter. The faster route is to fix the power to all Pylons. You can then go to any one of the consoles to see all IDs. Here’s the solution: Silver Zephyr, Alakandor and lastly, Toorna’s Profits. Return to Fassa for your reward.
Lassavou’s Debt – After speaking with Lassavou in one of the containers near to #3 and after completing the Fassa’s Freighters quest you can ask Fassa to let Lassavou’s debt go. Let Lassavou know and you’ll get another piece for the Airspeeder in the Refugee Quad.
Kahranna’s Transport – Speak with Kahranna in the Refugee Quad first and agree to help her find passage off Nar Shaddaa. Once you’ve been to Goto’s Yacht come back to Fassa and he’ll agree to let Kahranna find boarding on one of his freighters.
Odis’ Pilot Work – In the Refugee Quad you’ll also find Odis who is looking for work as a Freighter Pilot. Speak with Fassa about it once you have been to Goto’s Yacht to complete this quest.
3) Vogga’s Horde – There’s a number of people you’ll meet here and I haven’t marked exactly where you’ll find them in each container. Open each one and see who’s inside.
Aqualish Thugs – If you try to approach them they’ll tell you to get lost. Get into Stealth mode and walk close to them. You’ll find out how to break into Vogga’s hoard by dancing for Vogga and then using Juma Juice to sedate the Kath Hounds. Juma Juice can be purchased from the bartender in the Entertainment Promenade.
Lunar Shadow Crewman – These guys are looking for a new pilot. You can tell them about Odis in the Refugee Quad for Light Side points or find the pilot in the Jekk’Jekk Tarr area and convince him to return. You’ll need to use a character with a gas mask, not your main character, and go in there to find him.
Bith Scientist – The scientist wants you to return with an item from Pylon 3 and he gives you 500 credits to buy it. Heading over to the Pylon 3 (#4) you’ll find the seller is dead. Read the Datapad and then kill the “cleaning droid” that attacks you. Return to the Bith to find him missing. He’s left a Datapad behind and you get to keep the 500 credits.
Lassavou – Speak with Fassa (#2) to complete this quest for the Cryogenic Power Cell which is part of the Airspeeder. For Dark Side points tell him you’ve come to cellect the debt. You’ll get 200 credits by no Cryogenic Power Cell.
Lootra – He’s Aida’s husband who you spoke with in the Refugee Quad. To connect them together you’ll need to kill the Exchange Thugs guarding the entrance and then let Aida know the path is clear to go. If you threaten the thugs you won’t be able to attack them again unless you kill the Exchange boss first.
4) Pylon 3 – Head here for the Bith Scientists quest (#3). Search the container here for the Maneuvering Flaps, another piece of the Airspeeder.
5) Vogga the Hutt – You can get to see Vogga by either agreeing to dance with him by visiting the Entertainment Promenade or telling him that you want to talk about Goto. If you dance for him he’ll fall asleep. Put the Juma Juice in the water bowl to put the Kath Hounds to sleep. You’ll now get access to Vogga’s Horde through the door to the north for some pretty cool items including a Lightsaber.
You can also talk to Vogga about the Fuel situation on Telos and negotiate a deal for the Telosians after dealing with Goto on the Yacht. Once you have the deal set up you’ll need to talk to Lt. Grenn in the Entertainment 081 area of the Telos Station.
6) Vogga’s Storage – You’ll come here with the T3-M4 droid after visiting the Jekk’Jekk Tarr. We’ll come back to this in the walkthrough below.
7) Exit to the Jekk’Jekk Tarr – When you have been invited to visit the Jekk’Jekk Tarr Mira (or Hanharr if you are a Dark Side character) will intercept you and go in herself.
Jekk’Jekk Tarr
Mira will be the one who actually enters Jekk’Jekk Tarr regardless of whether she or Hanharr intercepted you. You’re goal is to meet with Visquis. You’ll need to pass through two green colored bars through the door to the right of where you enter. The yellow colored bar through the door to the left is where the Luna Shadow Captain is hiding out. You can convince him to go back to his crew or offer the job to Odis in the Refugee Quad. Mira is unprepared for this encounter and will be captured once she meets Visquis.
Your main character will now awaken. Bring him/her to the Jekk’Jekk Tarr to confront Visquis. You’ll learn Breath Control as you enter so you can breathe in a toxic environment. You’ll need to keep casting it as it runs out or you’ll be poisoned.
You’ll be attacked by a LOT of Gand so slice your way through them or use group effect force powers. Make your way to the room Visquis was in and speak with the attendant to find the exit which is in the northern part of the room.
Jekk’Jekk Tarr Tunnels
1) Entrance – When you first arrive here as your main character you’ll need to work your way through the tunnels to the sealed door at #2. You’re map won’t be working so an easy way to make it there is to hug the left wall, taking every turn to the left until you reach the sealed door.
2) Sealed Door
3) Mira vs Hanharr in the Battle Room – Once your main character reaches the sealed door you’ll take control of either Mira or Hanharr in a battle to the death. As Mira use ranged weapons and run away to keep your distance. Hanharr will run over the mines and make your job easier. As Hanharr just close the distance and swipe away. His expert melee skills will finish Mira quickly.
Once the battle is finished Visquis will release the Kath Hounds. Defeat them and then head to #4 for the Keycard.
4) Old Beast Tender Corpse – Search the corpse for the Keycard to get out of here. Open the door in the north and get ready to take on the Ubese Bounty Hunters.
5) Emergency Tunnel Control – You can explore the whole area with Mira or your main character. To get your main character back proceed to the console here to access all the available escape routes.
6) Workbench
With your main character head back to the battle arena where you’ll be captured by Goto and taken to his Yacht.
Back to the Ebon Hawk
After a cut-scene you’ll be back with T3-M4 in the Docks. Fight your way past the HK units and you’ll meet up with Mira and Atton. You’ll have a few challenging battles with Zhug Brothers and Gand to get back to the Ebon Hawk. It’s not that they’re tough but there are so many of them. Once you reach the Ebon Hawk you’ll fly off to rescue your main character in Goto’s Yacht.
Goto’s Yacht
You’ll enter Goto’s Yacht from the hatch in the north. You’ll have plenty of droids to fight here so make sure you have weapons suitable for taking down droids.
There are a number of consoles around the ship that will give you access to various functions. You’ll need to find the codes for each function before you have full access to that funcion. In order to make changes to a function you’ll also need the proper function, such as the Shut Down program or Overload program.
You have two main objectives here. The first is to free your main character by making it to the Audience Chamber. And the second is to get to the bridge, with access to Power Distribution and shut down the power so you can get back to the Ebon Hawk.
1) Hatch to Ebon Hawk – You won’t be able to return to the Ebon Hawk until you’ve shut down the Power Distribution from the Bridge.
2) Console & Utility Droid – Make sure you have someone with the computer skill and slice into the console. From here you can download the “overload” program. If you don’t you’ll need to kill the Goto Guard Droids and listen to their last transmission. It’s binary code. Select the correct count to get the program. Here are the answers.
zero zero zero = 0 zero zero one = 1 zero one zero = 2 zero one one = 3 one zero zero = 4 one zero one = 5 one one zero = 6 one one one = 7
Either that or slice the control to get the program which is much easier. The Utility Droid next to the console will have the “shut down” program.
3) Goto Starboard Commander – Kill the droid and search it for the access code to the Containment Cells. Use the console here to upload the two programs you’ve received “overload” and “shut down”. Unlock the containment cells and run the “shut down” program on it to remove the shields. You’ll now have access to these cells.
4) Damaged Droid – This little droid isn’t going anywhere. Search it for the Turret Defense access code. Use a console and unlock the Turret Defense System. Once again run the “shut down” program on the Turret Defense System.
5) Turrets – Hopefully you’ve shut these Turrets down but if not you can use some shields on all of your characters and take the down. There are droids here as well just to make things more difficult.
6) Main Character & Power Distribution Access Code – Head to this room to rescue your main character. Make sure you use the console here as it’s the only place where you can acquire the Power Distribution access code. Use a console to unlock the Power Distribution but you can only shut it down from the Bridge.
7) Damaged Droid – This little droid will have the “reset” program.
8) Lab Station
9) Workbench
10) Defense Turrets – This room is lined with Defense Turrets but they’re not too difficult to take down with the flurry. On the way back from the bridge this is also where you’ll run into the Twin Suns bounty hunters.
Continue towards the east and you’ll come across some mines and a Goto Central Commander. Kill the droid and search the remains to find the Minefield access code.
11) Command Console – Use the console here to unlock the Minefield system. Either use the “overload” or “shut down” program. If they’re in overload they will still work but will explode when the droids at #12 run over them.
12) Mines and Droids – There is a corridor of mines with droids beyond them. Either shoot at the droids in solo mode and let them run over the mines towards you. Once the droids are dealt with you’ll be able to disable the mines and get to the bridge.
13) Bridge – Check the cylinder on the right as you enter for some nice items and the Droid Controller access code. It’s a bit late now that all the droids are dead!
Use the Central Command Console and and run the “shut down” program on the Power Distribution system. You get the access code for it at #6. You’ll now be able to open the hatch to get back to the Ebon Hawk.
On the way back you’ll come across thugs and bounty hunters. Most notably the Twin Suns who will attack you at #10. Continue back to the Ebon Hawk and you’ll return to the Nar Shaddaa Docks to meet Zez-Kai Ell.
After taking out the Hk-50 droids speak with Fassa and complete any missions you need to complete. Such as find a job for the pilot from the Refugee Quad. Head up to the north and speak with Vogga the Hutt. He’ll give you 500 credits to go back to the Telos Station and organise a deal with Lt. Dol Grenn at the TSF office in the Entertainment 081 area.
Fly back to the Telos Station now to complete the deal or continue to the next planet. I choose Onderon but you’ll end up having to escape to the Onderon moon, Dxun when you get there.
Back: Knights of the Old Republic 2 Walkthrough
Recent Posts
- Star Wars: Dark Forces Remaster Released
- Banishers: Ghosts of New Eden PC Release
- Ghostrunner 2 Released for PC, Playstation 5 and XBox
- Shadow Gambit: The Cursed Crew Released by Mimimi Games
- System Shock Remake Released for PC, PS5, Xbox One
Walkthrough + Strategy Guide
In this article.

IGN Recommends


- Browse All RPGs
- Top Rated RPGs
- News Archive

Banshee Network
Walkthrough
Introduction & faq.
- Introduction & Advice
- Walkthrough FAQ
- Ebon Hawk Adrift
Peragus Mining Facility
- Administration Level
- Mining Tunnels
- Asteroid Exterior
- Dormitories
- Command Deck
- Crew Quarters
- Engine Deck
- The Ebon Hawk
- Residential 082 East
- Entertainment 081
- Dock Module
- Czerka Offices
- Residential 082 West
- Bumani Exchange
- Restoration Zone
- Czerka Site
- Underground Base
- Polar Plateau
- Secret Academy
- Jungle Landing
- Mandalorian Ruins
- Iziz Spaceport
- Merchant Quarter
- Western Square
- Iziz Cantina
Nar Shaddaa
- Refugee Landing Pad
- Entertainment Prom.
- Refugee Quad
- Jekk'Jekk Tarr
- Jekk'Jekk Tunnels
- Goto's Yacht
- Khoonda Plains
- Crystal Cave
- Jedi Courtyard
- Enclave Sublevel
- Valley of Dark Lords
- Sith Academy
- Shyrack Cave
- Secret Tomb
- Ruined Merchant Qtr.
- Jungle Tomb
- Royal Palace
- Rebuilt Jedi Enclave
- Res 082 West Redux
- Res 082 East Redux
- Ent 081 Redux
- Ravager Cmd. Deck
- Ravager Bridge
- Trayus Academy
- Trayus Crescent
- Trayus Proving Gnds.
- Trayus Core
Copyright © 2000-2021, GameBanshee.com
- Lexicon Gaming
- GameBanshee Home
- Privacy Policy
Your Complete Guide to Moscow's Sheremetyevo International Airport (SVO)
December 04, 2018
Airport Guides

We’re probably not telling you anything you don’t already know when we tell you that “going to the airport” isn’t exactly on everyone’s bucket list. But just like every destination is different, so is every airport. And just as navigating a new city is challenging in and of itself, so is navigating a new airport. How do I get from one terminal to the next? What are the best airport restaurants? Is there anything to do if I have a long layover?
If you’re anything like us, then these are probably the types of questions you have that perhaps you don’t get push notifications for. But never fear, because we have answers to your airport questions with our series of guides to the world’s top airports. Today we bring you the TripIt airport guide to Sheremetyevo International Airport (SVO) .
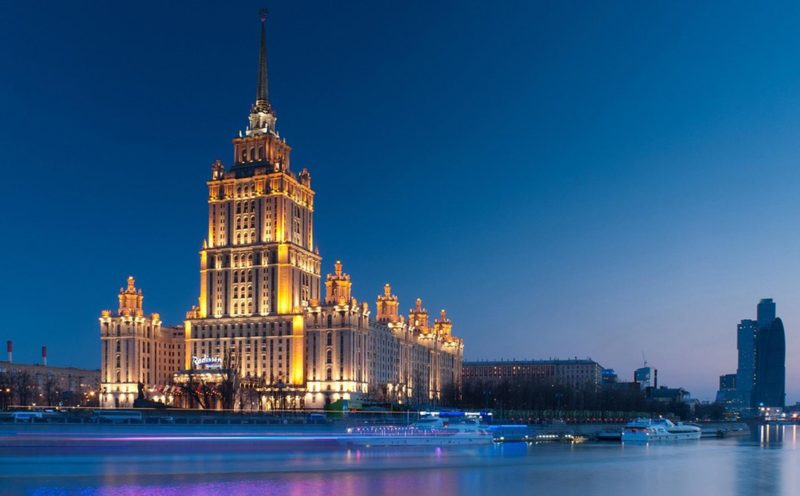
Sheremetyevo International Airport is one of three major airports serving Moscow. It's also Russia’s busiest airport, seeing more than 40 million passengers last year. Originally built as a military airfield for the Soviet Air Force, SVO has been a commercial airport since 1959. It has two main terminal areas, the north and south, which are linked by complimentary bus service. SVO is a primary base for Aeroflot and served by many of the major international airlines.
Sheremetyevo International Airport is located approximately 18 miles (30 km) from Central Moscow. By car or taxi, the airport is at least a 30-minute drive from Central Moscow. Public transportation services the airport from multiple public transit stations, but the quickest way to and from Central Moscow is on the Aeroexpress . Located inside the airport, the Aeroexpress takes 35 minutes and transfers passengers to Belorussky Railway Terminal. Additionally, several car sharing services are available, and car rental operators are located on the first floor of Terminal D.
Travelers flying through SVO will find a number of familiar fast-service restaurants, including Burger King, Subway, Starbucks, McDonald's, and KFC. Other restaurants for on-the-go items include Teremok (Terminal D), Ramen Club (Terminal F), Surf’n’Fries (Terminal F), and Kroshka Kartoshka (terminals B, D, F), which is one of Russia’s largest chains.
Restaurants of the sit-down variety include T.G.I Friday's (terminals D and F), Spaten (Terminal E) for beer and steak, Pyatyy Okean (Terminal F), Phố Phở (Terminal B), Mama Russia (terminals B and D), Magadan (terminals B and D), Lunch Point (Terminal F), La Pasteria (Terminal D), and Factory (Terminal D). SVO has many more restaurants, as well as a number of cafes and coffee shops, which you can view on the airport’s website . Finally, look out for the caviar vending machine.
Many of the restaurants listed above—such as Spaten, specializing in beer—double as great spots to enjoy a drink at Sheremetyevo International Airport. Elsewhere, enjoy a selection of Russian beer paired with sausage at Sibirskaya Korona (Terminal D) and Krušovice (Terminal B), or Irish fare and beer at Guinness Pub&Kitchen (Terminal E) and The Irish Bar (terminals B and F). Other bars include American Bar and Grill (Terminal B), Forshtadt Altai (Terminal D), O'Learys (Aeroexpress Terminal), and Schofferhofer (Terminal D).
Like most international airports, Sheremetyevo International Airport has a plethora of shops, including names you’re probably familiar with, like Hugo Boss, Calvin Klein, COACH, Swarovski, and Bvlgari. Unique to SVO, however, is its History Museum of Sheremetyevo , which is located on the fifth floor of Terminal F. The museum features exhibits, aviation paraphernalia and other items that tell the history of the airport. Also unique to SVO is its own spa, located on the second floor of the Moscow Business Lounge (Terminal D), and featuring a number of treatments for men and women. Other airport amenities include shower rooms and a salon in the Arrivals hall on the first floor of Terminal E. If you want to get some sleep, GettSleep is located in Terminal D, featuring individual sleep capsules with flexible hourly rates, free Wi-Fi, shower cabins, a co-working area and more.
Airport Lounges
Sheremetyevo International Airport has no shortage of business lounges, including the Gallery Lounge (occupying two floors in Terminal D), the Matryoshka Lounge (Terminal D), Moscow Lounge (Terminal D), Space Lounge (Terminal E), Classic Lounge (Terminal F), and Rublev Lounge (Terminal B)—which holds the record for longest buffet of any business lounge in the world. Most of these are available free for priority passengers, certain flight statuses and some cardholders. They're available to other guests for a fee. SVO's more prestigious lounges include the Mastercard Lounge in Terminal E and VIP lounges in terminals B, D, E and F.
Use TripIt’s interactive airport maps in the app to discover shop, restaurant, and bar locations. You’ll also have everything you need to navigate your way with estimated walk times and step-by-step directions.
Written By:
SPENCER SPELLMAN
Spencer is a seasoned food, drink, and travel writer who has written for publications from Outside Magazine to Travel + Leisure and Los Angeles Times. When he's not traveling, he's perfecting his favorite cocktails in his home bar. He chronicles his adventures (and cocktails) on his travel site, Whiskey Tango Globetrot.
- Skipping Airport Security Lines Is a Matter of Biometrics
- The Freelancer's Guide to Business Travel
About the Author

Stay one step ahead from planning to landing with the world's highest rated travel organizing app. Unlike other travel apps, TripIt can organize your travel plans no matter where you book. Simply forward your confirmation emails to [email protected] and in a matter of seconds, TripIt will create a master itinerary for every trip.

The Comprehensive Guide to Moscow Nightlife
- Posted on April 14, 2018 July 26, 2018
- by Kings of Russia
- 8 minute read
Moscow’s nightlife scene is thriving, and arguably one of the best the world has to offer – top-notch Russian women, coupled with a never-ending list of venues, Moscow has a little bit of something for everyone’s taste. Moscow nightlife is not for the faint of heart – and if you’re coming, you better be ready to go Friday and Saturday night into the early morning.
This comprehensive guide to Moscow nightlife will run you through the nuts and bolts of all you need to know about Moscow’s nightclubs and give you a solid blueprint to operate with during your time in Moscow.
What you need to know before hitting Moscow nightclubs
Prices in moscow nightlife.
Before you head out and start gaming all the sexy Moscow girls , we have to talk money first. Bring plenty because in Moscow you can never bring a big enough bankroll. Remember, you’re the man so making a fuzz of not paying a drink here or there will not go down well.
Luckily most Moscow clubs don’t do cover fees. Some electro clubs will charge 15-20$, depending on their lineup. There’s the odd club with a minimum spend of 20-30$, which you’ll drop on drinks easily. By and large, you can scope out the venues for free, which is a big plus.
Bottle service is a great deal in Moscow. At top-tier clubs, it starts at 1,000$. That’ll go a long way with premium vodka at 250$, especially if you have three or four guys chipping in. Not to mention that it’s a massive status boost for getting girls, especially at high-end clubs.
Without bottle service, you should estimate a budget of 100-150$ per night. That is if you drink a lot and hit the top clubs with the hottest girls. Scale down for less alcohol and more basic places.
Dress code & Face control
Door policy in Moscow is called “face control” and it’s always the guy behind the two gorillas that gives the green light if you’re in or out.
In Moscow nightlife there’s only one rule when it comes to dress codes:
You can never be underdressed.
People dress A LOT sharper than, say, in the US and that goes for both sexes. For high-end clubs, you definitely want to roll with a sharp blazer and a pocket square, not to mention dress shoes in tip-top condition. Those are the minimum requirements to level the playing field vis a vis with other sharply dressed guys that have a lot more money than you do. Unless you plan to hit explicit electro or underground clubs, which have their own dress code, you are always on the money with that style.
Getting in a Moscow club isn’t as hard as it seems: dress sharp, speak English at the door and look like you’re in the mood to spend all that money that you supposedly have (even if you don’t). That will open almost any door in Moscow’s nightlife for you.
Types of Moscow Nightclubs
In Moscow there are four types of clubs with the accompanying female clientele:
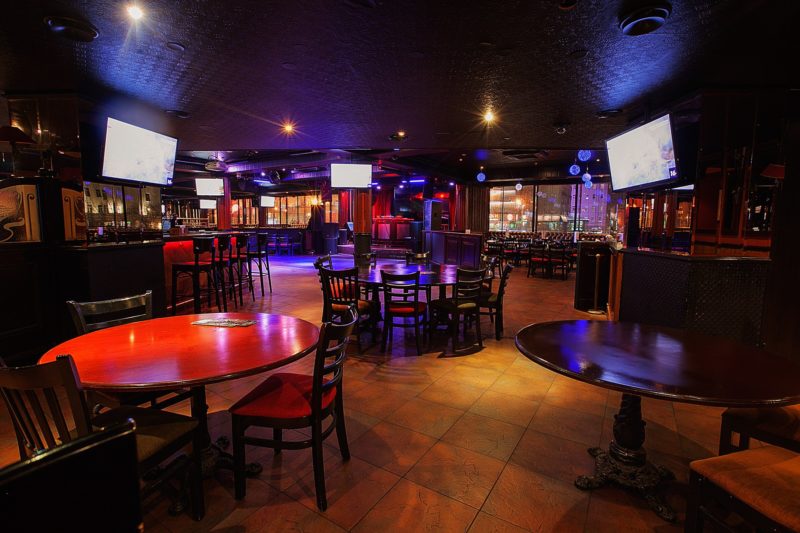
High-end clubs:
These are often crossovers between restaurants and clubs with lots of tables and very little space to dance. Heavy accent on bottle service most of the time but you can work the room from the bar as well. The hottest and most expensive girls in Moscow go there. Bring deep pockets and lots of self-confidence and you have a shot at swooping them.
Regular Mid-level clubs:
They probably resemble more what you’re used to in a nightclub: big dancefloors, stages and more space to roam around. Bottle service will make you stand out more but you can also do well without. You can find all types of girls but most will be in the 6-8 range. Your targets should always be the girls drinking and ideally in pairs. It’s impossible not to swoop if your game is at least half-decent.
Basic clubs/dive bars:
Usually spots with very cheap booze and lax face control. If you’re dressed too sharp and speak no Russian, you might attract the wrong type of attention so be vigilant. If you know the local scene you can swoop 6s and 7s almost at will. Usually students and girls from the suburbs.
Electro/underground clubs:
Home of the hipsters and creatives. Parties there don’t mean meeting girls and getting drunk but doing pills and spacing out to the music. Lots of attractive hipster girls if that is your niche. That is its own scene with a different dress code as well.

What time to go out in Moscow
Moscow nightlife starts late. Don’t show up at bars and preparty spots before 11pm because you’ll feel fairly alone. Peak time is between 1am and 3am. That is also the time of Moscow nightlife’s biggest nuisance: concerts by artists you won’t know and who only distract your girls from drinking and being gamed. From 4am to 6am the regular clubs are emptying out but plenty of people, women included, still hit up one of the many afterparty clubs. Those last till well past 10am.
As far as days go: Fridays and Saturdays are peak days. Thursday is an OK day, all other days are fairly weak and you have to know the right venues.
The Ultimate Moscow Nightclub List
Short disclaimer: I didn’t add basic and electro clubs since you’re coming for the girls, not for the music. This list will give you more options than you’ll be able to handle on a weekend.
Preparty – start here at 11PM
Classic restaurant club with lots of tables and a smallish bar and dancefloor. Come here between 11pm and 12am when the concert is over and they start with the actual party. Even early in the night tons of sexy women here, who lean slightly older (25 and up).
The second floor of the Ugolek restaurant is an extra bar with dim lights and house music tunes. Very small and cozy with a slight hipster vibe but generally draws plenty of attractive women too. A bit slower vibe than Valenok.
Very cool, spread-out venue that has a modern library theme. Not always full with people but when it is, it’s brimming with top-tier women. Slow vibe here and better for grabbing contacts and moving on.

High-end: err on the side of being too early rather than too late because of face control.
Secret Room
Probably the top venue at the moment in Moscow . Very small but wildly popular club, which is crammed with tables but always packed. They do parties on Thursdays and Sundays as well. This club has a hip-hop/high-end theme, meaning most girls are gold diggers, IG models, and tattooed hip hop chicks. Very unfavorable logistics because there is almost no room no move inside the club but the party vibe makes it worth it. Strict face control.
Close to Secret Room and with a much more favorable and spacious three-part layout. This place attracts very hot women but also lots of ball busters and fakes that will leave you blue-balled. Come early because after 4am it starts getting empty fast. Electronic music.
A slightly kitsch restaurant club that plays Russian pop and is full of gold diggers, semi-pros, and men from the Caucasus republics. Thursday is the strongest night but that dynamic might be changing since Secret Room opened its doors. You can swoop here but it will be a struggle.

Mid-level: your sweet spot in terms of ease and attractiveness of girls for an average budget.
Started going downwards in 2018 due to lax face control and this might get even worse with the World Cup. In terms of layout one of the best Moscow nightclubs because it’s very big and bottle service gives you a good edge here. Still attracts lots of cute girls with loose morals but plenty of provincial girls (and guys) as well. Swooping is fairly easy here.
I haven’t been at this place in over a year, ever since it started becoming ground zero for drunken teenagers. Similar clientele to Icon but less chic, younger and drunker. Decent mainstream music that attracts plenty of tourists. Girls are easy here as well.
Sort of a Coyote Ugly (the real one in Moscow sucks) with party music and lots of drunken people licking each others’ faces. Very entertaining with the right amount of alcohol and very easy to pull in there. Don’t think about staying sober in here, you’ll hate it.
Artel Bessonitsa/Shakti Terrace
Electronic music club that is sort of a high-end place with an underground clientele and located between the teenager clubs Icon and Gipsy. Very good music but a bit all over the place with their vibe and their branding. You can swoop almost any type of girl here from high-heeled beauty to coked-up hipsters, provided they’re not too sober.
Afterparty: if by 5AM you haven’t pulled, it’s time to move here.
Best afterparty spot in terms of trying to get girls. Pretty much no one is sober in there and savage gorilla game goes a long way. Lots of very hot and slutty-looking girls but it can be hard to tell apart who is looking for dick and who is just on drugs but not interested. If by 9-10am you haven’t pulled, it is probably better to surrender.
The hipster alternative for afterparties, where even more drugs are in play. Plenty of attractive girls there but you have to know how to work this type of club. A nicer atmosphere and better music but if you’re desperate to pull, you’ll probably go to Miks.
Weekday jokers: if you’re on the hunt for some sexy Russian girls during the week, here are two tips to make your life easier.
Chesterfield
Ladies night on Wednesdays means this place gets pretty packed with smashed teenagers and 6s and 7s. Don’t pull out the three-piece suit in here because it’s a “simpler” crowd. Definitely your best shot on Wednesdays.
If you haven’t pulled at Chesterfield, you can throw a Hail Mary and hit up Garage’s Black Music Wednesdays. Fills up really late but there are some cute Black Music groupies in here. Very small club. Thursday through Saturday they do afterparties and you have an excellent shot and swooping girls that are probably high.
Shishas Sferum
This is pretty much your only shot on Mondays and Tuesdays because they offer free or almost free drinks for women. A fairly low-class club where you should watch your drinks. As always the case in Moscow, there will be cute girls here on any day of the week but it’s nowhere near as good as on the weekend.
In a nutshell, that is all you need to know about where to meet Moscow girls in nightlife. There are tons of options, and it all depends on what best fits your style, based on the type of girls that you’re looking for.
Related Topics
- moscow girls
- moscow nightlife

The Top 3 Cities in Ukraine for First Timers
- Posted on July 7, 2018 August 4, 2019
You May Also Like

- Uncategorized
The Best Expat Blogs for Moscow
- Posted on May 31, 2020 June 1, 2020

Finding a Russian Bride: How and Where to Meet Her
- Posted on August 9, 2019 August 9, 2019

Meeting Women in Moscow: Dating Perspectives on the World’s Most Beautiful Women
- Posted on August 5, 2019 August 9, 2019

Meeting Russian Women: Top 5 Locations
- Posted on August 3, 2019 June 1, 2020

Moscow vs St. Petersburg – Which One to Visit?
- Posted on July 31, 2019 August 3, 2019

Hot Russian Girls – Where to Find & Date Them
- Posted on March 30, 2019 March 30, 2019
A Guide to Teaching English in Russia
- Posted on August 11, 2018 October 9, 2019

How to Attract Russian Girls
- Posted on July 15, 2018 August 4, 2019
Leave a Reply Cancel reply
Your email address will not be published. Required fields are marked *
Input your search keywords and press Enter.
Explore the world with tourHQ
- Destinations
- I am a Guide
- I am a Traveller
- Online Experiences
- Currency (USD)
The epicenter of modern Russia, Moscow booms with shiny new skyscrapers, the bulbous onion domes of the tsars and politically-rich Red Square. Explore the metropolis with a tourHQ guide.
Search Cities in Russia
Moscow Tour Guides

Jorge De Reval
I am a happy, enthusiastic, amusing Spanish guy. Lively and hyperactive. Recently became qualified ...

Stephen Florian
Holds a Masters Degree in Theatre Arts.

Julia Koval
Hello!My name is Julia and I work as a guide last 4 years, but before together with my friends we ...

Ekaterina Smirnova
Please note: I'm away from Moscow June 11-26, 2021. I am a native Muscovite but traveled ...

Vasil Valiev
Occupation: Senior guide-translator. Guiding since 2012 in Altai mountains, North of Russia ...

Marina Spasskaya
Hi there! My name is Marina and I'm a licensed Moscow city guide.Moscow is like ...

Greetings from Saint Petersburg. This is your private tour guide Ali in Saint Petersburg. I was ...

Maria Deulina
Dear friends,My name is Maria, I am a licensed guide about Moscow. Being a native Muscovite I have ...

Ashraf Rabei
My name is Ashraf ...I'm graduated from faculty of tourism and hotel guidance department, in Egypt ...

Hengameh Ghanavati
My name is Hengameh Ghanavati. Im a licenced international tour guide since 2014 and I have ...

Todd Passey
We are a cooperative of highly experienced, certified, professional guides. Each guide takes ...

Tim Brinley
Young at heart, adventurous, organized, good people skills, a good speaker, entertaining, ...

Nikolay Borkovoy
Hace 32 años nací en la ciudad de Moscú. Tengo experiencia trabajando como guía turístico en ...

Anika Socotra-International
Our mission is to provide you with the kind of holiday you want: where you can relax in wonderful ...
The sprawling, mind-boggling metropolis of Russian Moscow has long been one of the theatrical stages on which the great dramas of Europe and Asia have been played out in grand style. Burned by Napoleon in 1812, immortalised by Tolstoy, utilised by the Bolsheviks and championed as a bastion of heroic defiance by the post-war communists, it’s almost hard to believe just how defining the historical events that found their home on Moscow’s streets have been. Moscow tour guides will easily be able to mark the major must-see landmarks on the map, from the onion-domed orthodox Saint Basil's Cathedral, to the political powerhouse of Red Square just next door, while others will be quick to recommend a ride on Moscow’s famous subterranean metro system, or a visit to the UNESCO-attested Novodevichy Convent on the city’s southern side. But Moscow is a city also in the throes of a cultural wrangling between the old and the new. Creative energies abound here: Boho bars and pumping super clubs now occupy the iconic mega structures of the old USSR; high-fashion outlets, trendy shopping malls and luxurious residential districts stand as testimony to a city that’s now the undisputed playground of the world’s super-rich, while sprawling modern art museums dominate the cultural offering of the downtown districts north of the Moskva River.
Tell us your destination, date, and group size.
Our team of travel experts and guides will design a tailored itinerary just for you., enjoy your trip with peace of mind knowing everything is taken care of..
Say Goodbye to Travel Stress

Choose Currency Close modal
- USD US, dollar
- GBP British Pounds
Cookie icon We use cookies!
We, and third parties, use cookies for technical and analytical purposes, for marketing purposes and for integration with social media. For more information, refer to our Privacy Policy and Terms of Consent.
By clicking on 'I agree', you consent to the use of these cookies.
- Mobile Site
- Staff Directory
- Advertise with Ars
Filter by topic
- Biz & IT
- Gaming & Culture
Front page layout
telescopes and formulas —
The top 5 astronomical discoveries of all time (so far), from eratosthenes' circumference to black holes, we've learned a lot about the cosmos..
Paul Sutter - Mar 18, 2024 12:56 pm UTC

We’ve managed to discover quite a lot about our Universe from our relatively limited vantage point here on Earth. Many of those discoveries have been worthy of nothing more than an updated entry in some catalog. But some have been deeply revolutionary, completely changing the way we view the cosmos and our relationship to it.
What follows is a list of what I, a theoretical cosmologist, believe to be the most impactful discoveries ever made in astronomy. To help winnow down the possibilities to a manageable top-five ranking, I had to concoct some criteria. First, we're looking at discoveries that are both broad and deep (in the scientific sense), findings that simultaneously reached further than any previous discovery and also enabled (or at least accelerated) a new paradigm or branch of astronomy.
Second, I want to emphasize discoveries that were not obvious and didn’t just need someone to build a big enough telescope or powerful enough computer. I want discoveries that needed radical leaps of intuition and science-minded daring—where an enterprising scientist went out on a limb and followed their curiosity wherever it led.
Lastly, these sorts of lists will always include bias, so let me put mine front and center. I am a theorist, so I'll naturally be more inclined to find theoretical insights more interesting, relevant, and horizon-expanding than purely observational exploits. That philosophy will help shape my list.
I’m sure you'll have your own picks, and you may or may not disagree with the rankings I’m about to present. That’s fine. In fact, I hope the following list provides a springboard for discussion and, because science is fun, celebration of our many accomplishments.
So without further ado, presented in chronological order because I couldn’t make myself rank them by order of importance, I present to you the greatest astronomical discoveries of all time.
So far. According to me.
1) We’re gonna need a bigger boat
This first discovery is so old that we don’t even have direct access to the work of the man who accomplished it, a certain Greek polymath by the name of Eratosthenes. Living around 250 BCE, Eratosthenes was the first to develop an accurate method for measuring the circumference of the Earth. And like all great theorists before and since, he didn’t even need to get out of his pajamas to do it.
We only know of the work of Eratosthenes from a summary provided centuries later by another Greek astronomer, Cleomedes, who is mostly famous for… telling us about Eratosthenes. According to his summary, Eratosthenes calculated the circumference of the Earth by waiting for the summer solstice. At the solstice, the Sun stood directly overhead at noon at the city of Syene (today Aswan) in southern Egypt. Eratosthenes lived in Alexandria, several hundred miles north, so at that precise moment, the Sun was a little off from directly overhead. By measuring the angle of the Sun’s position and combining that with the known distance to Syene (something calculated by professional walker-measurers), Eratosthenes could calculate Earth’s circumference. He arrived at a startlingly accurate measurement, within a few percent of the modern value.
Presumably by the time of Eratosthenes, anyone who was paying attention already knew the Earth was round—the point of this work wasn’t to disprove flatness but to measure the circumference of an already assumed globe. But Eratosthenes was perhaps the first person in history to make a measurement of something far beyond direct human perception. There was no way for anybody to send teams of walker-measurers out to travel the entire circumference; instead, Eratosthenes devised a clever trick that used our relation to the heavens to let the Sun do the measuring for us.
Eratosthenes wrangled celestial objects and made them do his bidding. This was no mere astrology, with its tortured attempts to use the stars and planets to divine the fortunes of us mortals on Earth. This was astronomy, using careful and clever measurements to discover something new about the world.
reader comments
Channel ars technica.
IMAGES
VIDEO
COMMENTS
Just past the rows of deadly mines are the droids, waiting to get at you. In Stealth mode you can disable or recover them before having at the droids, or use the console at #12 to take down the mines, or shoot the droids from afar using one of your characters in Solo mode. The possibilities are many.
The Ebon Hawk has docked with Goto's yacht on its starboard side: the Map screen shows that this is the top left side of the map, and that the Audience Chamber, where your main character is under guard, is on the center right side, at the stern of the yacht. If your party tries to go back through the docking hatch behind them in the left wall:
Take this info and wheel towards the exit of the warehouse. You are stopped short by HK assassin droids. Fry these enemies with regular laser blasts and the shock arm if needed. Don't forget to ...
Tips - Goto's Yacht The Yacht can be confusing, but the goal is simple - you'll only need to find two items: "Shutdown program" & "Power Distribution Access Code". Other codes & programs are...
1) Landing Pad - You'll touch down on one of the landing pads in the Refugee sector. Unfortunately this pad has been claimed. Once you step out Quello will demand payment. You can threaten him or pay him. Either way there will be trouble later on once the Red Eclipse gang arrive. Head down the corridor to the east.
0:00 / 41:23 Kotor 2 TSLRCM 1.8.1 Walkthrough part 20 - Goto's Yacht ( Dark Side Male ) KotorHDTVChannel 25.6K subscribers Subscribe Subscribed 132 26K views 11 years ago Goto, the greatest...
- Playlist for Knights Of The Old Republic II -http://bit.ly/2bk8UCUKreia and Mira wander from death-trap to death-trap inside Goto's Yacht, searching aimles...
The free +1 Dexterity from "Download Droid Defense Algorithims" on Goto's yacht can also be applied to HK-47, in fact bringing both T3-M4 and HK-47 will grant +1 Dexterity to both droids. New Quest: Finding the HK factory. Most people who played TSLRCM would know about the added HK factory level which many had difficulties with.
500 Posted December 29, 2004 There is just something about this game, I really don't know. In KOTOR I never had problems like this. Okay I'm on Goto's Yacht. I saved the exile and now I'm trying to get off. Well the Gamespot strategy guide says that I need to goto the bridge. I did that.
Try to open the footlocker and you can't, your security. isn't high enough. Bash it open to get a broken item and computer spikes. Open the low security door at the south part of the room and the ...
KotOR II: The Sith Lords Walkthrough. Welcome to our Star Wars: Knights of the Old Republic II: The Sith Lords walkthrough! Simply click any of the links within the navigation bar to the right and you will be brought to the respective area.
Quest1738 Which party members to board Goto's yacht? First time playing the game and reached the point where I have to send two party members to save my character. I heard this point can be very difficult so I wanted to ask. Archived post. New comments cannot be posted and votes cannot be cast. Sort by: [deleted] • 4 yr. ago
Goto's Yacht : r/kotor r/kotor • 2 yr. ago KD12eckless Goto's Yacht KOTOR 2 Why is this level so hard? I die within the first two doors everytime. Any tips? Really frustrating that all these droids are able to beat me and I can't get past this. Please help I just want to save my main character lol Archived post.
For HD mode without frame skips:http://www.youtube.com/watch?v=BUGyzaOSkOA&feature=hdAfter looting Goto's vaults, we approach the Bridge. Goto has a new pla...
It has two main terminal areas, the north and south, which are linked by complimentary bus service. SVO is a primary base for Aeroflot and served by many of the major international airlines. Sheremetyevo International Airport is located approximately 18 miles (30 km) from Central Moscow. By car or taxi, the airport is at least a 30-minute drive ...
Dress code & Face control. Door policy in Moscow is called "face control" and it's always the guy behind the two gorillas that gives the green light if you're in or out. In Moscow nightlife there's only one rule when it comes to dress codes: You can never be underdressed. People dress A LOT sharper than, say, in the US and that goes ...
Goto's Yacht Companions. I'm playing Kotor 2 for the first time on mobile and I recently finished Goto's Yacht. I took Bao-Dur for all the skill based stuff (millions of mines, some repair use, and the terminals everywhere) and I also took Hanharr so he'd mow down the droids... which he did amazingly. I was wondering for all the people ...
After we are rescued, we make our way to the Bridge of Goto's Yacht so we can make our escape. Light Side Male Walkthrough
301 Moved Permanently . The document has been permanently moved.
Classic Radisson cruise from Gorky Park. 2,5 hours to see the capital's main attractions. An English audio guide, as well as a delicious menu will contribute to your comfort. Dinner trip on Radisson yacht in Moscow. A great option to try Russian seafood served by one of the best fish restaurant. Also, enjoy the live jazz band.
Our team of travel experts and guides will design a tailored itinerary just for you. Enjoy your trip with peace of mind knowing everything is taken care of. The epicenter of modern Russia, Moscow booms with shiny new skyscrapers, the bulbous onion domes of the tsars and politically-rich Red Square. Explore the metropolis with a tourHQ guide.
So far. According to me. 1) We're gonna need a bigger boat. This first discovery is so old that we don't even have direct access to the work of the man who accomplished it, a certain Greek ...