No products in the cart.
Sailing Ellidah is supported by our readers. Buying through our links may earn us an affiliate commission at no extra cost to you.

The Standing Rigging On A Sailboat Explained
The standing rigging on a sailboat is a system of stainless steel wires that holds the mast upright and supports the spars.
In this guide, I’ll explain the basics of a sailboat’s hardware and rigging, how it works, and why it is a fundamental and vital part of the vessel. We’ll look at the different parts of the rig, where they are located, and their function.
We will also peek at a couple of different types of rigs and their variations to determine their differences. In the end, I will explain some additional terms and answer some practical questions I often get asked.
But first off, it is essential to understand what standing rigging is and its purpose on a sailboat.
The purpose of the standing rigging
Like I said in the beginning, the standing rigging on a sailboat is a system of stainless steel wires that holds the mast upright and supports the spars. When sailing, the rig helps transfer wind forces from the sails to the boat’s structure. This is critical for maintaining the stability and performance of the vessel.
The rig can also consist of other materials, such as synthetic lines or steel rods, yet its purpose is the same. But more on that later.
Since the rig supports the mast, you’ll need to ensure that it is always in appropriate condition before taking your boat out to sea. Let me give you an example from a recent experience.
Dismasting horrors
I had a company inspect the entire rig on my sailboat while preparing for an Atlantic crossing. The rigger didn’t find any issues, but I decided to replace the rig anyway because of its unknown age. I wanted to do the job myself so I could learn how it is done correctly.
Not long after, we left Gibraltar and sailed through rough weather for eight days before arriving in Las Palmas. We were safe and sound and didn’t experience any issues. Unfortunately, several other boats arriving before us had suffered rig failures. They lost their masts and sails—a sorrowful sight but also a reminder of how vital the rigging is on a sailboat.
The most common types of rigging on a sailboat
The most commonly used rig type on modern sailing boats is the fore-and-aft Bermuda Sloop rig with one mast and just one headsail. Closely follows the Cutter rig and the Ketch rig. They all have a relatively simple rigging layout. Still, there are several variations and differences in how they are set up.
A sloop has a single mast, and the Ketch has one main mast and an additional shorter mizzen mast further aft. A Cutter rig is similar to the Bermuda Sloop with an additional cutter forestay, allowing it to fly two overlapping headsails.
You can learn more about the differences and the different types of sails they use in this guide. For now, we’ll focus on the Bermuda rig.
The difference between standing rigging and running rigging
Sometimes things can get confusing as some of our nautical terms are used for multiple items depending on the context. Let me clarify just briefly:
The rig or rigging on a sailboat is a common term for two parts:
- The standing rigging consists of wires supporting the mast on a sailboat and reinforcing the spars from the force of the sails when sailing.
- The running rigging consists of the halyards, sheets, and lines we use to hoist, lower, operate, and control the sails on a sailboat.
Check out my guide on running rigging here !
The difference between a fractional and a masthead rig
A Bermuda rig is split into two groups. The Masthead rig and the Fractional rig.
The Masthead rig has a forestay running from the bow to the top of the mast, and the spreaders point 90 degrees to the sides. A boat with a masthead rig typically carries a bigger overlapping headsail ( Genoa) and a smaller mainsail. Very typical on the Sloop, Ketch, and Cutter rigs.
A Fractional rig has forestays running from the bow to 1/4 – 1/8 from the top of the mast, and the spreaders are swept backward. A boat with a fractional rig also has the mast farther forward than a masthead rig, a bigger mainsail, and a smaller headsail, usually a Jib. Very typical on more performance-oriented sailboats.
There are exceptions in regards to the type of headsail, though. Many performance cruisers use a Genoa instead of a Jib , making the difference smaller.
Some people also fit an inner forestay, or a babystay, to allow flying a smaller staysail.
Explaining the parts and hardware of the standing rigging
The rigging on a sailing vessel relies on stays and shrouds in addition to many hardware parts to secure the mast properly. And we also have nautical terms for each of them. Since a system relies on every aspect of it to be in equally good condition, we want to familiarize ourselves with each part and understand its function.
Forestay and Backstay
The forestay is a wire that runs from the bow to the top of the mast. Some boats, like the Cutter rig, can have several additional inner forestays in different configurations.
The backstay is the wire that runs from the back of the boat to the top of the mast. Backstays have a tensioner, often hydraulic, to increase the tension when sailing upwind. Some rigs, like the Cutter, have running backstays and sometimes checkstays or runners, to support the rig.
The primary purpose of the forestay and backstay is to prevent the mast from moving fore and aft. The tensioner on the backstay also allows us to trim and tune the rig to get a better shape of the sails.
The shrouds are the wires or lines used on modern sailboats and yachts to support the mast from sideways motion.
There are usually four shrouds on each side of the vessel. They are connected to the side of the mast and run down to turnbuckles attached through toggles to the chainplates bolted on the deck.
- Cap shrouds run from the top of the mast to the deck, passing through the tips of the upper spreaders.
- Intermediate shrouds run from the lower part of the mast to the deck, passing through the lower set of spreaders.
- Lower shrouds are connected to the mast under the first spreader and run down to the deck – one fore and one aft on each side of the boat.
This configuration is called continuous rigging. We won’t go into the discontinuous rigging used on bigger boats in this guide, but if you are interested, you can read more about it here .
Shroud materials
Shrouds are usually made of 1 x 19 stainless steel wire. These wires are strong and relatively easy to install but are prone to stretch and corrosion to a certain degree. Another option is using stainless steel rods.
Rod rigging
Rod rigging has a stretch coefficient lower than wire but is more expensive and can be intricate to install. Alternatively, synthetic rigging is becoming more popular as it weighs less than wire and rods.
Synthetic rigging
Fibers like Dyneema and other aramids are lightweight and provide ultra-high tensile strength. However, they are expensive and much more vulnerable to chafing and UV damage than other options. In my opinion, they are best suited for racing and regatta-oriented sailboats.
Wire rigging
I recommend sticking to the classic 316-graded stainless steel wire rigging for cruising sailboats. It is also the most reasonable of the options. If you find yourself in trouble far from home, you are more likely to find replacement wire than another complex rigging type.
Relevant terms on sailboat rigging and hardware
The spreaders are the fins or wings that space the shrouds away from the mast. Most sailboats have at least one set, but some also have two or three. Once a vessel has more than three pairs of spreaders, we are probably talking about a big sailing yacht.
A turnbuckle is the fitting that connects the shrouds to the toggle and chainplate on the deck. These are adjustable, allowing you to tension the rig.
A chainplate is a metal plate bolted to a strong point on the deck or side of the hull. It is usually reinforced with a backing plate underneath to withstand the tension from the shrouds.
The term mast head should be distinct from the term masthead rigging. Out of context, the mast head is the top of the mast.
A toggle is a hardware fitting to connect the turnbuckles on the shrouds and the chainplate.
How tight should the standing rigging be?
It is essential to periodically check the tension of the standing rigging and make adjustments to ensure it is appropriately set. If the rig is too loose, it allows the mast to sway excessively, making the boat perform poorly.
You also risk applying a snatch load during a tack or a gybe which can damage the rig. On the other hand, if the standing rigging is too tight, it can strain the rig and the hull and lead to structural failure.
The standing rigging should be tightened enough to prevent the mast from bending sideways under any point of sail. If you can move the mast by pulling the cap shrouds by hand, the rigging is too loose and should be tensioned. Once the cap shrouds are tightened, follow up with the intermediates and finish with the lower shrouds. It is critical to tension the rig evenly on both sides.
The next you want to do is to take the boat out for a trip. Ensure that the mast isn’t bending over to the leeward side when you are sailing. A little movement in the leeward shrouds is normal, but they shouldn’t swing around. If the mast bends to the leeward side under load, the windward shrouds need to be tightened. Check the shrouds while sailing on both starboard and port tack.
Once the mast is in a column at any point of sail, your rigging should be tight and ready for action.
If you feel uncomfortable adjusting your rig, get a professional rigger to inspect and reset it.
How often should the standing rigging be replaced on a sailboat?
I asked the rigger who produced my new rig for Ellidah about how long I could expect my new rig to last, and he replied with the following:
The standing rigging should be replaced after 10 – 15 years, depending on how hard and often the boat has sailed. If it is well maintained and the vessel has sailed conservatively, it will probably last more than 20 years. However, corrosion or cracked strands indicate that the rig or parts are due for replacement regardless of age.
If you plan on doing extended offshore sailing and don’t know the age of your rig, I recommend replacing it even if it looks fine. This can be done without removing the mast from the boat while it is still in the water.
How much does it cost to replace the standing rigging?
The cost of replacing the standing rigging will vary greatly depending on the size of your boat and the location you get the job done. For my 41 feet sloop, I did most of the installation myself and paid approximately $4700 for the entire rig replacement.
Can Dyneema be used for standing rigging?
Dyneema is a durable synthetic fiber that can be used for standing rigging. Its low weight, and high tensile strength makes it especially popular amongst racers. Many cruisers also carry Dyneema onboard as spare parts for failing rigging.
How long does dyneema standing rigging last?
Dyneema rigging can outlast wire rigging if it doesn’t chafe on anything sharp. There are reports of Dyneema rigging lasting as long as 15 years, but manufacturers like Colligo claim their PVC shrink-wrapped lines should last 8 to 10 years. You can read more here .
Final words
Congratulations! By now, you should have a much better understanding of standing rigging on a sailboat. We’ve covered its purpose and its importance for performance and safety. While many types of rigs and variations exist, the hardware and concepts are often similar. Now it’s time to put your newfound knowledge into practice and set sail!
Or, if you’re not ready just yet, I recommend heading over to my following guide to learn more about running rigging on a sailboat.
Sharing is caring!
Skipper, Electrician and ROV Pilot
Robin is the founder and owner of Sailing Ellidah and has been living on his sailboat since 2019. He is currently on a journey to sail around the world and is passionate about writing his story and helpful content to inspire others who share his interest in sailing.
Very well written. Common sense layout with just enough photos and sketches. I enjoyed reading this article.
Thank you for the kind words.
Leave a Reply Cancel reply
Your email address will not be published. Required fields are marked *
My Cruiser Life Magazine
Cutter Rigged Sailboats [GUIDE] Advantages, Sailing, Options & Features
Cutter rigs are often more prevalent in boating magazines and theory than they are in your marina. Most cruising sailboats are Bermuda rigged sloops with just one permanently attached headsail. So, are two headsails better than one? Or, are they double the trouble?
Table of Contents
- History of Cutters
What is a Cutter Rig?
Cutter features, cutter rig options, sailing a cutter rigged sailboat, 5 popular manufacturers making cutter rigs, it takes two to tango, cutter rigged sailboat faqs.

History of Cutters
Cutters became popular in the early 18th century. These traditional cutters were decked (instead of open) and featured multiple headsails. Smugglers used cutters to smuggle goods, and the coast guard used cutters to try to catch the smugglers.
Various navies also used the cutter rig. Navy cutters featured excellent maneuverability and were better at sailing to windward than square-rigged ships.
Navies used cutters for coastal patrol, collecting customs duties, and “cutting out” raids. These “cutting out” operations consisted of a boarding attack. Fast, maneuverable cutters could stealthily approach an enemy vessel and board it. This type of attack was common in the late 18th century.
US Coast Guard ships, now powerful, fast, engine-driven, steel vessels, are still called cutters today as a nod to their past.
A cutter rig sailboat has two headsails instead of just one. The jib is located forward and is either attached to a bowsprit or the bow. The inner sail is called the staysail and is attached to an inner forestay.
Traditional cutters were built for speed. Today, cutter rigged sailboats are popular with ocean-crossing sailors, cruisers, and sailors looking for an easy to manage, versatile rig for all conditions.
It’s important to distinguish cutters from other types of boats with a single mast. Cutters regularly fly two headsails on nearly every point of sail. Many sloops are equipped to fly different-sized headsails, but it is unusual or unnecessary for them to fly more than one at a time.

Solent Rig vs Cutter Rig
A solent rig is traditionally called a slutter–a little bit sloop and a little bit cutter. This configuration features two large headsails mounted close together. The solent rig is good if you do a lot of downwind sailing. You can pole out both headsails and go wing-on-wing, with one headsail on the starboard side and one on the port side.
If you are on any other point of sail, you can only use one solent rig headsail at a time. If you use the inner sail, the wind flow is disrupted by the furled forward sail. And, if you use the forward sail, you’ll have to furl it to tack because there’s not enough space between the forestays.
The solent rig is a way to add more sail options to a standard sloop. Most solent stays are not required rigging to keep the mast up, so owners remove them when not in use to make tacking the primary headsail easier.
Advantages of a Cutter Rig
There are a lot of reasons to like a cutter. A cutter rigged boat has redundant rigging and spreads the sail load across its rigging. And a cutter rig offers increased sail options–it offers increased sail area in light winds and easy and efficient ways to decrease sail area in heavy weather.
In heavy weather, a cutter will drop or furl her larger headsail – usually a yankee or a genoa. That leaves just the smaller inner staysail. This arrangement is superior to the standard sloop, which sails in high winds by reefing her headsail. The staysail, however, lowers the center of effort on the sail plan and maintains draft over the reefed mainsail. That makes the boat more stable, maintains performance, and reduces stresses on the rig.
If you imagine the sailor going to sea and needing to reef, it’s easy to see how many more choices they have than the sloop sailor. While each sailor can reef their mainsail, a cutter skipper has full control over both headsails as well.
Because a cutter rig spreads the load across two headsails, it’s easier to manage. There might be more sails, but each sail is smaller and has smaller loads on it. That makes cutters the preferred option for sailing offshore when short-handed, as are more cruising couples.
Lastly, it has to be added that there’s something appealing about the traditional looks of a cutter.
Disadvantages of a Cutter Rig
While there are many benefits of a cutter, there are drawbacks and disadvantages too.
Sailors will have more lines to manage and more processes to think through. More sails mean more halyards and sheets. And when it comes to maintenance and upkeep, a cutter will have more standing and running rigging to replace, along with one more sail.
Cutters are also harder to tack. You’ll be dealing with two headsails instead of just one. Many designs deal with this problem by making the staysail self-tacking. This has fallen out of favor, but it’s a great advantage if you find yourself short-tacking up or down rivers.
Regardless of whether you need to tack both headsails or not, getting the larger sail to tack through the slot and around the inner forestay is sometimes a challenge. Many skippers find themselves furling the headsail, at least partially, to complete the tack.
Cutters need extra foretriangle room, which can mean adding a bowsprit, moving the mast back, or both.
Cutter Rig Position
Looking at a cutter rigged sailboat diagram, you might see a bowsprit depicted. Often, cutters fly their yankee from a bowsprit. Bowsprits allow boat designers to increase the fore triangle’s size without making the mast taller. Other cutters don’t use a bowsprit and mount the yankee sail on the bow.
A cutter sailboat might seem like more work. After all, there are two sails to trim and manage. In addition, you’ll have to perform maintenance on two sails and purchase and maintain double the hardware.
However, the two headsail arrangement can be easier to manage when the sails are under load. Instead of having one jib or genoa to trim, the weight and pressure are spread across two sails.
Mast Location
Today’s modern boat designers often focus on providing living space in the cabin. Designers often move the mast forward to create a larger, more open saloon. When the mast is forward, there’s less space to mount two headsails. A cutter sailboat needs a decent foretriangle area.
A cutter rigged sailboat is also more expensive for boat builders. The deck must be strong enough to handle the inner forestay’s loads. Between the additional building costs, saloon design issues, and customers’ concern over increased complexity, boat builders often favor a single headsail.
Easier on the Boat and Crew
Since the loads are distributed between two smaller sails instead of being handled by one large genoa. This means there’s less pressure on attachments points and hardware, and therefore less wear and tear. In addition, because there are separate attachment points on the deck for each sail, the load is distributed across the deck instead of focused on one spot.
Because each headsail is smaller, the sails are easier to winch in, so the crew will find it easier to manage the sails.

There’s nothing cookie-cutter about a sailing cutter. From the cut of the jib to the configuration of the staysail, each cutter sailboat is unique.
Yankee, Jib, or Genoa
Traditional cutters have a yankee cut headsail along with a staysail. The yankee is high-cut and usually has no overlap. The high cut improves visibility, and a yankee has less twist than a typical jib. By sloop standards, it looks very small, but on a cutter it works in unison with the staysail.
A jib is a regular headsail that does not overlap the mast, while a genoa is a big jib that does overlaps. The amount of overlap is measured in percentage, so a 100-percent working jib fills the foretriangle perfectly. Other options include the 135 and 155-percent genoas, which are popular for sailors in light winds.
The problem with using a big jib or genoa with a staysail is that there will often be a close overlap between the two headsails. If flown together, the air over the staysail interferes with the air over the outer sail, making each one slightly less efficient. In these cases, it’s often better to drop the staysail and leave it for when the wind pipes up.
Roller Furler, Club, or Hank-On Sails
Sailors have many options to manage and store their cutter’s sails. Sailors can mix and match the options that work for them.
Roller Furler vs Hank-on Sails
You can have both sails on roller furlers, both hanked on, or a mix of the two.
Buying and maintaining two roller furlers is expensive, but it makes the sails easy to manage. You can easily unfurl, reef, and furl both headsails from the cockpit without having to work on the deck.
Hank-on sails are fool-proof and offer less expense and maintenance. You can use a hank-on staysail, either loose-footed or club-footed, depending on your needs. Hank-on sails make sail changes easy and they never jam or come unfurled unexpectedly.
The most common setup on most cutters is to have the larger yankee or jib on a furler, and the smaller and more manageable staysail hanked on.
Club-footed Staysail
A club-footed staysail is attached to a self-tacking boom. Since there is only one control sheet to handle, there’s a lot less work to do to tack from the cockpit. It tacks just like another mainsail. You can tack the yankee while the club-footed staysail self-tacks.
Island Packets and many other cutters feature this arrangement, which makes tacking easy.
However, a club-footed staysail takes up space on the foredeck–it’s always in the way. It’s harder to get to your windlass and ground tackle. In addition, it’s harder to store your dinghy on the foredeck under the staysail boom. The boom also presents a risk to anyone on the foredeck, since it can swing during tacks and jibes and is even lower to the deck than the mainsail boom.
Loose-footed Staysail
Keeping a loose-footed staysail on a furler clears space on the deck. Without the boom, you can more easily move around the foredeck, and you’ll have more space when you are managing the anchor. In addition, you can more easily store your dinghy on the foredeck.
However, the staysail loses its self-tacking ability. You’ll now have to have staysail tracks for the sheet’s turning blocks and another set of sheet winches in the cockpit. When it comes time to tack the boat, you’ll have two headsails with four sheets and four winches to handle. Most owners choose to furl the outer headsail before the tack. Then, they can perform the maneuver using the staysail alone.
The good news is that most offshore boats are not tacking very often. If you’re on a multi-day passage, chances are you’ll only tack once or twice on the whole trip.
Downwind and Light Air Sails
There are a number of light air sails that will help your cutter perform better when the wind is light. Popular options include the code zero, gennaker, and asymmetrical spinnaker.
Adding one of these sails to your inventory can make it a dream sailing machine. A code zero can be flown in light air. Since the cutter is already well equipped for sailing in heavy air, a light air sail really gives you the ability to tackle anything.
Sloop Rig, Ketch, and Yawl
While some describe a cutter as a cutter-rigged sloop or a sloop cutter, a modern sloop has one mast and one permanent headsail.
But you’ll also find the cutter rig used on a ketch or a yawl. A cutter ketch or yawl offers a cruising sailor increased sail area and choices by adding the mizzen mast and sail behind.
Sailing a cutter rigged boat is not that different from sailing a traditional sloop. Sailors will have to pay close attention to trim and tacking.
Sailing a Cutter Rig to Windward
A cutter usually can’t point as high as a sloop when sailing to windward. The yankee hinders the staysail’s airflow, and the staysail starts to stall.
Tacking a Sailboat Cutter
If you need to short tack up a narrow channel, and both your sails are loose-footed, you can roll up one of the headsails and just use one headsail to tack. Many staysails have a boom and are self-tacking. This means you can tack the yankee, and the staysail will take care of itself.
Reefing a Cutter
A cutter sailboat has more options to easily get the right amount of sail. You can add a reef to your mainsail, then furl or reef the yankee a little, and then add another reef to the mainsail. As the wind increases, you can take the yankee in all together, and sail with a double-reefed mainsail and the staysail. Finally, you can add the third reef to the mainsail. Some staysails can be reefed, too.
A cutter rig offers many options during heavy weather. For example, you may end up taking the mainsail down altogether and leaving the staysail up. Or, you might choose to replace the staysail with a tiny storm sail.
Adding a storm jib on a sail cutter is much easier than a standard sloop. On a sloop, you’d have to remove the large genoa from the bow and then add the storm sail. This operation places the skipper in a challenging situation, which can be avoided on a cutter.
On a cutter, you can remove the staysail and add the storm jib to the inner forestay. Working a little aft of the bow will give you increased stability while managing the staysail’s smaller load.
While many modern sailboats are sloop-rigged, cutter-seeking sailors still have options.
Rustler Yachts
While many new yachts have ditched the sturdy offshore cutter rig in favor of greater simplicity, Rustler is making a name for themselves by bringing it back. It’s still one of the best options for offshore sailing, and it’s great to see a modern yacht company using the rig to its full potential.
The Rustler doesn’t need a bowsprit to accommodate its cutter rig. The Rustler is set up for single-handed and offshore cruising with all lines managed from the cockpit. Their smaller boats are rigged as easier-to-sail sloops for coastal hops, while the larger 42, 44, and 57 are rigged as true cutters with staysails and yankees.
Cabo Rico Cutters
Cabo Rico built cutters between 34 and 56 feet long. They aren’t currently in production but often come up on the used boat market. They are beautiful, semi-custom yachts that turn heads where ever they go. Of all the cutters the company built, the William Crealock-designed Cabo Rico 38 was the most long-lived, with about 200 hulls built. The second most popular design was the 34. The company also built a 42, 45, 47, and 56—but only a handful of each of these custom beauties ever left the factory. Most of the larger Cabo Ricos were designed by Chuck Paine.
Cabo Ricos have bowsprits, and the staysail is usually club-footed, although owners may have modified this. Cabo Ricos are known for their solid construction, beautiful teak interiors, and offshore capabilities.
View this post on Instagram A post shared by Hold Fast Sailing (@sparrowsailing)
Pacific Seacraft
Pacific Seacraft features a full line of cutters. Pacific Seacraft boats are known for their construction, durability, and overall quality.
Just a few of the best-known cutters built by Pacific Seacraft include the following.
- Pacific Seacraft/Crealock 34
- Pacific Seacraft/Crealock 37
- Pacific Seacraft 40
View this post on Instagram A post shared by Jeffersön Asbury (@skipper.jeff)
Island Packet Yachts
Island Packet boats are probably the most popular cutter design available today. Designer and company founder Bob Johnson created beautiful cutter-rigged full-keel boats with shallow drafts that were very popular around Florida, the Bahamas, and the east coast of the US.
Island Packets are known for their comfortable, spacious layouts. Older models could be ordered from the factory as either sloop or cutter-rigged. The result is that you see a mix of the two, as well as plenty of cutters that have removed their staysails to make a quasi-sloop.
Island Packet is still in business today, but now favors solent-rigged sloops with twin headsails.
View this post on Instagram A post shared by SV Miette (@sv_miette)
Hess-Designed Cutters
Lyle Hess designed several famous cutter-rigged boats, including the Falmouth Cutter 22 and the Bristol Channel Cutter 28. These gorgeous boats are smaller than most cruising boats but are a joy to sail. Lyle Hess’ designs were popularized by sailing legends Lin and Larry Pardey, who sailed their small wood-built cutters Serraffyn and Taleisin around the world multiple times.
These beautiful cutters have a timeless look like no other boats. They have inspired many other designs, too. You’ll find them built from both wood or fiberglass, but a variety of builders and yards have made them over the years.
View this post on Instagram A post shared by Professional photographer (@gary.felton)
Cutter rigged boats offer cruising sailors a flexible sail plan that’s perfect for offshore sailing. Sailors can adjust the amount of sail according to the current wind conditions. Traditional cutters were known for being fast and agile, and today’s cutters carry on the tradition with pride.
What is a cutter rigged yacht?
A cutter rigged yacht features two headsails. One headsail, usually a high-cut yankee, is all the way forward, either on a bowsprit or the bow. The staysail is smaller and attached to an inner forestay.
What is the advantage of a cutter rig?
A cutter rig offers cruising sailors more flexibility. They can easily increase and decrease the sail area and choose the optimum combination for the sailing conditions. While there are more lines and sails to handle, each sail is smaller and therefore easier to manage.

Matt has been boating around Florida for over 25 years in everything from small powerboats to large cruising catamarans. He currently lives aboard a 38-foot Cabo Rico sailboat with his wife Lucy and adventure dog Chelsea. Together, they cruise between winters in The Bahamas and summers in the Chesapeake Bay.
Leave a comment
Your email address will not be published. Required fields are marked *
Save my name, email, and website in this browser for the next time I comment.

Sailboat Rig: Everything You Need to Know
by Emma Sullivan | Jul 26, 2023 | Sailboat Maintenance

Sailboat rig
A sailboat rig refers to the arrangement of sails and mast on a sailboat. It determines how the boat harnesses wind power for propulsion. Common types include sloop, cutter, and ketch rigs. Each rig has distinct characteristics affecting sailing performance and maneuverability.
Demystifying the Sailboat Rig: An Essential Guide for Beginners
Setting sail on a boat for the first time can be an exhilarating yet daunting experience. The complex rigging system that makes a sailboat sail, known as the sailboat rig, may seem like a puzzle to unravel. But fear not! In this comprehensive guide, we will empower beginners with all the knowledge needed to navigate the intricacies of a sailboat rig.
To understand the mechanics of a sailboat rig, let’s embark on a metaphorical voyage. Imagine your sailboat as a magnificent seafaring vessel, equipped with masts and sails resembling the wings of a grand albatross gliding effortlessly through the open ocean.
At its core, the sailboat rig consists of three primary components: mast(s), boom(s), and sails. Think of these parts as crucial players working harmoniously, relying on wind power to propel your vessel forward.
The majestic mast stands tall and proud in the center of your vessel. It serves two vital purposes – providing stability and acting as an anchor point for various ropes and fittings. Commonly made from aluminum or carbon fiber, masts come in different shapes (round or oval) and sizes (tall or short) depending on your boat’s design.
Secured to your mast is another essential component—the boom. This horizontal beam runs along the bottom edge of your mainsail – the primary driving force behind your journey through water. Complementing each other seamlessly, both mast and boom facilitate efficient sail control and maximize performance under varying wind conditions.
Now it’s time to unfurl those magnificent sails that will catch gusts of wind like gossamer wings harnessing nature’s hidden powers! Sails come in various forms—mainsails (attached to masts), jibs (forward-facing triangular sails attached to bowstays), genoas (larger overlapping jibs), spinnakers (giant, colorful downwind sails), and more. Each sail offers a unique purpose, allowing you to navigate different wind angles and speeds with finesse.
As a beginner, it’s vital to comprehend the intricate network of ropes and lines that connect your rigging components. Rigging lines travel up your mast through blocks or pulleys, offering mechanical advantage for hoisting sails or adjusting their positions. These ropes, cunningly woven like a master craftsman’s tapestry across your vessel, give you control over the delicate dance between wind and water.
It’s important to familiarize yourself with key terms commonly used in the sailing lexicon as they relate to rigging. Terminologies such as halyards (ropes used to raise/lower sails), sheets (lines controlling the angle of sails relative to the boat), outhauls (apply tension along the boom), vangs (control vertical position of the boom), and many more will soon become an essential part of your nautical vocabulary.
Remember, understanding how these elements work together is just half the battle—tuning your sailboat rig correctly enhances its efficiency. Adjusting tensions on various lines ensures optimal sail shape and minimizes unwanted fluctuations due to gusts or lulls in wind power.
The art of sailing lies in delicately balancing science and intuition. As you become more acquainted with your sailboat rig, experiment with different adjustments during your voyages – an alchemical process honed over time through experience.
Now that we’ve shed light on the enigmatic world of sailboat rigs, embrace this newfound knowledge with confidence! Step aboard your trusty vessel armed with a deeper understanding of its intricate workings – ready to embark on countless memorable adventures on open waters.
In closing, demystifying the sailboat rig is not just about unraveling technicalities; it signifies unlocking the true essence of sailing itself—a breathtaking fusion of nature’s power and human ingenuity, offering endless opportunities to explore uncharted horizons. So, hoist those sails high and let the winds of discovery carry you forward!
Mastering the Art of Sailboat Rigging: A Step-by-Step Tutorial
Title: Mastering the Art of Sailboat Rigging: A Step-by-Step Tutorial
Introduction: Welcome aboard, aspiring sailors and sailing enthusiasts! Embarking on a sailboat journey is an exhilarating experience, but before you set sail, it’s vital to master the art of sailboat rigging. This step-by-step tutorial will guide you through every aspect of rigging technique, ensuring a seamless and efficient sailing experience.
1. Understanding the Basics of Sailboat Rigging: Before delving into the finer details, let’s start with the basics. Sailboat rigging refers to the configuration and setup of ropes, wires, and other components that control your boat’s sails. These interconnected systems play a crucial role in adjusting sail shape, maintaining stability, and achieving optimal performance while navigating wind currents.
2. Essential Equipment for Rigging: Your journey towards rigging mastery begins by familiarizing yourself with the essential equipment required. Items such as halyards (ropes used to hoist the sails), sheets (ropes used to adjust sail position), standing rigging (stainless steel wires stabilizing mast and spreading loads), and running rigging (control lines) must be carefully selected based on boat size, type, and your intended sailing adventures.
3. Inspecting Your Rigging Components: Safety should always be your priority when embarking on any sailing adventure. Therefore, inspecting your rigging components becomes imperative before setting sail. Thoroughly examine all standing riggings, checking for visible wear or damage that may compromise their integrity. Pay attention to worn-out turnbuckles or frayed wire strands – promptly replacing or repairing them ensures that you’ll have robust support while riding the waves.
4. Tuning Your Mast: Once your safety checks are complete, it’s time to tune your mast – one of the key elements determining how efficiently your boat captures wind power. By adjusting tension in both upper and lower shrouds, you can optimize mast bend and sail shape. With a properly tuned mast, your boat will be better balanced, promoting stability and enhancing your overall sailing experience.
5. Hoisting Sails and Adjusting Sail Shape: With an optimally tuned mast, it’s time to hoist the sails! Begin by attaching the halyards to the sail’s head, meticulously ensuring a secure connection. As you raise the sails, closely monitor their shape – envisioning how different adjustments will impact performance. Experiment with trimming the sheets while observing changes in airflow over the sail surface; this practice facilitates controlling speed and direction with precision.
6. Mastering Reefing Techniques: Even the mightiest sailors occasionally encounter rough seas or strong gusts of wind. Hence, mastering reefing techniques becomes paramount for maintaining control during adverse weather conditions. Learn how to reduce sail area by reefing or partially lowering mainsail or jib – keeping your boat manageable while preserving stability and preventing excessive heeling.
7. Routine Maintenance and Care: Finally, achieving mastery in sailboat rigging requires ongoing maintenance and care throughout your journey. Regularly inspect all lines for wear or chafe marks caused by friction against shackles or blocks; lubricate blocks for smoother operation and prevent corrosion on metal components; protect ropes from UV damage by using covers or stowing them away when not in use.
Conclusion: Congratulations on taking this adventurous step towards mastering the art of sailboat rigging! By understanding the basics of rigging techniques, diligently inspecting equipment, tuning your mast effectively, adjusting sails for optimal performance, learning reefing techniques for unpredictable conditions, and performing routine maintenance – you are well-equipped to embark on unforgettable sailing experiences with utmost confidence and skillfulness. So hoist those sails high, catch that perfect wind current – let your magnificent voyage begin!
Sailboat Rig FAQ: Expert Answers to Common Questions
Title: Sailboat Rig FAQ: Expert Answers to Common Questions
Introduction: Embarking on a sailboat journey brings an exhilarating mix of adventure, freedom, and connection with nature. However, navigating the intricacies of sailboat rigging can sometimes be perplexing for beginners and even experienced sailors. To help you unravel the mysteries of this vital component, we have compiled the most frequently asked questions about sailboat rigs along with expert answers that aim to demystify this topic. So grab your seafaring hat and join us as we delve into the depths of the Sailboat Rig FAQ!
1. What is a sailboat rig? Answer: Think of the rig as a sailboat’s skeleton. It encompasses all components involved in supporting and controlling a vessel’s sails. This includes masts, booms, shrouds, stays, halyards, and various fittings that work in harmony to manipulate the sail shape and control its position relative to wind direction.
2. How does mast height affect performance? Answer: Mast height plays a crucial role in determining a boat’s performance capabilities. Taller masts enable larger sails to be hoisted higher above turbulent air close to water level, resulting in increased wind power and better upwind sailing ability. Additionally, taller masts often allow for more sophisticated rigging systems which offer greater control over sail shape adjustments.
3. What are the different types of rigs? Answer: There are several types of rigs commonly found on sailboats today:
– Bermudan Rig: This type features one main triangular-shaped mainsail with a single jib or genoa headsail at the bow. – Gaff Rig: Characterized by a four-sided mainsail utilizing both gaff (a spar) and boom. – Schooner Rig: A two-masted configuration featuring fore-and-aft rigged sails on both masts. – Cutter Rig: Combines multiple head sails with one mast and a mainsail, allowing for enhanced versatility in varying wind conditions.
4. Why do some sailboats have multiple masts? Answer: Multi-masted configurations offer advantages including greater sail area, increased flexibility for varying wind conditions, and the ability to achieve smaller, more manageable sail sizes. They can enhance downwind sailing performance and are often seen on larger vessels or traditional sailing ships.
5. What is standing rigging vs. running rigging? Answer: Standing rigging refers to the fixed components that support the mast, such as shrouds and stays. On the other hand, running rigging comprises movable equipment like halyards and sheets responsible for adjusting sails’ position and tension.
6. How frequently should I inspect my rigging? Answer: Regular inspections of your rigging are crucial to ensure your safety on the water. Check for signs of wear, damage, or corrosion at least once a year or before embarking on an extended voyage. Pay special attention to critical areas like connections, turnbuckles, chainplates, and spreader tips.
7. Can I adjust my sail shape while underway? Answer: Absolutely! Modern sailboat rigs provide ample opportunities to manipulate sail shape through various control mechanisms such as halyard tensioning devices (winches), boom vangs (kickers), cunninghams (downhauls), traveler systems, adjustable backstays, outhauls and more—all designed to optimize performance by maximizing aerodynamic efficiency and controlling power distribution across different wind conditions.
Conclusion: Understanding sailboat rigs is fundamental knowledge every sailor should possess. Mastery over this crucial aspect enhances both safety at sea and overall performance capabilities. By gaining insights from our expert-driven Sailboat Rig FAQ guide, you’re now equipped with in-depth knowledge about key concepts related to masts’ impact on performance, different types of rigs available today, the importance of regular inspections as well as understanding various control mechanisms for sail shape adjustments. So hoist your sails, captain, and let the wind carry you to new sailing adventures!
Exploring the Different Components of a Sailboat Rig
Title: Demystifying the Enigmatic Components of a Sailboat Rig – A Journey into the Heart of Sailing Mastery
Introduction: Embarking on a sailing adventure instantly transports us to a world of freedom, tranquility, and excitement. As we glide across the open water under the power of nothing but the wind, it’s easy to feel at one with nature. However, behind this seemingly effortless experience lies an intricate system called a sailboat rig. Today, we embark on a voyage of knowledge as we unravel and explore the different components that make up this marvelous mechanism.
1. Mast: The Graceful Backbone Let’s start our journey by familiarizing ourselves with the focal point of any sailboat rig – the mast. Rising majestically toward the sky like a guardian angel, this towering structure plays multiple roles. First and foremost, it provides vertical support to secure the sails in place while absorbing forces generated by various elements such as wind pressure and wave motion. This sturdy column ensures stability and plays an instrumental role in shaping our boat’s performance.
2. Boom: A Swinging Arm Revolutionizing Sail Control As we move down from aloft to uncover another pivotal component, our gaze lands upon an unsung hero – the boom. With its silent elegance, this horizontal spar extends off the mast and helps to maintain tension within our mainsail or other layers of sailcloth. Additionally, its ability to swing horizontally facilitates improved control over our vessel’s speed and maneuverability through one key concept – trimming! By adjusting the position of our boom relative to both wind direction and sail angle, we harness an incredible spectrum of possibilities for enhanced performance.
3. Sails: Sculpting Nature’s Breath No discussion surrounding sailboat rigs would be complete without dwelling on their most captivating feature – sails themselves! These sprawling canvases blend artistry with technicality as they capture windswept energy from Mother Nature herself. Composed of broad sections called panels, these sails enroll and unfurl, shaping the very essence of our sailing experience. The mainsail, jib, spinnaker, and other types each serve different functions and adapt to varying wind conditions. Mastering the art of sail manipulation is the pinnacle of any sailor’s journey towards achieving true maritime expertise.
4. Standing Rigging: Lifelines Amidst Windy Waters Now that we’ve explored the dynamic elements above deck let us delve further into an unseen but vital part of the sailboat rig – the standing rigging. Comprising stainless steel wires or lines known as stays and shrouds, this network holds our mast aloft while enduring immense forces transmitted during sailing maneuvers. Far from being mere static support, these lifelines counterbalance stresses generated by our sails’ incredible power. Proper tuning and maintenance are crucial here to ensure reliable integrity necessary for a safe voyage.
5. Running Rigging: The Orchestra Conducting Sailing Symphony Finally, our exploration brings us to running rigging – a symphony in control! Consisting of ropes, lines, and blocks adorning our vessel like intricate threads through a tapestry, this dynamic system empowers sailors with direct influence over their boat’s speed and direction. By deftly manipulating halyards and sheets among other key components like cleats or winches, we fine-tune various aspects ranging from sail trim to hoisting or dousing sails at will.
Conclusion: From its soaring mast to its intertwined running rigging, a sailboat rig demonstrates a perfect fusion of science and artistry nurturing our maritime experience. As we navigate uncharted waves or glide under starlit skies on these remarkable vessels, may this enlightening journey into their multifaceted components encourage profound respect for both nature’s forces and human ingenuity. So step aboard your adored craft today – armed with newfound knowledge – as you set off on extraordinary adventures across the vast oceans that beckon.
How to Properly Set Up and Adjust Your Sailboat Rig
How to Properly Set Up and Adjust Your Sailboat Rig: Achieving Smooth Sailing
Setting up and adjusting the rig on your sailboat may seem like an overwhelming task, but with a little guidance, it can become a seamless process that enhances your sailing experience. In this blog post, we will delve into the key steps and considerations for ensuring proper rig setup, allowing you to navigate the waters with confidence.
1. Understand the Anatomy of Your Sailboat Rig Before diving into adjustments, familiarize yourself with the different components comprising your sailboat rig. The main parts include the mast, spreaders, shrouds and stays (also known as standing rigging), forestay, backstay, and boom. Each element plays a vital role in maintaining a balanced sail shape and overall stability.
2. Begin with Setting Up the Mast The first step is to properly set up the mast – this is crucial for achieving an optimal sail shape while underway. Securely attach it to the keel or deck using appropriate means such as wooden wedges or metal shoes. Laminate any spaces between the mast base and stepping fixture to eliminate unnecessary movement.
3. Checking Mast Alignment and Rake To ensure proper alignment, double-check that your mast stands upright without any bends or twists when viewed head-on from various angles. A slightly forward incline at its top section known as rake can contribute to better sailing performance by generating more lift force on your sails.
4. Tensioning Shrouds and Stays Now it’s time to tackle tensioning your shrouds and stays effectively. These cables support your mast by distributing forces exerted by wind pressure evenly throughout its structure. Start by tightening all shrouds moderately until they’re taut but not excessively stretched – precise tension ultimately depends on factors like boat size, type of sailing, and weather conditions.
5. Precise Tuning: Balancing Shroud Tension Professional sailboat rigging entails finding the right balance of tension between port and starboard shrouds. You can fine-tune this by adjusting the turnbuckles, effectively altering the mast’s side-to-side bend. Carefully observe that your mast remains centered and straight under normal wind conditions when tweaking shroud tensions.
6. Fine-tuning Forestay and Backstay Next, focus on optimizing your forestay and backstay tension to refine your sail shape further. The forestay keeps your mast from falling forward under heavy winds, while the backstay stabilizes it amidst strong gusts. Achieving the correct adjusted length for each is key to maintaining an efficient airflow over your sails.
7. Adjusting Boom Height and Angle Don’t forget about the boom – it plays a significant role in controlling sail shape and twist. Position it parallel to the deck when sailing at a beam reach or on a run. Fine adjustments can be made by tightening or loosening its topping lift, ensuring optimal clearance above crew heads during maneuvers.
8. Continual Assessment: Monitoring Your Rig Once you’ve set up your sailboat rig as per our guidelines, ongoing monitoring is essential for its longevity and performance efficiency. Regularly inspect cables for wear, corrosion, or fatigue that might weaken their integrity over time.
By following these detailed steps with due diligence, you’ll have a professionally set up and well-adjusted sailboat rig that will help you navigate any waterways with ease and finesse — ultimately affording you smooth sailing adventures! Remember: mastering this process takes practice, so stay patient while honing your skills.
So why wait? Embark on this exciting endeavor today, taking charge of your sailboat’s rig setup like an experienced sailor would. Let the winds guide you towards unforgettable voyages as you harness the true potential of your vessel’s capabilities!
Avoiding Common Mistakes in Sailboat Rigging: Tips and Tricks
Title: Sailing Smoothly: Tips and Tricks to Avoid Common Mistakes in Sailboat Rigging
Introduction: Setting sail on a beautifully rigged sailboat is an exhilarating experience for any sailor. However, even the most seasoned sailors can fall prey to common mistakes that can affect the performance and safety of their vessel. In this blog post, we will explore some professional, witty, and clever tips and tricks to help you avoid these pitfalls in sailboat rigging. So grab your cup of coffee, sit back, and let’s dive into the world of flawless rigging!
1. The Importance of Proper Alignment: Imagine trying to walk in shoes that are too loose or too tight – uncomfortable and difficult “sailing” indeed! Similarly, misalignment in your rigging can cause unnecessary strain on your sails, mast, and standing rigging. To ensure a seamless sailing experience, take the time to meticulously align all key components such as spreaders, shrouds, forestay, and backstay. Trust us; this attention to detail will pay off with improved boat handling and increased efficiency.
Witty tip: Just like cooking pasta al dente (firm but not hard), give your rigging alignment some love so you stay aligned with smooth sailing!
2. Regular Inspection for Chafe: Chafe is akin to corrosion slowly eroding the strength of your rigging over time. Keep a watchful eye on areas prone to chafing such as halyards running over sheaves (pulleys), cleats rubbing lines together or against metal fittings. Invest in protective covers or tapes specially designed for chafe-prone areas like spreader tips or jib sheets rubbing against lifelines.
Clever trick: Think of chafe as the sneaky Bermuda Triangle lurking within your sailboat’s rigging – stay vigilant lest it weakens your ship!
3. Tensioned Correctly – Not Too Tight, Not Too Loose: Finding that perfect balance between too tight and too loose is essential for optimal sail shape and increased boat performance. Over-tightening can strain the rigging, causing undue stress on sails and decreasing their lifespan. Conversely, under-tightened rigging may result in saggy sails and compromised boat speed. Seek professional guidance or refer to your sailboat’s manufacturer specifications to achieve the ideal tension for each part of your rigging.
Professional advice: Like a good massage, aim for just the right tension – firm enough to feel supported but not so tight that it becomes uncomfortable!
4. Regularly Inspect Swage Fittings: Swage fittings are commonly used to terminate wire standing rigging, providing a secure connection between wires and terminal ends. However, these fittings can suffer from fatigue or corrosion over time, compromising their strength and reliability. Inspect swage fittings closely for any signs of cracking, leaking (in hydraulic swages), or corrosion. If detected, promptly consult an expert rigger who can address the issue before it jeopardizes your safety at sea.
Witty observation: Remember, even tiny cracks can make swages crumble like well-baked cookies – nip them in the bud before they create chaos during your sailing adventures!
Conclusion: Avoiding common mistakes in sailboat rigging requires a combination of precision, regular inspection, and a touch of wit. By properly aligning your rigging components, diligently inspecting for chafe damage, maintaining correct tension levels throughout your rigging system, and regularly monitoring swage fittings’ integrity – you’ll be setting yourself up for smooth sailing experiences both metaphorically and literally! So grab those tools and set sail with confidence as you navigate the vast seas hassle-free.
Happy sailing!
Recent Posts

- Sailboat Gear and Equipment
- Sailboat Lifestyle
- Sailboat Maintenance
- Sailboat Racing
- Sailboat Tips and Tricks
- Sailboat Types
- Sailing Adventures
- Sailing Destinations
- Sailing Safety
- Sailing Techniques

Learn How To Rig a Gaff Rig Sailboat – A Step-by-Step Guide
Alex Morgan
Rigging a gaff rig sailboat is essential for anyone who wants to embark on a sailing adventure with this unique type of sailboat. Gaff rig sailboats are known for their traditional design and distinctive triangular shape that sets them apart from other sailboats.
To properly rig a gaff rig sailboat, it is crucial to understand the different components involved, such as the gaff spar , boom , sails , and rigging . In this comprehensive guide, we will walk through the step-by-step process of rigging a gaff rig sailboat, including preparing the spar and sails, hoisting the mainsail, attaching the boom and headsail, and setting the rigging. we will provide valuable tips for rigging and sailing a gaff rig sailboat, including maintaining proper tension, adjusting the gaff spar and boom, and understanding sail trim. By following this guide, you will be able to rig your gaff rig sailboat effectively and set sail with confidence.
Key takeaway:
- Introduction to Gaff Rig Sailboats: Gaff rig sailboats are a type of sailboat that utilize a gaff spar, boom, sails, and rigging to operate.
- Components of a Gaff Rig Sailboat: The gaff spar, boom, sails, and rigging are all vital components that make up a gaff rig sailboat.
- Step-by-Step Guide: How to Rig a Gaff Rig Sailboat: Rigging a gaff rig sailboat involves preparing the spar and sails, hoisting the mainsail, attaching the boom and headsail, and setting the rigging.
Components of a Gaff Rig Sailboat
Get to know the key components that make up a gaff rig sailboat . From the sturdy gaff spar to the versatile boom , the beautifully crafted sails to the intricate rigging , each sub-section of this section unravels the essence of a gaff rig sailboat. Explore the intricate details and learn about the important role these components play in the smooth sailing of this classic rigging system.
The Gaff Spar is a vital component of a Gaff Rig Sailboat , providing support to the sail. It is a pole attached to the mast and extends horizontally towards the stern of the boat. The Gaff Spar has a significant role in controlling the shape and position of the sail, impacting the boat’s performance.
The Gaff Spar consists of several parts that contribute to its functionality. These include the jaws , which secure it to the mast, and the peak halyard , used to raise and lower the gaff. The throat halyard controls the position of the gaff on the mast.
When rigging a Gaff Spar, proper tension and alignment are necessary. The jaws should be securely attached to the mast, and the halyards should be adjusted to achieve the desired sail shape. Maintaining the correct tension throughout the sail is crucial for optimal performance.
Fun fact: The Gaff Spar is a distinctive feature of Gaff Rig Sailboats and allows for a larger sail area, making them powerful and efficient vessels.
The boom is a vital part of a gaff rig sailboat. It is a horizontal pole that extends from the mast and supports the lower edge of the mainsail. Here are some important facts about the boom:
Function: The boom controls the shape and angle of the mainsail, maintains tension in the sail, and allows for effective maneuvering of the boat.
Construction: Booms are made of aluminum or wood, depending on the sailboat type. They are designed to be sturdy yet lightweight to withstand wind forces.
Attachment: The boom is attached to one end of the mast and can pivot freely. The other end connects to the mainsail, allowing it to move as the sail is raised, lowered, or adjusted.
Manipulation: Sailors adjust the boom position using the boom vang, a device that controls tension and height. Adjusting the boom optimizes sail shape and trim, enhancing the boat’s performance.
Safety: Caution is necessary when near the boom to avoid collisions. Sailors should be mindful of their position and the boom’s movement during tacking or gybing.
Fact: The boom in a gaff rig sailboat aids in optimizing sail shape and trim, improving performance and maneuverability on the water.
The sails are essential components of a gaff rig sailboat. There are two main types of sails used in this rig: the mainsail and the headsail .
The mainsail is the largest sail and is attached to the gaff spar. It captures the wind and propels the boat forward. The mainsail can be adjusted to control the sail’s angle and shape , optimizing performance.
The headsail , also known as the foresail , is located forward of the mast. It complements the mainsail by providing additional power and stability. The headsail can be adjusted to control the wind captured, allowing sailors to adapt to different conditions.
Both sails are crucial for maneuvering and controlling the gaff rig sailboat. They are designed and crafted for efficiency and performance on the water. Sail trim , adjusting the position and tension of the sails, is vital for speed and handling.
Regularly inspect and maintain the sails to ensure a successful sailing experience. Check for wear or damage and make necessary repairs or replacements. Proper care and attention will enhance the sails’ longevity and the overall sailing experience.
Rigging a gaff rig sailboat involves several steps to ensure the sails and rigging are properly set up for smooth sailing. Here is a step-by-step guide:
1. Check the spar and sails for damage or wear. Attach the gaff spar securely to the mast.
2. Hoist the mainsail by attaching the halyard to the head of the sail and raising it up the mast. Secure the halyard.
3. Connect the boom to the mast and secure it using the boom vang.
4. Attach the headsail by connecting the halyard to the head of the sail and hoisting it up the forestay.
5. Adjust the shrouds and stays to set the rigging. Check for proper tension for stability and support.
6. Attach the halyards and sheets to the sail and boom, respectively. Ensure they are properly tensioned for sail control.
Maintaining proper tension in the rigging is crucial for stability and performance. Regularly check and adjust the tension as needed. Correctly adjusting the gaff spar and boom is important for sail control and achieving the desired sail shape and performance. Understanding sail trim is essential for optimizing the performance of a gaff rig sailboat. Experiment with different sail positions to find the most efficient settings for various wind conditions.
Step-by-Step Guide: How to Rig a Gaff Rig Sailboat
Get ready to set sail with this step-by-step guide on rigging a gaff rig sailboat. From preparing the spar and sails to hoisting the mainsail, attaching the boom and headsail, and setting the rigging – we’ll walk you through each crucial step. Whether you’re a seasoned sailor or a curious novice, these tips will help you navigate the process smoothly and get you out on the water in no time. So grab your gear and let’s rig that sailboat!
Preparing the Spar and Sails
Preparing the Spar and Sails for rigging a gaff rig sailboat involves several crucial steps. It is essential to carefully inspect the spar for any signs of damage or wear, such as cracks , splits , or loose fittings. This thorough inspection ensures the safety and functionality of the sailboat.
Next, it is important to prepare the sails by laying them out on a clean surface and checking for any tears or holes . This step guarantees that the sails are in optimal condition for rigging.
To hoist the sails up the mast, it is necessary to attach the halyards securely. It is crucial to ensure that they are properly attached and free from any knots that could hinder the smooth hoisting process.
Controlling the angle and tension of the sails can be achieved by attaching the sheets . These sheets must be securely fastened and properly adjusted to maintain the desired sail position.
Another important attachment is the downhaul , which allows for controlling the shape of the sail. It is of utmost importance to securely attach and properly adjust the downhaul to ensure an optimal sailing experience.
Carefully check the rigging , including the shrouds and stays , for any signs of damage or wear. It is crucial to properly tension and securely fasten all rigging components to guarantee the sailboat’s stability.
Inspecting the sail track and slides on the mast for cleanliness and obstructions is another essential step. This inspection ensures that the sails can smoothly and efficiently slide along the mast during rigging.
Once these steps have been completed, you will be fully prepared to continue rigging your gaff rig sailboat. Always remember to follow the manufacturer’s instructions and utilize proper sailing techniques for a safe and enjoyable experience on the water.
Hoisting the Mainsail
To hoist the mainsail on a gaff rig sailboat, follow these steps:
- Attach the halyard to the head of the mainsail .
- Begin hoisting the mainsail by pulling on the halyard.
- Keep an eye on the luff to ensure proper alignment.
- Continue hoisting the mainsail to the desired height.
- Secure the halyard once the mainsail is fully hoisted.
Suggestions for hoisting the mainsail :
- Take your time and be careful.
- Communicate with your crew members.
- Practice in calm weather conditions first.
- Regularly inspect rigging components for good condition and maintenance.
Remember, hoisting the mainsail is important for preparing the sailboat. Follow the steps carefully and stay safe on the water.
Attaching the Boom and Headsail
To attach the boom and headsail on a gaff rig sailboat, follow these steps:
1. Position the boom: Place the boom on the mast and slide it toward the aft end until it aligns with the jaws of the gaff spar.
2. Secure the boom: Attach the boom to the jaws of the gaff spar using a stainless-steel pin or bolt. Ensure it is tightly secured to prevent movement during sailing.
3. Attach the headsail: Take the headsail and attach it to the forestay connected to the masthead. Use hanks or clips on the headsail to fasten it securely to the forestay. Ensure all attachments are secure.
4. Adjust the tension: Check the tension of the headsail by gently pulling on the sheets. The headsail should be taut but not overly tight. Make necessary adjustments for the desired tension.
5. Inspect connections: Double-check all connections and fastenings to ensure they are secure. Confirm that the boom is properly attached to the gaff spar and the headsail is securely fastened to the forestay.
By following these steps, you can successfully attach the boom and headsail on a gaff rig sailboat, giving you a smooth and efficient sailing experience.
Setting the Rigging
To properly set the rigging on a gaff rig sailboat, follow these steps:
1. Adjust the shrouds and stays: Ensure that these lines are properly tensioned and secure. They support the mast and maintain its position.
2. Rig the halyards and sheets: Attach the halyards to the sails and run them through the appropriate blocks or pulleys. The halyards hoist and control the sails. The sheets control the angle and tension of the sails.
Setting the rigging is critical for rigging a gaff rig sailboat. The proper tension and alignment of the shrouds and stays ensure mast stability and performance. Rigging the halyards and sheets correctly is essential for controlling the sails and maneuvering the boat effectively. By following these steps, you can ensure that your gaff rig sailboat is properly rigged and ready for a successful sailing experience.
Gaff rig sailboats have a rich history dating back to the 17th century. They were commonly used on working sailboats and fishing vessels due to their versatility and efficiency. The design features a large, fore-and-aft mainsail supported by a gaff spar. This rigging allowed sailors to navigate different wind conditions and made these boats well-suited for hauling cargo and coastal trading. Although modern sailboat designs have evolved, gaff rig sailboats are still admired for their aesthetic appeal and nostalgic charm. Many sailing enthusiasts still enjoy the unique experience of setting the rigging and sailing a gaff rig sailboat, connecting with a bygone era of maritime history.
Tips for Rigging and Sailing a Gaff Rig Sailboat
Get ready to set sail with these expert tips for rigging and sailing a gaff rig sailboat . We’ll dive into the secrets of maintaining proper tension, adjusting the gaff spar and boom , and understanding sail trim . Discover the key elements to make your gaff rig sailboat glide effortlessly through the water and experience the thrill of harnessing the wind’s power. So, grab your ropes and let’s embark on an exciting journey into the world of gaff rig sailing !
Maintaining Proper Tension
Maintaining proper tension is crucial for the performance and safety of a gaff rig sailboat. To achieve this, follow these steps:
1. Regularly inspect the rigging for any signs of wear or damage, including the shrouds, stays, halyards, and sheets.
2. Adjust the rigging tension as needed to ensure the integrity of the rig and prevent excessive movement.
3. To check the tension of the shrouds and stays, gently apply pressure to the mast and observe the deflection. The mast should have a slight bend .
4. If the tension is too loose , tighten the shrouds and stays gradually using an appropriate tensioning device. Remember to distribute equal tension on both sides.
5. On the other hand, if the tension is too tight , release some tension by turning the tensioning device counterclockwise.
6. Pay close attention to the tension of the halyards and sheets. They should support the sails without hindering their movement.
7. Regularly inspect the tension of the gaff spar and boom, ensuring they are both secure and properly tensioned to control the shape of the sail.
8. Adjust the tension of the gaff spar and boom as necessary to achieve optimal sail trim and performance .
9. Maintain proper tension throughout your sailing trip and make adjustments as the conditions change.
By following these steps, you can ensure that your gaff rig sailboat maintains the proper tension for a safe and enjoyable sailing experience.
Adjusting the Gaff Spar and Boom
Adjusting the gaff spar and boom is imperative when rigging a gaff rig sailboat . It is crucial for ensuring the proper sail shape, stability, and control while sailing.
To begin, check the alignment by making sure the gaff spar is parallel and centered with the mast.
Next, tighten the gaff jaws by securely fastening them around the mast. This will prevent any movement during sailing.
Then, attach the throat halyard to the throat of the gaff spar . This will allow you to control the height and angle of the mainsail.
Fine-tune the tension of the throat halyard to achieve the desired sail shape. More tension will raise the gaff spar , while less tension will lower it.
Securely attach the peak halyard to the peak of the gaff spar . This will give you control over the leech tension and the overall shape of the mainsail.
Adjust the tension of the peak halyard to achieve optimal sail shape. Increasing the tension will increase leech tension and flatten the sail, while decreasing the tension will allow the sail to fill out more.
Always check the boom position to ensure it is properly attached to the mast and gaff spar . It should be parallel to the deck and positioned at the desired height.
To control the twist in the mainsail, modify the boom angle. Higher boom angles will increase twist, while lower angles will decrease it.
Increase the tension in the boom vang to control the downward force on the boom. This will stabilize the mainsail and prevent excessive leech flutter.
By following these steps and making necessary adjustments to the gaff spar and boom , you can optimize the performance and maneuverability of your gaff rig sailboat.
Understanding Sail Trim
Understanding sail trim is crucial for sailing a gaff rig sailboat effectively. Sail trim optimizes sail performance and maximizes speed and efficiency. Consider the following aspects of sail trim:
1. Adjusting the sails: Properly understand sail trim and set the sails for efficient propulsion. Keep the sails trimmed according to wind direction and strength. Well-trimmed mainsail and headsail provide optimal power and balance.
2. Controlling twist: Understanding sail trim helps maintain the desired amount of twist based on wind conditions. Too much twist reduces efficiency, while too little twist causes excessive heeling. Adjust sheets and halyards to control twist effectively.
3. Balancing the boat: Proficient sail trim helps maintain balance and stability while sailing. Understand how to adjust the sails to evenly distribute forces, minimizing weather helm or lee helm. Balanced boats sail more efficiently and are easier to control.
4. Monitoring sail shape: Pay attention to sail shape and understand how sail trim affects it. The sails should have a smooth, aerodynamic shape without excessive wrinkles or flapping. Adjust tension on halyards, sheets, and outhaul to achieve the desired sail shape.
5. Reacting to changing conditions: Understanding sail trim means being attentive to shifts in wind direction and strength. Make necessary adjustments promptly to optimize performance.
Understanding sail trim comes with experience. Regular practice and observation of how adjustments affect boat performance enhance sail trim proficiency. By cultivating this understanding, you can improve efficiency and enjoyment of sailing a gaff rig sailboat .
Facts about How To Rig A Gaff Rig Sailboat:
Some Facts About How To Rig A Gaff Rig Sailboat:
- ✅ Modern gaff rig sailboats offer practicality and simplicity, with easier trailing and rigging compared to Bermudan rigs. (Source: Classic Boat)
- ✅ The lower center of effort of gaff rigs allows for lighter lifting keels and easier downwind performance. (Source: Classic Boat)
- ✅ Trimming a gaffer can be challenging and rewarding, with boom angle and jib tension being important factors in optimizing performance. (Source: PBO)
- ✅ Gaff rig owners often prefer cream or white sails for better visibility and a classic appearance. (Source: PBO)
- ✅ Sewing the ends of two ropes together using sailmaker’s twine allows for easy replacement of worn or damaged halyards on gaff-rigged sailboats. (Source: PBO)
Frequently Asked Questions
1. how do i rig a gaff rigged sailboat with multiple blocks.
Rigging a gaff rigged sailboat with multiple blocks can seem daunting at first, but the process is actually simple if both ends of the halyards are accessible from the deck. By sewing the ends of the two ropes together using sailmaker’s twine, you can create a smooth joint that can be easily pulled through the blocks. Simply pull on the free end of the old halyard, and the new one will automatically reeve.
2. What are the advantages of using lightweight synthetics in gaff rigging?
Using lightweight synthetics in gaff rigging offers several advantages. These materials are not only lighter in weight, but they also have increased strength and durability. They are less prone to stretching and UV degradation, providing a longer lifespan for your rigging. Lightweight synthetics can improve upwind efficiency and downwind performance, resulting in a smoother sailing experience.
3. Why are gaff rigs preferred in heavier winds?
Gaff rigs are often preferred in heavier winds due to their lower rig tension and the use of high peak gaffs. The lower center of effort and shorter spars of gaff rigs allow for better balance and easier management of sail area in strong winds. This results in less heel and a more comfortable sail, allowing sailors to maintain control and stability even in challenging conditions.
4. How are gaff rigs different from bermuda rigs?
Gaff rigs and bermuda rigs differ in their sail configurations and rigging. Gaff rigs use a spar, or strong pole, on top of the sail, while bermuda rigs have a triangular mainsail. Gaff rigs were commonly used in the past and offer a classic appearance, while bermuda rigs are more modern and efficient. Bermuda rigs have become dominant in the sailing scene, but gaff rigs are still appreciated by enthusiasts for their unique sailing capabilities and timeless charm.
5. What are some modern conveniences in gaff-rigged sailboats?
Modern gaff-rigged sailboats, also known as gaffers, offer a blend of classic style designs and modern conveniences. These boats are designed for practicality and simplicity, providing easier trailing and rigging compared to bermudan rigs. They often feature improved performance, with upgrades such as carbon spars and modern hardware. Gaffers also have lighter lifting keels and better downwind performance thanks to their lower center of effort, making them suitable for a variety of sailing conditions.
6. How do I replace an old wick in a paraffin lamp on a gaff-rigged vessel?
Replacing an old wick in a paraffin lamp on a gaff-rigged vessel is a simple process. Just like replacing a worn or damaged halyard, you can use a technique called sewing. Stitch the ends of the new wick together using light sailmakers twine, creating a smooth joint. Then, pull out the old wick by pulling on the free end, and the new one will automatically be pulled through. This technique can be used both on a gaff-rigged vessel and for other purposes, such as replacing a halyard.
About the author

Leave a Reply Cancel reply
Your email address will not be published. Required fields are marked *
Save my name, email, and website in this browser for the next time I comment.
Latest posts

The history of sailing – from ancient times to modern adventures
History of Sailing Sailing is a time-honored tradition that has evolved over millennia, from its humble beginnings as a means of transportation to a beloved modern-day recreational activity. The history of sailing is a fascinating journey that spans cultures and centuries, rich in innovation and adventure. In this article, we’ll explore the remarkable evolution of…

Sailing Solo: Adventures and Challenges of Single-Handed Sailing
Solo Sailing Sailing has always been a pursuit of freedom, adventure, and self-discovery. While sailing with a crew is a fantastic experience, there’s a unique allure to sailing solo – just you, the wind, and the open sea. Single-handed sailing, as it’s often called, is a journey of self-reliance, resilience, and the ultimate test of…

Sustainable Sailing: Eco-Friendly Practices on the boat
Eco Friendly Sailing Sailing is an exhilarating and timeless way to explore the beauty of the open water, but it’s important to remember that our oceans and environment need our protection. Sustainable sailing, which involves eco-friendly practices and mindful decision-making, allows sailors to enjoy their adventures while minimizing their impact on the environment. In this…
The Various Types of Sailboats and Rigs
Aditya Adjie / EyeEm / Getty Images
The Modern Sloop
The most common type of small-to-midsize sailboat is the sloop. The rig is one mast and two sails. The mainsail is a tall, triangular sail mounted to the mast at its leading edge, with the foot of the sail along the boom, which extends aft from the mast. The sail in front called the jib or sometimes the headsail, mounts on the forestay between the bow and the masthead, with its trailing corner controlled by the jib sheet.
The Bermuda or Marconi Rig
These tall triangular sails are called the Bermuda rig, or sometimes the Marconi rig, named for their development more than two centuries ago in Bermudan boats. Because of the physics of how force is generated by wind blowing past a sail, tall thin sails generally have more power when the boat is sailing into the wind.
Racing Sloop
Gail Oskin / Getty Images
Here is another example of a sloop with a Bermuda rig. This is PUMA Ocean Racing's il Mostro, one of the fastest monohull sailboats in the world, in the 2008/2009 Volvo Ocean Race. The sails are much bigger than found on most cruising sailboats, but the general rig is the same. In both of the sloops shown so far, the jib reaches to the top of the masthead. These are sometimes called masthead sloops.
Fractional Sloop Rig
Ahunt [CC0] / Wikimedia Commons
Here, notice a small racing dinghy with a sloop rig. This is still a Bermuda rig, but the mainsail is proportionally larger and the jib smaller, for ease of handling and maximum power. Note that the top of the jib rises only a fraction of the distance to the masthead. Such a rig is called a fractional sloop.
KenWiedemann / Getty Images
While a sloop always has two sails, a cat-rigged boat generally has only one. The mast is positioned very far forward, almost at the bow, making room for a very long-footed mainsail. The mainsail of a cat rig may have a traditional boom or, as in this boat, a loose-footed mainsail attached at the aft corner to what is called a wishbone boom.
Compared to Bermuda Rigs
A primary advantage of a cat rig is the ease of sail handling, such as not having to deal with jib sheets when tacking. Generally, a cat rig is not considered as powerful as a Bermuda rig, however, and is more rarely used in modern boats.
Cat-Rigged Racing Dinghy
technotr / Getty Images
In this photo, there is another cat rig, which works well on small racing dinghies like this Laser. With a small boat and one sailor, a cat rig has the advantages of being simple to trim and very maneuverable when racing.
John White Photos / Getty Images
A popular rig for midsize cruising boats is the ketch, which is like a sloop with a second, smaller mast set aft called the mizzenmast. The mizzen sail functions much like a second mainsail. A ketch carries about the same total square footage of sail area as a sloop of the equivalent size.
Make Sail Handling Easy
The primary advantages of a ketch are that each of the sails is usually somewhat smaller than on a sloop of equivalent size, making sail handling easier. Smaller sails are lighter, easier to hoist and trim and smaller to stow. Having three sails also allows for more flexible sail combinations. For example, with the wind at an intensity that a sloop might have to double-reef the main to reduce sail area, a ketch may sail very well under just jib and mizzen. This is popularly called sailing under “jib and jigger”—the jigger being an old square-rigger term for the aft-most mast flying a triangular sail.
While a ketch offers these advantages to cruisers, they may also be more expensive because of the added mast and sail. The sloop rig is also considered faster and is therefore used almost exclusively in racing sailboats.
Public Domain
A yawl is very similar to a ketch. The mizzenmast is usually smaller and sets farther aft, behind the rudder post, while in a ketch the mizzenmast is forward of the rudder post. Aside from this technical difference, the yawl and ketch rigs are similar and have similar advantages and disadvantages.
Tomás Fano [ CC BY-SA 2.0 ], via Wikimedia Commons
A typical schooner has two masts, and sometimes more, but the masts are positioned more forward in the boat. Unlike in a ketch or yawl, the forward mast is smaller than the aft mast (or sometimes the same size). One or more jibs may fly forward of the foremast.
Traditional Schooners
While some modern schooners may use triangular, Bermuda-like sails on one or both masts, traditional schooners like the one shown here have gaff-rigged sails. At the top of the sail is a short spar called the gaff, which allows the sail to extend back along a fourth side, gaining size over a triangular sail of the same height.
Gaff-rigged schooners are still seen in many areas and are well loved for their historic appearance and sweeping lines, but they are seldom used anymore for private cruising. The gaff rig is not as efficient as the Bermuda rig, and the rig is more complicated and requires more crew for sail handling.
Schooner With Topsail and Flying Jibs
Print Collector / Getty Images
Above is another gaff-rigged schooner that is using a topsail and several flying jibs. Tacking or gybing a complicated sail plan like this takes a lot of crew and expertise.
Square-Rigged Tall Ship
Bettmann / Getty Images
In this illustration, notice a large three-masted square-rigger flying five tiers of square sails, several headsails, and a mizzen sail. Although this is a modern ship, one of many still used around the world for sail training and passenger cruise ships, the rig is essentially unchanged from centuries ago. Columbus, Magellan, and the other early sea explorers sailed in square-riggers.
Generating Power
Remarkably efficient sailing downwind or well off the wind, square sails do not generate power from their leading edge as in the Bermuda rig, which has become predominant in modern times. Thus, square-riggers generally do not sail upwind. It was due to this limitation that the great trade wind sailing routes around the world were developed centuries ago.
Buying a Sailboat: Sloop vs. Ketch
Learn How to Sail a Small Sailboat
Learn the Parts of a Sailboat and How to Communicate Them
Review of the O'Day Mariner 19 Sailboat
How to Rig Your Small Sailboat and Prepare to Sail
Tall Ships in Los Angeles and Southern California
West Wight Potter 19 Sailboat Review
The 10 Best Inflatable Stand-Up Paddleboards of 2024, Tested and Reviewed
Owner's Review of the MacGregor 26 Sailboat Models
12 Best Things to Do in Juneau During an Alaska Cruise
Heavy Weather Sailing
The 8 Best Sunglasses for Men of 2024, Tested and Reviewed
13 New Ocean Cruise Ships in 2018
Where to Go in 2023: The Most Exciting Destinations to Explore This Year
The 11 Best Two-Person Tents of 2024, Tested and Reviewed
The 9 Most Popular Places for Destination Weddings
- BOAT OF THE YEAR
- Newsletters
- Sailboat Reviews
- Boating Safety
- Sailing Totem
- Charter Resources
- Destinations
- Galley Recipes
- Living Aboard
- Sails and Rigging
- Maintenance
How to Inspect and Tune a Sailboat Rig
- By Ralph Naranjo
- Updated: May 14, 2020

Major mast failures usually begin as minor hardware problems. At least that’s what scrap-bin forensics seems to confirm. So, instead of dreading a dismasting, prevent it with a sensible approach to rig maintenance.
Some sailors inspect their masts and rigging with the spar stepped, but most recognize how much will remain unseen. Riggers recommend that the mast come out every few years and be placed on a pair of sturdy sawhorses ready for close-up scrutiny. My DIY approach focuses on hardware junctions and points where load paths intersect. Packed in my rigger’s bag are the usual hand tools, plus a Scotch pad, a quality magnifying glass and a small digital camera to record the findings. The old rule of thumb is that standing rigging has a decade’s, or one circumnavigation’s, worth of reliability; it’s a benchmark that remains valid today.
Another important issue is the rigging’s designed safety factor, or how much stronger the components are than they need be. The catch here is material deterioration over time, and the fact that there’s a direct correlation between stronger structures and increased reliability. For example, by increasing 1-by-19 shrouds and their attendant hardware from 5/16 inch to 3/8 inch, the higher safe working load translates into a longer life span. It’s a legit assumption, but doing so is both costlier and adds weight aloft, which can rob performance. The same tenets apply for a larger-diameter spar section and greater wall thickness. Engineers and naval architects try to balance these competing factors.

Some decades ago, I watched the deck-stepped spar of my first little cruising sloop drop into the drink. It drove home the fact that it really is the little things that count. In that case, it was a stainless- steel toggle, connected to an upper shroud turnbuckle, which had endured a few too many on-off load cycles. A tiny, nearly invisible crack had opened up, and salt spray had found a new home. The resulting corrosion tipped the scale and led to a dramatic failure. Since then, rig scrutiny has become my obsession.
The old rule of thumb is that standing rigging has a decade’s, or one circumnavigation’s, worth of reliability.
Wire and rod end fittings need a close look, especially in areas where there are brown stains and signs of cracks, pitting or other surface deterioration. This includes an evaluation of clevis-pin holes that should be circular, not elongated. Confer the same level of scrutiny to the clevis pins themselves. Don’t confuse stainless-steel clevis pins with chrome-plated bronze pins. The latter are just fine when used in bronze fittings, but when a bronze clevis pin is placed in a stainless-steel chainplate hole, the bronze pin can be carved away by the much harder stainless-steel chainplate.
My inspection process includes a rigging-wire wipe-down with a rag that easily snags on tiny cracks. It includes careful scrutiny of hardware junctions. I search for signs of chafe, especially where fiber or wire running rigging makes directional changes at sheave boxes, and around where the headsail furler’s top swivel rides. Looking closely at masthead exit points, I check for sheave wobble, excess side play and signs of pulley damage.

This is also the time to sort out halyards that are rubbing against external or internal obstructions. I use a bright, narrow-beam LED flashlight for a good visual inspection of the internal portion of the mast. Not only will it pinpoint screws and sheave boxes that might be causing chafe, but it also will help you untangle crossed halyards and confirm fairleads. While working at the heel end of the spar, look closely for corrosion and a condition riggers call “elephant foot.” It’s an actual wrinkling of the alloy tube section caused by too much compression and a too-thin wall section. It’s most often seen on raceboats with powerful hydraulic mast-adjusting systems, and on cruising boats that have pounded into too many steep wave faces.

Roller furling foils hide the wire or rod on which they spin. Rigging end fittings and terminals can usually be inspected, but a broken strand of wire inside the foil might initially go unnoticed, at least for a little while. This is another reason why offshore cruisers opt for a cutter or solent rig that adds a second stay for some extra insurance. Following the once-a-decade rule, it makes sense to completely disassemble furling systems, and replace the wire along with any worn bearings, bushings or plastic spacers.
My inspection process includes a wire wipe-down with a rag that easily snags on tiny cracks. I search for signs of chafe everywhere.
Keep in mind that when the mast is unstepped, many roller furling drums and head foils (especially on boats with deck-stepped rigs) extend beyond the heel of the spar. If the yard doesn’t splint and immobilize the extended foil and drum, do it yourself. All it entails is a couple of 2-by-4’s, or a pair of old oars lashed or duct-taped to the mast just above the heel. This double splint should extend to the base of the roller-furling drum where it too is lashed or taped. It keeps the drum from dangling and bending the foil during transport, and while the rig is stored on a mast rack.

Spreaders also deserve a really close look. All too often, excess anti-chafe protection results in the spreader tips becoming a water trap that turns into a hidden corrosion bath. So, when the rig is down, cut away the spreader-tip padding, and use white vinegar and a plastic scrub pad to get rid of any white powdery oxidation. Remove the spreaders from the spar, and inspect the area where spreader bases make contact with the mast. Look for compression damage to the mast wall and signs of corrosion damage. If all is well, reassemble using one of the tried-and-proven water-resistant lubricants. I’ve settled on Lanocote, McLube Sailkote and Super Lube, using Boeshield T-9 and WD-40 as my go-to spray protectant and penetrant. Throw away the old cotter pins, and use new pins on all of the reassembled rigging.

“She’ll be right, mate,” was the favorite phrase of an old Kiwi friend, but it isn’t good advice when it comes to keeping the rig where it belongs. Don’t shy away from calling in a qualified rigger to handle larger problems.

Most boatyards will restep spars but won’t tune the rig. Their goal is to set up the mast and rigging to approximate how it arrived. Occasionally, they hit the mark and even replace the mast wedges appropriately. Otherwise, I wait for a flat calm to make sure that the boat has no list. This involves using a tape measure to confirm the athwartship trim (waterline to rail-height port equals waterline to rail-height starboard). Then I check the perpendicular and rake of the mast using the main halyard with a makeshift plumb bob (dive weight) attached. The retune requires loosening the turnbuckles and incrementally retensioning the rigging. Small amounts of headstay and backstay adjustment relocates the masthead, causing the makeshift plumb bob to move significantly. I use prior measurements from previous mast-tuning successes to set the rake to a sweet spot that, in the past, delivered a minimal amount of weather helm.

With the rake set, I insert a set of teak or high-density hard-rubber wedges between the mast and the mast partners. These wedge-shaped spacers have a top flange that prevents them from falling into the bilge when the mast compresses on one side of the partners and opens the gap wider on the other. With all the wedges set, I incrementally add tension to the rig, tightening headstay and backstay first, while carefully maintaining the rake angle. Next, I adjust the upper shroud (or V1), working from side to side to keep the mast perpendicular. Finally, I snug up (but not overtension) the lower and intermediate shrouds. This static tuning sets the stage for an underway final tune, during which I check how well the spar remains in column. Leeward bends and S-curves are problematic and must be minimized. Boats with discontinuous rigging have shrouds that are not one continuous wire run. They utilize turnbuckles located above spreaders that must be individually adjusted to eliminate side bend.
During sea trials, make sure the leeward standing rigging is not overly slack and flopping around like loose spaghetti.
Intentional fore and aft mast bending can influence sail shape, and is put to good use aboard raceboats. Adding such complication to most cruising boats, which are normally steered by an autopilot, makes less sense. In-mast furling spars are least happy with powerful hydraulic backstays bowing the mast. So, get sound advice from a rigger/mast builder before adding hydraulic sail-shaping gear.

A sea trial should follow your static mast tune. And as you beat to windward in a modest 10- to 15-knot true breeze, check the leeward standing rigging. Make sure it’s not overly slack and flopping around like loose spaghetti. If so, add more shroud tension to both sides. A tension-testing gauge will work, but many sailors do fine estimating by hand. Cruising-boat rigs shouldn’t have the same amount of rig tension as a raceboat beating to windward. However, if your sailboat’s mast is deck-stepped, make sure the coachroof isn’t deforming due to the compression load. A compression post, ring frame or other rigid structure should be spreading such loads. If you’re unsure of the correct rig tune, arrange a session with a rigger or sailmaker—and start the season in optimized trim.
Technical expert Ralph Naranjo has inspected the rig on his Ericson 41, Wind Shadow , on countless occasions.
- More: fitting out , hardware , How To , mast , rigging
- More How To

Cruising with a Pet

Fatty Goodlander: Have Little, Want Less

How to Ride a Wave

How To Prioritize Your Sailboat’s Spring Checklist

A Big, New World

Cruising World On Board: Windelo 50

Into the Mystic: A Pacific Northwest Adventure

- Digital Edition
- Customer Service
- Privacy Policy
- Email Newsletters
- Cruising World
- Sailing World
- Salt Water Sportsman
- Sport Fishing
- Wakeboarding
Better Sailing

What is Sailboat Rigging?
The domain of rigging is an essential matter for the safety and good performance of your sailboat. Nowadays, the type of rigging is still evolving. Generally, rigging is depending on the type of sail used or the number of masts. As a basic rule, the replacement of the standing rig should be done every 10 years, except for multihulls or regattas, and rod or composite fiber rigging. A good set of rigging is of great importance in order to ensure navigation without causing any damage. A useful tip is to perform often thorough checks of the state of the rigging of your sailboat. Like this, you will prevent any possible damages from happening. So, let’s examine what exactly is sailboat rigging.
Standing and Running Rigging
Standing rigging supports your sailboat’s mast. The standing rigging consists of all the stainless steel wires that are used to support the mast. Moreover, standing rigging includes the rods, wires, and fixed lines that support the masts or bowsprit on a sailing vessel. In addition, all these reinforce the spars against wind loads transferred from the sails. On the other hand, running rigging is the rigging for controlling and shaping the sails on a sailboat. Running rigging consists of the main and jib sheet, the boom vang, the downhaul, and the jib halyard.
The subdivision of running rigging concerns the jeers, lifts, and halyards (halyards). This supporting equipment raises or lowers the sails and also controls the lower corners of the sails, i.e. the tacks and sheets. Over the centuries and up until nowadays, the history of sailboats rigging is still developing. What we’ve learned by now is that the combination of square and fore-and-aft sails in a full-rigged ship creates a highly complex, and mutually reliant set of components.
Wire Rigging
Wire rigging is the most common form of standing rigging on sailboats today. Furthermore, the style of the wire used is made of stainless steel, which is also a common wire style. What is advantageous with wire is that it’s quite affordable, especially when using swage fittings. The wire has also a long life expectancy, about 10 to 20 years, depending on use and the region you’re sailing to. However, wire rigging is more elastic than rod and synthetic rigging, thus it offers the lowest performance.
Rod Rigging
The rod rigging composition is of high-quality materials that provide low stretching. Moreover, it has a very long lifespan and great breaking strength, much more than that of its wire counterpart. Its life expectancy is attributed to the design, which is a mono strand, as well as to its composition that makes it very corrosion resistant.
Synthetic Rigging
Synthetic rigging is a new type of rigging and just like a rod, has minimum breaking strength. Nowadays, synthetic rigging offers low stretch performance features (that may vary depending on construction type), which are quite good for sailboats, among others. However, synthetic rigging will not last as long as the metal components. Most of the time, metal wire and rod are far better than synthetic rigging.
Based on the two rig types which are square-rigged and fore-and-aft, let’s divide the fore-and-aft rigs into three groups:
- Lateen Rig has a three-sided mainsail on a long yard.
- Bermuda rig which has a three-sided mainsail.
- Gaff rig is the head of the mainsail and has a four-sided mainsail.

Parts of a Sailboat Rigging and Terminology
Cruising sailboats will usually have their mast supported by 1 x 19 stainless steel wire. However, there are some racing sailboats that may choose rod rigging. Why? That’s because rod rigging has a stretch coefficient that is some 20% less than wire. The downside is that it’s more difficult to install and adjust, as well as less flexible with a shorter life span. So, let’s move on and see the parts of the sailboat’s rigging and their terminology:
- Forestay and Backstay : Forestay and backstay support the mast fore and aft. The forestay keeps the mast from falling backward. It attaches at the top of the mast. The backstay is important for the sail’s control because it directly affects the headsail and mainsail.
- Cap Shrouds and Lower Shrouds : These parts hold the mast steady athwartship. The shrouds are attached to the masthead and via chainplates to the hull. Moreover, forward and aft lower shrouds provide further support. The lower shrouds are always connected to the mast, just under the first spreader, and at the other end to the hull.
- Spreaders : In general, spreaders keep the shrouds away from the mast. What is of high importance, in terms of stability, is their length and fore-and-aft angle. The rigs of cruising boats may have up to three pairs of spreaders, depending on a number of factors such as the sailboat’s size and type. Keep in mind that the more spreaders a sailboat has then the lighter the mast section can be. Last but not least, the spreaders must be robust in order to withstand the compression loads of the shrouds.
- Masts and Booms : Masts are tall spars that carry the sails, navigate the sailboat, and control its position. Sailboat booms are horizontal spars to which the foot of a sail is bent. The booms attach to the lower part of the mast. There are some sailboats with unstayed masts, like the junk rig and catboat rigs. They have no standing rigging at all, and neither stays to support them. For example, a Bermuda rig has a single mast and just one headsail, thus a relatively simple rigging layout. On the other hand, schooners or ketches have a really complex rigging, i.e. with multi-spreader rigs. Apparently, the mast on a sailboat is an important component.
- Chainplates, Toggles, and Turnbuckles : These important components of sailboat rigging attach the shrouds to the hull. The chainplate is a metal plate that fastens to a strong point in the hull. Toggles are comprised of stainless steel fittings that absorb non-linear loads, located between the shrouds and the chainplate. Turnbuckles (or rigging screws) are also stainless steel materials that allow the shroud tension to adjust better.
- Parts of Running Rigging : As mentioned above, running rigging has to do about shaping, supporting, and stabilizing the sails on a sailing boat. Therefore, the necessary materials for running rigging are numerous and need further explanation. Some of these materials are: The topping lifts, the halyards, the outhauls and downhauls, the boom vangs, the sheets, and more.
Sailboat Rigging – Summary
So, what is sailboat rigging? Sailboat rigging concerns the wires, lines, and ropes that hold the rig and control the sails. To be more accurate, this means the tensioned stays and shrouds that support the mast. Rigging has to do about the booms, masts, yards, sails, stays, and cordage. Same way with cars, sailboats also have an engine, but in the form of sails. This is the standing and running rigging. When we refer to standing rigging this means that the stays and shrouds are supported by the mast. On the other hand, running rigging refers to rope halyards, sheets, and other control lines. Depending on the type of your sailboat, this sail-engine might be old, new, or maybe somewhere in between.

Peter is the editor of Better Sailing. He has sailed for countless hours and has maintained his own boats and sailboats for years. After years of trial and error, he decided to start this website to share the knowledge.
Related Posts

Sailing with Friends: Tie Knots, Navigate the Seas and Create Unforgettable Memories

Atlantic vs Pacific: Which is More Dangerous for Sailing?

Lagoon Catamaran Review: Are Lagoon Catamarans Good?

Best Inboard Boat Engine Brands
- Buyer's Guide
- Destinations
- Maintenance
- Sailing Info
Hit enter to search or ESC to close.
Sailboat Parts Explained: Illustrated Guide (with Diagrams)
When you first get into sailing, there are a lot of sailboat parts to learn. Scouting for a good guide to all the parts, I couldn't find any, so I wrote one myself.
Below, I'll go over each different sailboat part. And I mean each and every one of them. I'll walk you through them one by one, and explain each part's function. I've also made sure to add good illustrations and clear diagrams.
This article is a great reference for beginners and experienced sailors alike. It's a great starting point, but also a great reference manual. Let's kick off with a quick general overview of the different sailboat parts.
General Overview
The different segments
You can divide up a sailboat in four general segments. These segments are arbitrary (I made them up) but it will help us to understand the parts more quickly. Some are super straightforward and some have a bit more ninja names.
Something like that. You can see the different segments highlighted in this diagram below:

The hull is what most people would consider 'the boat'. It's the part that provides buoyancy and carries everything else: sails, masts, rigging, and so on. Without the hull, there would be no boat. The hull can be divided into different parts: deck, keel, cabin, waterline, bilge, bow, stern, rudder, and many more.
I'll show you those specific parts later on. First, let's move on to the mast.

Sailboats Explained
The mast is the long, standing pole holding the sails. It is typically placed just off-center of a sailboat (a little bit to the front) and gives the sailboat its characteristic shape. The mast is crucial for any sailboat: without a mast, any sailboat would become just a regular boat.
I think this segment speaks mostly for itself. Most modern sailboats you see will have two sails up, but they can carry a variety of other specialty sails. And there are all kinds of sail plans out there, which determine the amount and shape of sails that are used.
The Rigging
This is probably the most complex category of all of them.
Rigging is the means with which the sails are attached to the mast. The rigging consists of all kinds of lines, cables, spars, and hardware. It's the segment with the most different parts.
The most important parts
If you learn anything from this article, here are the most important parts of any sailboat. You will find all of these parts in some shape or form on almost any sailboat.

Okay, we now have a good starting point and a good basic understanding of the different sailboat parts. It's time for the good stuff. We're going to dive into each segment in detail.
Below, I'll go over them one by one, pointing out its different parts on a diagram, listing them with a brief explanation, and showing you examples as well.
After reading this article, you'll recognize every single sailboat part and know them by name. And if you forget one, you're free to look it up in this guide.

On this page:
The hull is the heart of the boat. It's what carries everything: the mast, the sails, the rigging, the passengers. The hull is what provides the sailboat with its buoyancy, allowing it to stay afloat.
Sailboats mostly use displacement hulls, which is a shape that displaces water when moving through it. They are generally very round and use buoyancy to support its own weight. These two characteristics make sure it is a smooth ride.
There are different hull shapes that work and handle differently. If you want to learn more about them, here's the Illustrated Guide to Boat Hull Types (with 11 Examples ). But for now, all we need to know is that the hull is the rounded, floating part of any sailboat.
Instead of simply calling the different sides of a hull front, back, left and right , we use different names in sailing. Let's take a look at them.

The bow is the front part of the hull. It's simply the nautical word for 'front'. It's the pointy bit that cuts through the water. The shape of the bow determines partially how the boat handles.
The stern is the back part of the hull. It's simply the nautical word for 'back'. The shape of the stern partially determines the stability and speed of the boat. With motorboats, the stern lies deep inside the water, and the hull is flatter aft. Aft also means back. This allows it to plane, increasing the hull speed. For sailboats, stability is much more important, so the hull is rounded throughout, increasing its buoyancy and hydrodynamic properties.
The transom is the backplate of the boat's hull. It's the most aft (rear) part of the boat.
Port is the left side of a sailboat.
Starboard is the right side of a sailboat
The bilges are the part where the bottom and the sides of the hull meet. On sailboats, these are typically very round, which helps with hydrodynamics. On powerboats, they tend to have an angle.
The waterline is the point where the boat's hull meets the water. Generally, boat owners paint the waterline and use antifouling paint below it, to protect it from marine growth.
The deck is the top part of the boat's hull. In a way, it's the cap of the boat, and it holds the deck hardware and rigging.
Displacement hulls are very round and smooth, which makes them very efficient and comfortable. But it also makes them very easy to capsize: think of a canoe, for example.
The keel is a large fin that offsets the tendency to capsize by providing counterbalance. Typically, the keel carries ballast in the tip, creating a counterweight to the wind's force on the sails.
The rudder is the horizontal plate at the back of the boat that is used to steer by setting a course and maintaining it. It is connected to the helm or tiller.
Tiller or Helm
- The helm is simply the nautical term for the wheel.
- The tiller is simply the nautical term for the steering stick.
The tiller or helm is attached to the rudder and is used to steer the boat. Most smaller sailboats (below 30') have a tiller, most larger sailboats use a helm. Large ocean-going vessels tend to have two helms.
The cockpit is the recessed part in the deck where the helmsman sits or stands. It tends to have some benches. It houses the outside navigation and systems interfaces, like the compass, chartplotter, and so on. It also houses the mainsheet traveler and winches for the jib. Most boats are set up so that the entire vessel can be operated from the cockpit (hence the name). More on those different parts later.
Most larger boats have some sort of roofed part, which is called the cabin. The cabin is used as a shelter, and on cruising sailboats you'll find the galley for cooking, a bed, bath room, and so on.
The mast is the pole on a sailboat that holds the sails. Sailboats can have one or multiple masts, depending on the mast configuration. Most sailboats have only one or two masts. Three masts or more is less common.
The boom is the horizontal pole on the mast, that holds the mainsail in place.
The sails seem simple, but actually consist of many moving parts. The parts I list below work for most modern sailboats - I mean 90% of them. However, there are all sorts of specialty sails that are not included here, to keep things concise.

The mainsail is the largest sail on the largest mast. Most sailboats use a sloop rigging (just one mast with one bermuda mainsail). In that case, the main is easy to recognize. With other rig types, it gets more difficult, since there can be multiple tall masts and large sails.
If you want to take a look at the different sail plans and rig types that are out there, I suggest reading my previous guide on how to recognize any sailboat here (opens in new tab).
Sail sides:
- Leech - Leech is the name for the back side of the sail, running from the top to the bottom.
- Luff - Luff is the name for the front side of the sail, running from the top to the bottom.
- Foot - Foot is the name for the lower side of the sail, where it meets the boom.
Sail corners:
- Clew - The clew is the lower aft (back) corner of the mainsail, where the leech is connected to the foot. The clew is attached to the boom.
- Tack - The tack is the lower front corner of the mainsail
- Head - The head is the top corner of the mainsail
Battens are horizontal sail reinforcers that flatten and stiffen the sail.
Telltales are small strings that show you whether your sail trim is correct. You'll find telltales on both your jib and mainsail.
The jib is the standard sized headsail on a Bermuda Sloop rig (which is the sail plan most modern sailboats use).
As I mentioned: there are all kinds, types, and shapes of sails. For an overview of the most common sail types, check out my Guide on Sail Types here (with photos).
The rigging is what is used to attach your sails and mast to your boat. Rigging, in other words, mostly consists of all kinds of lines. Lines are just another word for ropes. Come to think of it, sailors really find all kinds of ways to complicate the word rope ...
Two types of rigging
There are two types of rigging: running and standing rigging. The difference between the two is very simple.
- The running rigging is the rigging on a sailboat that's used to operate the sails. For example, the halyard, which is used to lower and heave the mainsail.
- The standing rigging is the rigging that is used to support the mast and sail plan.
Standing Rigging

Here are the different parts that belong to the standing rigging:
- Forestay or Headstay - Line or cable that supports the mast and is attached to the bow of the boat. This is often a steel cable.
- Backstay - Line or cable that supports the mast and is attached to the stern of the boat. This is often a steel cable.
- Sidestay or Shroud - Line or cable that supports the mast from the sides of the boat. Most sailboats use at least two sidestays (one on each side).
- Spreader - The sidestays are spaced to steer clear from the mast using spreaders.
Running Rigging: different words for rope
Ropes play a big part in sailing, and especially in control over the sails. In sailboat jargon, we call ropes 'lines'. But there are some lines with a specific function that have a different name. I think this makes it easier to communicate with your crew: you don't have to define which line you mean. Instead, you simply shout 'mainsheet!'. Yeah, that works.
Running rigging consists of the lines, sheets, and hardware that are used to control, raise, lower, shape and manipulate the sails on a sailboat. Rigging varies for different rig types, but since most sailboats are use a sloop rig, nearly all sailboats use the following running rigging:

- Halyards -'Halyard' is simply the nautical name for lines or ropes that are used to raise and lower the mainsail. The halyard is attached to the top of the mainsail sheet, or the gaffer, which is a top spar that attaches to the mainsail. You'll find halyards on both the mainsail and jib.
- Sheets - 'Sheet' is simply the nautical term for lines or ropes that are used to set the angle of the sail.
- Mainsheet - The line, or sheet, that is used to set the angle of the mainsail. The mainsheet is attached to the Mainsheet traveler. More on that under hardware.
- Jib Sheet - The jib mostly comes with two sheets: one on each side of the mast. This prevents you from having to loosen your sheet, throwing it around the other side of the mast, and tightening it. The jib sheets are often controlled using winches (more on that under hardware).
- Cleats are small on-deck hooks that can be used to tie down sheets and lines after trimming them.
- Reefing lines - Lines that run through the mainsail, used to put a reef in the main.
- The Boom Topping Lift is a line that is attached to the aft (back) end of the boom and runs to the top of the mast. It supports the boom whenever you take down the mainsail.
- The Boom Vang is a line that places downward tension on the boom.
There are some more tensioning lines, but I'll leave them for now. I could probably do an entire guide on the different sheets on a sailboat. Who knows, perhaps I'll write it.
This is a new segment, that I didn't mention before. It's a bit of an odd duck, so I threw all sorts of stuff into this category. But they are just as important as all the other parts. Your hardware consists of cleats, winches, traveler and so on. If you don't know what all of this means, no worries: neither did I. Below, you'll find a complete overview of the different parts.
Deck Hardware

Just a brief mention of the different deck hardware parts:
- Pulpits are fenced platforms on the sailboat's stern and bow, which is why they are called the bow pulpit and stern pulpit here. They typically have a solid steel framing for safety.
- Stanchons are the standing poles supporting the lifeline , which combined for a sort of fencing around the sailboat's deck. On most sailboats, steel and steel cables are used for the stanchons and lifelines.
Mainsheet Traveler
The mainsheet traveler is a rail in the cockpit that is used to control the mainsheet. It helps to lock the mainsheet in place, fixing the mainsails angle to the wind.
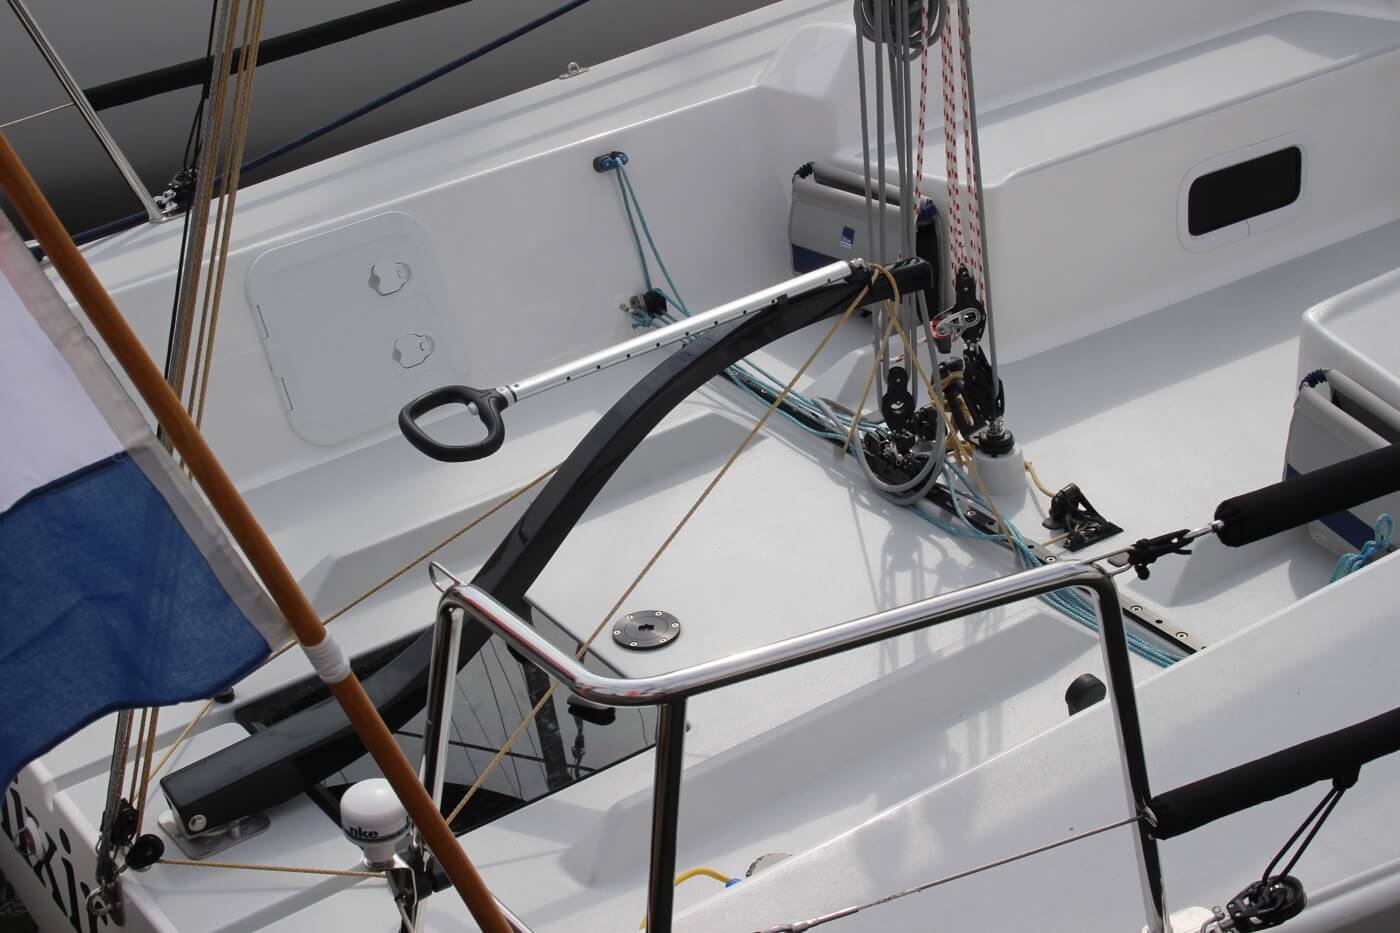
If you're interested in learning more about how to use the mainsheet traveler, Matej has written a great list of tips for using your mainsheet traveler the right way . It's a good starting point for beginners.
Winches are mechanical or electronic spools that are used to easily trim lines and sheets. Most sailboats use winches to control the jib sheets. Modern large sailing yachts use electronic winches for nearly all lines. This makes it incredibly easy to trim your lines.
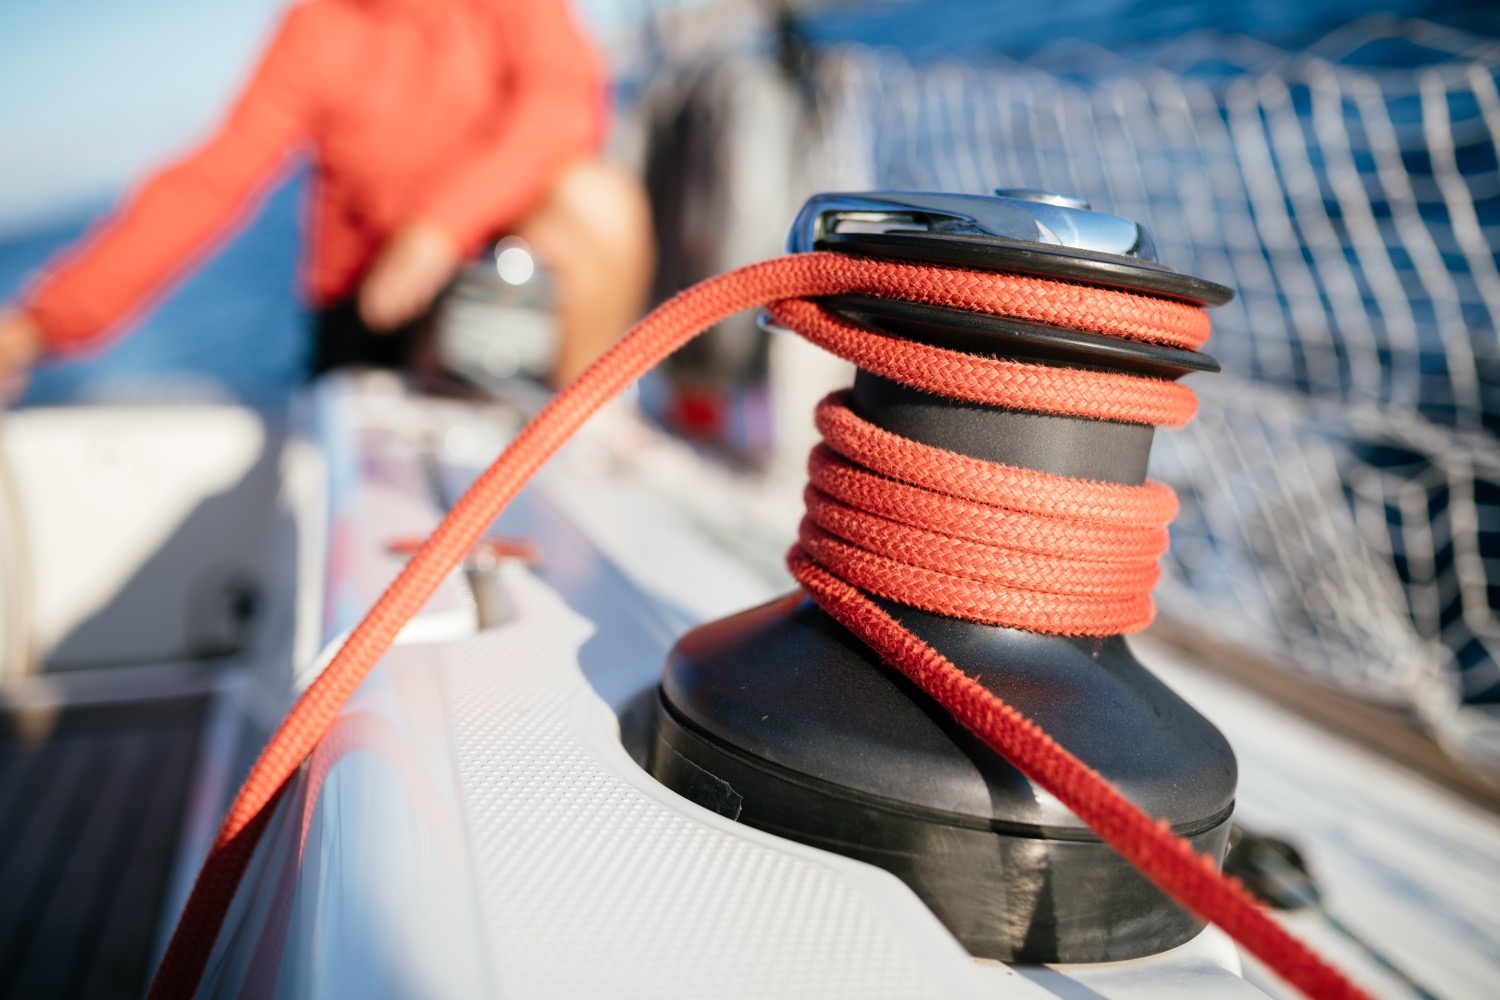
You'll find the compass typically in the cockpit. It's the most old-skool navigation tool out there, but I'm convinced it's also one of the most reliable. In any way, it definitely is the most solid backup navigator you can get for the money.
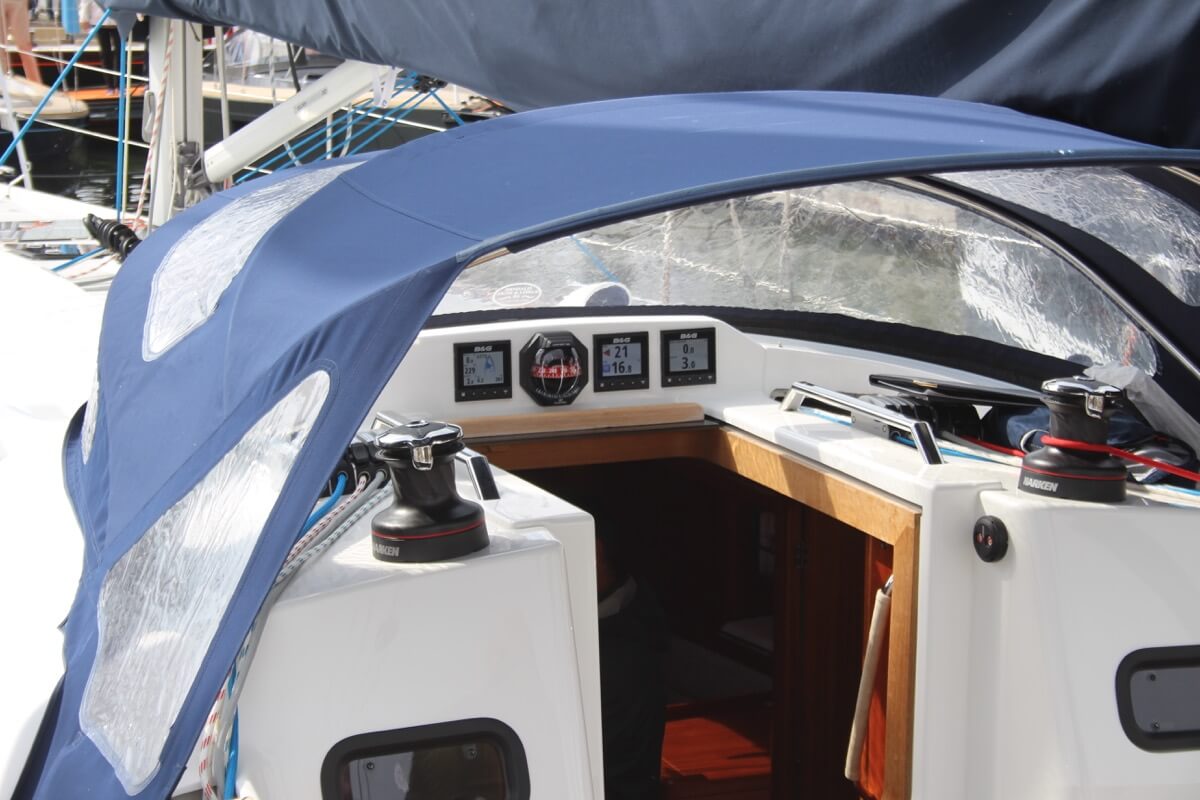
Want to learn how to use a compass quickly and reliably? It's easy. Just read my step-by-step beginner guide on How To Use a Compass (opens in new tab .
Chartplotter
Most sailboats nowadays use, besides a compass and a map, a chartplotter. Chartplotters are GPS devices that show a map and a course. It's very similar to your normal car navigation.
Outboard motor
Most sailboats have some sort of motor to help out when there's just the slightest breeze. These engines aren't very big or powerful, and most sailboats up to 32' use an outboard motor. You'll find these at the back of the boat.
Most sailboats carry 1 - 3 anchors: one bow anchor (the main one) and two stern anchors. The last two are optional and are mostly used by bluewater cruisers.
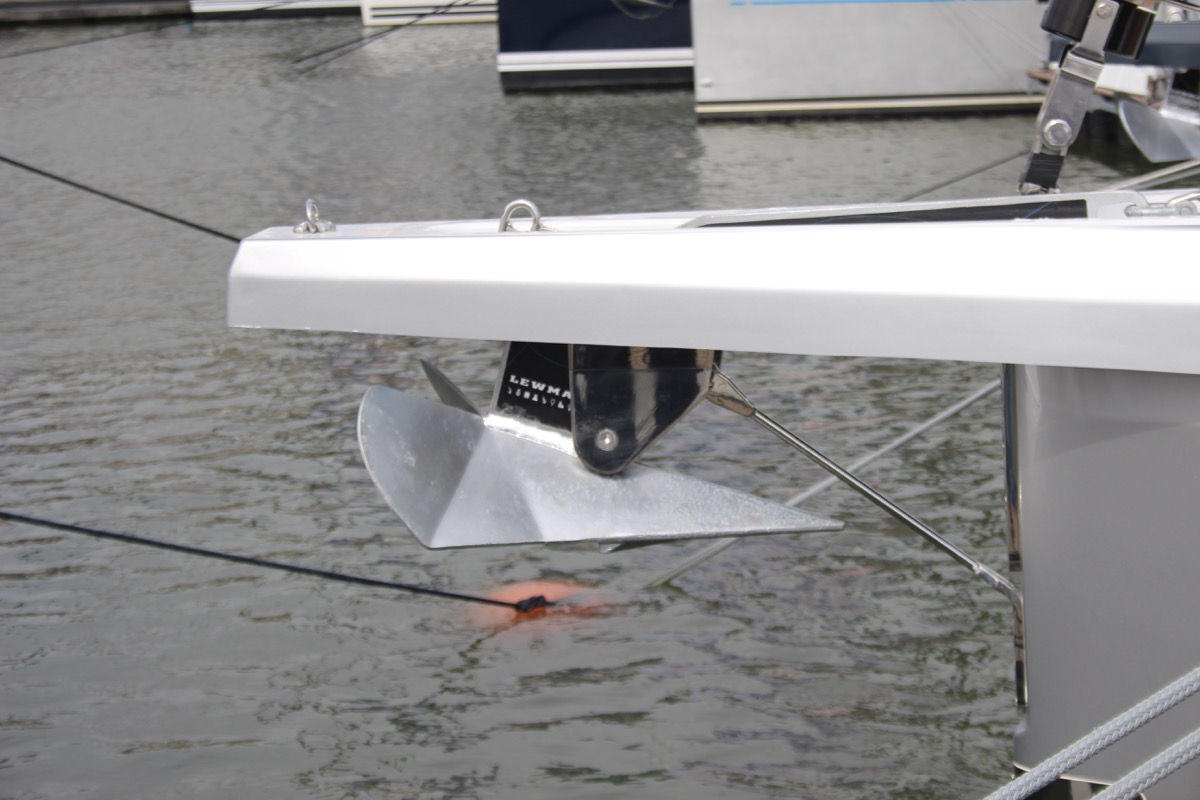
I hope this was helpful, and that you've gained a good understanding of the different parts involved in sailing. I wanted to write a good walk-through instead of overwhelming you with lists and lists of nautical terms. I hope I've succeeded. If so, I appreciate any comments and tips below.
I've tried to be as comprehensive as possible, without getting into the real nitty gritty. That would make for a gigantic article. However, if you feel I've left something out that really should be in here, please let me know in the comments below, so I can update the article.
I own a small 20 foot yacht called a Red witch made locally back in the 70s here in Western Australia i found your article great and enjoyed reading it i know it will be a great help for me in my future leaning to sail regards John.
David Gardner
İ think this is a good explanation of the difference between a ”rope” and a ”line”:
Rope is unemployed cordage. In other words, when it is in a coil and has not been assigned a job, it is just a rope.
On the other hand, when you prepare a rope for a specific task, it becomes employed and is a line. The line is labeled by the job it performs; for example, anchor line, dock line, fender line, etc.
Hey Mr. Buckles
I am taking on new crew to race with me on my Flying Scot (19ft dingy). I find your Sailboat Parts Explained to be clear and concise. I believe it will help my new crew learn the language that we use on the boat quickly without being overwhelmed.
PS: my grandparents were from Friesland and emigrated to America.
Thank you Shawn for the well written, clear and easy to digest introductory article. Just after reading this first article I feel excited and ready to set sails and go!! LOL!! Cheers! Daniel.
steve Balog
well done, chap
Great intro. However, the overview diagram misidentifies the cockpit location. The cockpit is located aft of the helm. Your diagram points to a location to the fore of the helm.
William Thompson-Ambrose
An excellent introduction to the basic anatomy and function of the sailboat. Anyone who wants to start sailing should consider the above article before stepping aboard! Thank-you
James Huskisson
Thanks for you efforts mate. We’ve all got to start somewhere. Thanks for sharing. Hoping to my first yacht. 25ft Holland. Would love to cross the Bass Strait one day to Tasmania. 👌 Cheers mate
Alan Alexander Percy
thankyou ijust aquired my first sailboat at 66yrs of age its down at pelican point a beautifull place in virginia usa my sailboat is a redwing 30 if you are ever in the area i wouldnt mind your guidance and superior knowledge of how to sail but iam sure your fantastic article will help my sailboat is wings 30 ft
Thanks for quick refresher course. Having sailed in California for 20+ years I now live in Spain where I have to take a spanish exam for a sailboat license. Problem is, it’s only in spanish. So a lot to learn for an old guy like me.
Very comprehensive, thank you
Your article really brought all the pieces together for me today. I have been adventuring my first sailing voyage for 2 months from the Carolinas and am now in Eleuthera waiting on weather to make the Exumas!!! Great job and thanks
Helen Ballard
I’ve at last found something of an adventure to have in sailing, so I’m starting at the basics, I have done a little sailing but need more despite being over 60 life in the old dog etc, thanks for your information 😊
Barbara Scott
I don’t have a sailboat, neither do l plan to literally take to the waters. But for mental exercise, l have decided to take to sailing in my Bermuda sloop, learning what it takes to become a good sailor and run a tight ship, even if it’s just imaginary. Thank you for helping me on my journey to countless adventures and misadventures, just to keep it out of the doldrums! (I’m a 69 year old African American female who have rediscovered why l enjoyed reading The Adventures of Robert Louis Stevenson as well as his captivating description of sea, wind, sailboat,and sailor).
Great article and very good information source for a beginner like me. But I didn’t find out what I had hoped to, which is, what are all those noisy bits of kit on top of the mast? I know the one with the arrow is a weather vane, but the rest? Many thanks, Jay.
Louis Cohen
The main halyard is attached to the head of the mainsail, not the to the mainsheet. In the USA, we say gaff, not gaffer. The gaff often has its own halyard separate from the main halyard.
Other than that it’s a nice article with good diagrams.
A Girl Who Has an Open Sail Dream
Wow! That was a lot of great detail! Thank you, this is going to help me a lot on my project!
Hi, good info, do u know a book that explains all the systems on a candc 27,
Emma Delaney
As a hobbyist, I was hesitant to invest in expensive CAD software, but CADHOBBY IntelliCAD has proven to be a cost-effective alternative that delivers the same quality and performance.
https://www.cadhobby.com/
Leave a comment
You may also like, guide to understanding sail rig types (with pictures).
There are a lot of different sail rig types and it can be difficult to remember what's what. So I've come up with a system. Let me explain it in this article.

The Ultimate Guide to Sail Types and Rigs (with Pictures)

The Illustrated Guide To Boat Hull Types (11 Examples)

How To Live On a Boat For Free: How I'd Do It

How To Live on a Sailboat: Consider These 5 Things
Own your first boat within a year on any budget.
A sailboat doesn't have to be expensive if you know what you're doing. If you want to learn how to make your sailing dream reality within a year, leave your email and I'll send you free updates . I don't like spam - I will only send helpful content.
Ready to Own Your First Boat?
Just tell us the best email address to send your tips to:
Service Locator
- Angler Endorsement
- Boat Towing Coverage
- Mechanical Breakdown
- Insurance Requirements in Mexico
- Agreed Hull Value
- Actual Cash Value
- Liability Only
- Insurance Payment Options
- Claims Information
- Towing Service Agreement
- Membership Plans
- Boat Show Tickets
- BoatUS Boats For Sale
- Membership Payment Options
- Consumer Affairs
- Boat Documentation Requirements
- Installation Instructions
- Shipping & Handling Information
- Contact Boat Lettering
- End User Agreement
- Frequently Asked Questions
- Vessel Documentation
- BoatUS Foundation
- Government Affairs
- Powercruisers
- Buying & Selling Advice
- Maintenance
- Tow Vehicles
- Make & Create
- Makeovers & Refitting
- Accessories
- Electronics
- Skills, Tips, Tools
- Spring Preparation
- Winterization
- Boaters’ Rights
- Environment & Clean Water
- Boat Safety
- Navigational Hazards
- Personal Safety
- Batteries & Onboard Power
- Motors, Engines, Propulsion
- Best Day on the Water
- Books & Movies
- Communication & Etiquette
- Contests & Sweepstakes
- Colleges & Tech Schools
- Food, Drink, Entertainment
- New To Boating
- Travel & Destinations
- Watersports
- Anchors & Anchoring
- Boat Handling
Tuning A Sailboat Rig
Advertisement
If your sailboat seems slower, follow our how-to on tuning your rig for optimal performance.

Photo: Bigstock
Spring is a time of prepping your boat for the coming season. While powerboaters fine-tune their engines, sailors should consider fine-tuning their rigs. Doing it yourself may seem intimidating, but it shouldn't be. Anyone reasonably handy can do it in a few hours. The reward is easier and faster sailing throughout the coming season.
Let's start with the basics for new sailors. With a few exceptions, a sailboat mast is held up by a series of stainless-steel wires. But those wires also perform several other equally important functions. When a sailboat is at rest and there is no wind blowing, the stress on these wires is very light with almost all the load downward toward the keel. However, when the boat is sailing and heeled over in a fresh breeze, more stress is placed on the wires and they have to work harder to hold the mast upright and stop it from bending.
The wires that prevent the mast from moving from side to side are called shrouds, and the ones that prevent fore and aft movement are called stays. The larger and taller the mast, the greater the load, and the number of shrouds and stays required. On a typical cruiser, say up to about 35 feet, there will generally be one forestay, one backstay, and two shrouds on each side.
To get the best performance from your boat and sails, the rigging needs to be set up correctly — often called "tuning the rig." The rig should be tuned with the boat in the water on a day with little to no wind. You'll also want to be away from wakes and other boats that can rock your boat. To start, the turnbuckles for the stays and shrouds should be hand-tight only. This is sufficient to hold up the rig but places no strain on anything — yet. Lay on your back on the boat's foredeck and sight up the front of the mast. It should be perfectly straight with no bends or kinks. Next, tighten the lower shrouds — these are the ones that do not go all the way to the top of the mast and often attach to the mast at the base of the crosstrees (the two horizontal spars at the upper ends of the topmasts).
You'll need a large screwdriver to rotate the turnbuckle, and a wrench to hold the shroud fitting and prevent it turning as you tighten. Give a couple of complete turns on either side. Have a helper release the main halyard and keep a little tension while you pull down the end that normally attaches to the mainsail until it just touches the top of the toerail adjacent to the chain plate. Have your helper cleat off the halyard, then swing the halyard over the boom and check the measurement on the other side. They should be the same. If not, adjust the turnbuckles until they the measurement is equal on port and starboard.

Adjusting and tuning a sailboat rig will often bring benefits such as easier handling and better performance.
Next do the same for the cap shrouds, these are the ones that go to the top of the mast, but note that due to the length of the shrouds, it is easy to bend the mast to either port or starboard. With the shrouds adjusted, sight up the mast one more time to ensure that it is still straight.
Next comes the fore and aft adjustment, which is made with the backstay and forestay. Masts should be plumb or lie back slightly. It should never rake forward. A good starting point is to tighten up the forestay and backstay a little over hand-tight. Use the main halyard as a plumb bob. Cleat off the halyard so the free end is just clear of the top of the boom and let it hang. If the shackle on the end of the halyard hits the mast, the mast is likely too far forward, so slacken off the forestay and tighten the backstay. Adjust a little at a time until the end of the halyard hangs free — 4 or 5 inches is a good starting point.
You'll need to install cotter pins into the turnbuckles to prevent them loosening over time, but before doing that, take the boat for a sail when the wind is blowing about 10 knots and see how everything works. With the boat on a beam reach, note the tightness of the windward shrouds. If they appear slack, they will need to be adjusted up. If the boat is hard on the tiller or wheel and tries to turn into wind, the mast has too much aft rake, so you'll want to slacken the backstay and tighten up on the forestay a little. If the bow wants to turn away from the wind, the mast is too far forward, so you'll need to move the mast back a little.
If you are at all unsure about tackling this task, play it safe and smart — seek out the services of a qualified rigger who has access to rig tension gauges and other specialized tools.
Related Articles
The truth about ceramic coatings for boats.
Our editor investigates the marketing claims of consumer-grade ceramic coatings.
Fine-Tune Your Side Scan Fishfinder
Take your side-scanning fishfinder off auto mode, and you’ll be spotting your prey from afar in no time
DIY Boat Foam Decking
Closed-cell foam flooring helps make boating more comfortable. Here’s how to install it on your vessel
Click to explore related articles
Contributing Editor, BoatUS Magazine
A marine surveyor and holder of RYA Yachtmaster Ocean certification, BoatUS Magazine contributing editor Mark Corke is one of our DIY gurus, creating easy-to-follow how-to articles and videos. Mark has built five boats himself (both power and sail), has been an experienced editor at several top boating magazines (including former associate editor of BoatUS Magazine), worked for the BBC, written four DIY books, skippered two round-the-world yachts, and holds the Guinness World Record for the fastest there-and-back crossing of the English Channel — in a kayak! He and his wife have a Grand Banks 32.
BoatUS Magazine Is A Benefit Of BoatUS Membership
Membership Benefits Include:
Subscription to the print version of BoatUS Magazine
4% back on purchases from West Marine stores or online at WestMarine.com
Discounts on fuel, transient slips, repairs and more at over 1,200 businesses
Deals on cruises, charters, car rentals, hotel stays and more…
All for only $25/year!
We use cookies to enhance your visit to our website and to improve your experience. By continuing to use our website, you’re agreeing to our cookie policy.
- Find A School
- Certifications
- North U Sail Trim
- Inside Sailing with Peter Isler
- Docking Made Easy
- Study Quizzes
- Bite-sized Lessons
- Fun Quizzes
- Sailing Challenge

What’s in a Rig? The Cutter Rig
By: Pat Reynolds Sailboat Rigs , Sailboats
What’s in a Rig Series #2
A variation on the last installment of What’s in a Rig (the sloop) is the Cutter Rig. Although it has gone through some changes through the course of history, the modern cutter rig is generally a set-up with two headsails. The forward sail is called the yankee and the one slightly behind it is the staysail.
Cutter rigs are a choice a cruising sailor might opt for more offshore work. Since longer passages usually means encountering heavier weather, the cutter rig can be the perfect choice to have a ready-to-go balanced sailplan when the wind picks up. They are not quite as easy to tack as sloops, but since cruisers go for days without tacking, the ability to quickly furl the yankee and have a small staysail up in a stiff breeze is worth the sacrifice.
Cutter rig fans also enjoy the balance it provides. A small staysail set farther back on the boat and a reefed main is a very solid arrangement on a windy day and for cruisers who want to be comfortable in 25-knots, this is important. Also, a staysail makes heaving-to easier – this is a task far more utilized by the cruising sailor.
So, there you have it – the cutter rig is a set-up preferred by sailors on a voyage. They have disadvantages in how they tack but strengths in how they behave in open-ocean conditions.
What's in a Rig Series:

Related Posts:

- Learn To Sail
- Mobile Apps
- Online Courses
- Upcoming Courses
- Sailor Resources
- ASA Log Book
- Bite Sized Lessons
- Knots Made Easy
- Catamaran Challenge
- Sailing Vacations
- Sailing Cruises
- Charter Resources
- International Proficiency Certificate
- Find A Charter
- All Articles
- Sailing Tips
- Sailing Terms
- Destinations
- Environmental
- Initiatives
- Instructor Resources
- Become An Instructor
- Become An ASA School
- Member / Instructor Login
- Affiliate Login
Types of Sailboats: A Complete Guide

Last Updated by
Daniel Wade
June 15, 2022
Learning the different types of sailboats can help you identify vessels and choose the right boat.
In this article, we'll cover the most common kinds of sailboats, their origins, and what they're used for. We'll also go over the strengths and weaknesses of each design, along with when they're most useful.
The most common kind of sailboat is the sloop, as it's simple to operate and versatile. Other common sailboat types include the schooner, cutter, cat, ketch, schooner, catamaran, and trimaran. Other sailboat variations include pocket cruisers, motorsailers, displacement, and shoal-draft vessels.
The information found in this article is sourced from boat reference guides, including A Field Guide to Sailboats of North America by Richard M. Sherwood and trusted sources in the sailing community.
Table of contents
Distinguishing Types of Sailboats
In this article, we'll distinguish sailboats by traits such as their hull type, rig, and general configuration. Some sailboats share multiple characteristics with other boats but fall into a completely different category. For example, a sailboat with a Bermuda rig, a large engine, and a pilothouse could technically be called a sloop, but it's more likely a motorsailer.
When discerning sailboat type, the first most obvious place to look is the hull. If it has only one hull, you can immediately eliminate the trimaran and the catamaran. If it has two or more hulls, it's certainly not a typical monohull vessel.
The next trait to consider is the rig. You can tell a lot about a sailboat based on its rig, including what it's designed to be used for. For example, a long and slender sailboat with a tall triangular rig is likely designed for speed or racing, whereas a wide vessel with a complex gaff rig is probably built for offshore cruising.
Other factors that determine boat type include hull shape, overall length, cabin size, sail plan, and displacement. Hull material also plays a role, but every major type of sailboat has been built in both wood and fiberglass at some point.
Sailboat vs. Motorsailer
Most sailboats have motors, but most motorized sailboats are not motorsailers. A motorsailer is a specific kind of sailboat designed to run efficiently under sail and power, and sometimes both.
Most sailboats have an auxiliary engine, though these power plants are designed primarily for maneuvering. These vessels cannot achieve reasonable speed or fuel-efficiency. Motorsailers can operate like a powerboat.
Motorsailers provide great flexibility on short runs. They're great family boats, and they're popular in coastal communities with heavy boat traffic. However, these features come at a cost. Motorsailers aren't the fastest or most efficient powerboats, and they're also not the most agile sailboats. That said, they make an excellent general-purpose sailing craft.
Monohull vs. Multi-hull: Which is Better?
Multihull sailboats are increasingly popular, thanks to advances and lightweight materials, and sailboat design. But are they better than traditional sailboats? Monohulls are easier to maintain and less expensive, and they offer better interior layouts. Multihulls are more stable and comfortable, and they're significantly easier to control. Multihull sailboats also have a speed advantage.
Monohull Sailboats
A monohull sailboat is a traditionally-shaped vessel with a single hull. The vast majority of consumer sailboats are monohulls, as they're inexpensive to produce and easy to handle. Monohull sailboats are proven and easy to maintain, though they lack the initial stability and motion comfort of multi-hull vessels.
Monohull sailboats have a much greater rig variety than multi-hull sailboats. The vast majority of multihull sailboats have a single mast, whereas multi-masted vessels such as yawls and schooners are always monohulls. Some multi-hull sailboats have side-by-side masts, but these are the exception.
Catamaran Sailboats
The second most common sailboat configuration is the catamaran. A catamaran is a multihull sailboat that has two symmetrical hulls placed side-by-side and connected with a deck. This basic design has been used for hundreds of years, and it experienced a big resurgence in the fiberglass boat era.
Catamarans are fast, efficient, and comfortable. They don't heel very much, as this design has excellent initial stability. The primary drawback of the catamaran is below decks. The cabin of a catamaran is split between both hulls, which often leaves less space for the galley, head, and living areas.
Trimaran Sailboats
Trimarans are multi-hull sailboats similar to catamarans. Trimarans have three hulls arranged side-by-side. The profile of a trimaran is often indistinguishable from a catamaran.
Trimarans are increasingly popular, as they're faster than catamarans and monohulls and considerably easier to control. Trimarans suffer from the same spatial limitations as catamarans. The addition of an extra hull adds additional space, which is one reason why these multi-hull vessels are some of the best-selling sailboats on the market today.
Sailboat Rig Types
Rigging is another way to distinguish sailboat types. The rig of a sailboat refers to it's mast and sail configuration. Here are the most common types of sailboat rigs and what they're used for.
Sloops are the most common type of sailboat on the water today. A sloop is a simple single-mast rig that usually incorporates a tall triangular mainsail and headsail. The sloop rig is easy to control, fun to sail, and versatile. Sloops are common on racing sailboats as they can sail quite close to the wind. These maneuverable sailboats also have excellent windward performance.
The sloop rig is popular because it works well in almost any situation. That said, other more complex rigs offer finer control and superior performance for some hull types. Additionally, sloops spread their entire sail area over just to canvases, which is less flexible than multi-masted rigs. The sloop is ideal for general-purpose sailing, and it's proven itself inland and offshore.
Sloop Features:
- Most popular sailboat rig
- Single mast
- One mainsail and headsail
- Typically Bermuda-rigged
- Easy to handle
- Great windward performance
- Less precise control
- Easier to capsize
- Requires a tall mast
Suitable Uses:
- Offshore cruising
- Coastal cruising
Cat (Catboat)
The cat (or catboat) is a single-masted sailboat with a large, single mainsail. Catboats have a thick forward mast, no headsail, and an exceptionally long boom. These vessels are typically gaff-rigged, as this four-edged rig offers greater sail area with a shorter mast. Catboats were popular workboats in New England around the turn of the century, and they have a large following today.
Catboats are typically short and wide, which provides excellent stability in rough coastal conditions. They're hardy and seaworthy vessels, but they're slow and not ideal for offshore use. Catboats are simple and easy to control, as they only have a single gaff sail. Catboats are easy to spot thanks to their forward-mounted mast and enormous mainsail.
Catboat Features:
- Far forward-mounted single mast
- Large four-sided gaff sail
- Short and wide with a large cockpit
- Usually between 20 and 30 feet in length
- Excellent workboats
- Tough and useful design
- Great for fishing
- Large cockpit and cabin
- Not ideal for offshore sailing
- Single sail offers less precise control
- Slow compared to other rigs
- Inland cruising
At first glance, a cutter is difficult to distinguish from a sloop. Both vessels have a single mast located in roughly the same position, but the sail plan is dramatically different. The cutter uses two headsails and often incorporates a large spar that extends from the bow (called a bowsprit).
The additional headsail is called a staysail. A sloop only carries one headsail, which is typically a jib. Cutter headsails have a lower center of gravity which provides superior performance in rough weather. It's more difficult to capsize a cutter, and they offer more precise control than a sloop. Cutters have more complex rigging, which is a disadvantage for some people.
Cutter Features:
- Two headsails
- Long bowsprit
- Similar to sloop
- Gaff or Bermuda-rigged
- Fast and efficient
- Offers precise control
- Superior rough-weather performance
- More complex than the sloop rig
- Harder to handle than simpler rigs
Perhaps the most majestic type of sailboat rig, the schooner is a multi-masted vessel with plenty of history and rugged seaworthiness. The schooner is typically gaff-rigged with short masts and multiple sails. Schooners are fast and powerful vessels with a complex rig. These sailboats have excellent offshore handling characteristics.
Schooners have a minimum of two masts, but some have three or more. The aftermost large sail is the mainsail, and the nearly identical forward sail is called the foresail. Schooners can have one or more headsail, which includes a cutter-style staysail. Some schooners have an additional smaller sale aft of the mainsail called the mizzen.
Schooner Features:
- At least two masts
- Usually gaff-rigged
- One or more headsails
- Excellent offshore handling
- Precise control
- Numerous sail options (headsails, topsails, mizzen)
- Fast and powerful
- Complex and labor-intensive rig
- Difficult to adjust rig single-handed
- Offshore fishing
Picture a ketch as a sloop or a cutter with an extra mast behind the mainsail. These vessels are seaworthy, powerful, excellent for offshore cruising. A ketch is similar to a yawl, except its larger mizzen doesn't hang off the stern. The ketch is either gaff or Bermuda-rigged.
Ketch-rigged sailboats have smaller sails, and thus, shorter masts. This makes them more durable and controllable in rough weather. The mizzen can help the boat steer itself, which is advantageous on offshore voyages. A ketch is likely slower than a sloop or a cutter, which means you aren't likely to find one winning a race.
Ketch Features:
- Headsail (or headsails), mainsail, and mizzen
- Mizzen doesn't extend past the rudder post
- Good offshore handling
- Controllable and mild
- Shorter and stronger masts
- Easy self-steering
- Slower than sloops and cutters
- Less common on the used market
A dinghy is a general term for a small sailboat of fewer than 28 feet overall. Dinghys are often dual-power boats, which means they usually have oars or a small outboard in addition to a sail. These small boats are open-top and only suitable for cruising in protected waters. Many larger sailboats have a deployable dinghy on board to get to shore when at anchor.
Dinghy Features:
- One or two people maximum capacity
- Easy to sail
- Works with oars, sails, or an outboard
- Great auxiliary boat
- Small and exposed
- Not suitable for offshore use
- Going from anchor to shore
- Protected recreational sailing (lakes, rivers, and harbors)
Best Sailboat Type for Stability
Stability is a factor that varies widely between sailboat types. There are different types of stability, and some sailors prefer one over another. For initial stability, the trimaran wins with little contest. This is because these vessels have a very high beam-to-length ratio, which makes them much less prone to rolling. Next up is the catamaran, which enjoys the same benefit from a wide beam but lacks the additional support of a center hull section.
It's clear that in most conditions, multihull vessels have the greatest stability. But what about in rough weather? And what about capsizing? Multihull sailboats are impossible to right after a knockdown. This is where full-keel monohull sailboats excel.
Traditional vessels with deep displacement keels are the safest and most stable in rough weather. The shape, depth, and weight of their keels keep them from knocking over and rolling excessively. In many cases, these sailboats will suffer a dismasting long before a knockdown. The primary disadvantage of deep-keeled sailboats is their tendency to heel excessively. This characteristic isn't hazardous, though it can make novice sailors nervous and reduce cabin comfort while underway.
Best Sailboat Type for Offshore Cruising
The best sailboat type for offshore cruising is the schooner. These graceful aid robust vessels have proven themselves over centuries as durable and capable vessels. They typically use deep displacement keels, which makes them stable in rough weather and easy to keep on course.
That said, the full answer isn't quite so simple. Modern multihull designs are an attractive option, and they have also proven to be strong and safe designs. Multihull sailboats are an increasingly popular option for offshore sailors, and they offer comfort that was previously unknown in the sailing community.
Many sailors cross oceans in basic Bermuda-rigged monohulls and take full advantage of a fin-keel design speed. At the end of the day, the best offshore cruising sailboat is whatever you are comfortable handling and living aboard. There are physical limits to all sailboat designs, though almost any vessel can make it across an ocean if piloted by a competent skipper and crew.
Best Sailboat Type for Racing The modern lightweight Bermuda-rigged sailboat is the king of the regatta. When designed with the right kind of hull, these vessels are some of the fastest sailboats ever developed. Many boats constructed between the 1970s and today incorporate these design features due to their favorable coastal and inland handling characteristics. Even small sailboats, such as the Cal 20 and the Catalina 22, benefit from this design. These boats are renowned for their speed and handling characteristics.
Related Articles
I've personally had thousands of questions about sailing and sailboats over the years. As I learn and experience sailing, and the community, I share the answers that work and make sense to me, here on Life of Sailing.
by this author
Learn About Sailboats
Most Recent

What Does "Sailing By The Lee" Mean?
October 3, 2023

The Best Sailing Schools And Programs: Reviews & Ratings
September 26, 2023
Important Legal Info
Lifeofsailing.com is a participant in the Amazon Services LLC Associates Program, an affiliate advertising program designed to provide a means for sites to earn advertising fees by advertising and linking to Amazon. This site also participates in other affiliate programs and is compensated for referring traffic and business to these companies.
Similar Posts

Affordable Sailboats You Can Build at Home
September 13, 2023

Best Small Sailboat Ornaments
September 12, 2023

Discover the Magic of Hydrofoil Sailboats
December 11, 2023
Popular Posts

Best Liveaboard Catamaran Sailboats
December 28, 2023

Can a Novice Sail Around the World?
Elizabeth O'Malley

4 Best Electric Outboard Motors

How Long Did It Take The Vikings To Sail To England?

10 Best Sailboat Brands (And Why)
December 20, 2023

7 Best Places To Liveaboard A Sailboat
Get the best sailing content.
Top Rated Posts
Lifeofsailing.com is a participant in the Amazon Services LLC Associates Program, an affiliate advertising program designed to provide a means for sites to earn advertising fees by advertising and linking to Amazon. This site also participates in other affiliate programs and is compensated for referring traffic and business to these companies. (866) 342-SAIL
© 2024 Life of Sailing Email: [email protected] Address: 11816 Inwood Rd #3024 Dallas, TX 75244 Disclaimer Privacy Policy
Rigging - Turnbuckles , Toggles , Wire & Rod Components, Norseman Cones & Fittings.
Furling Systems - Systems and replacement parts from a variety of Manufacturers.
Traveller Systems - Adjustable Track Systems for Mainsheet and other applications.
Sailboat Hardware - Rope Clutches, Blocks, Track & Fittings, Winches, etc.
Custom Parts - Custom items, or those out of production or otherwise unavailable.
Consultation - Special projects, research, or information not detailed on-site.
Copyright 1996 - 2024, Rig-Rite, Inc. Disclaimer Web Site maintained by The WATER Group
COMMENTS
The sail rig is determined by the number of masts and the layout and shape of sails. Most modern ships are fore-and-aft rigged, while old ships are square-rigged. Rigs with one mast are sloops and cutters. Ketches, yawls, brigs, and schooners have two masts. Barques have three masts.
A beginners guide to sailboat rigging, including standing rigging and running rigging. This animated tutorial is the first in a series and covers sails, line...
Cat boat with single gaff-rigged sail 2. Gaff Sloop Sloop with gaff rig 3. Cutter Classic cutter from 1884, unbeaten in all her races in America in 1886 Two-masted rigs. Two-masted boats can have an extra mast in front or behind the main mast. Behind (aft of) the main mast is called a mizzen mast. In front of the main mast is called a foremast.
The deceptive simplicity of the typical sailboat rig can lead to a kind of benign neglect on the part of the boat owner. Since so many decades-old boats still sport their original rigs, the inherent toughness of aluminum spars and wire standing rigging encourages complacency—and complacency is dangerous on a sailing boat. Take the time to get ...
PLEASE NOTE: THIS VIDEO HAS BEEN UPDATED WITH ENHANCED GRAPHICS AND IMPROVED SOUND. CHECK IT OUT HERE https://youtu.be/tRgWtPaCQQcA beginners guide to sailbo...
5. Secure the mast using the appropriate rigging and fasteners. Attach the standing rigging, such as shrouds and stays, to the mast and the boat's hull. Fact: The mast of a sailboat is designed to withstand wind resistance and the tension of the rigging for stability and safe sailing. 2.
Lateen rig is commonly used in the Indian Ocean and the Mediterranean. Square Rigged. This is a rig whereby the mainsails are arranged in a horizontal spar so that they're square or vertical to the mast and the keel of the boat. The square rig is highly efficient when sailing downwind and was once very popular with ocean-going sailboats. Conclusion
Mast Configuration and Sails (sloop, fractional rig sloop, ketch, schooner, yawl, cutter, cat) Let's explore those different types in a little more detail. Hull type The hull is the main part of a sailboat, which is usually made of fiberglass, metal, or wood. Hull type describes the number of hulls. Monohull - one hull; Catamaran - two hulls
The rig or rigging on a sailboat is a common term for two parts, the standing, and the running rigging. The standing rigging consists of wires supporting the mast on a sailboat and reinforcing the spars from the force of the sails when sailing. Check out my guide on standing rigging here!
Sloop rigged sailboats (Bermuda Rig) is the most common sail rig and popular with racing sailboats as well. The Bermuda Rig. This is the most common type of sailing rig out there. It consists of one large, triangular shaped sail (called the mainsail) that goes all the way to the top of the mast in most cases.
When it comes to sail rigging, there are several types commonly used in sailing vessels. The most common ones include sloop rig, ketch rig, schooner rig, cutter rig, catboat rig, and yawl rig. Each type has its distinctive features and advantages depending on factors like boat size, wind conditions, and intended use. 2.
The rig or rigging on a sailboat is a common term for two parts: The standing rigging consists of wires supporting the mast on a sailboat and reinforcing the spars from the force of the sails when sailing. The running rigging consists of the halyards, sheets, and lines we use to hoist, lower, operate, and control the sails on a sailboat.
Advantages of a Cutter Rig. There are a lot of reasons to like a cutter. A cutter rigged boat has redundant rigging and spreads the sail load across its rigging. And a cutter rig offers increased sail options-it offers increased sail area in light winds and easy and efficient ways to decrease sail area in heavy weather.
Sailboat rig A sailboat rig refers to the arrangement of sails and mast on a sailboat. It determines how the boat harnesses wind power for propulsion. Common types include sloop, cutter, and ketch rigs. Each rig has distinct characteristics affecting sailing performance and maneuverability. Demystifying the Sailboat Rig: An Essential Guide for BeginnersDemystifying the Sailboat
To attach the boom and headsail on a gaff rig sailboat, follow these steps: 1. Position the boom: Place the boom on the mast and slide it toward the aft end until it aligns with the jaws of the gaff spar. 2. Secure the boom: Attach the boom to the jaws of the gaff spar using a stainless-steel pin or bolt.
The Modern Sloop. The most common type of small-to-midsize sailboat is the sloop. The rig is one mast and two sails. The mainsail is a tall, triangular sail mounted to the mast at its leading edge, with the foot of the sail along the boom, which extends aft from the mast. The sail in front called the jib or sometimes the headsail, mounts on the ...
If so, add more shroud tension to both sides. A tension-testing gauge will work, but many sailors do fine estimating by hand. Cruising-boat rigs shouldn't have the same amount of rig tension as a raceboat beating to windward. However, if your sailboat's mast is deck-stepped, make sure the coachroof isn't deforming due to the compression ...
A sailing vessel's rig is its arrangement of masts, sails and rigging. [1] Examples include a schooner rig, cutter rig, junk rig, etc. [2] A rig may be broadly categorized as "fore-and-aft", "square", or a combination of both. Within the fore-and-aft category there is a variety of triangular and quadrilateral sail shapes.
The domain of rigging is an essential matter for the safety and good performance of your sailboat. Nowadays, the type of rigging is still evolving. Generally, rigging is depending on the type of sail used or the number of masts. As a basic rule, the replacement of the standing rig should be done every 10 years, except for multihulls or regattas, and rod or composite fiber rigging. A good set ...
Rigging varies for different rig types, but since most sailboats are use a sloop rig, nearly all sailboats use the following running rigging: Halyards-'Halyard' is simply the nautical name for lines or ropes that are used to raise and lower the mainsail. The halyard is attached to the top of the mainsail sheet, or the gaffer, which is a top ...
The rig should be tuned with the boat in the water on a day with little to no wind. You'll also want to be away from wakes and other boats that can rock your boat. To start, the turnbuckles for the stays and shrouds should be hand-tight only. This is sufficient to hold up the rig but places no strain on anything — yet.
The Cutter Rig. By: Pat Reynolds Sailboat Rigs, Sailboats. What's in a Rig Series #2. A variation on the last installment of What's in a Rig (the sloop) is the Cutter Rig. Although it has gone through some changes through the course of history, the modern cutter rig is generally a set-up with two headsails. The forward sail is called the ...
Naval architects designate sailboat rig types by number and location of masts. The six designations are sloop, cutter, cat, ketch, yawl, and schooner. Although in defining and describing these six rigs I may use terminology associated with the sail plan, the rig type has nothing to do with the number of sails, their arrangement or location.
Best Sailboat Type for Racing The modern lightweight Bermuda-rigged sailboat is the king of the regatta. When designed with the right kind of hull, these vessels are some of the fastest sailboats ever developed. Many boats constructed between the 1970s and today incorporate these design features due to their favorable coastal and inland ...
Since 1961, RIG-RITE has engineered, manufactured and distributed Spars, Rigging and Hardware Systems for Sailboats. RIG-RITE stocks the largest variety of related Systems and Hardware available anywhere, Specializing in original replacement parts for Systems on yachts built the world over. Spars - Masts, Booms, Spreaders, Spinnaker Poles ...