November 1, 2018

Make a Toy Sailboat
A sailing science activity from Science Buddies
By Science Buddies & Ben Finio
Flip or float? Built a tiny boat that can really set sail--with the help of a little physics.
George Retseck
Key concepts Physics Forces Weight Buoyancy Gravity Center of mass
Introduction It's time to set sail! Even if you don’t live near a lake or ocean, you will get to do some sailing in this science activity as you build your own toy sailboat. But first you have to make sure your boat doesn’t capsize! Are you up for the challenge?
Background Do you remember playing with toy boats in the bathtub—or have you ever been on a real boat? Boats can float because of buoyancy. At the same time they are pulled down by the force of their own weight (caused by gravity) they are pushed up by the buoyant force, which is equal to the weight of the volume of water they displace. (You can find a more detailed explanation of buoyant force in the “More to explore” section.) Some boats are made of materials that are less dense than water, meaning they have less mass per unit volume. These materials will always float. Other boats, however, are made of metals such as steel, which are much denser than water. So how do they float? They can because they’re hollow, so there is a lot of empty air space inside the boat’s hull. The average density of the boat (including both the metal and the air) is lower than the density of water.
On supporting science journalism
If you're enjoying this article, consider supporting our award-winning journalism by subscribing . By purchasing a subscription you are helping to ensure the future of impactful stories about the discoveries and ideas shaping our world today.
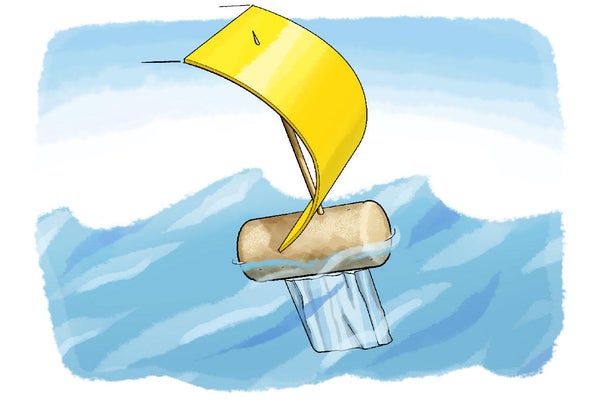
Boats don’t just need to float—they also need to stay upright and avoid capsizing, or flipping over. To do this they need a low center of mass, meaning their weight is concentrated toward the bottom of the boat, not the top. That might seem like it would be a problem for sailboats, which have very tall sails that stick way up into the air. How do they stay balanced with so much mass concentrated way up high? They do so with another part called the keel, which is on the bottom of the boat. (If you’ve only ever seen a sailboat from above the water, you might not even know the keel existed!) The keel is a big part under the boat, shaped like a fin, which serves two purposes. It holds the ballast, or heavy weight, that helps lower the boat's center of mass. It also helps prevent the boat from being blown sideways by the wind. In this project you’ll see how a keel can help keep a sailboat from flipping over and help it go straight.
Three wine corks
Two rubber bands
Several screws or nails
Waterproof material, such as craft foam, wax paper or paper milk carton to make a sail
Aluminum foil
Sink, bathtub or a large container you can fill with water (The container should be deeper than the length of your nails/screws.)
Preparation
Fill your container with water. Make sure the water is deep enough so you can vertically submerge your longest nail/screw.
Line up three corks (side by side, not end to end).
Use two rubber bands to hold the corks together, forming a “raft.”
Poke a toothpick into the center cork, so it sticks straight up. This is your boat’s mast (the part that holds the sail).
Cut a square of your thin waterproof material to make a sail. It should be about six centimeters square.
Poke the toothpick through opposite ends of the sail (near the edges) to hold it in place.
You’ve made your first sailboat! Put it in the water. What happens?
Blow on the sail from behind. What happens?
Now make a skinnier boat by removing the rubber bands and the two outer corks. Keep the sail in place. Depending on how you attached the sail initially, you might need to rotate it 90 degrees.
Put your new sailboat back in the water. What happens?
Uh-oh! Your sailboat probably tipped over! That’s not good. To fix it, try adding a keel. Carefully stick a nail or screw into the bottom of the boat, directly opposite the sail.
Try putting the boat back in the water. Does it stay upright this time?
If your boat doesn’t stay upright, keep adding nails or screws (in a straight line with the first one) until it can float without tipping over.
Now try blowing on the sail again. What happens? Does your boat move in a straight line?
Right now, your keel is made of one or more nails/screws, but they are not connected to one another. Cut a rectangular piece of aluminum foil and tightly wrap it around the nails/screws to make a fin shape.
Put your boat back in the water and try blowing on the sail again. What happens this time? Does it go straight?
Extra: Try making a bigger sail and using part of a wooden skewer for the mast instead of a toothpick. How heavy does your ballast need to be to balance the boat with a bigger sail? Hint: Try attaching a horizontal nail/screw to the bottom of your keel to act as ballast. That way you don't have to keep poking more nails/screws into the cork.
Observations and results Your first sailboat was probably pretty stable because it was very wide (made from three corks). When you removed two corks to make it skinnier, however, your sailboat probably became unstable and tipped over. It’s similar to standing with your feet tightly together instead of spread out slightly—it’s harder to balance. When you added nails/screws to the bottom of your sailboat you lowered its center of mass and made it more stable. Individual vertical nails, however, don’t do a very good job pushing against the water—the water can flow right around them. That means the keel doesn’t do a good job making the boat go straight. If you blew on the sail, your boat might have curved off to one side or spun in circles. When you wrapped the nails in aluminum foil you made the keel more like a fin. It can cut through the water very easily in one direction, but it provides a lot of resistance against the water in the other direction. That makes it easier for your boat to move forward, and harder for it to move sideways. This is why real sailboats can be long, skinny and have tall sails—the keel prevents them from tipping over and helps them go straight!
More to explore What Is Buoyant Force? , from Khan Academy Buoyant Science: How Metal Boats Float , from Scientific American DIY Toy Sailboat , from Science Buddies Shipping Science: Building a Boat That Can Carry Cargo , from Scientific American Science Activities for All Ages! , from Science Buddies
This activity brought to you in partnership with Science Buddies

- Science Projects
- Project Guides
- STEM Activities
- Lesson Plans
- Video Lessons
Make a Toy Sailboat

Introduction
It's time to set sail! Even if you live nowhere near a lake or ocean, you will get to do some sailing in this science activity as you build your own toy sailboat. But first, you have to make sure your boat doesn't capsize! Are you up for the challenge?
- Wine corks (3)
- Rubber bands (2)
- Several screws or nails
- Craft foam, wax paper, or paper milk carton to make a sail
- Aluminum foil
- Sink, bathtub, or a large container you can fill with water. The container should be deeper than the length of your nails/screws.

- Fill your container with water. Make sure you can put your longest nail/screw vertically into the water and completely submerge it.
Instructions
- Line up three corks (side by side, not end-to-end).
- Use two rubber bands to hold the corks together, forming a "raft."
- Poke a toothpick into the center cork, so it sticks straight up. This is your boat's mast (the part that holds the sail).
- Cut a square of thin waterproof material (see materials list - don't use regular paper) to make a sail. It should be about 6 cm x 6 cm.

- Now make a skinnier boat by removing the rubber bands and the two outer corks. Keep the sail in place. Rotate your sail 90 degrees so it matches the next picture.
- Uh-oh! Your sailboat probably fell over! That's not good. To fix it, try adding a keel. Stick a nail or screw into the bottom of the boat, directly under the sail.

- Put your boat back in the water and try blowing on the sail again.

What Happened?
Your first sailboat was probably pretty stable, because it was very wide (made from three corks). However, when you removed two corks to make it skinnier, your sailboat probably became unstable and tipped over. It's similar to standing with your feet tight together instead of spread out slightly—it's harder to balance. When you added nails/screws to the bottom of your sailboat, you lowered its center of mass and made it more stable. However, individual vertical nails don't do a very good of job pushing against the water—the water can flow right around them. That means they don't do a good job of making the boat go straight. If you blew on the sail, your boat might have curved off to one side or spun in circles. When you wrapped the nails in aluminum foil, you made the shape more like a fin. It can cut through the water very easily in one direction, but provides a lot of resistance against the water in the other direction. That makes it easier for your boat to move forward, and harder for it to move sideways. This is why real sailboats can be long, skinny, and have tall sails—they have a part called the keel that prevents them from tipping over and helps them go straight! Read the Digging Deeper section to learn more about the science behind this project.
Digging Deeper
Do you remember playing with toy boats in the bathtub, or have you ever been on a real boat? Boats can float because of buoyancy. While they are pulled down by the force of their own weight (caused by gravity), they are pushed up by the buoyant force, which is equal to the weight of the volume of water that they displace. Some boats are made of materials that are less dense than water, meaning they have less mass per unit volume. These materials (like cork) will always float. However, other boats are made of metals like steel that are much denser than water—so how do they float? They can float because they're hollow, so there is a bunch of empty air space inside the boat's hull. The average density of the boat (including both the metal and the air) is lower than the density of water.
But boats don't just need to float - they also need to stay upright and avoid capsizing (flipping over). To do this, they need a low center of mass, meaning their weight is concentrated towards the bottom of the boat, not the top. That might seem like it's a problem for sailboats, boats with very tall sails that stick way up into the air. How do they stay balanced with so much mass concentrated way up high? They do so with another part called the keel, which is on the bottom of the boat (so if you've only seen a sailboat from above the water, you might not even know the keel exists!). The keel is a big part under the boat, shaped like a fin, that serves two purposes. It holds the ballast, or heavy weight, that helps lower the boat's center of mass. It also helps prevent the boat from being blown sideways by the wind. In this project you made a keel from nails and aluminum foil, which helped prevent your sailboat from flipping over and helped it go straight.
Ask an Expert
For further exploration.
- Try making a bigger sail and using part of a wooden skewer for the mast instead of a toothpick. How heavy does your ballast need to be to balance the boat with a bigger sail? Hint: try attaching a horizontal nail/screw to the bottom of your keel to act as a ballast. That way you don't have to keep poking more nails/screws into the cork.
Related Resources
Project ideas.
- Show Others Like This

Explore Our Science Videos

Welcome to Avada Magazine! Today is : May 5, 2024
popular posts

April crafty days
Crafty days in april.

My Wordsearch template printable
My wordsearch templates.

knitted toy patterns
10 brilliant free toy knitting patterns.

Collage Magazine Crowns

Toilet Paper Roll Fireworks
Toilet paper roll firework art.

14 Fun Penguin Crafts (1)
14 fun penguin crafts.

Coconut loaf
Easy coconut loaf.

Add heading
Quick & easy cleaning hack: glass shower door.

Strawberry & Rhubarb Coconut Muffins (1)
Strawberry & rhubarb coconut muffins, make your own toy sailboat.
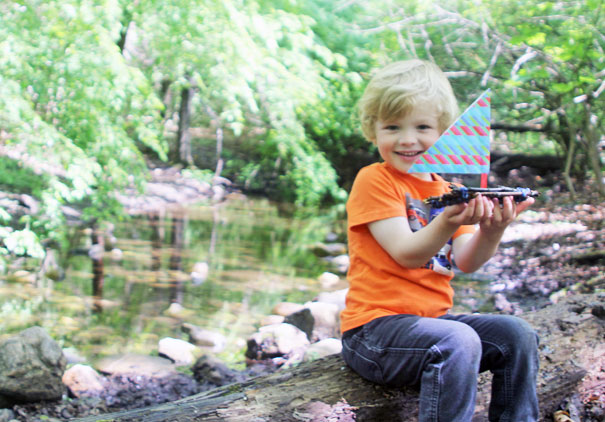
Homemade toys can be some of the most fun! Today we are discovering all of the best ways to make your own toy sailboat! We have done all of the hard work now all you need to do is pick one from this list or make them all and see which design makes the best sailboat.No kit-sets are involved with these make your own toy sailboat crafts making them all that more satisfying. Bath, creek, pool or a bucket of water in the sunshine it is hard to beat some old time sailboat fun.

1. Cork & Toothpicks

The design of this sailboat is simple, it is quick to make but works amazingly well. If you have corks to spare then this is the toy sailboat for you! Click here to read the full tutorial.
2. Triple Cork Sailboat

This sailboat consists of three corks secured together with a couple of rubber bands and finished off with a toothpick and paper sail. A simple design which is sure to be a champion floater. Follow this link to read the full tutorial.
3. Sponge Bath Boat Toy

How long will it float for? That is a fun game! This sponge sailboat is beyond cute, especially with the adorable cork sailors. Click here to read the full tutorial.
4. Balsa Wood Sailboat

Balsa wood makes an ideal base for a floating sailboat. This is one fun sailboat for older children to make or for little ones with lots of help. Head over to Handmade Charlotte to find out more.
5. Margarine Tub Boat

make a self-propelled tug tub boat from an empty margarine container. Children will love painting and decorating their boat. Even better is watching it propel itself around the bath! Visit Red Ted Art to find out more.
6. Milk Carton Sailboat

Upcycle an empty milk carton into an amazing sailboat. We love upcycled crafts! Click here to find out more.
7. Twig Boat Craft

Keep it traditional and make your toy sailboat from twigs gathered from the garden. Make a paper sail alternatively try using a leaf for some true nature play fun. Follow this link to find out more.

Click here to view our 6 Pirate Kids Crafts.
editor's pick

18 Fun DIY Bird Arts & Crafts

10 Egg Carton Animals

What Does Experiential Learning Mean When It Comes To Kids?
Latest video, news via inbox.
Nulla turp dis cursus. Integer liberos euismod pretium faucibua
One Comment

Wow Its really helpful for me in my craft projects thanks dear 😊
Leave A Comment Cancel reply
Save my name, email, and website in this browser for the next time I comment.
Notify me of follow-up comments by email.
Notify me of new posts by email.
you might also like
8 vampire crafts for kids.
Get kids excited for Halloween with these 8 Vampire Crafts […]
Cardboard Crayon Rubbing Art
Cardboard crayon rubbing art is a fantastic art activity for […]
4 Clutter-free Gift Ideas for Kids
It’s a given that children’s birthdays are just as much […]
Bringing you the latest news and insights, Everyday!
© 2012 - 2024 Avada Website Builder by ThemeFusion • All Rights Reserved.
Press “ESC” key to close
recent posts

Cornhole Board Size And Dimensions: Everything You Need To Know

8 DIY Organization Hacks for Your New Space
Get connected.
How to Build a Boat: 25 Designs and Experiments for Kids
If you subscribe to the Inspiration Laboratories newsletter , you know we had fun making boats a while back. I’ve been collecting ideas for how to build a boat ever since. You’ll love these ideas. They are kid-friendly, doable, and you probably have the supplies for most of them on hand. I get commissions for purchases made through the affiliate links in this post.

How to Build a Boat

Materials to Consider
What materials can you use to make a boat that actually floats? Here’s a list to get you started:
- Paper (will it need to be waterproofed?)
- Plastic container
- Egg cartons
- Cardboard (will it need to be waterproofed?)
- Orange peel
- Craft sticks
- Sticks from a tree or other pieces of wood
What other materials am I leaving out? Comment below and let me know.
More to Consider
What else do you need to construct the boat? String or something to fasten pieces together? Glue or tape? Will the boat fall apart once it’s placed in the water?
Our egg carton boat was simply made by placing a straw into the egg carton and taping on a piece of paper. It floated in the bathtub pretty easily. We didn’t test the sail. Would it actually work?
Who will the passengers be? What will the boat carry?
After building the boat, see how much weight it can hold. (Pennies are a good option for older kids to use.)
Ways to Build a Boat
Create a boat building challenge.
- Try this Cork Raft Building Challenge from Kitchen Counter Chronicles.
- Discover which materials make the best boats . Science Sparks shows you how.
- Design a speedboat and test to see if it will float like Creative Family Fun.
- Teach Preschool set up two boat building stations with different materials. Compare the designs and see how they’ll float.
- Allow your child to decide on the materials they’ll need to build a boat that floats as well as how they’ll design the boats. Planet Smarty Plants tells of their design process.
- Here’s a simple boat science experiment from East Coast Mommy. Build boats, test their buoyancy, and predict how many rocks it will take to sink them. Check out their materials and design.
- What unique materials could you use? The Craft Train made their boats using sponges and duct tape .
- Craftulate has 5 boat designs . I especially like the way they made the speedboats out of foam.
- Challenge your child to build a hydrofoil . How much weight can it hold before sinking? Kids Activities Blog has the instructions.
- Let you child be in charge of investigating different boat designs . Will a shell work for a boat? Fantastic Fun and Learning finds out.
Design a Boat Powered by Wind
- Learn how to make a paper boat from My Little 3 and Me. What types of paper work best?
- NurtureStore shows us 3 ways to make a sail boat . Pay attention to the design of the sail.
- Add some sparkle to your design. Mama Pappa Bubba made cork sail boats with sparkly sails .
- Create a boat from a juice box . hands on : as we grow has the plan.
- Make pool noodle boats like Frogs and Snails and Puppy Dog Tails.
- Build wax boats like these from Housing a Forest.
- Race duck tape boats across the water. Mess for Less tells us how.
- These ice boats made of natural materials from Reading Confetti are simply lovely.
Build a Boat Powered by Something Other Than Wind
- Make a self-propelled tug boat . Red Ted Art has the tutorial.
- Make a balloon powered egg boat . Capri+3 has instructions and a video to show you how.
- Or try this balloon powered boat from Life with Moore Babies.
- This baking soda powered boat from Science Sparks is sure to be a hit.
- Adventure in a Box builds a toy wooden paddle boat .
- Sail a boat down a homemade river like Gift of Curiosity.
Share a picture of your boats with me on Inspiration Laboratories on Facebook !
More Hands-On Science Ideas for Kids
- 20 Ways to Build a Rocket: Experiments and Crafts for Kids
- 10 Ways to Make a Volcano with Kids
- 8 Egg Drop Experiments plus ideas and tips for designing your own
Subscribe to our newsletter and get exclusive science explorations for young scientists in each issue.
This post was originally published on April, 28 2015.
Leave a Reply Cancel reply
Your email address will not be published. Required fields are marked *
Save my name, email, and website in this browser for the next time I comment.
© 2024 Inspiration Laboratories
18 Homemade Toy Boats Plans You Can DIY Easily

Is your kid looking forward to his next watercraft science project? Or, do you want to build them a fun toy boat that floats for the best bath experience for them? Whatever be your reason, we’ve got your back!
Find 18 DIY toy boat craft ideas in this post. From wooden toy boat DIYs for adults to completely kid-friendly projects for your child to replicate, we’ve got all the fantastic resources. Enjoy!
Table of Contents
1. Make Fantastic Electric DIY Boats – 4 Ideas!
2. diy wooden boat – balloon-powered, 3. four fun ways to diy a toy boat, 4. diy sponge boat for kids, 5. diy a wooden toy boat using scrap wood, 6. here’s how you make a diy toy boat, 7. cost-effective shampoo bottle toy sail boat, 8. woodworking for kids – diy a simple wooden toy boat, 9. making simple toy boats – 4 simple ideas, 10. diy water bottle toy boats, 11. make a rubberband powered popsicle sticks boat, 12. diy a toy sailboat for your next science project, 13. a simple pop pop boat using household materials, 14. 7-step wooden toy boat tutorial, 15. a candle powered homemade boat – 10 minutes easy diy, 16. diy elastic band powered toy boat, 17. how to make a cardboard pirate ship, 18. simple rubberband powered wooden toy boat.
A DC motor, switch, battery, and wood scrap piece or a PVC board – once you have these supplies ready, follow this tutorial by BONG MAKER to DIY fantastic motor-powered toy boats. You’ll not only learn one method of DIYing a toy boat but four in this tutorial.
We must say, a true genius and fun project for your next DIY session!

Balloon-powered toy boats – how crazy is that? Be it to please your inner child or your kids, this DIY wooden boat tutorial by Adventure In a Box will pass with flying colors.
You’ve provided all the information you’ll need for the project in this tutorial. All you need is readily available supplies, woodworking tools, and mediocre handyman skills.
Check More Details
This kid-friendly DIY toy boat tutorial by Yuro Ostr is excellent if you’re looking for a fun project to do with your children. From a simple balloon-powered boat to an electric styrofoam boat, this tutorial features four fantastic ways to build a toy boat. Do check it out!

Here’s how you make a fun DIY sponge boat for your kids for their bath time. In fact, with a little guidance, they probably can make this on their own. How great is that?
All the materials and tools required are listed in this post, followed by a step-by-step tutorial and documented images of the DIY process for your ease.
The Youtuber from Scrap Wood City DIYed a fabulous toy boat using scrap spruce pieces and an oak dowel. Unfortunately, unlike other easy DIYs, this project requires you to have at least basic woodworking tools and skills. If you follow this tutorial, do share your experience with us.

If this is your time attempt at DIYing a toy boat, this post by Seniorcare2share is a must-read!
From a toy boat out of milk bottles to pool noodles, this post features plenty of fantastic ways of DIY toy boat building, along with a brief process overview of each of them. And the great news is that almost all of these ideas are easily replicable, even if you’re a DIY beginner!
Do you have some empty shampoo bottles lying around your house? Turn them into toy sailboats to create merry memories with your child! This DIY idea is truly brilliant yet affordable.
All the construction parts and supplies are listed at the beginning of the video. The Youtuber has shared more information regarding the project in the description box. Do give it a read.

This DIY wooden toy boat idea by Adventure In a Box is a fantastic project for your next parent-kid DIY session. And the best part is that the process is incredibly easy.
Nevertheless, you might require a few woodworking tools for this DIY. All the materials and tools required are listed in the post for your ease.
This DIY features a simple rectangular boat built by an adorable kid Anselm . But you can always add more components such as exhaust funnels, cabins, or other components to refine the DIY further.
We understand that not every parent’s woodworking skill is on point. So, we present you another tutorial video by Yuri Ostr that features four brilliant toy boat ideas , three of which use Styrofoam and the final one using a soda can.
The great aspect of this DIY is that all ideas are simple, easy to replicate, and very kid-friendly. If your child loves DIYs, make sure you involve them during these projects. They’ll have a blast!

Here’s how you make a toy boat out of plastic bottles! This is a brilliant yet easy kid-friendly DIY toy boat. All you need is cardboard, duct tape, two water bottles, a colorful cut-out triangle, and that’s it!
And the best part is that if your kid is old enough to handle scissors with care, they can completely DIY this toy boat on their own. Just a little supervision will be enough.
If your kids are into popsicle stick crafts, we guarantee they love this cool elastic band paddled popsicle sticks boat DIY by DaveHax.
Easy to build, fantastic to look at, and is efficient to play with – what more do you want from a DIY tool boat? This tutorial features a clear step-by-step elaboration of the project. What’s more, if you’re a DIY and hacks fanatic, you’ll find this channel truly fascinating!

Did you know you could DIY a simple sailboat using wine corks? This project by Science American is great for your science-enthusiast kid. And the best part about this DIY is that the procedure is absolutely kid-friendly.
For your ease, the materials required are listed at the beginning of the project, followed by the procedure. Furthermore, this post gives the DIYer an insight into the mechanism of a boat and why this DIY toy boat works like one. We must say, an informational read!
DaveHax , in this tutorial, instructs you on DIYing a candle-powered pop pop boat . All you need is an empty cola can, juice cartoon, two straws, and blu-tack.
Supervise your kids on their attempt to replicate this amazing DIY or make them one if they’re very young. The Youtuber suggests his viewers use epoxy glue instead of blu-tack and waterproof paint the boat for this DIY boat to last longer. We hope it helps!

For those familiar to woodworking and who own woodworking tools, we’d definitely recommend them to build a wooden boat for their kids, as it lasts way longer. Here’s a written tutorial by Teacherben on Instructables.
The project features 7 steps along with step-by-step images documented throughout the DIY journey. If you’re confident in your handyman skill, this project should be easy to replicate.
Ignited Innovative Indian has come up with a great tutorial video where he builds a pop pop candle-powered boat. The great news is that you can DIY this boat in under 10 minutes! This project is a great idea to keep your baby or toddler busy during their bath times.
What’s more, if you and your kid are a fan of easy and fun DIYs like these, we guarantee you’ll love more videos by this channel .

Here’s another child-friendly tutorial on a simple elastic band-powered DIY toy boat. All you is an empty plastic container, glue, scissors, elastic band, and 3 craft sticks!
A great aspect of this DIY is that it can literally be completed in minutes. This DIY undoubtedly is a great science project for your kid.
What do kids like more than a boat? A pirate boat! While this DIY can be relatively more time-consuming and demanding, it looks totally worth it!
Follow along Mr S as he DIYs a fascinating pirate boat in this tutorial. One has to be quite detail-oriented to make as beautiful a pirate boat as the Youtuber makes. The only downside to this DIY – the pirate boat doesn’t actually float as some other toy boats we’ve talked about in this post do!

Now, if you want to DIY your kid a durable wooden boat but lack the skills to build a complex one, this written tutorial by Queen Bee Of Honey Dos is just for you!
Find all the material required and instructions for this project in detail in this post. Simple, easy-to-DIY yet functional and fantastic! How great is that?
How to make a toy wooden boat? How to make a toy boat out of plastic bottles? We believe we’ve provided you with all the appropriate resources where you’ll get your queries regarding DIY boat craft like these answered.
Do you have any other DIY toy boat ideas? Or, which of these 18 toy boat DIY projects did you find the most fun to replicate? Let us know in the comments. We’d love to interact with you!
Related posts:
- 27 Homemade Pontoon Boat Plans You Can DIY Easily
- 17 Homemade Fishing Rod Holder For Boat Plans
- 17 Homemade Boat Seats Plans You Can DIY Easily
- 18 Homemade Boat Trailer Guides Plans You Can DIY Easily
Leave a Comment Cancel reply
Save my name, email, and website in this browser for the next time I comment.
- Activities for Kids
- Arts & Crafts
How to Build & Float Your Own Mini Sailboat
Crafting and outdoor exploration come together with this project—learn how to build a boat that floats and sails. The best part? You’ll only need to buy a couple of supplies because the main part of this barge is made from sticks that you find outside. Read on for the step-by-step instructions and you’ll soon have a ship to sail the high seas (or slow streams).
What You’ll Need
1 piece of paper (patterned scrapbook paper is nice, but plain construction paper also works)
2 craft sticks
string or twine
hot glue gun
14 sticks in similar sizes (5-6 inches long works well)
How to Make the Boat
1. Start by wrapping 12 the sticks together with your twine. We used Kid Made Modern Craft Twine ( target.com , $9.99) to add a pop of color, but white string would also work just fine. Tie one end of the twine to the end of one stick and wrap the string around a few more times, then move on to the next stick. Wrap the twine around that stick a few times and then use the same piece of twine to wrap the third stick and so on and so on until 12 of your sticks are connected. (You’ll use two elsewhere.) Don’t worry too much about how many times you loop around or how perfect your wrapping is. Knot off the twine on the last stick. Then, do the same thing on the opposite side of your sticks.
2. Wrap two sticks onto the bottom. Now add two more sticks, one on each end of your boat, to the bottom of your group of sticks. Again, tie a knot on one end of the stick then weave your twine in and out of the connected sticks, looping the twine around each stick and then around the stick on the bottom. Repeat for the second stick.
3. Cut 2 triangles out of your paper. Ours measured 5-inches along the side and bottom, but you may want to adjust based on the length of your sticks. We used Kid Made Modern Print Palooza patterned paper ( target.com , $7.99 for 150 sheets). However, if you have plain construction paper, ask your child to decorate it with stickers, crayons, markers, or any other way you like.
4. Add the craft sticks as your mast. Line up the craft sticks along the edge of the triangle to create your mast. Use a hot glue to secure the craft sticks.
5. Glue the triangles together. Ask your child to cover the two triangles with glue, using the glue stick. Then, press them together to complete your sail.
6. Connect the sail to the raft. Slip the craft stick in between two of the sticks in the middle of your boat. Use a piece of twine to wrap around the craft stick and around the two middle sticks until it feels fairly secure. To give it extra support, add hot glue all around the area where the craft stick and twigs come together.
7. Sail your boat. Once the glue has cooled and dried, your craft is ready for its first voyage. Fill a baby pool or other vessel (even the bath tub!) with water and watch your homemade schooner float.
8. Create some wind. Want to get your boat moving faster? Use a straw to blow it across the water.
9. Take it to the park. For further experimentation, we took our model to the park so it could sail in a real stream. Even after several sails and a few capsizes, our sailboat has held up.
Happy sailing!
Project inspired by Minieco’s handmade boats .
Have you crafted any boats with your kid? Tell us about your design in a comment.
–Julie Seguss
Need some fresh ideas?
Subscribe to our weekly newsletter for expert parenting tips and simple solutions that make life instantly better.
By subscribing you agree to Tinybeans Terms and Privacy Policy
Related reads

Why Are Gen Z Kids Covering Their Noses in Family Photos?

Screen Time for Babies Linked to Sensory Differences in Toddlerhood, Study Shows

Kids Shouldn’t Have to Finish Dinner to Get Dessert, Dietitian Explains

The Questions Parents Should Be Asking Their Pediatrician—but Aren’t

6 Better Phrases to Say Instead of ‘Be Careful’ When Kids Are Taking Risks
- your daily dose

- and connection

- Your daily dose


Learn How to Make a Miniature Sailboat | Step-by-Step Guide
Alex Morgan

Making a miniature sailboat can be a rewarding and enjoyable hobby. Building your own miniature sailboat allows you to unleash your creativity, learn about boat construction, and have a functional piece of art. With the right materials, tools, and techniques, you can create a beautiful miniature sailboat that is both aesthetically pleasing and capable of sailing. In this article, we will guide you through the process of making a miniature sailboat, from gathering materials and tools to painting and finishing touches, testing and setting sail, as well as troubleshooting and maintenance. Let’s embark on this exciting journey of constructing your very own miniature sailboat.
Key takeaway:
- Making a miniature sailboat maximizes creativity: Building a miniature sailboat allows individuals to express their creativity and craftsmanship while creating a functional toy or decorative piece.
- Gathering the right materials and tools is crucial: The quality of the miniature sailboat depends on using the right materials and tools for each component, such as the hull, mast, sails, rigging, and accessories.
- Attention to detail enhances the finished product: Painting and adding finishing touches to the miniature sailboat, including sanding, priming, applying paint and varnish, and adding details and decorations, bring the sailboat to life and make it visually appealing.
Gather Materials and Tools
Get ready to set sail on a fantastic DIY adventure! In this section, we’ll dive into the essential steps of gathering materials and tools for creating your very own miniature sailboat. From crafting the sturdy hull to designing the mast and sails, we’ll cover all the bases. We’ll even explore the intricate details of rigging and accessories that will give your sailboat that extra touch of authenticity. So, hoist your imagination and get ready to embark on this nautical journey with us.
To create the table for the sub-topic “ 1. Hull “, the following information is provided:
The table above provides vital information about the hull of a miniature sailboat. It includes details about the construction material , shape , length , width , keel , and bilge . These factors greatly impact the sailboat’s performance and stability on the water.
2. Mast and Sails
When building a miniature sailboat, the mast and sails are the most crucial components. It is essential to select a strong and lightweight material such as aluminum or carbon fiber for the mast. Cutting the mast to the desired length is also important, ensuring that it is tall enough to catch sufficient wind. To guarantee stability, securely attaching the mast to the boat’s deck using screws or bolts is necessary. Attaching the sails to the mast with sail ties or rigging clips is essential, ensuring proper alignment and tightness. Setting up the necessary rigging lines to control the positioning and tension of the sails is also important. Prior to setting sail, it is crucial to test the mast and sails to ensure that they are securely fastened and functioning properly.
I once had the exciting experience of building a miniature sailboat, and attaching the mast and sails filled me with anticipation. As the wind caught the sails and propelled the boat forward, a sense of pride engulfed me for my creation. Witnessing my sailboat smoothly glide across the water, responding to the wind, was an exhilarating sight. Building and sailing a miniature sailboat truly showcases the ingenuity and craftsmanship of humans.
3. Rigging and Accessories
Below is a table outlining the steps of rigging and accessorizing a miniature sailboat:
Rigging and accessories are vital for the performance and functionality of a miniature sailboat. Securely attaching the mast and sails ensures stability and proper maneuvering. Rigging lines adjust the sails to catch wind effectively. Accessories such as pulleys, cleats, and winches enhance overall control and ease of operation. Paying attention to proper rigging and accessories leads to a well-functioning and enjoyable miniature sailboat experience.
Throughout history, sailing has fascinated and allowed people to explore open waters. Sailboats have been used for transportation, discovery, and leisure from ancient civilizations to modern times. Miniature sailboats now provide enthusiasts with the thrill of sailing on a smaller scale. With the right rigging and accessories, these vessels navigate waters gracefully and precisely, bringing joy to builders and sailors. The art of rigging a sailboat has been passed down through generations and holds tremendous importance in sailing. By understanding the rigging process and selecting suitable accessories, sailors can create miniature sailboats that embody the spirit of adventure and love for the sea.
Building the Miniature Sailboat
To set sail on the journey of building a miniature sailboat , we’ll dive into the practical steps that bring it to life. Get ready to embark on a captivating adventure as we tackle the art of constructing the hull, attaching the mast and sails, and adding the intricate rigging and accessories. From the sturdy foundation of the hull to the intricate details of the rigging, each sub-section will unveil essential elements to create a captivating miniature sailboat . So, grab your tools and let’s set sail into the world of boat building !
1. Constructing the Hull
To begin constructing the hull, gather all of the necessary materials including plywood, a saw, and sandpaper. Measure and cut the plywood to the desired dimensions for the hull .
It is important to sand the edges of the plywood in order to achieve a smooth finish . Next, apply wood glue along the edges and join the pieces together to form the hull . While the glue is drying, use clamps to hold the pieces in place.
To reinforce the hull , add epoxy resin to the joints. Once the entire hull is dry, sand it down for a polished look. For added protection, apply a primer . Paint the hull with the desired color using marine-grade paint for water resistance.
It is important to note that the hull plays a vital role in the stability and performance of a sailboat on the water.
2. Attaching the Mast and Sails
To successfully attach the mast and sails to your miniature sailboat, simply follow these steps:
1. Begin by preparing the mast, ensuring it is clean and free from any debris or imperfections.
2. Carefully position the mast in the designated area on the hull, making sure it is properly aligned.
3. Secure the mast to the hull using either adhesive or small screws, ensuring a stable attachment.
4. Attach the sails by positioning them on the mast and securing them with small strings or ropes.
5. To improve the catchability of the wind, adjust the tension of the strings or ropes to properly tighten the sails.
6. Test the attachment by gently moving the sailboat to ensure the mast and sails are securely attached. Make any necessary adjustments for stability.
7. Check that the sails can move freely and are not obstructed by the mast or any other parts of the sailboat.
By following these steps, you will achieve a secure attachment of the mast and sails to your miniature sailboat . This is crucial for optimal performance and the enjoyment of your sailing experience.
3. Adding Rigging and Accessories
Adding Rigging and Accessories
When adding rigging and accessorizing your miniature sailboat , you should follow these steps:
1. Begin by attaching the mast to the hull using either glue or screws.
2. Next, secure the sails to the mast using small clips or ties.
3. Then, add the rigging lines by tying them to specific locations on both the mast and hull. These lines play a vital role in controlling the movement and positioning of the sails.
4. Attach smaller accessories, such as life rings or flags , to the boat using either adhesive or small hooks.
To ensure optimal results, make sure that the rigging lines are tight and the accessories are securely fastened. This will help prevent any accidental detachment while in use.
If you want to enhance the overall appearance of your mini sailboat, you can consider using colorful and eye-catching accessories. You can also experiment with various types of rigging materials, such as thread or thin wire , to achieve different visual effects.
Painting and Finishing Touches
Give your miniature sailboat the perfect finishing touches with the section on painting and finishing . From sanding and priming to applying paint and varnish, we’ll cover all the steps you need to know. Plus, we’ll show you how to add those final details and decorations that will truly make your sailboat shine. Get ready to transform your creation into a masterpiece that will impress all who see it.
1. Sanding and Priming
When sanding and priming a miniature sailboat, it is important to follow these steps:
1. Prepare the surface: Start by cleaning the hull with a damp cloth to effectively remove dust and debris.
2. Sand the hull: Take a gentle approach and sand the entire hull using fine-grit sandpaper in a circular motion.
3. Remove any sanding residue: After sanding, it’s crucial to wipe away any residue or dust with a clean, dry cloth.
4. Apply the primer: To ensure a smooth surface, use either a small paintbrush or foam brush to apply a thin, even coat of primer to the hull. Make sure to cover the entire surface area and allow the primer to dry completely.
5. Sand the primer: Once the primer is dry, lightly sand it using fine-grit sandpaper. This step will help smooth out any imperfections.
6. Remove any sanding residue: Eliminate any remaining residue or dust by using a clean, dry cloth.
By following these steps, you will ensure that the hull of your miniature sailboat is properly sanded and primed, creating a smooth surface for painting.
2. Applying Paint and Varnish
To apply paint and varnish to a miniature sailboat , follow these steps:
1. Sand the surface to remove imperfections and create a smooth, even surface.
2. Apply primer to the hull and other parts of the sailboat. This helps the paint adhere better and provides a good base for the colors.
3. Choose the colors you want and apply them using a small brush or airbrush. Start with the base color and let it dry before adding additional colors or details.
4. Once the paint is dry , apply varnish to protect the paint and give it a glossy finish. Use a brush or spray varnish, following the product instructions for application.
5. Allow the varnish to dry completely before handling the miniature sailboat or adding any additional details.
Pro-tip: When painting a miniature sailboat, use thin coats of paint and varnish for smooth, even coverage. Work in a well-ventilated area to prevent fumes. Remember to clean brushes thoroughly after each use to maintain their quality for future projects.
3. Adding Details and Decorations
– First , gather all the necessary materials for adding details and decorations to your miniature sailboat. This can include flags, stickers, miniature figures, or decorative ropes.
– Next , consider where you want to place these decorations on your sailboat. Popular areas include the hull, mast, and sails.
– Carefully attach each decoration using an appropriate adhesive, ensuring that they are securely in place.
– Use small paintbrushes to add intricate details or accents , such as patterns or designs, to the flags, figures, or other decorative elements.
– To protect the decorations and give them a glossy finish, apply a coat of varnish or sealant. This will also keep them from getting damaged over time.
– Take a moment to inspect the added details and decorations , making any necessary adjustments to improve their overall appearance.
– Be patient and allow ample time for the glue, paint, and varnish to dry completely before moving or handling the miniature sailboat.
Testing and Setting Sail
As we delve into the thrilling section of “ Testing and Setting Sail ” in our article on “ How To Make A Miniature Sailboat ,” get ready to embark on an exciting adventure. We’ll explore the essential steps in this process, including preparing for launch , selecting the right conditions , and monitoring and adjusting the sailboat. So, hold onto your hats and let’s navigate the waters of sailboat testing together!
1. Preparing for Launch
To effectively prepare for the launch of a miniature sailboat, it is important to follow these steps:
1. Assess the weather conditions: Before launching, it is crucial to check the weather forecast. Look out for calm winds and clear skies, as this will ensure smooth sailing and minimize any accidents.
2. Position the boat properly: Ensure that the sailboat is placed in a clear area, away from rocks or other boats. This will provide enough space for maneuverability.
3. Secure the mast and sails: Double-check that the mast and sails are securely attached. This is essential for effective wind-catching and to ensure a smooth sailing experience.
4. Inspect the rigging and accessories: Take the time to examine the rigging and accessories, such as ropes, pulleys, and hooks. Make sure they are in good condition and properly connected to prevent any mishaps or malfunctions.
5. Conduct a final safety check: Before launching, perform a thorough safety check. Confirm that all necessary safety equipment, including life jackets and flotation devices, are on board and easily accessible.
6. Position the sailboat in the water: Carefully place the sailboat in the water, ensuring that it floats steadily. Avoid any sudden movements or excessive force during this process.
7. Adjust the sails: Based on the wind conditions, adjust the sails accordingly. Raise and trim them for optimal performance and speed.
8. Launch the sailboat: Release the sailboat into the water gently, either by pushing it or releasing it from a docking position. Observe its movement and make any necessary adjustments for a successful launch.
By following these steps, you can effectively prepare your miniature sailboat for a successful launch and enjoy a pleasant sailing experience.
2. Selecting the Right Conditions
Selecting the Right Conditions
When setting sail with your miniature sailboat , it is crucial to select the right conditions. Here are a few key steps to follow:
1. Analyze wind patterns and carefully choose a location that offers consistent and steady wind direction. By doing so, you can ensure smoother sailing and a more enjoyable experience.
2. Before embarking on your sailboat adventure, make sure to check the weather forecast. Avoid sailing on days when strong winds, storms, or unfavorable conditions are expected. This will help you steer clear of potential risks and hazards.
3. Look for calm waters with gentle waves for optimal stability and maneuverability. Avoid areas known for strong currents, rapids, or turbulent waters as they can greatly affect your sailboat’s performance.
4. It is important to select a location that provides ample space for your sailboat to navigate freely. Avoid crowded areas to minimize the risk of collisions and enhance your overall safety.
5. Opt for a location with good visibility to easily keep an eye on your sailboat. Avoid areas with dense fog, limited visibility, or high traffic, as they can hinder your ability to navigate effectively.
By diligently following these steps and carefully selecting the right conditions, you can have a safe and enjoyable sailing experience with your miniature sailboat .
3. Monitoring and Adjusting the Sailboat
Monitoring and adjusting the sailboat is crucial for optimal performance on the water. By following these steps, you can ensure that your miniature sailboat is in top condition:
Regularly check the balance of your sailboat to make sure it is evenly weighted and not leaning to one side. This will help maximize its performance.
Observe the wind direction and any changes in speed. Adjust the sails accordingly to harness the power of the wind effectively.
Monitor the position of the rudder to control the sailboat’s direction. Make small adjustments as needed to stay on course.
Pay close attention to the water conditions. If the waters are rough or choppy, you may need to make adjustments to the rigging or sails. It is important to ensure that everything is secure and properly adjusted for safe navigation.
Continuously monitor the sailboat’s speed and be ready to make changes to the sails or rigging to either increase or decrease speed as desired.
It is essential to take note of any issues or malfunctions that may arise. Address problems such as loose lines or a broken mast before continuing your sailing adventure.
By following these steps , you can effectively monitor and adjust your miniature sailboat , providing you with a successful and enjoyable sailing experience.
Troubleshooting and Maintenance
Looking to keep your miniature sailboat seaworthy? In this section, we’ll tackle troubleshooting and maintenance to ensure smooth sailing. From addressing balance and stability issues to repairing damages and wear, we’ve got you covered. Plus, we’ll reveal tips for keeping your sailboat shipshape through proper cleaning and storage practices. Get ready to take charge of your miniature vessel’s longevity and performance!
1. Handling Balance and Stability Issues
Handling Balance and Stability Issues
To effectively handle balance and stability issues in a miniature sailboat, it is important to follow these steps:
1. Check the alignment of the keel and rudder to ensure that the keel is securely in place and that the rudder is properly aligned with the centerline of the boat.
2. Adjust the position of the mast by moving it either forward or backward in order to determine the ideal balance point. Moving the mast forward will increase weather helm , while moving it backward will increase lee helm .
3. Modify the shape of the sail by adjusting the tension on the halyard and cunningham lines in order to control the sail draft. A flatter sail shape can help reduce heeling and improve stability.
4. Trim the sails by making small adjustments to the main and jib sheets in order to achieve proper sail trim. Over-trimming the sails can lead to excessive heeling, while under-trimming can result in poor performance.
5. If the boat continues to be unstable even after making adjustments, consider adding small weights to the keel or hull. This can help lower the boat’s center of gravity and enhance stability.
Pro-tip: Achieving the perfect balance and stability in a miniature sailboat may require some trial and error. Experiment with different adjustments and take note of their effects on the boat’s performance.
2. Repairing Damages and Wear
When repairing damages and wear on a miniature sailboat , follow these steps for proper maintenance and longevity:
1. Identify the damage: Inspect the sailboat for cracks, scratches, or broken parts.
2. Gather necessary tools and materials: Prepare epoxy resin, sandpaper, paint, and replacement parts if needed.
3. Prepare the damaged area: Clean and remove debris, using sandpaper to create a suitable surface.
4. Repair the damage: Apply epoxy resin according to the manufacturer’s instructions, ensuring a secure bond.
5. Sand and paint: After the repair has cured, sand the area for a smooth finish. Use matching paint for a seamless appearance.
6. Inspect and test: Carefully check for any remaining damages and test the sailboat’s functionality.
7. Maintain regularly: Clean and maintain the sailboat regularly to prevent further wear and damage.
By following these steps, you can effectively repair damages and wear on your miniature sailboat , ensuring its continued functionality and enjoyment. Proper maintenance is key to prolonging the life of your sailboat and ensuring many happy sailing adventures.
3. Cleaning and Proper Storage
To ensure the longevity and enjoyment of your miniature sailboat, it is essential to follow these steps for cleaning and proper storage:
1. Begin by rinsing the sailboat with freshwater immediately after sailing. This will effectively remove saltwater and debris.
2. Allow the sailboat to thoroughly air dry before storing it. This step is crucial in preventing the growth of mold or mildew.
3. When cleaning the hull, gently scrub away any dirt or stains using mild soap and water. Rinse with freshwater to ensure a thorough clean.
4. Carefully remove the sails and inspect them for any dirt or damage. Clean the sails using mild soap and water, making sure to rinse them thoroughly. It is important to allow the sails to completely dry before storing them.
5. Take the time to check the rigging for any signs of wear or damage. Use a damp cloth to remove any dirt or grime that may have accumulated.
6. Find a secure, temperature-controlled storage area that is dry. This will protect the sailboat from potential damage. Ideally, store the sailboat on a rack or shelf to avoid placing unnecessary pressure on the hull.
By following these cleaning and proper storage practices, you can extend the lifespan of your miniature sailboat and enjoy it for years to come.
Some Facts About How To Make A Miniature Sailboat:
- ✅ Making a miniature sailboat requires basic woodworking skills. (Source: SailChecker)
- ✅ There are many online tutorials and videos available that provide step-by-step instructions on making a miniature sailboat. (Source: The Spruce Crafts)
- ✅ The materials needed to make a miniature sailboat include wood, glue, paint, and fabric for the sail. (Source: Model Boat Builder)
- ✅ Miniature sailboats can be made in various sizes, from small tabletop models to larger display pieces. (Source: Model Yachting)
- ✅ Building a miniature sailboat is a fun and creative project that can be enjoyed by people of all ages. (Source: The Artful Parent)
Frequently Asked Questions
How do i cancel my contracts or subscriptions on youtube.
To cancel your contracts or subscriptions on YouTube, follow these steps:
- Go to the ‘Verträge hier kündigen’ section on the YouTube website.
- Read the instructions carefully and fill out any required forms.
- Submit the cancellation request and wait for confirmation.
- Your contracts or subscriptions will be terminated as per the provided instructions.
How can I test new features on YouTube?
To test new features on YouTube, you can follow these steps:
- Keep an eye on the YouTube website for announcements or notifications regarding beta testing.
- If a beta testing opportunity is available, visit the ‘neue funktionen testen’ section on the YouTube website.
- Follow the instructions provided to join the beta testing program.
- You may be given access to test new features and provide feedback to help improve YouTube.
What guidelines and safety measures should I be aware of when using YouTube?
When using YouTube, it is important to follow the guidelines and safety measures outlined by the platform:
- Visit the ‘Richtlinien & Sicherheit’ section on the YouTube website to familiarize yourself with the community guidelines.
- Respect copyright laws and avoid uploading or using copyrighted content without proper permission.
- Report any inappropriate or harmful content using the reporting tools provided by YouTube.
- Protect your personal information and avoid sharing sensitive data with unknown individuals or websites.
What information does the NetzDG Transparenzbericht provide?
The NetzDG Transparenzbericht on YouTube provides information on how the platform handles illegal content and user complaints in compliance with the German Network Enforcement Act (NetzDG). It includes details on the number of complaints received, actions taken, and the overall transparency of YouTube’s content moderation policies.
Will the copyright for YouTube content expire in 2023?
No, the copyright ownership for YouTube content is not set to expire in 2023. The statement refers to the copyright ownership by Google LLC, which remains valid. The specific copyright duration for content on YouTube may vary depending on the applicable laws and the rights of the content creators.
How does YouTube work?
YouTube is a video sharing platform where users can upload, watch, and interact with a wide variety of videos. Users can create their own channels, subscribe to other creators, and engage with content through likes, comments, and shares. YouTube operates through a website and mobile applications, allowing users to access videos and features from various devices.
About the author

Leave a Reply Cancel reply
Your email address will not be published. Required fields are marked *
Save my name, email, and website in this browser for the next time I comment.
Latest posts

The history of sailing – from ancient times to modern adventures
History of Sailing Sailing is a time-honored tradition that has evolved over millennia, from its humble beginnings as a means of transportation to a beloved modern-day recreational activity. The history of sailing is a fascinating journey that spans cultures and centuries, rich in innovation and adventure. In this article, we’ll explore the remarkable evolution of…

Sailing Solo: Adventures and Challenges of Single-Handed Sailing
Solo Sailing Sailing has always been a pursuit of freedom, adventure, and self-discovery. While sailing with a crew is a fantastic experience, there’s a unique allure to sailing solo – just you, the wind, and the open sea. Single-handed sailing, as it’s often called, is a journey of self-reliance, resilience, and the ultimate test of…

Sustainable Sailing: Eco-Friendly Practices on the boat
Eco Friendly Sailing Sailing is an exhilarating and timeless way to explore the beauty of the open water, but it’s important to remember that our oceans and environment need our protection. Sustainable sailing, which involves eco-friendly practices and mindful decision-making, allows sailors to enjoy their adventures while minimizing their impact on the environment. In this…
- Skip to main content
- Skip to primary sidebar
Sailboat Craft - Easy Kids Activities
By Damjana Jakos • Updated on Aug 13, 2022
See how to make a styrofoam boat that floats. This easy sailboat craft is perfect for kids during the summer. An easy and fun summer craft project your kids will love to do, and might extend into hours of water play fun! Check it out here.

If you are looking for fun kids activities, check out these too:
- Making Bubble Snakes – So Much Fun!
- How to Make Easy Diy Paintbrushes - Quick!
- Diy Paper Bookmarks - Made By Kids!
- Water Walking Experiment For Kids
Check out this easy sailboat craft that kids can do to make diy sailboats out of styrofoam packaging. A great water play idea for the summer your kids will love!
Diy Sailboat Craft
To ensure these boats will float, we used some styrofoam packaging we got a few weeks ago. It's a great water play idea for the summer, and our kids love it. Yours will too! These DIY sailboats don't take a lot of time to make, and you probably have all the supplies at hand already:
Supplies For Sailboat crafts:

Gathering your supplies will be quick - you only need these:
- a few pieces of styrofoam packaging
- a few pieces of self adhesive vinyl-coated color paper (the vinyl coated type will last longer!)
- toothpicks or thin sticks
How To Make An Easy Sailboat - Tutorial:

1) Cut an equilateral triangle from the self-adhesive vinyl-coated paper in the desired color.
Fine motor skills task for kids: cutting. If kids will be cutting these triangles, you can first draw them on the backside of the paper sheet.

2) Peel off the backing and tape the color paper around the toothpick, leaving the bottom third of the toothpick exposed. Here's your sail.

3) Stick the toothpick into a piece of styrofoam and here's your sailboat for hours of water play!
Totally easy and quick. You can make tons of them, depending on the number of players and the number of styrofoam pieces.

A great way for kids to have races - either in a giant bucket or a water table, it will always mean tons of fun for the summer!

Not only are these styrofoam boats easy to make, they float, too!

It is not necessary to have a backyard for this kind of water play. At first, we simply used our kitchen sink, and it worked perfectly. one piece of advice, however: if you are about to set up the water play in your kitchen, make sure to have a towel at hand, to easily take care of any spills.

Hours of fun and play for your kids!
Once finished, they went to play with this diy masking tape racetrack we built on the floor a few days ago (again!)
Save For Later:
MORE POSTS YOU MIGHT LIKE:

WANT MORE FREE TUTORIALS AND PATTERNS?
Get email updates and never miss out on new patterns, printables, and tutorials:
More Kids Crafts
Reader Interactions
Leave a reply cancel reply.
Your email address will not be published. Required fields are marked *
Save my name, email, and website in this browser for the next time I comment.
POPULAR SEARCHES:
- Raspberry Pi
- Woodworking
- 3D Printing
- Maker Faire

- All Stories
- Magazine Projects
- Board Guide
- Magazine Issues
Projects from Make: Magazine
Wooden mini yacht.
Build a Wooden Mini Yacht this weekend.
- Time Required: A weekend
- Print this Project

By Thomas Martin
Thomas martin.

When my son was 3 years old, I made a small bathtub boat with him, using scrap wood and a piece of dowel. It lasted much longer and got more of his attention than any dollar-store bath toy, and about six years later we decided to try building a larger boat for the pool and local ponds we fished.
Here’s the result of our experimentation: a simple and worthy pond sailer that’s rigged and scaled like a real yacht. You can build it in a weekend using readily available materials and tools.
Project Steps
Prepare the sailcloth..
It’s hard to find waterproof fabric that’s easy to cut and won’t fray. You can make your own by stretching ripstop nylon loosely over a frame or 2 hangers, and spraying it lightly (in a well-ventilated area) with polyurethane.
First spray up and down, and then back and forth, until the fabric is well coated but not saturated.
Let dry overnight.
Mark and cut the parts.
Download the project plan and print it at full size. Following the plan, measure and mark the mast, jib boom, and mainsail boom lengths on the ¼” dowel. Trace the hull from the printed pattern onto the top and 2 ends of the cedar block; cut templates or use carbon paper. Draw the keel and masthead crane patterns on the brass strips, and draw the bowser (rigging clip) pattern 8 times on the thin plastic.
Cut and drill all the parts. Any fine-tooth saw will cut the dowel, or you can roll it under an X-Acto blade and snap the score. Heavy-duty shears or a hacksaw will cut the brass; be sure to file away the sharp edges afterward. You can saw or file down the hull’s shape, then use a hobby knife or thin chisel to excavate the slot for the keel. Drill all holes, plus pilot holes for the screw eyes (in the hull, just poke pilot holes in by hand with a thumbtack).
Finally, file, sand, and smooth all parts. The more time you spend here, the better — especially if you plan to use a clear finish over the wood.
Mount the keel.
On the underside of the hull, mask both sides of the keel’s slot with tape. Wearing gloves, and in a well ventilated location, mix and spread some 5-minute epoxy into the slot using a scrap stick or wooden match.
Slide the keel into position and hold it there while the epoxy cures. You can square it up using a business card on each side.
Use a gloved finger to smooth the epoxy along the joint line, and fill any voids with more epoxy.
Finish the wood.
Finish the hull uniformly, or for a big-boat look, paint the outside of the hull and stain the deck.
Sand the hull with 100-grit paper over a sanding block, and again with 150-grit. Apply a first coat of paint or varnish, and re-sand with 180-grit before each subsequent coat.
For a stained deck, first paint the hull upside down, then re-sand the top perimeter to remove any overspray. Rub stain into the deck and edge, let dry, and coat with varnish or polyurethane.
For the mast and boom pieces, bevel the cut edges for a more finished look, then sand with fine grit to remove any fuzz. Stain if desired, and cover with at least 2 coats of varnish or polyurethane sealer, sanding lightly between coats.
Assemble the mast and booms.
Cut a slot in the top of the mast and glue in the masthead crane. Once that’s secure, follow the plan to install all screw eyes: 4 to the mast, 1 on the fore end of each boom, 1 more on the mainsail boom (for the boom vang), and 4 to the deck. Screw these in until the shank of the screw is completely into the wood.
Insert the brass brad down through the hole in the jib boom and bend it into a clew hook.
Use needle nose pliers to open the mainsail boom eye, hook it onto the eye on the mast, and close it. This forms the gooseneck, the joint that lets the boom swing from side to side (far left in the photo). Press the mast down into the hole in the deck with the masthead crane centered afterward, and tap it gently down into its hole with a hammer.
Add the sails.
After the sail material is dry, trace and cut it to the plan patterns. Lay the boat on its side on a hard surface with the masts and booms in place and fit the sails to the areas for rigging. For the grommets, cut a small X at each sail corner, insert a grommet up through the hole, press the cloth down around it, and tap the grommet flat with the eyelet tool until it firmly grips the cloth.
NOTE: It’s a good idea to practice setting grommets first with a couple of sailcloth scraps and extra grommets. It’s time for rigging. Knot and cut a short length of dacron line, thread it through a bowser, and string the boom vang. For these and all other knots, add a tiny drop of cyanoacrylate glue immediately after tying; the line is slippery and won’t hold knots otherwise.
Use 5″ lengths of line to tie each sail grommet to its corresponding screw eyelet or drilled hole with a square knot. You’ll need about 10″ for the top of the jib sail, which threads through 2 eyelets before tying off to the uphaul bowser.
Referring to the plans, tie the 4 lower connections on the booms first, and then add the upper lines for tension, so there are no wrinkles in the sails along the booms. Thread a bowser onto the jib uphaul as indicated: for their final tensions, you’ll adjust the jib using the uphaul at the top, and the mainsail using the boom vang.
For the backstay, tie in a long length of line at the masthead crane and install a bowser, routing the line through the eyelet at the stern.
Tighten the backstay and the sails so that they’re fairly tight but the mast is not bowed forward or aft. Finally, add the 2 lines called sheets. For these, cut two 15″ lines. Tie each one through the hole in the aft end of a boom, thread it through the sheet eyelet on the deck just underneath, then through 2 holes in a bowser, through the other sheet’s eyelet, and finally through the last hole in the bowser, doubleknotting the line.
NOTE: It’s important to tie the bowsers exactly as shown on the plan to make them work. The sheets let you adjust the angle (trim) of the sails — slack for downwind sailing or tight for crosswind — letting you cross a pond or pool in any direction that isn’t too close to directly upwind.
This project first appeared in MAKE Volume 20 , page 56.
From the Shed: New Arrivals

DIY Arcade Joystick Kit

Make: Arduino Electronics Starter Pack

Maker's Notebook - Hardcover 3rd Edition

Transistor Cat Kit

Our websites use cookies to improve your browsing experience. Some of these are essential for the basic functionalities of our websites. In addition, we use third-party cookies to help us analyze and understand usage. These will be stored in your browser only with your consent and you have the option to opt-out. Your choice here will be recorded for all Make.co Websites.

Ready to dive into the realm of hands-on innovation? This collection serves as your passport to an exhilarating journey of cutting-edge tinkering and technological marvels, encompassing 15 indispensable books tailored for budding creators.

Escape to an island of imagination + innovation as Maker Faire Bay Area returns for its 15th iteration!
Buy tickets today save 15% and lock-in your preferred date(s)..

- My Wishlist
- United States
- Sets by theme
- Price Ranges
- LEGO Merchandise
- Pick and Build
- Bestsellers
- Offers & Sale
- Coming Soon
- Find inspiration
- Last Chance to Buy
- Architecture
- Botanical Collection New
- Creator 3in1
- Creator Expert
- Despicable Me 4 New
- Harry Potter™
- Jurassic World
- LEGO® Animal Crossing™ New
- LEGO® Avatar
- LEGO® Braille Bricks New
- LEGO® DREAMZzz™
- LEGO® DUPLO® Peppa Pig New
- LEGO® Education
- LEGO® Gabby's Dollhouse
- LEGO® Icons
- LEGO® Indiana Jones™
- LEGO® Super Mario™
- Lord of the Rings™
- Minifigures
- Monkie Kid™
- SERIOUS PLAY®
- Sonic the Hedgehog™
- Speed Champions
- Star Wars ™
- Accessories
- LEGO® Throw Blankets New
- Lunch Boxes
- Puzzles & Board games
- Role Play & Costumes
- Video Games
- LEGO® Water Bottles
- Adults Welcome
- Arts and Crafts
- Coding for Kids
- Learn to build
- Real-Life Heroes
- Robots for Kids
- Pick a Brick
- Brick Accessories & Kits
- Minifigure Factory
- Our Magazines
- Livestreams
- All LEGO Themes
- All LEGO Interests
- Looking For a Gift?
- For Families
- LEGO® Fortnite®
- LEGO® Insiders
- LEGO® Mosaic Maker
- LEGO® Gift Ideas
- Sustainability
- LEGO Builder
- LEGO Life App
- LEGO Catalogs
- FREE LEGO Life Magazine
- Check Order Status
- Delivery & Returns
- Find a LEGO Store
- Find Building Instructions
- Common Questions
- Replacement Parts
LEGO® Insiders gift with qualifying purchase* Learn more
Gift with $40 LEGO® Star Wars ™ purchase* Learn more
LEGO® Insiders Members' Sale 4/30-5/5* Learn more
4X points on selected LEGO® Star Wars ™ items* Shop now
2X points on selected LEGO® Star Wars ™ items* Shop now
FREE Shipping with orders over $35!* Learn more
- LEGO® Sonic the Hedgehog™
Tails' Adventure Boat
Coming Soon on August 1, 2024
Specifications
Appeal to young adventure-lovers and video game character fans ages 8+ with a fun gamer gift in this Tails’ Adventure Boat (76997) toy building set for kids, packed with functions and interactive play options. This LEGO® Sonic the Hedgehog™ collectible playset features a boat with a built-in speed sphere launcher on the front, karaoke machine and dance floor, plus parasail connectors at the back. Fun role-play options with 4 characters, an island model with 3 rings, an arch, a beach chair and other accessories.
This cool Sonic toy lets fans of the Blue Blur create endless stories with Sonic and Tails: from having a party on the boat, with dancing, karaoke, water-skiing and parasailing, to relaxing on the island after defeating Jawz and rescuing a Tocky.
Fast action fun meets imaginative play with LEGO Sonic the Hedgehog toys. Kids also get an easy, intuitive building adventure with the LEGO Builder app, where they can zoom in and rotate models in 3D, save sets and track their progress.
- Sonic toy for kids – Treat boys, girls and fans aged 8+ with this action-packed Tails’ Adventure Boat set that lets kids create stories with their favorite Sonic the Hedgehog™ characters
- Collectible set for play – The playset features a boat with built-in launcher, Tails and Sonic figures with new expressions, Tocky and Jawz characters, and an island with an arch, 3 rings and more
- Video game set with functions – This fun LEGO® toy features an easy-to-use speed sphere launcher that’s built into the front of the boat, with space to load the sphere and a lever to launch it
- Fun gamer gift – The brick-built interactive boat toy and island inspires high-seas adventures with Sonic and Tails, making it a fun gift for kids and video game fans to show friends and play with
- Intuitive instructions – The LEGO® Builder app guides kids on an intuitive building adventure with tools that let them zoom in and rotate models in 3D, save sets and track their progress
- LEGO® Sonic toys – All LEGO Sonic the Hedgehog™ playsets introduce kids to fast action fun and imaginative play with different characters and story possibilities
- Measurements – This 393-piece toy set includes a buildable boat toy for kids that measures over 4 in. (10 cm) high, 4.5 in. (11 cm) long and 9 in. (23 cm) wide

Florida women drive 500 miles from Jacksonville to Key West in toy cars to 'save animals'

Two 29-year-old Florida women who have been best friends since Kindergarten embarked on a 500-mile journey together, and not by way of automobiles or other traditional forms of transportation, but rather motorized toy cars.
Cassie Aran and Lauren Lee have been doing challenges and documenting them on social media for years, including traveling 45 miles in Heelys and kayaking in a cheap inflatable kayak to an island in Tampa Bay, but this time they wanted to do the "next big thing."
The women initially planned to break the Guinness World Record for the longest journey in a toy car by driving down the coast of Florida from Jacksonville to Key West.
"We wanted to do something bigger than anything we've ever done," Aran told USA TODAY. "We've been best friends since Kindergarten so we've done a lot of crazy stuff together, but we wanted to do something just a little bit bigger."
Their TikTok videos documenting their road trip have amassed hundreds of thousands of views.
Fundraiser organized for Best Friends Animal Society
The drive would also be for a good cause as the women hoped to "save animals along the way" by organizing a fundraiser for Best Friends Animal Society . As of Friday, over $16,000 has been donated, surpassing the women's goal of $10,000.
"We shout (the fundraiser) out in our videos and are trying to do our best to help the Best Friends Animal Society... the main thing they do is end kill shelters and start more humane options," Aran said. "It's a big passion of mine personally because I have a rescue dog."
In addition to the fundraiser, the women will also donate proceeds from their merchandise sales to the Best Friends Animal Society, Aran said.
Guinness World Record wanted to make Cassie Aran and Lauren Lee pay an 'exorbitant fee'
Although the initial plan was to break the Guinness World Record, the women learned halfway through their journey that they would have to pay $16,000 to have their names in the records book.
"We received an email from (Guinness World Record) essentially saying it's free to attempt any record, but since we were raising money, it technically put us into a different category," Lee said. "We weren't just individuals doing this anymore, it put us into a corporate category."
The women had to decide between paying an "exorbitant fee" or helping the animals, according to Lee.
"We decided the animals were obviously more important than the title," Lee said. "It's something we can always do again, we love doing stuff like this anyways."
How did the idea to drive toy cars 500 miles come about?
The idea behind driving toy cars 500 miles originated from the women driving Barbie Power Wheels when they were girls growing up in New Jersey, Lee said. Their childhood experiences encouraged them to try driving in toy cars again, so around two years ago, they drove 35 miles from Tampa to Clearwater, she added.
Their 35-mile trip in toy cars from Walmart evolved into them driving nearly $1,800 toy cars together for 58 days straight, according to Lee. The two will finish their adventure on Saturday morning when they cross the finish line in Key West, where the city's mayor and commissioner will be issuing them a certificate saying they completed their travels, she said.
Cassie Aran and Lauren Lee aren't biting 'each other's heads off'
Lee called the experience with Aran "phenomenal" despite people leaving comments wondering how haven't "bit each other's heads off."
"Through all the years we've learned what each other needs in those moments of being tired, hungry, fed up or whatever," Lee said. "After a long day, we know how to keep the spirits up... I feel like we've communicated very well through the whole thing."
Aran said sometimes it did get discouraging because some days their on the road for 16 hours trying to make it to their destination, and "just everything's going wrong" from the car breaking to the battery going dead.
"Sometimes it can get scary or discouraging but then the other one always tries to pick the other one up," Aran said.
'It's about the little steps'
People can take away from the women's whole experience that they "don't have to make massive strides every day," Lee said.
"It's about the little steps that you take in those days on the way to your big goal," she said. "No dream is too big to achieve... we just took it day by day, anything is possible."
Aran said their journey should encourage people to get out of their comfort zones.
"I would love people to look at this and just do something that makes them a little bit uncomfortable," she said. "That's the only way to grow."

Wooden Toy Boat

Introduction: Wooden Toy Boat

This was my first attempt at making a traditional wooden toy boat. A friend needed it for a kids' workshop she was running and it was great excuse for a fun afternoon in the shop.
Step 1: Make the Template

I installed the "Bezier Spline" plugin for SketchUp and used that to create a template that I would use for cutting out the basic shape of the boat. I printed it out and used a spray adhesive to glue it to a 2" thick piece of recycled wood that I had laying around. I like the Scotch brand repositionable adhesive. The nozzle never gets gummed up like some others that I have tried and it's easy to peel it up and stick it back down if you aren't sure exactly where you want it to go.
Step 3: Rough Cutting

I have a tabletop miter saw that is pretty handy for projects like this. It's a small table saw and miter saw in one. I used the table saw on top to rip the board to width and then popped it open and used the miter saw underneath to cut it closer to shape.
Step 4: Shaping

I built a simple jig a while back so that my belt sander can either lay on its back or be turned on its side with a little platform for sanding straight edges. (I got the idea from seeing this post by John Heisz on the IBuildIt.ca forums.) My sander is a Maktec that it came with a mounting bracket to make this a lot easier to do.)
So with the sander turned on its side, I was able to smooth the edge into shape.
Next, I used a rounding-over bit with a bearing on my router table to soften the edge of the base a bit more. Then went back to the belt sander, this time with it on its back, to get the final shape of the bottom of the boat. I imagine that this could be also be done with a hand plane but it worked out pretty well this way, albeit with a lot of dust.
The router table, for anyone who is interested, just pops in and out of my Black & Decker Workmate. I was really happy to discover that a 2x4 sits in the gap perfectly, so it has been really easy to build a whole bunch of modules that can fit easily and securely on there.
Step 5: The Top

I printed a second template and cut out the middle to make the top of the boat. I put this on a piece on 1/2" plywood and cut it out with a jigsaw. I drilled a few holes in the middle to make things easier when cutting the curves. Then I put it back on the router table with the same round-over bit to smooth the inside.
I glued it to the bottom part and tacked it with a couple of nails, then did the outside edge of the top on the router table Since there was a bearing on the router bit, I didn't have to worry about taking off too much. With a little more sanding, it came out nicely.
Note that while putting the top piece on at this point made it easier to shape it, it made it much more difficult to paint. At the very least, I probably should have painted the inside edge, That way I wouldn't have had to muck about with the masking tape later on.
Step 6: Painting

With masking tape and some patience, I did the top. Then flipped the whole thing over and used a spray lacquer for the bottom. I'm not thrilled with the glossy look though. Next time, I would use matte for sure.
Step 7: The Mast

I used a drill bit about the same diameter as my dowel and pressed the end of dowel against it to get a bit of a curve so they would fit together without a gap. Then I started with a tiny pilot hole and worked up through a couple of drill bits so make sure I wouldn't split the dowel with the screw. I used a countersink so the screw would sit nicely in the hole and together with a little glue, it held really well.
I put a piece of masking tape on the drill bit when I drilled the hole to insert the mast. This helped ensure that I drilled to the correct depth. I didn't glue the mast in. I got a pretty good friction fit and it could be taken apart if needed.
I also drilled tiny holes in the ends of the dowels for thread to go through to hold the sail but as you can see, I ended up sewing a sail that slid over the mast after the first one came off a few times. Maybe next time, I will make the sail out of stronger stuff and use grommets in the corners.
This was a fun project to do and using what I've learned and a lot of what I still have to learn, I hope to make another one with my own kids (more hand tools, less power tools). I never actually tested this one in the water (it was meant to be ornamental) so it should be interesting...

Recommendations

For the Home Contest

Big and Small Contest

Remake It - Autodesk Design & Make - Student Contest

Tennessee first graders get in Kentucky Derby spirit with toy horse competition
The students named their toy horses silly names like sockball, cybertooth, secretary sally and my hippo loves me..
HENDERSONVILLE, Tenn. (WMSV) – With the 150th Kentucky Derby being held Saturday, one Tennessee first-grade class got in the racing spirit.
Merrol-Hyde Magnet School in Hendersonville held their own derby and STEM project by getting dressed up like they were headed to Churchill Downs and making fan-powered toy horses to race.
Photos show the students named their toy horses silly names like Sockball, Cybertooth, Secretary Sally and My Hippo Loves Me, which won the race.
“We added like these boosters to the back that blows wind into them,” a student on the winning team said. “It hits the sail that we made, and then it blows it, and it goes super-fast.”
The student added their horse’s name was inspired by the tune, “I Want Hippopotamus For Christmas.”
Here’s how to watch the Kentucky Derby , which airs on WSMV4 Saturday afternoon.
Copyright 2024 WSMV. All rights reserved.

‘I was so proud to be her mother’: Franklin family mourns daughter killed in hit-and-run crash

Spring Hill High School vandalized overnight, cancels classes

11-year-old raises money to pay off classmate’s lunch debt

10-year-old boy on life support after suddenly falling severely ill, family says

‘Do better’: Students, parents disappointed after Tennessee school vandalized during senior prank
Latest news.

Murfreesboro Police investigating after shots fired, multiple shell casings found

Lipscomb Academy gifted NASA moon tree

LIST: Events for Cinco De Mayo in Nashville

Alzheimer’s Association TN Chapter to host women’s luncheon

Alzheimer's awareness women's luncheon
I Witnessed the Future of AI, and It’s a Broken Toy
The Rabbit R1 is a device defined by empty promises.

Listen to this article
Listen to more stories on hark
This story was supposed to have a different beginning. You were supposed to hear about how, earlier this week, I attended a splashy launch party for a new AI gadget—the Rabbit R1—in New York City, and then, standing on a windy curb outside the venue, pressed a button on the device to summon an Uber home. Instead, after maybe an hour of getting it set up and fidgeting with it, the connection failed.
The R1 is a bright-orange chunk of a device, with a camera, a mic, and a small screen. Press and hold its single button, ask it a question or give it a command using your voice, and the cute bouncing rabbit on screen will perk up its ears, then talk back to you. It’s theoretically like communicating with ChatGPT through a walkie-talkie. You could ask it to identify a given flower through its camera or play a song based on half-remembered lyrics; you could ask it for an Uber, but it might get hung up on the last step and leave you stranded in Queens.
When I finally got back to my hotel room, I turned on the R1’s camera and held up a cold slice of pizza. “What am I looking at?” I asked. “You are looking at a slice of pizza,” the voice told me. (Correct!) “It looks appetizing and freshly baked.” (Well, no.) I decided to try something else. “What are top 10 …” I stumbled, letting go of the button. I tried again: “What are the top 10 best use cases for AI for a normal person?” The device, perhaps confused by our previous interaction, started listing out pizza toppings beginning with the No. 2. “2. Sausage. 3. Mushrooms. 4. Extra Cheese.”
Until now, consumer AI has largely been defined by software: chatbots such as ChatGPT or the iPhone’s souped-up autocorrect . Now we are experiencing a thingification : Companies are launching and manufacturing actual bits of metal and plastic that are entirely dedicated to AI features. These devices are distinguished from previous AI gadgets, such as the Amazon Echo, in that they incorporate the more advanced generative-AI technology that has recently been in vogue, allowing users more natural interactions. There are pins and pendants and a whole new round of smart glasses .
Read: Alexa, should we trust you?
Yet for all its promise, this new era is not going very well. Take Humane, a Rabbit competitor that launched a wearable “AI Pin” earlier this month. That device has been positioned as a smartphone replacement, with a price to match: It costs $699 and requires a $24 monthly subscription fee. Reviewers brutalized the pin, saying it is slow, overheats, and struggles to answer basic queries. “I’m hard-pressed to name a single thing it’s genuinely good at,” The Verge wrote .
By comparison, the R1 is satisfyingly small in its ambition and (relatively) affordable in its price ($199, no subscription). The device itself is fun and retro-chic: Jesse Lyu, Rabbit’s founder and CEO, reportedly bought every member of his team a Tamagotchi for inspiration. And, in fairness, the R1 does some interesting things. Onstage, Lyu showed how the device can interpret a handwritten table and convert it into a working digital spreadsheet. It managed to speak a summary of a handwritten page when I asked, though only with about 65 percent accuracy. I was able to use the gadget to order an acai bowl on DoorDash, although it couldn’t handle any customizations. (I wanted peanut butter.) And I never got Uber to work. (Though at one point, the device told me the request had failed when it in fact hadn’t, leaving me on the hook for a $9 ride I didn’t even take.)
One of the big selling points of the R1 is that it supposedly runs something called a large action model, or LAM—a spin on the phrase large language model , which is the technology powering recent chatbots. Whereas ChatGPT can answer questions and draft you a mediocre essay, the R1 can, in theory, complete actions that you might take on different apps (Venmo-ing your friend $20, for example). Rabbit has said the device will be able to learn any app, if you teach it. Lyu compared the technology to a Tesla: When on autopilot, a Tesla car can in theory recognize a stop sign not because engineers tell it how a stop sign looks but because it has been trained on countless hours of footage to recognize the sign’s physical attributes. Likewise, R1 will be able to accomplish tasks on your phone without having to be taught each app.
The problem is, none of this is actually real. At least not yet. As with so many AI products, the R1 is fueled more by hype than by a persuasive use case. (So many of its functions could, after all, be done on a smartphone.) Back in February, Lyu said the Rabbit was training its model on 800 apps . This week, it launched with the ability to use just four: Spotify, DoorDash, Uber, and Midjourney (a popular AI art generator). The company says LAM is in “very early stages.”
Read: Phones will never be fun again
Onstage before an audience of reporters and Rabbit fanboys on Tuesday night, Lyu seemed nervous at times, at one point encouraging people to laugh in order to ease his nerves. Prior to the event, a user had posted on GitHub accusing Rabbit of misrepresenting its technology. “For those with a technical background, it’s painfully clear that there’s no artificial intelligence or large action model in sight,” the anonymous post, which has since been deleted, read. On X , Lyu characterized the post as “all false claims.” Lyu promised to fix any bugs that might crop up in R1 devices. Before demoing DoorDash onstage, he admitted that the feature doesn’t yet work as fast as they’d like it to: “But I want to show you, and I want to be frank with you guys.”
Yet Lyu also breathlessly announced a number of new initiatives, including a high-concept system that would allow people to someday merge the physical and the digital, so people could point at various smart items in their home and control them through Rabbit’s AI. (Never mind that the R1 has launched without many of its promised features.) Toward the end of the presentation, the words Be Humble appeared on the giant screen behind him. “We are a really, really humble team,” Lyu told the crowd. Those words were still displayed when, a few moments later, the curtains on either side of the stage dramatically dropped to reveal conveyor belts loaded with boxes of R1s. Music started blasting, and people started lining up to snatch theirs.
The R1 is a reminder of the disconnect, for better and for worse, between a Silicon Valley culture that often prioritizes speed over quality and high consumer expectations about the products they use. And to be fair, expectations are high at least in part because of the extraordinary products that have emerged from that same competitive and iterative culture over the years.
As the party wound down, news of the first bug arrived: There was no way to change the time zone on the devices, many of which were programmed by default to the West Coast. Turns out the future is stuck three hours behind.
The 7 biggest home-staging mistakes people make when trying to sell their house
- Home staging can significantly increase a home's value .
- Staged homes sell 88% faster and for 20% more than non-staged homes, a report found.
- Interior designer Dan Mazzarini and home stager Meridith Baer shared common home-staging mistakes.
There are a few common mistakes when preparing your home for sale that can deter potential buyers.
Business Insider spoke to Dan Mazzarini, an interior designer and the creative director at BHDM Design , and Meridith Baer, the owner of Los Angeles-based luxury home-staging company Meridith Baer Home , about the biggest mistakes people make when staging.
Home staging can seriously up the value of your home when trying to attract a buyer, research shows.
A survey by the National Association of Realtors conducted in 2021 found that 82% of buyers' agents said home staging made it easier for their buyers to visualize themselves in the home.
A 2023 report by Realtor.com also found that staged homes sell 88% faster and for an average of 20% more than non-staged homes.
Here are the biggest home-staging mistakes people make when trying to sell their house.
Leaving up all the "Live, Laugh, Love" pillows and quotes around your home.
You might love your "Live, laugh, love" pillow or "Memories made here" kitchen sign, but Dan Mazzarini said you should remove those personal touches when staging your home for buyers.
"Staging to sell is about cleaning up. It's about a simplification, and it's about putting away the personal," Mazzarini told Business Insider. "While you want people to understand how they would live in a home, you don't want them to necessarily focus on you and your personal style in the home."
"You're trying to create a pretty general canvas to attract as many people as possible because you want that top dollar," he added.
Keeping personal items like family photos and kids' toys out in the open.
Family photos can help create a personalized, cozy atmosphere, but they're not the best decor when it comes to home staging.
"You want to make sure that buyers immediately go, 'This is how I want to live,'" Meridith Baer said. "So, obviously, they don't want to see your family photographs all over the place. They want to see themselves living there."
Mazzarini also recommended taking out family photos and kids' toys.
"All those things have to come down because while it is your personal taste, it also reflects your personal values," Mazzarini said.
If you do want to keep a few toys out to appeal to parents, Baer said to opt for neutral, high-quality ones that don't grab too much attention — and to keep them organized in a kid's room, rather than in the main living space.
Cluttering the living room with excess throw pillows, books, and trinkets.
Baer's biggest tip for home staging, especially in the living room, is to get rid of any clutter.
"Our advice to sellers is to get rid of as much junk as possible," she said. "You want it to look easy to live there, so you want to declutter."
"You don't need 20 pillows on a sofa or a bed, even if that's how you like to live," Mazzarini added.
Bookshelves are one area of the home that can easily become cluttered with junk. To remedy this, Baer recommended wrapping brightly colored books in paper or turning them backward so that the pages face out for a more neutral look.
Leaving clutter like cookbooks and small appliances on your kitchen counters.
Mazzarini and Baer both suggested tidying your kitchen counters and removing items like small appliances before a showing to avoid making the space look smaller and disorganized.
"This is the time to clean it up, clean the surfaces, and make it look and smell great," Mazzarini said.
Baer said, "You want to put away as much as you possibly can. It might be convenient to have it all out, but you want to hide anything that isn't pretty. I always love putting bowls of fresh fruit and maybe some flowers in the kitchen."
Not replacing your old bedding or towels with fresh linens.
Baer said that replacing your old towels and bed linens with new ones is one way to freshen up a space without spending a lot of money.
"That's stuff that doesn't cost a lot, but really makes a huge difference," she said.
Mazzarini suggested purchasing white towels and bedding from budget-friendly retailers such as Target or T.J. Maxx to give your bathrooms and bedrooms a new look.
Leaving dirty or half-used toiletries and shampoo bottles in your bathroom and shower.
Half-empty or multicolored shampoo and toiletry bottles can create a messy look that detracts from the amenities and overall look of your bathroom.
"Only keep out on the counter things that are generally pretty and maybe of the same color or the same ilk," Baer said.
To create a streamlined look, Baer advised putting all toiletry bottles away or transferring your products to simple, neutral glass bottles to create a hotel-like atmosphere.
Forgetting to put away any valuables or jewelry you wouldn't want to go missing.
It might not affect the sale, but Baer said it's always a good idea to put items like jewelry or valuable personal items in a safe space before staging or showing your home.
"People should not keep any valuables, jewelry, or watches lying around, everything should be locked up," Baer said. "Because you never know, right, when you're showing it."
- Main content
COMMENTS
Fill your container with water. Make sure the water is deep enough so you can vertically submerge your longest nail/screw. Procedure. Line up three corks (side by side, not end to end). Use two ...
Line up three corks (side by side, not end-to-end). Use two rubber bands to hold the corks together, forming a "raft." Poke a toothpick into the center cork, so it sticks straight up. This is your boat's mast (the part that holds the sail). Cut a square of thin waterproof material (see materials list - don't use regular paper) to make a sail.
Build a toy sailboat from simple materials in this hands-on science activity. View written instructions on the Science Buddies website at https://www.science...
This lengthy video guides viewers step-by-step through the process of making a simple toy sailboat using pine lumber and common hand tools. It is designed t...
This is the second attempt at making a toy sailing boat. I made one a few weeks back, but was never happy with the design or overall appearance of that one. ...
These homemade sailboat softies are a great (and quick) beginner sewing project and so much fun to sew! This easy sewing DIY might keep your summer memories alive a tad longer. And it makes a perfect homemade gift for a baby. This softie toy is easy to make and fun to play with.
The best place to sail your boat and test out the rudder is a tub of calm water. Of course, it's fun to play with as a bath toy as well. It's just that the splashing will interfere with the rudder action. Start with the rudder in the middle position and have your child blow into the sail to move the boat forward.
4. Balsa Wood Sailboat. Balsa wood makes an ideal base for a floating sailboat. This is one fun sailboat for older children to make or for little ones with lots of help. Head over to Handmade Charlotte to find out more. 5. Margarine Tub Boat. make a self-propelled tug tub boat from an empty margarine container.
Step 2: The Skateboard-touch. Cut out a piece of an old skateboard, with the following dimensions: 20mm wide, 85mm long. Drill an 8mm hole for the dowel to go through. Testfit and draw a shape you like on the skateboardpiece. You can make your own dowel with a thread cutting die.
Step 11: Putting It Together Pt.II. Gently place the base of the ship onto the taped water bottles, so that the point of the bow is in between the caps. Step 12: Creating the Sails Pt. III. Lace a chopstick through the holes of 2 cardboard tube pieces, so that the pointed side is away from them. Do the same for the other chop stick, except only ...
Make a Toy Catamaran: This project is an easy to build toy boat (catamaran). Yes, there may be a lot of steps, but they are there to add detail and prevent confusion, really this project is not too difficult. This boat is designed to be built with a limited …
Mama Pappa Bubba made cork sail boats with sparkly sails. Create a boat from a juice box. hands on : as we grow has the plan. Make pool noodle boats like Frogs and Snails and Puppy Dog Tails. Build wax boats like these from Housing a Forest. Race duck tape boats across the water.
16. DIY Elastic Band Powered Toy Boat. Here's another child-friendly tutorial on a simple elastic band-powered DIY toy boat. All you is an empty plastic container, glue, scissors, elastic band, and 3 craft sticks! A great aspect of this DIY is that it can literally be completed in minutes.
Pro-tip: When folding the paper in half, use your fingertips to gently guide the paper along the crease line for a smooth and precise fold. Step 5: Creating the Sail of the Origami Sailboat. 1. Fold the top edge of the paper diagonally to the bottom edge, firmly creasing the fold. 2.
Line up the craft sticks along the edge of the triangle to create your mast. Use a hot glue to secure the craft sticks. 5. Glue the triangles together. Ask your child to cover the two triangles with glue, using the glue stick. Then, press them together to complete your sail. 6. Connect the sail to the raft.
Making a miniature sailboat requires basic woodworking skills. (Source: SailChecker) There are many online tutorials and videos available that provide step-by-step instructions on making a miniature sailboat. (Source: The Spruce Crafts) The materials needed to make a miniature sailboat include wood, glue, paint, and fabric for the sail.
How to Make a Paper SailBoat Model Tutorials..This video is on the Paper SailBoat Tutorials! I would like to show origami the Paper Toy..Material = Color Pap...
How To Make An Easy Sailboat - Tutorial: 1) Cut an equilateral triangle from the self-adhesive vinyl-coated paper in the desired color. Fine motor skills task for kids: cutting. If kids will be cutting these triangles, you can first draw them on the backside of the paper sheet. 2) Peel off the backing and tape the color paper around the ...
Assemble the mast and booms. Cut a slot in the top of the mast and glue in the masthead crane. Once that's secure, follow the plan to install all screw eyes: 4 to the mast, 1 on the fore end of each boom, 1 more on the mainsail boom (for the boom vang), and 4 to the deck. Screw these in until the shank of the screw is completely into the wood.
Sonic toy for kids - Treat boys, girls and fans aged 8+ with this action-packed Tails' Adventure Boat set that lets kids create stories with their favorite Sonic the Hedgehog™ characters. Collectible set for play - The playset features a boat with built-in launcher, Tails and Sonic figures with new expressions, Tocky and Jawz characters ...
Florida women drive 500 miles from Jacksonville to Key West in toy cars to 'save animals'. Two 29-year-old Florida women who have been best friends since Kindergarten embarked on a 500-mile ...
Step 1: Make the Template. I installed the "Bezier Spline" plugin for SketchUp and used that to create a template that I would use for cutting out the basic shape of the boat. I printed it out and used a spray adhesive to glue it to a 2" thick piece of recycled wood that I had laying around. I like the Scotch brand repositionable adhesive.
Here is a toy boat I made for a simple DIY model toy sailboat made from a shampoo bottle that actually sails much better than I anticipated. The constructio...
The students named their toy horses silly names like Sockball, Cybertooth, Secretary Sally and My Hippo Loves Me. ... "It hits the sail that we made, and then it blows it, and it goes super-fast
3. Mushrooms. 4. Extra Cheese.". Until now, consumer AI has largely been defined by software: chatbots such as ChatGPT or the iPhone's souped-up autocorrect. Now we are experiencing a ...
Hello everyone!Welcome to this new miniseries! In Prepare Yourself For Christmas I will show you how you can make quick and simple, last minute Christmas Gif...
A survey by the National Association of Realtors conducted in 2021 found that 82% of buyers' agents said home staging made it easier for their buyers to visualize themselves in the home. A 2023 ...