Better Sailing


How to Repair Sails On Your Sailboat
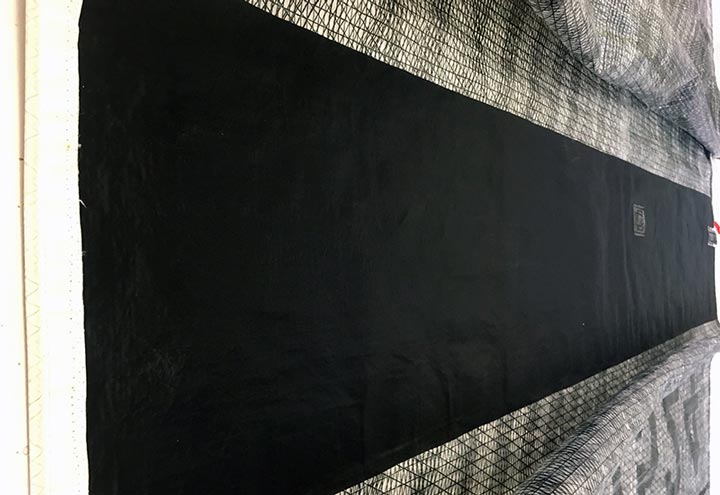
Even if you try to avoid any sail damage to your sailboat, there will be a time, unfortunately, when they get damaged at sea. So, what happens in the event of sail damage? Of course, the fact is that you’ll have to repair them while at sea and then quickly do a damage assessment. For that, you will probably need someone to lend you a hand and a flat surface to place the sail open. But before we get to the details on how to DIY repair a sail tear on your sailboat remember to be prepared for any unexpected scenario. In other words, having the right tools and supplies onboard gives you a huge advantage in dealing with the problem. Some of the basic tools include a waxed twine, a selection of sail needles, sharp scissors, spare webbing, and a sticky-back Dacron. Let’s move on and see the details!
Stitching your Sails
It is of great importance for a sailor to be able to stitch a sail by hand. If you know how to do this, it’s really practical in case of a chafe or of any other torn seams. The process is really simple. Firstly, make one pass to stitch on one set of diagonals as well as to the opposite direction and then fill in the other set. This can be applied in case you are following an existing zigzag stitch. Moreover, the sailor’s palm will facilitate you in order to force the needle through the fabric, and pliers will help you pull the needle through it. Remember to melt the ends of each knot with a lighter to prevent any loosening, as well as try to make tight stitches to ensure a strong repair. Buy a Sail Repair Kit From Amazon
Patch Repairs
For repairs that are not on a seam, a patch fix is necessary. You can use a Dacron patch for almost everything except spinnakers. Dacron can even stick to many laminate sails on the film side, but not on some resin-based and silicone-covered sails. In addition, dacron tapes come in different forms of thickness rolls and you can also buy larger sheets. Naturally, sails are not flat and they’re made up of panels that create depth. However, due to its design, when the surface you lay it on is flat it might pose you a problem. So do some temporary tucks and folds in the cloth, but away from the rip, and try to keep it flat. So, be patient and follow the below-mentioned procedure:
- The space you’re going to “work” is essential. Find a dry and safe place with a flat surface like below the saloon table or even on a chopping board.
- Always clean your fabric of salt with a freshwater rinse. Then allow a few moments for the fabric to dry. Continue by removing any residues with rubbing alcohol. This tip facilitates the drying process, as the alcohol evaporates.
- Most of the time, some sails (mostly white), tear in lines. For that reason, they shouldn’t be pulled too close together or overlap each other. Otherwise, their shape will change, and thus loading will be created. In case the tear has gone off in different directions repair the longest first.
>>Also Read: Best Sail Repair Tape
Seam Repairs
In order to make sure that no seams are starting to appear, try to check your sails daily. It’s not particularly hard for a seam to be unstitched, right in the middle of your voyage. So, if you see any loose stitching, put the sail down immediately, if possible, in order to get it fixed. Stitching a seam back together is a task that requires some time and attention. However, it’s much easier than dealing with ripped fabric. When you stitch seam you just work your way methodically back through all the holes. Try finding a comfy place on deck to work because it might be difficult to move a large sail down below. And remember that “a stitch in time saves nine”!
Patch and Glue
Sail damage can be also caused by a tear to the sun protection on roller-furling headsails. If that happens don’t put new holes in your sail in order to stitch up the tear. This will be really time consuming. Use instead some sticky-back which definitely is an efficient and fast solution. Although you have to take the sail down and put it back up to do that, sticky-back is the answer to this problem.
The first step is to cut the corners of the patch round in order to keep them from peeling off the sail. Then clean the whole area from the repair with acetone, and once the patch is ready, rub from the center to the edge with a scissor handle in order to make sure that it’s totally adhered. Furthermore, sticky-back patches work efficiently for small holes in the actual fabric of the sail. If any holes appear in the fabric then use patches on both sides of the sail, an inch or two larger than the rip in all directions. Keep in mind to slightly counterbalance the two patches so that the load won’t spread out around the repair. Also, take with you ripstop sticky-back to match the colors on any downwind sails, as well as small, pre-cut round patches, which can be practical for small holes in nylon sails.
A lot of spinnakers are no longer stitched and are put together just with tape, so if you need to make a repair it’s a particularly easy task. For most repairs a sticky back spinnaker repair tape is fine. Try not to change the panel’s shape and don’t use too much cloth for the patch. This way you’ll avoid generating unnecessary loads and stress lines. Instead, use the same amount of cloth for the patch so it moves and stretches simultaneously. Also, in case that a tear passes through the panels, repair one panel at a time and not all together. This way each panel is going to move and stretch as it was designed to.
One of the things that need occasional repairs on your sails is fabric. Fabric is one of the most vulnerable parts of your sails. Most of the time, when a sailboat uses its slab reefing it will subsequently wear out the webbing attachments to the tack rings. Therefore a failure of the webbing connection to the mainsail luff slides will be caused. As I’ve mentioned before, the most practical and easy solution to this is to be equipped with twine, a webbing, a needle, and a sailor’s palm . In case you don’t have the correct size of webbing, then Spectra cord can attach a slide fairly well.
These repairs are permanent and won’t take you more than an hour. Another sail damage for many sailboats with full-length battens might be caused by the connection point between the batten and the luff track on the mast. The best thing to do if that happens is to apply West System epoxy along with 3M adhesive sealant 5200 fast cure . This will untie your hands and is also an easy task to perform.
Common Damage Areas
- Spinnakers : Anything sharp can damage the spinnakers. Especially near the boom, so check that everything is taped up. Also, spinnakers tend to get caught between the shrouds and above the spreaders so consider closing off this gap with a bungee.
- Spreader and Rig Chafe : When you’re sailing downwind the mainsail spends a lot of time relaxing on the rig. Keep in mind to fill your spreaders with pipe insulation. Moreover, consider having extra reinforcement patches for the spreaders on the batten pockets and at each reef point.
- Spreader Ends : Always reinforce the sail and put smooth cages around protrusions. In addition, wrap foam around your spreader caps on long voyages.
- Bottom of the Headsail : Try to lower the halyard enough in order to reach the damaged section. Then reinforce with a sail repair tape . In case the conditions don’t favor you to do so, keep a wrap in the sail to take the pressure off the damage.
Summary – How to Repair the Sails
All this is much easier if your sails aren’t damaged in the first place. But, I know for a fact that sometimes you can’t prevent it from happening. In any case, always be alert to what is going on with the rags. Moreover, always carry a sail repair kit (link to Amazon) on board especially for long-distance cruising. Before leaving for any long trip have also a sailmaker service to check your sails for any weak points. Last but not least, in case that your sails are damaged at sea reinforce any loose stitching immediately and tape both sides of repairs to ensure extra strength.

Peter is the editor of Better Sailing. He has sailed for countless hours and has maintained his own boats and sailboats for years. After years of trial and error, he decided to start this website to share the knowledge.
Related Posts

How Does a Boat Sail Upwind? Unveiling the Mechanics of Against the Wind Sailing

How Does Sailing Work? The Physics of Sailing

Best Non Skid Boat Deck Paints

How to Restore Teak on a Boat
- Buyer's Guide
- Destinations
- Maintenance
- Sailing Info
Hit enter to search or ESC to close.
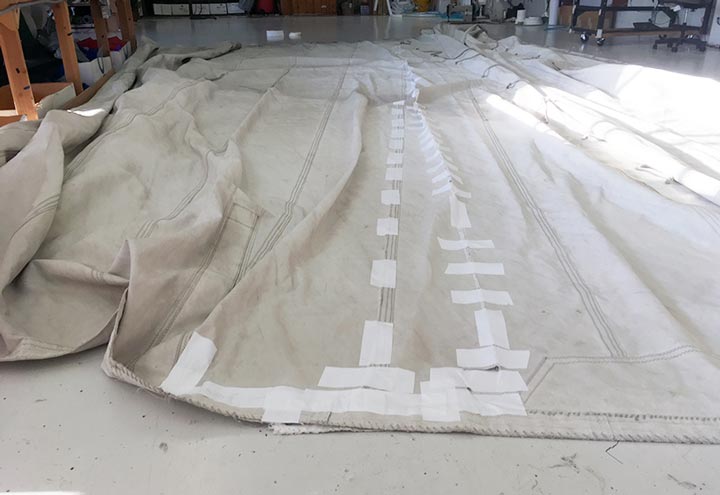
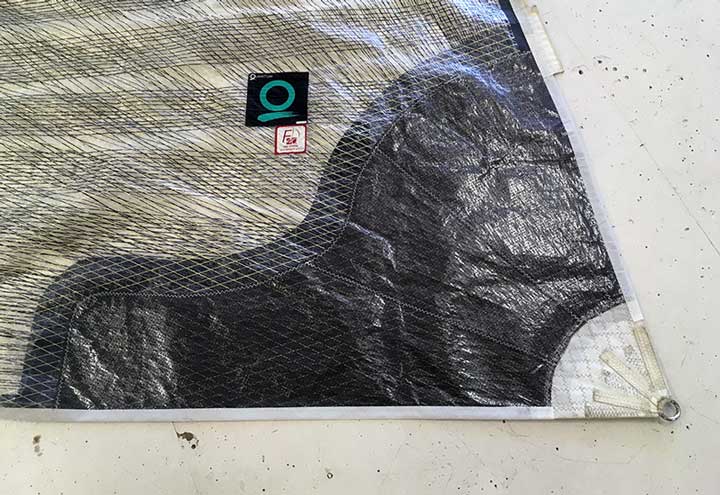
A Sailmaker's Guide to Patching
Mother Nature can wreak havoc on even the best sailing gear and equipment. Thankfully, with repair magicians like Quantum’s Eric Grigsby here, you don’t need to fret if a nasty storm or big breeze damages your sails. Eric explains what goes into common patching repairs and how he makes sails as good as new.

A lot of the repairs you’ll read about here can be avoided with regular inspections (Catch the wear before it needs a major fix!), but, at some point in your sail’s life, it will likely need repair for any number of reasons ranging from a nasty puff to crew error. Some of the most common issues I see, such as torn or chafed areas, can be repaired with patches. The following descriptions will give you a look at the different types of patches used to repair specific damage to both cruising and racing sails and make them like new again.
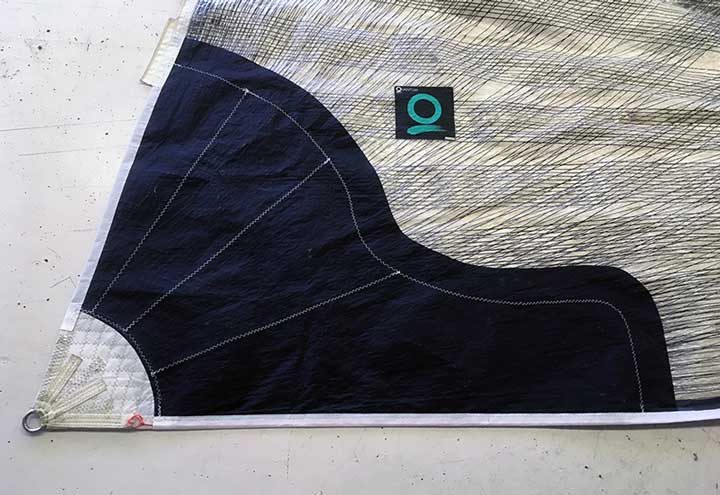
WINDOW PATCHES
A window patch involves completely removing the torn or damaged area and replacing it with new cloth of the same type. Window patches is the more common approach with Dacron cloth and nylon spinnaker cloth than with laminate cloth and are usually done when there is significant damage. The torn cloth is reassembled using masking or insignia tape, and then the damaged area is pinned out flat and sectioned off with double-sided adhesive tape. The new cloth is then positioned with the fibers in the correct orientation, and the old cloth cut out on the opposite side of the sail and the seams stitched. If the window patch is executed as I’ve explained, it will not affect sail shape or strength. However, it is essential to first remove the shape in the sail, pin the area flat, and orient the warp and weft fibers in the correct direction in relation to the area you will be replacing on the sail. Warp fibers run with the length of the roll; weft fibers are woven perpendicular to the warp yarns. Many cloths also have bias and scrim yarns in them. It is critical to match up the fibers because they act as load paths that take the strain and shock-loading the sail is subjected to while underway. The new cloth should be as close as possible to the same weight, style, and yarn type if a clean repair is to be made.
LIKE A PUZZLE
A tall-ship sail's tear is taped back into place in preparation for a window patch. The damaged material will eventually be removed when the new panels are stitched in.

NEW MATERIAL
The new panels are pinned down over the reassembled damage. Next, it will be stitched in place and the damaged portion removed.
BAND-AID PATCHES
A band-aid patch uses a piece of cloth with adhesive backing and applies it to the damaged area on both sides of the sail and then is usually stitched down. This repair is common for small holes and tears and is often the preferred method for repairing laminate sails. A small tear or pinhole in a spinnaker can be repaired using an insignia patch applied to both sides. An insignia patch is a lightweight polyester woven cloth with a pressure-sensitive adhesive (PSA) backing, which makes it excellent for small spinnaker and laminate repairs. The surface is wiped clean of any dirt or salt before the repair is made. The patch cloth must be applied flat and rubbed down vigorously to activate the pressure-sensitive adhesive.
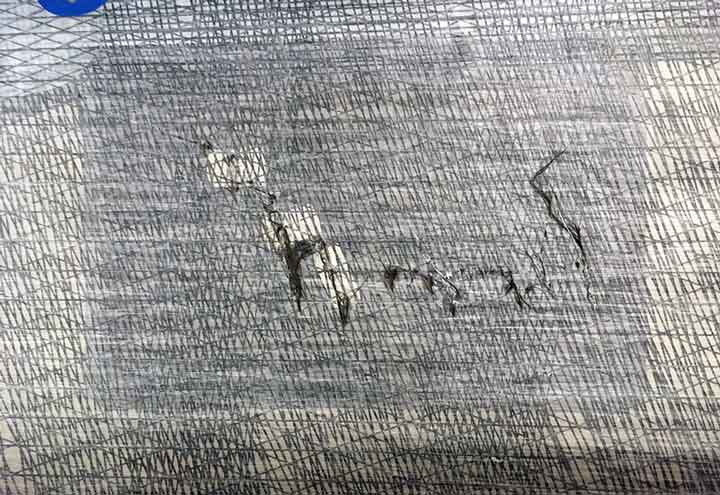
A simple tear is no match for a band-aid patch appropriately applied. Here the patch is already applied to one side and is being prepped for the next step.
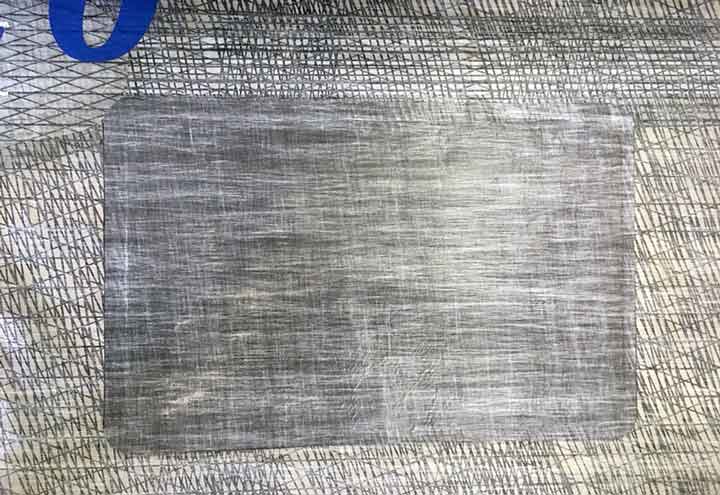
Straight forward fix
The patch is applied to the other side and once cured the sail is good to go.
Laminate sails can vary greatly, and their yarn layout and construction is typically a bit more sophisticated and delicate than conventional sail cloths due to their Mylar construction. Some laminates have Mylar films on both sides; others have taffeta films and even Mylar taffeta combinations with everything from carbon to Kevlar yarns. Often the best approach to repairing large tears on laminate racing sails is Ultrabond (hot glue) band-aid patches with minimal to no sewing required. If the yarns are fully severed, then new cloth of the same or similar style and weight will need to be applied in order to make a proper repair. The yarns in laminate cloth create the structure of the sail and act as load paths similar to the individual fibers that comprise more traditional cloth like Dacron. A cover layer of insignia or spectra/Kevlar PSA should be placed over the repair on both sides of the sail. The patches need to be different sized, with one larger than the other to prevent any hinge points, which is a laminate sail’s worst nightmare. The repaired area needs to be left flat to cure before it is ready for use on the water. Smaller tears and damage to the film can be made using Mylar PSA on both sides, although, just like other adhesive tapes, the sail surface must be clean and flat before application.
IT HAPPENS TO THE BEST OF US
Opps...your bowman fell through the tack! No worries, we can fix that, too.
Nothing a little band-aid patch and a few stitches can't fix.
Now back to sailing.
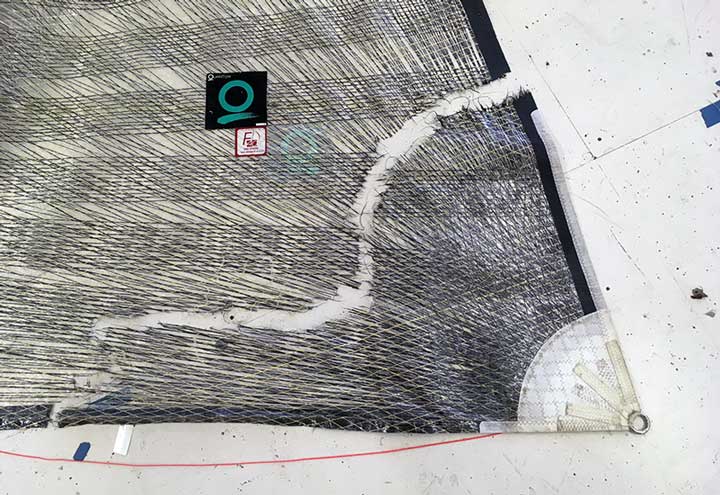
OTHER PATCHES
Corner patch/broadseam tearing.
Sometimes laminate sails can begin to break down along hinge points, such as at the edges of patches, broadseams, and leech belts, where there is a sharp transition from thick to thin cloth. For broadseam tearing, a repair using a triangular type of patch with a laminate structural patch on one side and staggered cover patches on one or both sides with sewing around the perimeter of the inner patch will do nicely.
For repairing tears around corner patches, it is common to extend the panels of the patch. This not only covers and reinforces the compromised area of sail, but it also moves the hinge point farther into the sail where the cloth still has integrity. Corner patches should always be offset on laminate sails to help prevent the kind of damage often found on clew patches.
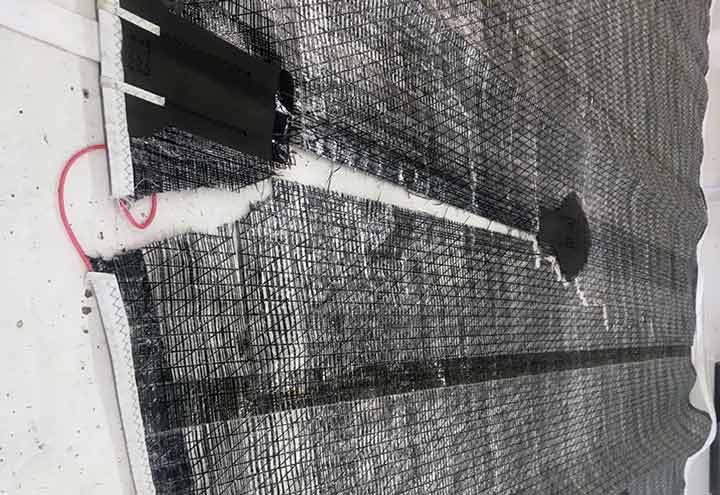
CHAFE PATCHES
Shroud chafe is a common sight on batten pockets and can usually be repaired with a little insignia or Dacron tape. Spreaders can also cause chafe and puncture holes in sails, so an insignia reinforcement patch should always be used wherever the sail comes in contact with standing rigging or stanchions. Insignia tape is versatile and can be used effectively and with minimal weight gain on nearly every cloth type.
LUFF TAPE PATCHES
Luff tape patches are another common patch, in this case made to a sail’s luff tape. Both racing and cruising sails see luff tape wear at high-load areas such as the head, batten pocket locations, and reefs. On larger racing yachts, a strong reinforcing tape is needed to withstand the heavy chafe they see on their mainsail luff tape. A cloth like Hydranet, cut on the bias and sewn on to high chafe areas, will take a lot of abuse and save your luff tape from being chewed up beyond repair. Spectra and Kevlar cloths are also good to use for this purpose as long as they are cut on the bias to ensure that both fibers will be working. On cruising headsails, the section of luff tape at the head often needs to be repaired due to UV exposure which breaks down the fibers in cloth over time. The tolerances are so tight on many furling forestays that lighter cloth like insignia needs to be used for this repair to ensure the boltrope will still fit.
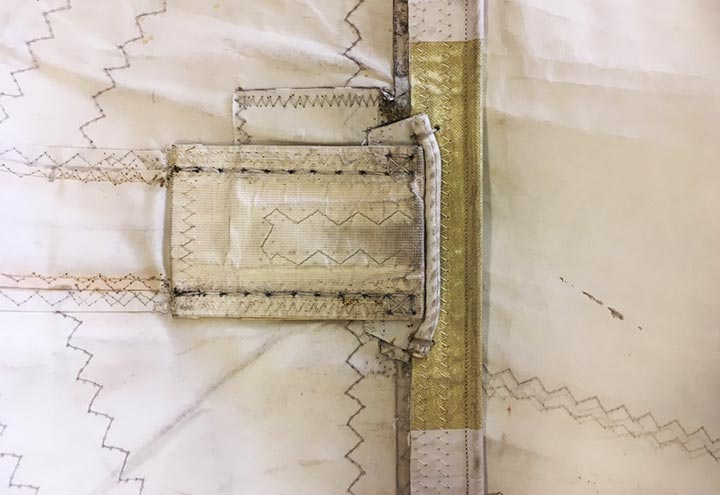
A COMMON WEAR POINT
A nicely placed Kevlar patch makes this luff good as new.
LEECH BREAKDOWN
The leech of an upwind sail can break down over time, particularly with laminate racing sails. A great way to strengthen the edge of the leech on lightweight laminate sails is to apply a larger insignia belt cut into a wave formation rather than a straight cut. This eliminates any future hinge point. Often a recut and wave insignia is all your leech needs to get it flying correctly again.
IT LOOKS A LOT WORSE THAN IT IS
Even gnarly damage like this can be repaired.
A few layers of material strategically ultrabonded over the damage and the sail is ready for use again.
With the right tools and know-how, almost any repair can be made to a sail as long as the cloth still has sufficient integrity. Some smaller repairs can be made onboard , while larger repairs will require the use of a loft and qualified sailmaker to breathe life back into your sail. For offshore cruisers, I highly recommend having a well-equipped repair kit to make emergency repairs. Check out our offshore repair kit checklist or call your local Quantum loft and they can help you assemble the right kit for your needs.
The Discussion

Us, too. We pour that passion into each of our newsletters to help you enjoy sailing even more.
- Forums New posts Unanswered threads Register Top Posts Email
- What's new New posts New Posts (legacy) Latest activity New media
- Media New media New comments
- Boat Info Downloads Weekly Quiz Topic FAQ 10000boatnames.com
- Classifieds Sell Your Boat Used Gear for Sale
- Parts General Marine Parts Hunter Beneteau Catalina MacGregor Oday
- Help Terms of Use Monday Mail Subscribe Monday Mail Unsubscribe
How to repair worn screw holes in fiberglass?
- Thread starter hdhr289
- Start date Jan 30, 2015
- Forums for All Owners
- Ask All Sailors

Looking for "how to" advice... The screws holding one of my bimini stainless mount brackets to my cabin top have pulled from the fiberglass. What is the best way to repair so I can reattach the bracket with screws? Should I just fill holes with gel coat then redrill pilot holes and attach again with screws and 4200/5200? Would filling the holes just with 4200/5200 and a couple wooden toothpicks to give the screws something more to bite into be a good idea? Would applying either 4200 or 5200 between the entire surface of base of stainkess bracket and fiberglass cabintop before reinstalling screws be recommended?
Fill the holes with epoxy thickened with colloidal silica, let cure and redrill.

mitiempo said: Fill the holes with epoxy thickened with colloidal silica, let cure and redrill. Click to expand

Maine Sail has a great "How-To" here: http://www.marinehowto.com/ scroll down to the one on sealing deck penetrations to prevent rot.. Works fine for loose holes. Another member had posted a similar method using a piece of heavy wire with a 90 deg bend on the end, chucked in a drill to hog out the core around the hole without enlarging the hole further.. I don't remember who posted it..
svchickadee
Use bolts instead of screws if possible.

svchickadee said: Use bolts instead of screws if possible. Click to expand

Ken13559 said: What is colloidal silica? Click to expand

Most 'screws' used on boats are 'wood screws' ... that can easily tear out of fiberglass. Before you go to the bother of 'filling' the holes ..... go to a hardware store and seek out 'sheet metal' screws that exactly match the 'head size' of your pulled out wood screws. You'll find that such sheet metal screws have a thicker/larger diameter at the threads, more open spaced threads, threads that run all the way from the tip to 'flush with the head" (many wood screws do not - they have a 'shoulder' or missing section of threads AT the head). The 'fit' will be tighter, you wont have to drill new holes, and wont be as vulnerable to 'tearing out' of the fiberglass.
I have never really understood the fascination with wood, or even sheet metal screws in fiberglass. I always wondered why one could not find something like a drywall anchor in stainless or nylon that would expand behind the fiberglass. Wouldn't that provide stronger holding power, use a machine screw, and be removable and reusable? I have seen them in nylon, but not stainless. The nylon ones don't seem to stay tight against the back when the screw is removed like the zinc anchors do, but zinc plated is not suitable for the marine environment.

Allan12210 said: Also called Micro balloons. Very light weight, micron size silicon dioxide spheres used to thicken and strengthen epoxy. Click to expand
Machine screws and self-tapping screws can actually work well, within proper limits. The FRP must be thick enough. Machine screws, for example, must be at least 1/4", course thread, and threaded through 2x diameter of high density FRP. That done, they will break before pulling out. Unfortunately, they are generally used poorly. That said, bolts are simpler and dependable.

hdhr289 said: Looking for "how to" advice... The screws holding one of my bimini stainless mount brackets to my cabin top have pulled from the fiberglass. What is the best way to repair so I can reattach the bracket with screws? Should I just fill holes with gel coat then redrill pilot holes and attach again with screws and 4200/5200? Would filling the holes just with 4200/5200 and a couple wooden toothpicks to give the screws something more to bite into be a good idea? Would applying either 4200 or 5200 between the entire surface of base of stainkess bracket and fiberglass cabintop before reinstalling screws be recommended? Click to expand
Rick Templeton
Any time you are able to access the area behind the fiberglass it is best to add a wood backer plate. I coat the wood with epoxy and attach it the inside with another coat. When it sets you can fill and redrill the hole. With the wood backer the fastener will hold much better. If I can't reach the area behind the fiberglass I use a hollow space anchor called a rivnut. They are a tubular insert that are placed into the the hole with a type of plier tool. Once inserted the pliers are squeezed together and the cylinder is collapsed leaving a ballooned bulb behind the fiberglass and a rim around the outside. The tool is removed leaving a threaded insert behind which will receive a bolt. I always use locktite on the bolts when they are installed. You can pick up a set at any upper scale hardware store for around 80$.
I'm trying to secure the wooden covering at V berth under anchor locker. No access to back when cover is mounted. Its either i fill the enlarged fibreglass holes with epoxy or glue a hard wood behind the hole so the wood screw cab bite the backing wood i.s.o. fibreglass. Can I use JB Weld epoxy to stick the wood to fibreglass? Its a very strong 2 part epoxy.

Rubber Anchor The forward deck grab rails on our P42 were leaking rain water into the forward cabin and a couple of screws were not holding. Removed the rails, cleaned the holes and used a rubber expanding anchor nut similar to the metal ones people use in sheetrock. These anchor nuts are designed for the industrial environment. I did not want to cut open then close up the headliner to place a backing plate. I rebedded the rails with 3M-4200 and used those rubber expanding nuts to secure them to the deck. That was eight years ago. Very strong holding and no leaks. See link below. http://www.lsengineers.co.uk/12-x-75-rubber-nut.html
gettinthere
West systems 610 epoxy is a nice choice for this application. If you use the tip, its a one shot deal. I use popcicle sticks to 'slice' off a bit of each part of the epoxy and then mix it up before applying. Has held some wood screws into fiberglass under quite a bit of load.
gettinthere said: West systems 610 epoxy is a nice choice for this application. If you use the tip, its a one shot deal. Click to expand
mitiempo said: You can buy extra tips inexpensively. Click to expand
Mounts for Biminis and dodgers can have a lot if stress on them (thunderstorm winds). Because of this I would recommend not using shirt cut repair using toothpicks, plastic mollys. They won't be full strength and they will like allow water ingress and bigger longtime issues. One of the replies mentioned thickening epoxy mix with 'micro balloons'. While micro balloons are routinely used to thicken epoxy... this type of mix makes the epoxy much softer/ weaker/ and definitely not for strength applications. The micro balloon mix is usually used where you will need to do a lot of shape sanding/ fairing and no major stresses expected. Straight epoxy is very strong but rather brittle by itself and can easily crack under stress. It's the strength medium like fiberglass that gives the epoxy mix it's great overall strength properties. In small repairs you can't fit the usual fiberglass cloth. So fill stripped screw holes with epoxy mix & cut up fiberglass threads from scrap fiberglass cloth. First root out any soft core under the surface decking described in another reply and fill with your mix. Then tape over with painters tape if it's on a angle to keep it from running out. I use fast epoxy which still takes 30-60 minutes to fire off. (Preheating the Part A and Part B and the repair area to slightly warm to the touch will significantly speed up the curing time).
- This site uses cookies to help personalise content, tailor your experience and to keep you logged in if you register. By continuing to use this site, you are consenting to our use of cookies. Accept Learn more…

- Boat Accessories
- Where to Buy
Special until March 31st: 40% off Teak Deck Sealant for the month of March. Use Code MAR24 at checkout. *restrictions apply
Free ground shipping in the Continental US for any orders over $150!
Sailboat Hull Repair Guide...
Sailboat hull repair guide.

A dent or hole in your sailboat’s hull can feel like damage to the entire boat. But if your hull is made from fiberglass, you may have more options than you initially thought. We put together this sailboat hull repair guide to help!
Step One: Preparation

Liquid LifeSeal® Sealant 5.2 fl. oz. Clear

Stainless Steel Cleaner 16 fl. oz.
Related blogs, thanksgiving trivia.
Thanksgiving is one of America’s oldest and most loved holidays. Even though the story is steeped in a dark history […]
Detailing Your Boat
There’s nothing better than hitting the water in a beautiful boat. A warm summer day with the sun shining, there’s […]
How To Properly Clean Your Boat Trailer
We all know that cleaning your boat is important to not only keep it looking great, but to also ensure […]
All products proudly made in the usa
Service Locator
- Angler Endorsement
- Boat Towing Coverage
- Mechanical Breakdown
- Insurance Requirements in Mexico
- Agreed Hull Value
- Actual Cash Value
- Liability Only
- Insurance Payment Options
- Claims Information
- Towing Service Agreement
- Membership Plans
- Boat Show Tickets
- BoatUS Boats For Sale
- Membership Payment Options
- Consumer Affairs
- Boat Documentation Requirements
- Installation Instructions
- Shipping & Handling Information
- Contact Boat Lettering
- End User Agreement
- Frequently Asked Questions
- Vessel Documentation
- BoatUS Foundation
- Government Affairs
- Powercruisers
- Buying & Selling Advice
- Maintenance
- Tow Vehicles
- Make & Create
- Makeovers & Refitting
- Accessories
- Electronics
- Skills, Tips, Tools
- Spring Preparation
- Winterization
- Boaters’ Rights
- Environment & Clean Water
- Boat Safety
- Navigational Hazards
- Personal Safety
- Batteries & Onboard Power
- Motors, Engines, Propulsion
- Best Day on the Water
- Books & Movies
- Communication & Etiquette
- Contests & Sweepstakes
- Colleges & Tech Schools
- Food, Drink, Entertainment
- New To Boating
- Travel & Destinations
- Watersports
- Anchors & Anchoring
- Boat Handling
How To Repair a Fiberglass Boat
Advertisement
Few things are more disheartening to the boat owner than staring at the fuzzy edge of broken fiberglass. However, the repairability of fiberglass is one of its best characteristics. The most horrifying hole in a fiberglass hull is quickly healed with a bit of glass fabric, a supply of resin, and equal parts skill and care. And the repair is less patch than graft — a new piece of skin indistinguishable from the old.
Fiberglass lay-up is nothing more than layers of glass fabric saturated with polyester (or epoxy) resin, yet most boatowners imagine a self-applied repair as only slightly more durable than a wet Band-Aid. This is a false concern. Follow a few simple rules and your lay-up will be just as durable as the rest of the boat.
Cut Away the Damage

Impact damage nearly always results in some associated delamination. Tap the impact area with the end of a plastic screwdriver handle to determine the extent of the damage; solid laminate sounds sharp, delamination dull. Check inside the boat to make sure nothing is in the way, then make a circular or oval cut to remove the damaged area. Never try to save damaged fiberglass; always cut it out and replace it with new laminate. Check all the edges and enlarge the hole if you find any additional delamination.
Working from Inside
If the damage area is small and above the waterline, make the repair from inside the hull, if possible. You are going to bevel the edge of the hole with a 12-to-1 chamfer, so if you repair a 3-inch diameter hole through a 1/2-inch-thick hull from the outside, you end up with about 15 inches (diameter) of surface damage to refinish. Repair it from the inside and you have only a 3-inch hole to refinish.
A second reason to make the repair from the inside is that you can back the hole on the outside with a polished surface, creating a mold that allows you to lay-up the repair the same way the boat was built--gelcoat first. Very little finish work will be required.
Before grinding, always wash the area around the hole thoroughly with a dewaxing solvent. The original fiberglass will have traces of mold release on the outer surface and wax surfactant on the inner surface. If you fail to remove the wax first, grinding will drag it into the bottom of the scratches and weaken the bond.
During the lay-up process, because each layer is applied before the previous one fully cures, each application of resin links chemically with the previous one to form a solid structure--as though all the layers were saturated at once. Unfortunately, no matter how strong the laminate-to-laminate bond, the initial bond of any repair is mechanical, not chemical. Consequently, grinding is the key to getting a strong repair.

Use a disk sander loaded with a 36-grit disk to grind a 12-to-1 bevel around the perimeter of the hole inside. Also grind a rectangular area of the inner surface a few inches beyond the bevel to accommodate a finishing layer of cloth. Protect your eyes with goggles and your lungs with a good dust mask. Long sleeves will reduce skin irritation. Tilt the sander so that only one side of the disk is touching the surface and the dust is thrown away from you. After you brush away the dust and wipe the area with an acetone-dampened rag, the sanded surface should have a uniform dull look.
Mask and Mold
To prevent any resin runs from adhering, give the exterior surface of the skin around the hole a heavy coat of paste wax, taking care not to get any on the edge or inside the hole. Mask the area below the hole.
Cut a scrap of smooth plastic laminate (Formica) or thin clear acrylic (Plexiglas) a foot larger than the hole. Wax this backer, then spritz it with polyvinyl alcohol (PVA) mold release. Screw or tape the backer to the outer surface. If the hull is flat or curving in only one direction in the damage area, the backer will assume the correct curve. If the hull is spherical, i.e. curving in two directions, acrylic screwed to the hull can sometimes be coaxed into the correct shape if warmed with a heat gun (before applying the mold release).
Cut sufficient fiberglass fabric to fit the hole. Unless you have reason to follow a different schedule, begin with two layers of 1 1/2-ounce mat, then alternate mat and 6-ounce cloth. The number of laminates will be determined by the thickness of the hull; you will roughly need one layer for every 1/32 inch. Cut the first layer of mat the full size of the ground depression, then cut subsequent pieces about an inch smaller. This order of largest piece first, then progressively smaller pieces is how you are going to apply the new fabric. We do it this counterintuitive way, particularly with polyester resin, because it maximizes the area of the secondary bond, the adhesion of the new cloth to the old laminate.
Using Polyester or Vinylester Resin
For above-the-waterline repairs you can use either polyester or vinylester resin. Of course, for an even stronger repair you can also use epoxy, but not if the surface of the repair will be gelcoat. (You should use epoxy for underwater repairs.)
If you are doing your repair with polyester or vinylester resin, you need laminating resin. Laminating resin does not fully cure while exposed to air, which allows you to get a chemical bond between the multiple laminates you will be applying. To get the final laminate to cure, you simply seal it from the air, either with a plastic or by coating it with polyvinyl alcohol (PVA) mold release.
The catalyst for both polyester and vinylester resin is methyl ethyl ketone peroxide, or MEKP. Do not confuse MEKP with the common solvent MEK; they are not the same.
Polyester resin usually requires 1 to 2 percent of hardener by volume (follow the manufacturer's instructions). As a rule of thumb, four drops of hardener will catalyze 1 ounce of resin at 1 percent. Be certain to stir the catalyst in thoroughly or part of the resin will be undercured, weakening the lay-up.
You can adjust the cure time by adding more or less catalyst. Temperature, weather, and the thickness of the laminate all affect curing times. Some experimentation is generally required. The mix shouldn't kick (start to harden) in less than 30 minutes. Hardening in about two hours is probably ideal, but overnight is just as good unless the wait will hold you up. Always err on the side of too little catalyst; if you add too much, the resin will "cook," resulting in a weak lamination.
Gelcoat is essentially pigmented polyester resin. Start the repair by spraying or brushing about 20 mils of color-matched gelcoat onto the waxed backer. Check the gelcoat thickness with a toothpick; 1/32 is about 30 mils.
When the gelcoat kicks, wet it with polyester resin and lay-up the first two layers of mat and one layer of cloth, compressing them against the gelcoat and working out all voids and bubbles with a resin roller and/or a squeegee.

Let the first three plies kick, then lay up four additional plies. Never lay up more than four plies at a time or the generated heat may "cook" the resin and weaken it. Continue the lay-up four plies at a time until the repair is flush with the interior surface.
For a finished look, cut a rectangular piece of mat and one slightly larger of cloth and apply these over the patch, smoothing them with a squeegee. Seal this top layer with plastic or PVA to allow a full cure.
Remove the backer from the exterior surface. Fill imperfections in the new gelcoat with gelcoat paste and allow it to cure fully. Clean the area around the patch, then sand, if necessary, and polish the repair area.
Related Articles
The truth about ceramic coatings for boats.
Our editor investigates the marketing claims of consumer-grade ceramic coatings.
Fine-Tune Your Side Scan Fishfinder
Take your side-scanning fishfinder off auto mode, and you’ll be spotting your prey from afar in no time
DIY Boat Foam Decking
Closed-cell foam flooring helps make boating more comfortable. Here’s how to install it on your vessel
Click to explore related articles
Contributor, BoatUS Magazine
Don Casey has been one of the most consulted experts on boat care and upgrades for 30 years, and is one of the BoatUS Magazine's panel of experts. He and his wife cruise aboard their 30-footer part of the year in the eastern Caribbean. His books include Don Casey's Complete Illustrated Sailboat Maintenance Manual, and the recently updated This Old Boat, the bible for do-it-yourself boaters.
BoatUS Magazine Is A Benefit Of BoatUS Membership
Membership Benefits Include:
Subscription to the print version of BoatUS Magazine
4% back on purchases from West Marine stores or online at WestMarine.com
Discounts on fuel, transient slips, repairs and more at over 1,200 businesses
Deals on cruises, charters, car rentals, hotel stays and more…
All for only $25/year!
We use cookies to enhance your visit to our website and to improve your experience. By continuing to use our website, you’re agreeing to our cookie policy.
Repairing Fiberglass On Boats (Complete Beginner’s Guide)

Fiberglass boats are arguably the best kind of boats you can own. They’re lightweight, fun to use, and easy to maintain.
They’re even easy to repair, and in this post on repairing fiberglass boats, we’ll tell you exactly how to do just that.
Let’s get started!
Table of Contents
Fiberglass Basics You Should Know

Fiberglass is a wonderful material that can be used to repair all sorts of things.
Learn how to work with fiberglass, and you can repair boats, vehicles, bathtubs, and many other items.
You can even learn to create your own parts, canoes, and even coolers. An entire lifetime could be spent learning how to build and repair things using fiberglass.
But first, you need to know how fiberglass works as well as what it is. Fiberglass by itself is just a sheet of glass fibers woven or matted together. By itself, it is not hard, waterproof, or useful for anything.
However, once you apply a chemical resin to the fiberglass, it becomes waterproof, hard, and incredibly durable. It also remains lightweight, which makes it great for applications such as aircraft, automobiles, and boating.
The type of resin you use, the type of fiberglass you use, and the core material you use will determine just how hard and durable the constructed fiberglass becomes.
Types of Fiberglass Cloth
There are many different types of fiberglass cloths out on the market today.
Some of these cloths include chopped strand mat, biaxial mat cloth, woven roving cloth, continuous roving cloth, carbon fiber cloths, and the list goes on and on.
This being said, there are two types of fiberglass cloths that you’ll be working with:
- Fiberglass fabrics, or cloths
- Fiberglass mat.
The fiberglass fabrics will be your main structural material, but you may end up using a fiberglass mat to help you work around turns and to help waterproof low-stress areas like the live wells.
With these fabrics, you’ll also have different weights.
These weights will help determine how thick and strong the material is. Popular boating fabric weights are 10 ounces, 6 ounces, 4 ounces, and 1.5-ounce cloths. These fabrics are sold by the yard and generally come in widths between three and five feet.
The type of fiberglass fabric you choose will be determined by the application you’re using it for.
Also, lighter cloths can be applied in multiple layers, so if you need more reinforcement, you can always combine a 4-ounce cloth and a 6-ounce cloth in two different layers to provide the thickness and strength of a similar 10-ounce cloth.
Types of Resin
There are a lot of different resins out on the market these days, but the two you’ll most likely be working with are either epoxy resin or polyester resin. Epoxy resin is more expensive than polyester resin, but it is often considered stronger. It is also more versatile as the epoxy resin will bond well over polyester resin, but polyester resin may not work well over an epoxy.
This being said, different epoxy materials will work better with different core materials.
For example, the polyester resin will melt some foams and plastics. I found this out the hard way when I mixed some epoxy resin up in a plastic cup. The resin started leaking right through the bottom of the cup, and I was very thankful that I had decided to play with the fiberglass outside.
Some other types of resin you might run into are polyurethane resin and silicone resin. These resins are even more expensive than epoxy resin, and it doesn’t really make sense to use them for boat repairs anyway.
Core Materials
The core material is just the material that is encapsulated by the fiberglass cloth and resin. Core material on boats is usually balsam wood or a foam core. However, almost any material can become a core material.
For example, I’ve applied several different types of fabric with polyester resin over the top of pieces of cardboard. The fiberglass and resin are so strong that it turns the cardboard into a hard shell that you can use to make many different things, including small boats.
If you ever need to do a small one-off project that does not require structural support, think about using cardboard as a cheap and easy alternative to creating a mold or using traditional core material.
This being said, your best bet is to use a core material that is meant for your particular application. For obvious reasons, being out on the water in a damaged balsa wood and fiberglass boat is a whole lot safer than being out there in a damaged cardboard boat.
Also, keep in mind that you don’t always need a core material. Sometimes you can create a mold that simply holds the fiberglass and resin together until they dry and become components themselves. Many fiberglass hulls are built using molds that consist of a thick layer of fiberglass and resin, and they are designed to be very strong with many layers of built-up woven fabrics and mats with no core material.
Camper shells are also built this way without any core material. If you’re curious about what this looks like, just do a quick search for fiberglass campers on this website, and you’ll see plenty of examples.
When you’re doing repairs on an existing fiberglass boat, you may not be using any core material either.
This is especially true if you’re just repairing a crack or hole in a non-load-bearing area. In this case, you’ll just be applying cloth over the crack and sealing it with resin.
How Is The Fiberglass Applied?
There are a few different ways that fiberglass can be applied.
- Roll it on with a paint roller
- Paint it on with a brush
- Spray it on with a spray gun.
When doing fiberglass boat repairs, you’ll most likely be painting or rolling it on in small batches.
The way you’ll do this is you’ll mix up a small amount of resin that you can successfully paint on over the fiberglass within about 15 to 20 minutes. This is about how much time you’ll have before the resin begins to dry and harden. If you mix too much resin, you’ll end up wasting it, so it’s important to start small until you get a feel for working with it.
Also, keep in mind that all of your fiberglass should be laid out over the area you’re repairing before you begin mixing your resin.
Once your resin becomes active, you won’t have time to go back and cut out pieces of fiberglass.
General Tips for Working with Fiberglass

As we alluded to earlier, fiberglass must be mixed before it can become active. This is usually done with a hardener. The manufacturer will tell you just how much hardener needs to be added to the resin.
Gel coats can also be added to the resin, but this shouldn’t be done until you are on your final layer.
If you apply the gel coat too early, you’ll end up having to sand the layer down before you can add any additional layers.
Also, keep in mind that fiberglass resins are meant to be used at different ambient temperatures. If the temperatures are too high or too cold, the resin will not cure properly.
You’ll know the resin didn’t cure correctly if the fiberglass feels tacky afterward.
Safety Tips for Working with Fiberglass
Fiberglass resins and hardeners can be toxic, and it’s important to keep them off of your body and out of your lungs.
Personally, I only work with fiberglass outside, but any well-ventilated area will do.
Also, if you’re working with polyester resin, you’ll want to wear a respirator. Not only is polyester resin toxic to breathe, but it smells awful. The smell is so bad that I won’t even leave the closed bottle of polyester resin inside my house for fear that it will make the house smell bad.
You don’t want to get resin on your skin or your eyes either. Wear protective clothing, gloves, and safety glasses to prevent this from happening.
For additional protection, you can also get a lotion that will work to coat your hands. This way, if the resin gets through your gloves, you’ll have an extra layer of protection between the resin and your skin. If the resin does end up getting on your skin, be sure to wash it off immediately.
People have been known to develop allergies to epoxy resin, and once you get this allergy, you’ll never be able to be around epoxy resin again.
Fiberglass Buying Tips
- Always buy fiberglass by the roll. Unfortunately, many people will try to sell you folded pieces of fiberglass because it is cheaper and easier to pack, ship, and store it this way. Sadly, folding fiberglass cloth can weaken the strands, so when you buy fiberglass that is folded, you’re buying cloth that is already damaged.
- Buy the hardener with the resin. It’s always easier just to buy the hardener and gel coats with the resin. Different resins will need different amounts of hardener, and the manufacturer will usually sell the two as a kit.
- Get good mixing cups. A poorly mixed resin will not work properly. Get good mixing cups so that you can accurately mix the resin and get the most benefit from it.
- Buy it locally (at first). A local marine store owner can often offer you valuable tips for working with fiberglass, and they can help tell you where you went wrong when you run into trouble. You’ll probably end up paying a bit more for your resin, but you’ll often end up with some good and free advice.
- Buy the right fiberglass for the job. When you go to buy fiberglass, you’ll notice right away that chop strand mat is dramatically cheaper than all of the other types of fiberglass. There is a reason for this. Fiberglass mat is not very strong, and it can be difficult to work with. Only use fiberglass mat when the job specifically calls for it. Resins are expensive, so there isn’t any point applying them over inferior fiberglass cloths.
Repairing The Hull
Before you decide to repair your own boat hull, you may want to do a reality check.
Is the boat hull severely damaged? Is your boat an ocean vessel that is going to be put under a lot of stress?
If you answered yes to these questions, you might want to save this project until you have a lot more experience with fiberglass repair. In this situation, a bad repair job could put your life in jeopardy, so the money you save will never be worth it.
This being said, there are a lot of small hull repairs that you could tackle yourself without much risk. For example, a small hole in a small boat that you only take out on the lake shouldn’t be too much for you to handle. Small cracks or holes in the areas above the water line might not be a big deal either, but please use your best judgment.
Repairing Holes in The Hull
To repair a hole in the hull, you may need to get some new core material. Try to match the new core material with the existing core material. Make sure the remaining core material is dry.
Once you have the core material, you’ll need to fit it into the hole. Next, measure and cut your fiberglass cloth. Lay the fiberglass over the area, using fiberglass tape if you have to. Once everything is in place, mix up your resin and apply it over the damaged area. You may need to do multiple layers.
For professional repairs of ocean-going hulls, the surrounding fiberglass is ground back on a slope of 1:12 to make a large area to be repaired; a 1/2″ thick fiberglass structure would be ground back 6″ in every direction from the hole.
The patch is then built-up with increasingly larger pieces of fiberglass mat and resin. Again, you need experience before trying this.
Your final coat should be a gel coat that matches the color of your boat.
Alternatively, you could repaint the boat after the repairs have been made.
Repairing Cracks
Be careful when repairing cracks in your hull, as they could be a sign of bigger structural issues.
For example, a balsa boat with cracks in it could have rotten wood inside the hull.
However, if you just see some cracks from when you accidentally backed into a tree last week, feel free to try to take on the repairs yourself. You probably won’t need any new core material, but you will need some fiberglass and some resin to patch up the crack.
Measure, cut, and layup your fiberglass before mixing your resin, and you shouldn’t have any trouble with the repair.
One thought to keep in mind with a repair like this is that you’ll probably spend more time sanding and painting than you will be doing the actual repairs. The more time you spend sanding, the better the boat will look when you’re done.
Repairing The Floor and Deck
The first thing you should do before making any repairs to the deck or the floors is to check to see how severe the damage is.
Often-times, decks and floors are made from wood, and if they are spongy or have holes in them, the wood is probably rotten underneath.
Before making any repairs to the fiberglass, you’ll need to take out this rotten wood and replace it. What seems like a small repair, in the beginning, can often end up being an extensive repair. If you don’t believe me, just look at all the free “project boats” listed on Craigslist.
Oftentimes you’ll see that the person giving it away received the boat for free himself, thinking that he could do the repairs and get a free boat.
Once he started to tear the boat apart, he realized just how much work and money would be needed and decided to give up on it.
Once you do know what you’re in for, start replacing the decking and flooring, making sure to keep the materials dry until they are encapsulated with new fiberglass and resin. Also, be sure to make a note of where the different pieces of hardware are connected to the deck, as you’ll need to put them back on when your repairs are complete.
If you’re careful, you can use the old decking that you pull off the boat as a template for creating your new decking.
Once your new flooring is complete, secure it to the boat and begin placing the fiberglass cloth over it. Be sure to use a good amount of fiberglass as the decking will need to be strong enough to support people walking over it. Mix up your resin and apply it in small batches.
If you have a large area to do, you’ll be tempted to make larger batches but don’t do this as you’ll only end up rushing the job or finding the resin sets up prematurely.
Flooring Alternatives
Another thought to keep in mind is that you don’t always need to replace your wood flooring with wood. Some people will skip the fiberglass altogether and simply install an aluminum floor instead.
This can be useful in certain applications but not very useful in others, so you’ll need to analyze your particular situation before you decide to make any changes.
If you do decide to skip the fiberglass, just be careful to find out what changes this will have on the weight of your boat. Making a heavier boat could reduce your boat’s max capacity and affect the way your boat sits in the water.
Repairing The Keel
The keel is an integral part of a boat. On a sailboat, the keel keeps the boat upright in the water and helps to keep it stable in heavy winds.
Being at the bottom of the boat leaves it much more vulnerable to scraping the ground and running into rocks. For this reason, a keel can often take damage even when the rest of the boat remains trouble-free.
The question is, do you want to repair this damage to the keel yourself?
If you have a small recreational boat that you can easily bring up on land, I’d say go for it. You can flip the boat over in your backyard and spend as much time as you need applying a new resin and gel coat to the keel.
For boats that you know will be scraping the bottom again, you may want to apply a keel guard as well. This will help protect your keel, so you don’t have to constantly make repairs each season.
Repairing The Transom
A solid transom will ensure that your boat’s engine doesn’t fall into the water. If you’re going to make this repair yourself, make sure you’re prepared to do it properly.
Oftentimes the core of the transom needs to be replaced, and you’ll want to make sure you replace it with a material that is as strong or even stronger than the original. This is especially true if you’ve upgraded the original boat engine to something bigger and heavier.
Once you’ve replaced the core material, the steps for making the repair remain the same.
Apply your fiberglass boat cloth and use as many coats of resin as you need to get the job done.
This repair includes a lot of hard edges, so you may need to overlap your layers of fiberglass at the top to get a good seal. Take your time and make sure the fiberglass wraps properly, or you’ll end up having to do a lot of sanding at the end of the job. Also, be careful to account for where the engine will be mounted so that you can match the hardware appropriately.
Repairing Hatches
Hatches are easy repairs, and they’re great for getting started with fiberglass.
When replacing a hatch, use the existing hatch to make a template for the new one.
The new hatch should be easy to make, and you won’t have to use a lot of thick fiberglass cloth since it won’t be the main structure of the boat.
The main thing to keep in mind when doing this repair is that the hatch will need to be sealed properly afterward. Oftentimes, people will do a great job repairing or replacing the fiberglass hatch, but they won’t seal it properly afterward, and they end with a leaky hatch.
Repairing Scratches
Scratches in the fiberglass usually don’t require extensive repairs, and the cost is usually minimal.
The reason for this is that the fiberglass does not need to be replaced, and the core material is not yet affected.
Unfortunately, some deep scratches in the gel coat can end up creating a lot of prep work. You’ll end up needing to do a lot of sanding to get the boat to look new again.
You’ll also need to do a good job matching the color.
If your boat is new, this may not be a problem, but if your boat has been out in the sun for a while, you won’t be able to use the original boat color as it will end up being too dark.
You’ll have to color match the boat, or you’ll have to resign yourself to painting the entire boat over again.
DIY Costs vs. Professional Costs
Doing repairs yourself will usually save you money, and they can sometimes even save you on time.
However, some jobs are too big to be done by beginners, and some jobs just take too much time for the DIY repair to be worth it.
I’ll try to give you a breakdown of some of the costs here so you can decide for yourself whether or not the repair is worth paying for or doing yourself.
Example costs from FiberGlassSite.com:
- 6-ounce fiberglass cloth 50” wide and 5 yards long. – $25.00
- 1 gallon of polyester resin with hardener. – $39.00
With this much cloth and resin, you could do a lot of small repairs of cracks and holes.
A simple hole or crack repair might cost you $50.00 each, so you’d definitely save money on smaller repairs, and you may even have some extra fiberglass left over for the future.
For a balsa core deck repair, you might want ¾ inch core. This costs about $50.00 for a 2’x4’ piece. You’ll also need a 10-ounce fiberglass cloth and polyester resin.
This repair might end up costing you a couple of hundred dollars, but it could save you a thousand.
Foam core used for repairing heavy damage to the hull of a sea-going vessel will need to be very strong. Not only this, but you’ll need to consult with a marine technician to determine what the best combination of foam, resin, and fiberglass should look like.
Between material costs and consulting costs, you’ll end up spending thousands of dollars. You’ll also end up spending a lot of time, and you may devalue the worth of the boat since a buyer might not feel safe buying a boat that was repaired by an amateur.
In this case, you may be better off paying a professional boat repair company to do your repairs.
Final Thoughts
Working with fiberglass can be tricky, but it can also be a lot of fun.
Learn how to work with fiberglass, and you’ll find an almost endless number of projects to take on.
Just keep in mind that working with fiberglass is not cheap or easy to get into. If you decide to take on fiberglass projects, be prepared to spend some time and money doing so.
Also, be prepared to mess up a few projects while you’re learning.
Click to share...
Step-by-Step Guide to Repairing Your Fiberglass Boat: From Small Holes to Structural Issues

Fiberglass boats are a popular choice for recreational boaters due to their durability and longevity, but even the toughest boats can experience damage from time to time. Whether you have a small hole from a stray rock, a drilled hole from installing hardware, or a larger structural issue, repairing a fiberglass boat can seem daunting. But with the right tools, materials, and a step-by-step approach, anyone can make a successful repair.
In this comprehensive guide, we will walk you through the process of repairing your fiberglass boat, from cleaning and sanding the surface, to applying fiberglass filler, gelcoat, and more. Whether you’re repairing a small hole or a large structural issue, we’ll provide you with the knowledge and techniques you need to make a professional-looking repair that will help extend the life of your boat. So, let’s get started!
Fiberglass boats are a popular choice among boaters due to their durability and lightweight nature. However, with time, use and exposure to the elements, your fiberglass boat may start to show signs of wear and tear, such as cracks, holes, and dings. In this blog post, we’ll take a look at the steps involved in repairing the bottom of a fiberglass boat, repairing a drilled hole, repairing a screw hole, and repairing large and small holes in the fiberglass boat hull.
Table of Contents
Repairing the Bottom of a Fiberglass Boat
- Clean the area: Start by thoroughly cleaning the damaged area with soap and water to remove any dirt, grease, or oil. Use a solvent-based cleaner if necessary to remove any stubborn stains.
- Sand the area : Use sandpaper to rough up the surface around the damaged area. This will help the repair material adhere better to the surface.
- Fill the area : Use a two-part epoxy resin to fill the damaged area. Mix the two parts according to the manufacturer’s instructions and apply a thin layer to the bottom of the boat using a putty knife.
- Smooth the surface: Use a plastic spreader to smooth out the surface of the epoxy resin. Make sure the surface is level and flush with the surrounding area.
- Sand the surface : Once the epoxy resin has cured, sand the surface to make it smooth and level with the surrounding area.
- Apply gelcoat : If the gelcoat on your boat is damaged, apply a fresh layer to protect the repair and give the boat a smooth finish.
Repairing a Drilled Hole in a Fiberglass Boat
- Fill the hole: Use a two-part epoxy resin to fill the drilled hole. Mix the two parts according to the manufacturer’s instructions and apply a thin layer to the hole using a putty knife.
- Smooth the surface : Use a plastic spreader to smooth out the surface of the epoxy resin. Make sure the surface is level and flush with the surrounding area.
Repairing a Screw Hole in the Boat Hull
- Clean the area : Start by thoroughly cleaning the damaged area with soap and water to remove any dirt, grease, or oil. Use a solvent-based cleaner if necessary to remove any stubborn stains.
- Fill the hole: Use a two-part epoxy resin to fill the screw hole. Mix the two parts according to the manufacturer’s instructions and apply a thin layer to the hole using a putty knife.
- Sand the surface: Once the epoxy resin has cured, sand the surface to make it smooth and level with the surrounding area.
Structural Fiberglass Repair
- Apply fiberglass mesh : Cut a piece of fiberglass mesh to fit over the damaged area and lay it over the surface. Use a two-part epoxy resin to cover the mesh and fill any gaps.
Repairing Fiberglass Boat Hull from the Outside
- Apply fiberglass cloth : Cut a piece of fiberglass cloth to fit over the damaged area and lay it over the surface. Use a two-part epoxy resin to cover the cloth and fill any gaps.
Repairing Large Holes in Fiberglass
Repairing small holes in the fiberglass boat hull.
- Apply fiberglass filler : Mix a small amount of fiberglass filler and apply it to the damaged area using a plastic spreader. Make sure the filler is level and flush with the surrounding surface.
- Sand the surface : Once the fiberglass filler has cured, sand the surface to make it smooth and level with the surrounding area.
In conclusion, repairing a fiberglass boat can seem intimidating, but with the right knowledge and approach, it can be a simple and rewarding process. Whether you have a small hole, a drilled hole, or a larger structural issue, by following the steps outlined in this guide, you can make a successful repair that will help extend the life of your boat and keep it looking great.
It’s important to remember that a proper repair starts with proper preparation, so take the time to clean and sand the surface, and use high-quality materials to make sure your repair is strong and durable. With a little patience and attention to detail, you’ll be able to make a repair that will make your boat look and perform like new. So, grab your tools and get started on your next fiberglass boat repair project!
Emily Smith
Emily Smith is a passionate sailor and travel enthusiast, who has spent the last 8 years exploring the world by boat. From the tranquil waters of the Great Lakes to the roughest oceans, Emily has sailed it all and decided to share the knowledge on Sailingbetter.com blog. With a keen eye for detail and a talent for storytelling, Emily offers readers an insight into the thrilling world of sailing and the beautiful destinations it can take you to. When she's not out on the water, Emily calls Chicago, Illinois home and enjoys sharing her love for sailing with others. Join her on her journey as she continues to discover new horizons and inspire others to live life to the fullest.
Recent Posts
Lagoon vs Leopard Catamaran: Which Sailboat Is Right for You?
Introduction When it comes to cruising on the open waters, catamarans have gained immense popularity for their stability, space, and comfort. Two of the leading catamaran manufacturers, Lagoon and...
How to Determine Sailboat Weight: A Comprehensive Guide
Introduction Sailing is a thrilling and adventurous activity that has captivated humans for centuries. Whether you are a seasoned sailor or a novice looking to set sail for the first time,...
How to Fix a Hole on a Fiberglass Boat – Complete DIY Guide
Nothing can sink a boat faster than a hole, and even the smallest hole could sink a ship. This is hopefully not something every boat owner will need to worry about, but it is a good idea to know how to fix a hole on a boat just in case the unthinkable ever happens to you. If your boat springs a leak, you should take it out of the water right away and get it repaired before going back out.
This past summer I was having coffee with a friend I hadn’t seen since I was young, and I told him how I bought my first boat recently. He started to tell me a story that has been stuck in my head ever since he told it to me. He told me how a few summers ago his family rented a cottage with friends of his, and the cottage came with access to a boat down at the dock. One of the teenage boys in the group had taken the boat out and must have hit a rock or something, because the next day when they all went back down to the dock, there was about 8 inches of water in the boat. When the owner showed up he took the boat out of the water and pointed out stretches and a crack in the bottom left side of the hull. Needless to say, that man will probably never include his boat for strangers to use again.
How Much Does Fiberglass Repair Cost?
The cost to repair fiberglass and gelcoat will vary depending on how much damage is done. Typically this cost could range from $75 to $125, per hour in most places. Again depending on how severe the damage is, this could take anywhere from a few hours, to several hours. For example, chips and gouges can take a few hours, while an actual hole could take five to ten hours.
You can choose to repair the damage yourself, and in most cases, it’s a fairly easy, straightforward procedure. If you have all of the tools needed, you could probably fix the repair for about $30 – $60 depending on how severe the damage is.
Fiberglass Boat Repair Kit
Currently, Amazon is selling this repair kit for $34.26 as of the time I am writing this. Click here to check the current price.
What is Gelcoat For Boats?
The gelcoat on a boat is the outer surface layer on a fiberglass boat hull, which is designed to protect the bottom layers of fiberglass, and give your boat that color and shine finish. The gelcoat is made up of special polyester resin and fiberglass, or epoxy resin which is typically used with carbon fiber for extra strength and water-resistance.
Just like any other finish, gelcoat is prone to scratches, chips, and deterioration. You might notice that over time your gelcoat might start to show ‘spider web’ looking cracks which would indicate a weakness in the underlying fiberglass. Another problem you might notice with the gelcoat is blistering, which generally means that there is a water intrusion under the gelcoat itself.
Most of the time the repairs to gelcoat scratches, cracks, and chips are a pretty straightforward repair that can generally be fixed using a gelcoat paste. It’s an easy job that can be performed by almost anyone, and really only requires a repair kit. The trickiest part is the sanding and polishing that’s required to blend the area with the hull.
How Do You Get Scratches Out of Gelcoat?
If your scratches are on the surface of the gelcoat, then those can be buffed out using a polishing compound, but if the scratches are deep they’ll need to be filled in. Normally if the surrounding gelcoat is in good condition, you can use a gelcoat paste to fill in the scratches. Because the surface of the cured gelcoat paste will be uneven, you will need to sand and polish the repair area.
What you will need:
First, you are going to need a gelcoat paste that can be picked up in a repair kit for less than $35. The kit should come with the gelcoat paste and hardener, selection of pigments, mixing sticks, and sealing film. You will also need to buy a single sheet of 150-, 220-, 400-, and 600-grit wet-or-dry sandpaper, and a flexible plastic spreader if you don’t already have one.
Matching the color:
Matching the color is going to be the toughest part of the repair. Many experts can tell you that it’s very difficult to perfectly match the color on a boat that’s been in the sun for a few years. White is typically a little easier to try matching, it’s more different when you start to get into colored hulls.
You can get a color-sample card from your local paint supply store that best matches your hull. Once you know which color-sample best matches, you can then ask the store clerk for the color formula used to create this specific color blend. With that information, you can then try to recreate the same color combination using the tints that came in your repair kit.
Prepare the scratch:
Before you start to apply the gelcoat paste to the scratch, take a screwdriver and run it down the scratch to open it up a little wider into a V shape. The reason for this is because the gelcoat paste is very thin and if it’s applied over the scratch then it’ll just end up forming a bridge over the scratch leaving a void under the newly applied gelcoat paste.
Apply Hardener:
To apply the hardener, make sure to read and follow the manufacturer’s instructions. Typically as a general rule, four drops of hardener will catalyze one ounce of resin at one percent. It’s better to add too little than too much hardener. The mix shouldn’t start to harden in less than 30 minutes. Hardening should take about two hours.
Apply the gelcoat paste:
Using a flexible plastic spreader, begin to work the gelcoat paste into the scratch. While applying the gelcoat paste, keep in mind that polyester resin will shrink slightly as it cures, so you’ll want to have the paste stick out a little from within the scratch. Remember you will be sanding this once it’s cured so it’ll be okay to put a little extra on. Don’t put too much extra, because that’ll create extra work for you when sanding.
Cover the repair area:
Gelcoat does not fully cure unless it’s covered up with a plastic sheet. Your repair kit might have come with a plastic film that you’ll have to use to cover the repair area. If you didn’t receive a plastic film with the repair kit, you can use some Saran Wrap or a plastic sandwich bag. First start by taping one side down to the surface just beside the repair, then smooth out the plastic onto the gelcoat and tape down the remaining sides. Let the plastic sit for at least 24 hours.
Sanding and polishing:
Once you’ve waited over 24 hours, you can remove the tape and plastic. Using a sanding block and a sheet of 150-grit sandpaper, begin to sand out the new section of gelcoat. For this, you’ll want to take your time and make sure you are only sanding the new patch of gelcoat and not the old surrounding gelcoat surfaces. Using a sanding block will help you keep the sanding confined to the repair area.
Once the new gelcoat has been sanded down and it’s now flush, switch to 220-grit wet-or-dry sandpaper. Continue to wet sand the repair, keeping your sanding block flat the whole time. For this, you are going to have to keep a slow drizzle of water running on the sanding area, while you sand the repair in a circular motion. Every so often, stop sanding and take your finger and run it over the repair area feeling for the ridge. Stop sanding when you can no longer feel a surrounding ridge.
Without using the sanding block anymore, switch over to a 400-grit wet-or-dry paper. Begin to sand the repair some more using water, until the repair area has a uniform appearance. Switch to a 600-grit wet-or-dry paper and continue sanding with water trickling over the repair for just a little longer.
Dry the water off using a soft cloth. Use a rubbing compound to help give the gelcoat a nice high gloss look. Apply the compound over a soft cloth, and begin to buff it over the surface of the repair area with a circular motion, first by using heavy pressure, then gradually reducing the pressure until the surface becomes glassy looking. If you are still able to see swirl marks in the gelcoat, continue to buff them out using a very fine finishing compound.
Finishing touch:
Once you have finished buffing out the last of the swirl marks in the gelcoat, you can now give the area a waxing. If you were able to match up the color properly, then once you are finished, the repair area should be hard to detect.
Repair small hole in a fiberglass boat hull
Hole going right through fiberglass into the boat:
- First, examine the hole and look for cracks and chips extending out from the hole. Use a marker to circle the entire damaged area. Making sure to include the cracked spots.
- Next, take a saw and cut out the damaged area that you’ve circled with the marker.
- Now that the holes cut out, you need to determine the thickness of the hull substrate and multiply that by 10. This will give you a circumference around the hole that you’ll need to bevel down. Take a measuring tape and marker to outline that distance around the hole.
- Using a power sander with a 50 grit sanding disc, you can now bevel the whole edge out to your mark.
- Once you’ve finished bevelling the area, you now need to find something to go in behind the hole to block it. Some people use Ducktape for this or a piece of wood with plastic wrap over it.
You can now follow the steps below starting on #4 to patch up the hole.
Cracked couple layers of fiberglass, not quite through into the boat:
- Chip away any loose fiberglass from around the hole.
- Next, take a small grinder and smoothen the edges of the hole, as well as the exposed fiberglass.
- After you’ve ground the area, you should now be down to the solid laminate.
- Using a painters tape, place the tape around the hole to avoid getting access resin on other parts of the hull.
- Take a clear piece of plastic and place it over the hole. Now using a marker, trace around the edges of the hole. Next, come in a little from the edge and trace the outline out again. Finally once again, within that outline, coming in a little more, trace around the hole one more time. You should have 3 outlines of the hole, that will look like the rings on a tree stump.
- Next, cut out the larger outline first, and than trace that onto the new sheet of fiberglass. Once you’ve cut the fiberglass out, cut the next size outline out of the plastic and trace that on the fiberglass. Do this until you have all 3 outlines of the fiberglass cut out.
- Stack the pieces in the void that you ground out on the hull (putting the smallest size down first and working up) and check if the height will be good, or if you need to add one more layer. Most of the time you can get away with 3 layers, but adding an additional layer wouldn’t hurt. It would just mean extra sanding if it was too high.
- Next, mix up the vinyl ester resin and hardener in a small plastic container. Mix it up really good.
- Take a paintbrush and carefully wet each piece, front, and back.
- Take the pieces, one at a time and place them in the void. Start with the smallest size first and working up. Using your paintbrush, carefully spread them out getting rid of any air pockets or wrinkles caused by placing them down.
- After the last piece is added, remove the surrounding tape, then take some peel ply and place it over the repair. Using your paintbrush, carefully dab it around the peel ply and spread it out. Then let it sit for about an hour.
- After an hour, you can then take a sander and slowly sand the area smooth.
- Once you’ve finished sanding the repair, clean the area with some acetone.
- This is where things get a little tricky. Mix up a batch of gel coat, trying to match the existing hull color.
- Once you think you have the same color, it’s time to apply the paint to the repair spot. Using a spray nozzle is easiest.
- Once the gel coat is hardened, take some acetone and wipe the area clean.
- Finally, perform some wet sanding to the area to help transition the repair to the rest of the hull and give it that natural look.
Similar Posts

Should I Disconnect My Boat Battery – What I Learned
One of the questions that I have asked myself was whether or not I should be disconnecting the battery while my boat is not in use. What I found out was that, yes, you should disconnect the battery if your boat is stored on land, but if you store your boat in the water, then…

How To Get Rid of And Prevent Algae on a Boat
I have to admit; I didn’t know too much about algae until I began researching it. I figured if my son were going to be coming out on the water with me, then I’d better learn more about it and make sure it wasn’t going to be harmful to us. As it turns out, there…

Can a Boat Battery Get Wet
I was sitting here thinking about my batteries that I have stored on my basement floor for the winter and it got me wondering if the batteries could get wet if my sump pump stopped working and the basement flooded. Marine batteries can get wet, but water can corrode the terminals, so should be dried…

Trolling Fishing – A Complete Guide For Beginners
For a lot of people fishing is an art, and finding the right method to catch a lot of fish can definitely take a while. But then again some methods are better than others. In many cases trolling is widely known as one of the best ways to start fishing, but for some people, it’s…

Which Boat Seat is Right For You
When it comes to boat seats there’s more to them then you think. There are many different styles and levels of comfort to choose from, similar to how there are many different styles of couches or recliners you can buy for your living room at home. Picking the right seat for you depends on you…

Basic Boating Terms That Beginners Should Learn
It’s always fun and exciting to go on a boating trip, but this does come with its fair share of challenges. The idea is to know precisely how to control your boat and get it to the desired fishing location. That’s why it makes a lot of sense to learn as many boating terms as…
- (678) 322-7877
- 9605 Jot Em Down Rd. Gainesville, GA 30506.
How to Repair Boat Fiberglass
Did you know you can repair holes in the hull or deck of your fiberglass boat? To make these strong and to near cosmetic perfection, visit a shop that specializes in boat fiberglass and gelcoat repair. A DIY enthusiast can also achieve good results with fiberglass and gelcoat repair. Learn the techniques and materials that are used to get the best results.

A hole in the side of this Boat was permanently repaired to cosmetic perfection by choosing the right fiberglass materials and applying the proper repair techniques.
What is Fiberglass and What Gives Fiberglass Strength?
Fiberglass is from two components: resin and fiber. It is called fiberglass because the structural fiber used is actually woven with tiny flexible strands of glass. The fiber is then saturated with resin, stretched into place, and when it cures through a chemical reaction, the result is a hard and durable material. The strength of the fiberglass largely depends on the weight of the structural fabric that is used. There are different weave patterns to the fabric that render it useful for different applications. The resin component is either polyester resin or epoxy resin. Epoxy resin is stronger. If the repair area is large and is in a high-stress part of a boat below the waterline, epoxy resin is the superior choice. This is because it has excellent bonding properties to an existing surface and is strong. Polyester resin is commonly used. However, one drawback is that it shrinks as it cures and thereby diminishes its adhesive qualities. This shrinkage is insignificant in small repairs, even in high-stress areas. But because of the shrinkage and reduced adhesion, there are limitations to using polyester resin for large repairs in high-stress areas. However, outside of large structural repairs, polyester resin is the material of choice and is used in the bulk of fiberglass repairs.

For small fiberglass repairs, polyester resin is used in combination with mat or chopped cloth mixed in resin to make a sturdy repair.
Fiber Choices For Fiberglass Repair
The most common type of fabric is plain weave cloth. It is easily recognized as it is woven at 90 degrees, and it looks like cloth. It comes in different weights, and a thicker cloth is stronger. One limitation of plain weave cloth is that it doesn’t conform to complex shapes or curves. It’s best applied on an even plane. For complex shapes and compound curves that require strength, the best fabric is modified twill. Its weave appears to be diagonal, but in reality, it is also woven at 90 degrees and is a looser weave with flexibility. It can conform to complex shapes without wrinkling. The most flexible fabric is called a mat. It has hair-like strands going in every direction. Mat is bonded with glue that dissolves in polyester resin, enabling it to conform easily to complex shapes or compound curves. However, it has less strength and is often used in cosmetic applications unless built up in many layers. Lastly is a fabric called roving. This is a fabric that has course bundles of strands in its weave. It is a very heavy fabric for the strongest of applications. It will be used in combination with layers of mat to give a smooth final surface.

Structural fiberglass cloth and cosmetic mat are used in combination with resin to make a strong fiberglass repair.
Repairing a Hole With Fiberglass
When repairing a hole with fiberglass, repairs are best made by access from both the inside and the outside of the repair. However, access from the interior may not always be possible because a floor or interior wall may block access. If it’s a serious structural repair in a high-stress area, you’ll have little choice but to cut a hole through the floor or wall to access the inside of the repair. However, doing a repair from the outside only is possible for small repairs or repairs in low-stress areas. The first thing to do is assess the damage carefully by cleaning the exterior with acetone. This will make hairline cracks evident, and you’ll want to grind all the way back until the crack terminates. First, using a 4-inch grinder with 80-grit sandpaper, grind or cut away any broken material in the perimeter of the hole that lacks structural integrity. Then with the grinder, taper the edges of the hole using a 12:1 rule. That is, taper back the edge of the hole at an angle that is 12 times the overall thickness of the fiberglass material.
Checkout marine product sales online for all your boat repair equipment.

To repair a hole, use a 4-inch grinder and coarse sandpaper to grind away any broken material that lacks integrity. Then taper back the edges of the hole.
If it’s a repair from both the inside and outside, the taper will be centered on the thickness of the fiberglass and taper back on both inside and outside, resembling the cutting edge of an ax. If the repair is done from the exterior only, then the taper will start at the bottom of the thickness of fiberglass and taper toward the outside, resembling the cutting edge of a carpenter’s chisel. Next, after the taper from the edge of the hole outward is complete, grind back toward the perimeter to where the hairline cracks ended. Now the entire repair area has been defined. Repeat the same on the inside of the repair if you’re doing a two-sided repair. Clean all surfaces with acetone to be free of dust so the resin will adhere.
For a two-sided repair, next, you’ll cut a piece of fabric that extends to the outer margin of the repair. Mix up resin and hardener, and on a scrap piece of cardboard, lay your piece of fabric, and use a brush to saturate the cloth with resin. Turn the fabric over and coat the other side. Next, take the brush and apply resin to the interior repair area. Then carefully stretch the resin-soaked fabric over the hole, so it’s on a smooth plane and wrinkle-free. Use the brush to press out any air pockets, so the patch sits flat against the existing interior surface. Once the interior fiberglass patch has been set up and is somewhat hard, have already cut a piece of cloth or several layered pieces of cloth that will fill the thickness of fiberglass to near the surface plane of the exterior. The outermost layers will be a resin-soaked mat, so it will be smooth and not show the texture of the cloth.
Let the patch dry. Once it is dry, grind down the high spots with 80-grit sandpaper until it is on the plane with the finished surface. At this point, clean off the sanded area, and assess the low spots. If there are still high spots, continue to grind them down. Next, you’ll use a resin that’s mixed with chopped strands of fiberglass. This is a cosmetic layer, as the structural layers are already in place. This will fill the low spots and bring the repair up to plane with the exterior surface. Once the chopped strand layer is set up and hard, grind down the high spots until in plane with the finished surface. The next step is to mix up what is referred to as “peanut butter .”This is resin and thickener and is the consistency of smooth peanut butter. Using a plastic applicator, apply the peanut butter resin mixture to give the final surface all the way to the perimeter of the repair. If it is a curved surface, use a metal, plastic, or plywood flex board to smooth the final contour. Once this layer is dry, grind it down so you’re perfectly on the plane with the exterior surface. Now there should only be some minor pits and pinholes to fill. Use a skim coat resin and hardener and apply using a plastic applicator. Once dry, sand to perfection using fine sandpaper.
Spray the Gelcoat
The Gelcoat is the shiny hard finish surface on the boat exterior. Once the color is matched, spray on the finish coats of gelcoat. Once the topcoat dries, use 600-grit wet sandpaper and higher to seamlessly blend the new gelcoat with the original finish. Lastly, use wax to give the final buff to make the repair invisible.

Gelcoat is the shiny cosmetic finish to Fiberglass repair. It is sprayed on and built up in multiple applications to create a glossy topcoat.
Repairing a Minor Chip or Gouge in the Gelcoat
In this case, the structural fiberglass has no damage, and it’s just the finish layer of gelcoat that needs repair. Grind the repair with a Dremel tool to expose clean fiberglass and bevel back the repair edge. Mix up the correct color of gelcoat with hardener, and take a small brush and create a slightly raised puddle of gelcoat that entirely fills the void and extends just past the margins of the repair area. Let the puddle dry hard, then using 600-grit wet sandpaper, sand until flush with the finished surface. On a flat surface, use a sanding block to create a perfect plane. End with a coat of wax to make the repair blend in perfectly.
Repairing fiberglass is a multi-step process. However, even the most unsightly damage from hitting a rock, bumping into a dock, or even a collision can be repaired to look just like new. Lakeside Marine offers professional boat fiberglass repair from minor dings to major structural repairs. We also handle fiberglass repairs for boat insurance claims, making the repair and insurance reimbursement process seamless. We even do boat modifications and restorations.

Lakeside Marine does fiberglass repairs for boat accident insurance claims, classic boat restorations, and custom high-performance boat modifications.
For professional results for your boat fiberglass repairs, call email [email protected] or go to our webpage and learn about our [fiberglass repair services], and read customer testimonials about how Lakeside Marine performed outstanding fiberglass repair while providing exemplary customer service.
Book a Boat Fiberglass and Gelcoat Repair
NEVER MISS A POST
Sign up for free and be the first to get notified about updates

Pre Winterization Maintenance Tips
Oct 27, 2022
Your boat served you well over the past boating season. However, with normal wear and tear, your boat requires attention. Maintain your boat as service needs arise, and keep its value and performance at its peak. Reasons to perform boat maintenance in the fall and...

Boat Fire Prevention and What to do in case of Fire
Aug 2, 2022
Boat fires are serious, and here’s how to maximize your safety. We discuss the common causes of boat fires, how to prevent them, and what action to take if a boat fire breaks out. What are the common causes of Boat Fires? Electrical fires Explosive gas or propane...

Why is Boat Bottom Painting Necessary?
Dec 27, 2021
Boat bottom painting is necessary for any boat that stays in the water continuously for long periods. Bottom paint, also called anti-fouling paint, deters the growth of aquatic organisms, plants, and algae that damage your boat’s hull, affect the boat’s performance,...
Submit a Comment Cancel reply
Your email address will not be published. Required fields are marked *
Save my name, email, and website in this browser for the next time I comment.
Submit Comment

Boating Basics Online is reader-supported. When you buy via our links, we may earn a commission at no cost to you. Learn more
How to Repair a Hole in a Fiberglass Boat?
Written by J. Harvey / Fact checked by S. Numbers

Like cracks and scratches, holes in a fiberglass boat hull are relatively common issues. Learning how to repair a hole in a fiberglass boat involves doing a step-by-step process to ensure complete restoration of the damaged areas.
I’ve developed this guide based on what I learned and applied in the past and up to the present, often to stellar results. You should be able to learn how to repair both small and large holes in your hull.
Table of Contents
Ways to Repair a Hole in a Fiberglass Boat
Tools to prepare for small holes in fiberglass boat hull:, step 1: get drilling, step 2: smoothen the edges, step 3: start mixing the epoxy then apply it, step 4: let the epoxy cure then start sanding, what to prepare, step 1: taper the hole’s edges, step 2: fill the hole with the epoxy mixture, step 3: allow the epoxy to partially cure then add layers of csm.
Whenever you need to patch a fiberglass boat that has a hole problem, the size of the hole mainly dictates the method you need to do and the tools you will need. As such, I’ve prepared two separate guides on how to repair a small hole or a large hole.
They apply to any kind of bottom repair involving holes but not to fiberglass cracks, which require a different method to be solved. I leave it up to you to decide whether the hole is big enough to warrant extra steps and resources.
This highlights the importance of assessing the damage first and foremost. What’s sure is you need to gather more tools and mats if the hole is on the big side.
Repairing a Small Hole
Before doing any kind of boat damage repair, prioritize wearing your safety equipment because you will be doing plenty of sanding and handling curing agents and hardeners.

Ready your DIY repair kit by preparing the following.
- Epoxy resin and hardener
- Dremel tool
- Filler or thickener
- Spatula for applying epoxy
- Sandpaper or sander
- PPEs (gloves, glasses, respirator, etc.)

Give all tiny holes a little drill treatment, just enough to expose the fresh fiberglass. This ensures the new repair materials stick like glue to the old fiberglass surface.

Grab a Dremel tool or any tool that you can use to taper the edges of the hole. Try to create a smooth slope from the hole to the surrounding area. This sets the stage for the epoxy to bond.

First, clean up the sufface with acetone. Getting the epoxy mixture right along with the additive. What’s important is for the epoxy to gain enough “muscle” to stick to the repair zone well.
Slather the epoxy using the spatula or any tool that you can use to smear it right into the hole. Don’t be worried if it overflows a bit. Epoxy tends to find its own level and overfilling ensures that the repair is flush with the surrounding area once it cures.

The time it takes to cure will depend on the product, and the manufacturer will most likely reveal the exact time. Once it’s rock solid, whip out the sandpaper and start with the roughest portions first then work your way to the smoother sides for a slick finish.
Once you get the finish you want, it’s time for some priming and painting. Again, these steps should fix a fiberglass boat with more minor-sized holes. If it’s a more sizable hole, then you will have to be ready for some elbow grease.
Fixing a Large Hole
Now you may be wondering, what counts as a “large hole” in the first place? The rule of thumb is if it’s around ¾-inch wide and thick. Structural fiberglass repair should always be approached with the thinking that you need to add as many reinforcements as needed.

- Epoxy resin
- Filler for epoxy
- Chopped strand mat
- Sandpaper or sander (80-grit)
- Brush or roller
- Mixing container
- Plastic sheeting

Sand a taper on the top surface around the hole. This will create the necessary gradual transition from the hole to the surrounding fiberglass. This also promotes better adhesion.

Be sure to wipe the work area down with some acetone. Then, mix the epoxy resin and hardener . Add a suitable filler to reinforce it.
Afterward, fill the hole with the epoxy mix, ensuring thorough coverage and that the hole is filled completely.

Epoxy should gel together to create a tacky surface. This enhances the bonding of other reinforcing layers you’re going to create.
Once it has partially cured, you can sand it again and wipe it down with acetone again. Then, apply two layers of chopped strand mat over it. You can just tear the CSM that will fit the hole – no need to cut.
Make sure that each layer is slightly bigger than the original hole and the previous layer of CSM. Saturate each layer of CSM with epoxy by tapping it with a brush. Give each one time to partially cure before adding the next layer.
Step 4: Do the final sanding and finishing

Done with all the CSM layers? All you need to do is to sand the surface flush and smooth. You can use grits finer than 80-grit to achieve the smoothness level you want and for the repaired area to blend with the entire hull’s surface.
Top everything off with a gel coat of your choosing.
If we summarize my guide on how to repair a hole in a fiberglass boat, the techniques are fairly easy to follow. However, I can’t stress enough the need to follow each step exactly as it is written.
Learning how to get the right epoxy mix, applying it, creating layers of CSM, and getting the correct curing (complete or partial) are but some of the most important points you should keep in mind. Here’s to excellent repair results, fellow boater!

“My intention from the first day establishing Boating Basics Online is to provide as much help as possible for boaters who want to experience a first safe and convenient trip. So feel free to join us and share your beautiful journeys to the sea!”
- River City Live
- Newsletters
WEATHER ALERT
2 river flood warnings in effect for Brantley and Glynn Counties
Old boat repair: how to flip a boat to fix it up, are you ready for an insider look at a whole new nunnsense.
Richard Nunn , News4JAX Chief Meteorologist
JACKSONVILLE, Fla. – According to Florida Marine , Florida is the boating capital of the United States. From freshwater lakes and rivers to the expanse of the Atlantic Ocean and the Gulf of Mexico, we have plenty of room to roam in vessels of all sizes.
That is if yours still floats.
Hi, my name is Richard and I bought a used boat.
This means I purchased the issues and problems that came with the boat. Overall, the ones that I could see were easily fixed and with a lot of elbow grease, scrubbing pads on pneumatic buffers, wet sanding, and three different cutting grades of compound I made an old boat look as good as an old boat could look.
Luvbug and I used the boat a dozen times, or more, and even had it blessed during the ‘23 Blessing of the Fleet.
Last July 4th weekend, I noticed that my bilge pump was running more than normal. After some inspection while on the water, I saw that I was taking on water. With the assistance of a secondary bilge pump and the support of some friends, I managed to return to a lift for additional inspection.
On the lift, a poorly patched crack was discovered. With the help of Flex Tape, yes the infomercial stuff, I got the boat from near the Buckman Bridge to Goodbys Creek and then on a trailer.
That is where this video picks up and the Nunnsense starts.
Join me outside the studio and away from the kitchen for an exclusive behind-the-scenes glimpse into the effort required to restore this old boat and set sail once more.
Related Video: Easy & Tasty: The simple steps to cooking homemade Chicken and Dumplings
Copyright 2024 by WJXT News4JAX - All rights reserved.
About the Author:
Richard nunn.
Richard Nunn is the Weather Authority Chief Meteorologist
Click here to take a moment and familiarize yourself with our Community Guidelines.

Friday 11 April 2014
Moscow metro - spirit of a city (e.p).

No comments:
Post a comment.

Explosions occurred in Moscow region, several settlements lost power
E xplosions were heard in the town of Lytkarino, Moscow region, tonight, November 23. Several settlements in the Moscow region are without power, according to Baza.
Around 1 a.m., local residents allegedly heard a bright flash from the substation. Afterward, the lights went out in the Lytkarivsky district. A fire reportedly broke out at the site of the explosion.
According to Russian media, power was lost in several settlements in the Moscow region.
It should be noted that Lytkarino is situated 30 kilometers from the Russian capital.
Shots fired in Russia
In 2023, the number of attacks in a number of regions of the Russian Federation by attack drones increased. Also, something often burns and explodes on the territory of Russia. Different regions, including Moscow, are under attack.
At the same time, Ukrainian intelligence has already warned residents of the Russian capital that they should hardly relax, as the number of drone attacks will only increase.
In particular, on the evening of November 10, explosions occurred near the Design Bureau of Mechanical Engineering corporation in the Moscow region, where Kinzhals and Iskandars are manufactured.
One of the largest attacks took place on the night of July 30, when unidentified drones struck the business center of the Russian capital, Moscow City. The drones hit the so-called "government tower," which houses the offices of the Ministry of Economic Development, Ministry of Industry and Trade, and Ministry of Communications.
Brigadier General Sergei Baranov recently said that Ukrainian troops are preparing for a large-scale winter attack on various regions of Russia with the help of kamikaze drones.
")
- Popular Professionals
- Design & Planning
- Construction & Renovation
- Finishes & Fixtures
- Landscaping & Outdoor
- Systems & Appliances
- Interior Designers & Decorators
- Architects & Building Designers
- Design-Build Firms
- Kitchen & Bathroom Designers
- General Contractors
- Kitchen & Bathroom Remodelers
- Home Builders
- Roofing & Gutters
- Cabinets & Cabinetry
- Tile & Stone
- Hardwood Flooring Dealers
- Landscape Contractors
- Landscape Architects & Landscape Designers
- Home Stagers
- Swimming Pool Builders
- Lighting Designers and Suppliers
- 3D Rendering
- Sustainable Design
- Basement Design
- Architectural Design
- Universal Design
- Energy-Efficient Homes
- Multigenerational Homes
- House Plans
- Home Remodeling
- Home Additions
- Green Building
- Garage Building
- New Home Construction
- Basement Remodeling
- Stair & Railing Contractors
- Cabinetry & Cabinet Makers
- Roofing & Gutter Contractors
- Window Contractors
- Exterior & Siding Contractors
- Carpet Contractors
- Carpet Installation
- Flooring Contractors
- Wood Floor Refinishing
- Tile Installation
- Custom Countertops
- Quartz Countertops
- Cabinet Refinishing
- Custom Bathroom Vanities
- Finish Carpentry
- Cabinet Repair
- Custom Windows
- Window Treatment Services
- Window Repair
- Fireplace Contractors
- Paint & Wall Covering Dealers
- Door Contractors
- Glass & Shower Door Contractors
- Landscape Construction
- Land Clearing
- Garden & Landscape Supplies
- Deck & Patio Builders
- Deck Repair
- Patio Design
- Stone, Pavers, & Concrete
- Paver Installation
- Driveway & Paving Contractors
- Driveway Repair
- Asphalt Paving
- Garage Door Repair
- Fence Contractors
- Fence Installation
- Gate Repair
- Pergola Construction
- Spa & Pool Maintenance
- Swimming Pool Contractors
- Hot Tub Installation
- HVAC Contractors
- Electricians
- Appliance Services
- Solar Energy Contractors
- Outdoor Lighting Installation
- Landscape Lighting Installation
- Outdoor Lighting & Audio/Visual Specialists
- Home Theater & Home Automation Services
- Handyman Services
- Closet Designers
- Professional Organizers
- Furniture & Accessories Retailers
- Furniture Repair & Upholstery Services
- Specialty Contractors
- Color Consulting
- Wine Cellar Designers & Builders
- Home Inspection
- Custom Artists
- Columbus, OH Painters
- New York City, NY Landscapers
- San Diego, CA Bathroom Remodelers
- Minneapolis, MN Architects
- Portland, OR Tile Installers
- Kansas City, MO Flooring Contractors
- Denver, CO Countertop Installers
- San Francisco, CA New Home Builders
- Rugs & Decor
- Home Improvement
- Kitchen & Tabletop
- Bathroom Vanities
- Bathroom Vanity Lighting
- Bathroom Mirrors
- Bathroom Fixtures
- Nightstands & Bedside Tables
- Kitchen & Dining
- Bar Stools & Counter Stools
- Dining Chairs
- Dining Tables
- Buffets and Sideboards
- Kitchen Fixtures
- Wall Mirrors
- Living Room
- Armchairs & Accent Chairs
- Coffee & Accent Tables
- Sofas & Sectionals
- Media Storage
- Patio & Outdoor Furniture
- Outdoor Lighting
- Ceiling Lighting
- Chandeliers
- Pendant Lighting
- Wall Sconces
- Desks & Hutches
- Office Chairs
- View All Products
- Side & End Tables
- Console Tables
- Living Room Sets
- Chaise Lounges
- Ottomans & Poufs
- Bedroom Furniture
- Nightstands
- Bedroom Sets
- Dining Room Sets
- Sideboards & Buffets
- File Cabinets
- Room Dividers
- Furniture Sale
- Trending in Furniture
- View All Furniture
- Bath Vanities
- Single Vanities
- Double Vanities
- Small Vanities
- Transitional Vanities
- Modern Vanities
- Houzz Curated Vanities
- Best Selling Vanities
- Bathroom Vanity Mirrors
- Medicine Cabinets
- Bathroom Faucets
- Bathroom Sinks
- Shower Doors
- Showerheads & Body Sprays
- Bathroom Accessories
- Bathroom Storage
- Trending in Bath
- View All Bath
- How to Choose a Bathroom Vanity

- Patio Furniture
- Outdoor Dining Furniture
- Outdoor Lounge Furniture
- Outdoor Chairs
- Adirondack Chairs
- Outdoor Bar Furniture
- Outdoor Benches
- Wall Lights & Sconces
- Outdoor Flush-Mounts
- Landscape Lighting
- Outdoor Flood & Spot Lights
- Outdoor Decor
- Outdoor Rugs
- Outdoor Cushions & Pillows
- Patio Umbrellas
- Lawn & Garden
- Garden Statues & Yard Art
- Planters & Pots
- Outdoor Sale
- Trending in Outdoor
- View All Outdoor
- 8 x 10 Rugs
- 9 x 12 Rugs
- Hall & Stair Runners
- Home Decor & Accents
- Pillows & Throws
- Decorative Storage
- Faux Florals
- Wall Panels
- Window Treatments
- Curtain Rods
- Blackout Curtains
- Blinds & Shades
- Rugs & Decor Sale
- Trending in Rugs & Decor
- View All Rugs & Decor
- Pendant Lights
- Flush-Mounts
- Ceiling Fans
- Track Lighting
- Wall Lighting
- Swing Arm Wall Lights
- Display Lighting
- Table Lamps
- Floor Lamps
- Lamp Shades
- Lighting Sale
- Trending in Lighting
- View All Lighting
- Bathroom Remodel
- Kitchen Remodel
- Kitchen Faucets
- Kitchen Sinks
- Major Kitchen Appliances
- Cabinet Hardware
- Backsplash Tile
- Mosaic Tile
- Wall & Floor Tile
- Accent, Trim & Border Tile
- Whole House Remodel
- Heating & Cooling
- Building Materials
- Front Doors
- Interior Doors
- Home Improvement Sale
- Trending in Home Improvement
- View All Home Improvement
- Cups & Glassware
- Kitchen & Table Linens
- Kitchen Storage and Org
- Kitchen Islands & Carts
- Food Containers & Canisters
- Pantry & Cabinet Organizers
- Kitchen Appliances
- Gas & Electric Ranges
- Range Hoods & Vents
- Beer & Wine Refrigerators
- Small Kitchen Appliances
- Cookware & Bakeware
- Tools & Gadgets
- Kitchen & Tabletop Sale
- Trending in Kitchen & Tabletop
- View All Kitchen & Tabletop
- Storage & Organization
- Baby & Kids

- View all photos
- Dining Room
- Breakfast Nook
- Family Room
- Bed & Bath
- Powder Room
- Storage & Closet
- Outdoor Kitchen
- Bar & Wine
- Wine Cellar
- Home Office
- Popular Design Ideas
- Kitchen Backsplash
- Deck Railing
- Privacy Fence
- Small Closet
- Stories and Guides
- Popular Stories
- Renovation Cost Guides
- Fence Installation Cost Guide
- Window Installation Cost Guide
- Discussions
- Design Dilemmas
- Before & After
- Houzz Research
- View all pros
- View all services
- View all products
- View all sales
- Living Room Chairs
- Dining Room Furniture
- Coffee Tables
- Home Office Furniture
- Join as a Pro
- Interior Design Software
- Project Management
- Custom Website
- Lead Generation
- Invoicing & Billing
- Landscape Contractor Software
- General Contractor Software
- Remodeler Software
- Builder Software
- Roofer Software
- Architect Software
- Takeoff Software
- Lumber & Framing Takeoffs
- Steel Takeoffs
- Concrete Takeoffs
- Drywall Takeoffs
- Insulation Takeoffs
- Stories & Guides
- LATEST FROM HOUZZ
- HOUZZ DISCUSSIONS
- SHOP KITCHEN & DINING
- Kitchen & Dining Furniture
- Sinks & Faucets
- Kitchen Cabinets & Storage
- Knobs & Pulls
- Kitchen Knives
- KITCHEN PHOTOS
- FIND KITCHEN PROS
- Bath Accessories
- Bath Linens
- BATH PHOTOS
- FIND BATH PROS
- SHOP BEDROOM
- Beds & Headboards
- Bedroom Decor
- Closet Storage
- Bedroom Vanities
- BEDROOM PHOTOS
- Kids' Room
- FIND DESIGN PROS
- SHOP LIVING
- Fireplaces & Accessories
- LIVING PHOTOS
- SHOP OUTDOOR
- Pool & Spa
- Backyard Play
- OUTDOOR PHOTOS
- FIND LANDSCAPING PROS
- SHOP LIGHTING
- Bathroom & Vanity
- Flush Mounts
- Kitchen & Cabinet
- Outdoor Wall Lights
- Outdoor Hanging Lights
- Kids' Lighting
- Decorative Accents
- Artificial Flowers & Plants
- Decorative Objects
- Screens & Room Dividers
- Wall Shelves
- About Houzz
- Houzz Credit Cards
- Privacy & Notice
- Cookie Policy
- Your Privacy Choices
- Mobile Apps
- Copyright & Trademark
- For Professionals
- Houzz vs. Houzz Pro
- Houzz Pro vs. Ivy
- Houzz Pro Advertising Reviews
- Houzz Pro 3D Floor Planner Reviews
- Trade Program
- Buttons & Badges
- Your Orders
- Shipping & Delivery
- Return Policy
- Houzz Canada
- Review Professionals
- Suggested Professionals
- Accessibility
- Houzz Support
- COUNTRY COUNTRY
Garage Door Sales & Repair Companies in Lytkarino
Location (1).
- Use My Current Location
Popular Locations
- Albuquerque
- Cedar Rapids
- Grand Rapids
- Indianapolis
- Jacksonville
- Kansas City
- Little Rock
- Los Angeles
- Minneapolis
- New Orleans
- Oklahoma City
- Orange County
- Philadelphia
- Portland Maine
- Salt Lake City
- San Francisco
- San Luis Obispo
- Santa Barbara
- Washington D.C.
- Lytkarino, Moscow Oblast, Russia
Featured Reviews for Garage Door Sales & Repair Companies in Lytkarino
Business services, connect with us.
IMAGES
VIDEO
COMMENTS
Got a hole or rip in your sail boat sails? Learn how to properly repair those holes using the Sailrite Ultrafeed LSZ-1 sewing machine and a few other supplie...
First, you'll want to trace a patch from new sailcloth to sew onto your existing sail. The patch should be at least 1 inch larger in circumference than the hole. This will give you plenty of space to sew your patch without getting your stitching too close to the hole. You'll use Seamstick Basting Tape to base the patch onto the sail, and ...
Depending on your hull laminate, you may or may not need to be more particular about the fiberglass fabric you use to create your patches. Using a compass and a Sharpie pen, Dave drew out a series of 16 circles on our glass fabric—eight on the mat and eight on the cloth—for each of our holes. Each series started with a circle a quarter-inch ...
Furthermore, sticky-back patches work efficiently for small holes in the actual fabric of the sail. If any holes appear in the fabric then use patches on both sides of the sail, an inch or two larger than the rip in all directions. Keep in mind to slightly counterbalance the two patches so that the load won't spread out around the repair.
Fiberglass Hull Repair: Easy Fix for Thru Hull HolesIf you're facing a thru hull hole in your fiberglass hull, worry no more! In this concise yet informative...
A band-aid patch uses a piece of cloth with adhesive backing and applies it to the damaged area on both sides of the sail and then is usually stitched down. This repair is common for small holes and tears and is often the preferred method for repairing laminate sails. A small tear or pinhole in a spinnaker can be repaired using an insignia ...
In small repairs you can't fit the usual fiberglass cloth. So fill stripped screw holes with epoxy mix & cut up fiberglass threads from scrap fiberglass cloth. First root out any soft core under the surface decking described in another reply and fill with your mix.
Learn how to fill a hole in your boat. If your fiberglass hull has screw holes, fiberglass damage, a hole under the water line, or anything like that, this v...
A dent or hole in your sailboat's hull can feel like damage to the entire boat. But if your hull is made from fiberglass, you may have more options than you initially thought. We put together this sailboat hull repair guide to help! Step One: Preparation. You won't be ready to tackle sailboat hull repair until you know a bit about what to ...
Repair it from the inside and you have only a 3-inch hole to refinish. A second reason to make the repair from the inside is that you can back the hole on the outside with a polished surface, creating a mold that allows you to lay-up the repair the same way the boat was built--gelcoat first. Very little finish work will be required.
For example, a small hole in a small boat that you only take out on the lake shouldn't be too much for you to handle. Small cracks or holes in the areas above the water line might not be a big deal either, but please use your best judgment. Repairing Holes in The Hull. To repair a hole in the hull, you may need to get some new core material.
Apply gelcoat: If the gelcoat on your boat is damaged, apply a fresh layer to protect the repair and give the boat a smooth finish. Repairing Small Holes in the Fiberglass Boat Hull. Clean the area: Start by thoroughly cleaning the damaged area with soap and water to remove any dirt, grease, or oil. Use a solvent-based cleaner if necessary to ...
Hole going right through fiberglass into the boat: First, examine the hole and look for cracks and chips extending out from the hole. Use a marker to circle the entire damaged area. Making sure to include the cracked spots. Next, take a saw and cut out the damaged area that you've circled with the marker.
Learn how to fix a crack or hole in a fibreglass boat with this short and easy video tutorial. You will see how to improve an old bad repair and make your boat look good again. Follow the ...
Once it is dry, grind down the high spots with 80-grit sandpaper until it is on the plane with the finished surface. At this point, clean off the sanded area, and assess the low spots. If there are still high spots, continue to grind them down. Next, you'll use a resin that's mixed with chopped strands of fiberglass.
Ways to Repair a Hole in a Fiberglass Boat. Repairing a Small Hole. Tools to Prepare for small holes in fiberglass boat hull: Step 1: Get drilling. Step 2: Smoothen the edges. Step 3: Start mixing the epoxy then apply it. Step 4: Let the epoxy cure then start sanding. Fixing a Large Hole.
Here's how to flip a boat so you can patch the bottom. 62 ... Tags: boat repair, flip a boat over, florida boats, gantry crane, news, ...
Luvbug and I used the boat a dozen times, or more, and even had it blessed during the '23 Blessing of the Fleet. Last July 4th weekend, I noticed that my bilge pump was running more than normal.
Repairing collision damage on a Laser sailboat. The Laser is a lightweight boat that's decked over, so most repairs have to be made from the outside.I used ...
It has been over a year since first being introduced to Limerick based 4-piece Moscow Metro* through their wonderful debut double-A side containing the tracks "Spirit of a City" and "Cosmos" for free, which sounded near perfect in spite of the band only being together for a few months at the time of recording. Now fast-forward 12 months, and as a result of the initial love for the band, they ...
Find company research, competitor information, contact details & financial data for TPK ESHELON, OOO of Lytkarino, Moscow region. Get the latest business insights from Dun & Bradstreet.
Explosions were heard in the town of Lytkarino, Moscow region, tonight, November 23. Several settlements in the Moscow region are without power, according to Baza. Around 1 a.m., local residents ...
Part 1 video will show you how to remove rust trails and 5200 sealant.Click the affiliate links below to purchase or view additional information.As an Amazon...
Search 8 Lytkarino garage door sales & repair companies to find the best garage door sales & repair company for your project. See the top reviewed local garage door sales & repair companies in Lytkarino, Moscow Oblast, Russia on Houzz.
Here I repair holes and stains, left behind from an old equipment installation. This can be done a few ways, including color matching, but, here, I show a si...