- Yachting World
- Digital Edition


Dismasted at sea: What to do during and after a dismasting
- September 30, 2019
Losing your mast is one of the worst things that can happen during an ocean crossing – bluewater veteran Susan Glenny explains what to do after a dismasting

When the Hallberg Rassy 46 Lykke dismasted during the 2017 ARC, the spinnaker pole was drafted in as a jury mast to support a light and VHF aerial
During the 2017 Rolex Fastnet Race , my yacht Olympia ’ s Tigress , a Beneteau First 40, lost her rig through a simple split pin failure.
We were 40 miles offshore at the time, with a trained but inexperienced charter crew on board. It was blowing a Force 6 and the middle the night. The following are some of the lessons we learned from the incident.
Just before midnight I went down below after my watch, having just come off the helm. I heard shouting from on deck and the first mate calling: “Sue, get on deck now – the shroud’s gone!”

Olympia’s Tigress setting off in the 2017 Rolex Fastnet Race, before the rig failure. Photo: Carlo Borlenghi
I rushed to get my lifejacket back on and pulled myself up the companionway. Looking out I could see that the V1 rod from the port side of the rig had detached completely at the first spreader. The rod was still attached at the deck chainplate but was arched over and dragging in the water. I turned to the helmsperson and shouted: “Whatever you do, don’t tack.”
We were upwind on starboard tack beating into a moderate to rough seaway, and if you were looking at the rig fully loaded from the starboard side you could have been fooled into thinking all was well.
But this was just the start – it would be ten hours before yacht and crew made it safely to land. For myself and four other crew, who’d just spent a full four hours on watch on deck, this was to be particularly exhausting.
Article continues below…

Running aground: Lessons learned from a nightmare scenario
We hit the sandspit at something over five knots and went hard aground. A moment before, the bottom had risen…

What are the most common repairs at sea for yachts sailing across the Atlantic? ARC survey results tell all
You cannot presume to be able to sail across an ocean without experiencing some problems or breakages with your equipment.…
My first plan was to try to keep the yacht stable under sail as we were closer towards land – and potential rescue – on the starboard tack. I called Falmouth Coastguard from our satellite phone and explained that we had a major rig failure; they contacted the Irish Coast Guard on our behalf. They also advised us to have our EPRIB on deck.
From midnight until around 0130 we sailed on starboard tack to get closer to land, but progressively got knocked and were no longer laying the Irish coast.
We managed to sail about 15 miles further inshore before, as predicted, the wind began to back. Soon we were no longer laying even the Fastnet Rock.

Safe after a lifeboat tow back to port, but Olympia’s Tigress had lost her mast above the first set of spreaders
At this point, around 0200, and two hours after we first noticed the issue with the shroud, I decided we needed to down sails and be prepared for whatever was going to happen to us next.
At first we tried to stabilise the rig using halyards as we motored towards Kinsale, but it quickly became apparent how completely unstable the whole rig was.
The flexibility of the aluminium mast was quite terrifying and in the rolling seaway the top of the mast was swaying up to 3-4m from the centreline. This caused ricocheting of the stabilising halyards from the deck and the noise was deafening, like a huge recoiling spring.

The Class 40 Phor-ty lost her rig during the same race – these aerial shots reveal the dangerous tangle of lines, rigging, sail and mast across the deck and cockpit. Photo: Carlo Borlenghi
I was extremely concerned about having anyone on deck because it was apparent that the rig was eventually going to come down.
Having no windward force on the rig, as you would do when sailing, meant the rig’s movement and which way it would fall was also totally unpredictable.
Thunderbolt crack
I sent all the crew below and slowed the boat speed to 3 knots. We were in contact with the Irish Coast Guard by satellite phone and limited VHF.
The Courtmacsherry lifeboat had been mustered in case the broken spar holed the boat.
At 0420 the yacht rolled violently to port in a big wave and, as we rolled back to starboard, the mast cracked with a sound like a thunderbolt.
It fractured cleanly at the first spreader level and fell to the starboard side, taking out all of the guard wires and damaging the deck.
The standing rigging on the port side was already compromised but the rig remained attached by the starboard V1 rod, the forestay rod and the backstay, which was Dyneema.
What followed was an extremely stressful 25 minutes of cutting the rig away, trying various methods, because you never knew what was going to work until it did.
The crew worked in groups on different parts of the rig, and we had the liferaft prepared to deploy in case the spar ruptured the hull.
The second mate had climbed what remained of the rig to cut the wires from the mast. What I remember most clearly is that absolutely everyone on board was waiting for instruction on what to do next.
The hardest part was the determination required to sever the highly loaded and arched rod rigging. The V1, with the rest of the rig, was moving up and down with the seaway and it felt like a miracle when we managed to saw it off – it was just brute force sawing with a hacksaw that got rid of it.

A hacksaw should deal with a felled forestay – but be aware that rigging under tension can whiplash unpredictably when cut
Next we removed the forestay by unscrewing the bottle screws and lastly freed the backstay.
Five-hour ordeal
At 0445 the rig sank. There was silence on board; no one said a thing for at least a minute. We were all in total and utter shock after a five-hour ordeal.
I first established if everyone was OK. Our youngest crew member had a metal shard in his eye resulting from the flying sparks of an angle grinder, while my second mate had taken a serious blow in the face as he detached the forestay from its fixing; the rod had ricocheted into his face. So we began tending to the injuries.

By 0500 the RNLI lifeboat arrived on the scene. They first checked with us that the rig had sunk, and we communicated with them through visual signalling and limited coms on a handheld VHF radio – the fixed VHF antenna went with the mast.
At this stage we were still 25 miles offshore – we were happy to motor to Kinsale or Cork but the lifeboat crew deemed it better to tow us given our lack of VHF and associated electrics. The stability of the yacht was also severely compromised without the mast.
It took four hours under tow to reach Ireland from 0530-0930. My first mate, Cath, and I alternated the helming watches for this period and allowed the crew to sleep.
I remember it being bitterly cold and us both trying to shield each other in turn from the wind exposure being generated from the fast tow – the cold was possibly exacerbated by the fact we were both tired and utterly burnt out.
Many thanks to my amazing crew that night: Cath, Willy, Felix, Simon, Gina, Matt, Conor, Fiona and Luke. Each and every one of them played a vital role in bringing our vessel back to land.
Many thanks also to Maritime Rescue Co-ordination Centre at Falmouth, the Irish Coast Guard and the Courtmacsherry lifeboat and crew.
What to do after a rig loss
- Communicate the situation as early as possible (in our case we were able to do this before the rig came down) with a Pan Pan call to a coastal radio station. This can either be through satellite phone or VHF radio, but remember as soon as you lose your rig you are also likely to lose your VHF aerial and radio communications. For us having a satellite phone was key.
- If you have spars in the water, get your liferaft and grab bags ready to deploy within 15 seconds. Have all the crew in lifejackets and waterproofs if they are not already.
- It’s likely that even after failure the rig will still be attached to the vessel via three standing rig points. For example, the port side failed on Olympia ’ s Tigress , but the rig was still attached via the forestay, the backstay and the starboard V1 rod. As soon as the rig has broken, split the crew into three teams to work on each area, and make sure you have three sets of whatever cutting gear you are using. You don’t want a jagged mast hanging around in the water next to you any longer than necessary. Nor do you want to successfully cut two points away, only to find the sinking rig dragging your bow down at the forestay (yes, that happened to us).
- On a safety checklist you may have to tick a box saying you have tested your rig cutting gear on a piece of material similar to that in your rig. However, you also need to ask yourself whether the cutting gear will work in the same way when the rig, rods or Dyform wires are moving up and down in a rough seaway, all in different sync to the boat’s movement. We’d always thought that having an angle grinder was the answer to cut away all rigging but we discovered we were wrong. With the rig moving it was very difficult to cut a groove in the rod. It also produced sparking and metal files, one of which flew into a crew member’s eye.
- Carry multiple pairs of goggles in your rig-cutting bag to prevent eye injury.
- Carry multiple cutting methods. We found that with rods the only thing that worked was brute force, cutting a groove with a standard high quality hacksaw, we had replacement blades and three hacksaws so were able to have new blades and saws ready rapidly, so as to have no delays in the cutting.
- Before heading to sea, think through any other methods you could use to detach stays and shrouds, for example removing pins or unscrewing bottle screws. It didn’t apply in our case, but I did realise the complexity that would be added by having a furling headsail system. Make sure you are familiar with how to remove a furler from the deck and have the tools on board to do this.
- If you have a period of time – as we did – with an unstable mast that has lost its structural integrity, use halyards to triangulate it to strong points on the deck. This might be more effective in a calm sea but for us the pre-break movement in the rig at the top (4-5m of sideways flexing) was scarily powerful. Before the mast broke, the ricocheting of the halyards thanks to the enormous flexing of the rig caused damage to the glassfibre at the deck mountings.
- Protect crew wherever possible; if the mast is going to come down there is less risk in having one person on deck than full crew. I stayed on deck alone while we attempted to motor towards Cork. The crew stayed ready below, formulating a plan for cutting the rig and communicating with the coastguard.
- When the rig comes down, if you can be sure the prop is free of lines try to manoeuvre the yacht under engine so the rig is down-sea and away from the hull.

The Hallberg-Rassy 46 Lykke dismasted during the 2017 ARC. Even after the rig had been cut away, the damaged guardrails, stanchions and metalwork create a hazard on deck. Photo: Stephan Mühlhause
Dos and Don’ts
- Do: Preserve everything you can – boom, lines, sails, blocks, clips etc. Rig loss claims are huge: ours was a £55,000 claim which didn’t include the boom or sails that we’d managed to conserve. Much more and the insurer would have considered writing the boat off.
- Do: Write an extensive plan of how you would get rid of your rig and talk through this plan in your crew safety briefing. Preassign roles to each person.
- Don’t: Be reticent in making rescue organisations aware of the situation. If a broken rig spar is going to go through the hull then help being on the way is better earlier than later.

Can you use rig cutting tools with one hand or will you be unable to hold on? Hydraulic cutters may be easiest.
Rig cutting options
- Hacksaws and multiple spare blades – highly effective on rod rigging
- High quality bolt croppers – effective on Dyform, but not effective on rods
- Hydraulic bolt croppers – effective on Dyform and rods
- Explosive rod and spar breakers – difficult to obtain in the UK
- High quality angle grinder – potentially useful for cutting rods and Dyform, but were found to be quickly effective on sails and Dyneema!
- Sharp, deck mounted safety knives
- High quality scissors
About the author
Susan Glenny is a commercial Ocean Yachtmaster and is school principal of Tigress Sport Sailing. She has skippered four transatlantic races and many offshore and inshore events in the Caribbean, Europe and Mediterranean. She leads Team Tigress and The Sirens Racing.
How to Tune a Sailboat Mast
Here are some general guidelines for tuning your mast’s standing rigging . please see our blog on how to properly adjust a turnbuckle before you begin. as always we recommend seeking the advice of a professional rigger for more specific tips and tricks regarding tuning your boat’s rigging..
Your boat must be in the water. Begin by just slacking off all of the side shrouds as evenly as possible, so that all stays can be adjusted by hand. Once loose, try and adjust all turnbuckles so that they are pretty much equally open (or closed) from port to starboard respectfully. Also go ahead and line up the cotter pin holes (if present) in the studs so that they are in a pin-able position. Now is also the time to balance out the threads, between the upper and lower studs of the turnbuckle, IF they are not even. Do this by unpinning the turnbuckle from the chainplate – BE CAREFUL HERE – to ensure the mast is secure before unpinning any one stay. Lastly, loosen all halyards or anything that may pull the mast to port, starboard, forward or aft.
1. Check by sighting up the backside of the mast to see how straight your spar is side to side. You can take a masthead halyard from side to side to ensure that the masthead is on center. Do this by placing a wrap of tape 3′ up from the upper chainplate pin hole on each upper shroud. Cleat the halyard and pull it to the tape mark on one side, mark the halyard where it intersects the tape on the shroud. Now do this to the other side, the mark on the halyard should also intersect the tape similarly. Please note: when the mast is equipped with port and starboard sheaves, instead of just one center-line sheave, it will appear slightly off to one side. Just keep this in mind……
2. Using the upper shrouds as controls, center the masthead as much as possible using hand tension only. Some masts are just crooked. If yours is(are) crooked, it will reveal itself when you loosen all of the stays and halyards initially and sight up the mast. Although you should use hand tension only, you can use a wrench to hold the standing portion (the stay portion) of the turnbuckle. If for some reason the shroud is totally slack and you still can’t turn the turnbuckle by hand then the turnbuckle may need to be serviced, inspected, and maybe replaced.
3. Tune the mast from the top shroud on-down, making sure the mast is in column. Remember: as you tension one shroud by adjusting the turnbuckle, to loosen the opposing shroud the same amount.

4. Once the mast is fairly straight from side to side, tighten the shrouds all evenly using tools for tensioning. Typically, for proper tension, the shrouds should be tightened using these guidelines; uppers are the tightest, and then fwd. lowers, then the aft lowers and intermediates should be hand tight plus just a turn or two. ~ With an in-mast furler it is recommended to tension the aft lower a bit more to promote a straighter spar (fore and aft) for better furling.
5. Now you can tension the aft most backstay (s). If the backstay has an adjuster it should be set at a base setting (500-1000 lbs). If the backstay simply has a turnbuckle then it should be tightened well. After this has been done, in either situation (adjustable or static backstay), one should site up the mast from a-beam and notice that the masthead has a ‘slight’ aft bias. If there is no aft bias, too much, or the mast is inverted (leaning forward), then the forward most forestay (s) will most likely need to be adjusted to correct this. If a furler is present then seek the council of a professional rigger or refer to your furler’s manual for instructions on how to access the turnbuckle if there is one present.
6. Finally, sight up the mast one last time and make any necessary adjustments.
7. MAKE SURE ALL TURNBUCKLES AND PINS HAVE COTTER PINS AND ARE TAPED NEATLY TO PREVENT CHAFE!
Read HERE for how to use a LOOS & Co. Tension Gauge!
Here is a little vid from our friend Scott at Selden Masts (click the link then hints and advice for more info) on rig tune…..
[youtube http://www.youtube.com/watch?v=rcCALZ4x6R4&w=420&h=315]
Is your mast fractionally rigged, only has a single set of lowers or is just plain different? Be sure to leave any questions or comments below.
Similar Posts
How modern sailing works.
An informative video answering some of the questions many of us have. One of them is how can the boat go towards the wind? Brought to you by some science folks over at KQED’s YouTube feed. A good find indeed. Enjoy….. [youtube http://www.youtube.com/watch?v=yqwb4HIrORM&w=560&h=315]
The Making of the J-Class “Atlantis”
Check out the level of quality and professionalism in this compressed yacht building video of the aluminum J Class, “Atlantis”. What an intense project. The yacht had been commissioned for a Dutch owner and the design was based on the original plans for a ‘Super J’, designed by Frank C Paine in the 1930’s. [youtube…
Boxing Day…
… December 26th, is also the start of the Rolex Sydney to Hobart Race 2013. This race marks the 68th anniversary for the event; continuing the tradition of racing from Australia’s Port Jackson/Sydney Harbour, south across the Bass Strait, along the east coast of the historic island of Tasmania and into Hobart. [youtube=http://www.youtube.com/watch?v=KhMjlcE_UxQ&w=420&h=315] This epic event has…
It Takes Two To Tango….
Volvo Ocean Race has seen yet another disaster. Leg leaders, Groupama have unfortunately been dis-masted just some 600NM from the finish line. This may have been some sort of record for the Volvo Ocean Race and Whitbread Cups combined, for being the most disastrous leg in history. Abu Dhabi, who never seemed to quite catch up from their initial…
Rope Clutches
As most things in life, there are pluses and minuses. Lewmar and Spinlock clutches are no exception. Let’s have a look…… Lewmar boasts of their “domino” style locking mechanism. Spinlock raves about their cam being a superior rope grabbing mechanism. Well, both are pretty cool and both have their place, let’s have a look… One of the downsides to the Lewmar clutch,…
Imagine crossing the Atlantic on one of these…………by yourself. Surfs Up! [youtube http://www.youtube.com/watch?v=l75CcGpcYjc&w=560&h=315] Brought to you by SailingNewsTV’s YouTube feed.
Leave a Reply Cancel reply
Your email address will not be published. Required fields are marked *
Save my name, email, and website in this browser for the next time I comment.
54 Comments
I have a 1965 Alberg 30. On a starboard tack the boat has more weather helm than on a port tack. I have not been able to achieve a balanced helm on either tack. New full batten main, new 150 roller furl genoa.
Other than the boat being evenly ballasted from port to starboard, e.g. holding tanks, fuel tanks, below deck furnishings, and storage items, I would check the rig from side to side. A crooked mast or poor static tune can result in the boat sailing differently on both tacks. A good way to test this is either sighting up the mast at the dock to ensure that the mast is relatively straight side to side and in column. You can also see that when beating (aka hard on the wind), you have to make adjustment’s to the mainsail sheet tension (NOTE: the traveler will likely need to be adjusted to mirror the same setting as on the previous tack). If notice that with the traveler in the same position on each respective tack that the sail is bubbling or flogging more on one tack than on the other, it is likely necessary to re-tune the mast. This can be done at the dock by following the guidelines in the article once the everything has been appropriately loosened to tension.
Let us know if this helps.
Any Hints, tips for tuning a 1977 Whitby 27 sloop 1/4 ton rig?
Nothing special that I can think of. Just follow the guidelines in the article. From what I can gather there are only a single set of lowers correct? Are the spreaders aft swept at all or just straight out? If it is single lowers and no sweep to the spreaders you’ll need to set the rake using the forestay adjustment to set the rake and the backstay to control the forestay tension. If you are interested in optimizing sail tuning, like in racing situations: higher wind sailing conditions will desire more tension on the shrouds, a bit more tension on the lower than the upper, but only slightly; and in lighter winds loosen them up a bit, a tad looser on the lower than the upper.
Hope that helps, and good luck.
How do I tune /2 in rigging. Neither of the loos gaug s are large enough?
Thanks for the question. Yes, I think the Loos gauges only go up to 3/8″ wire. First let me say that a tension gauge is not a must for proper tuning, more for tension recording and also not exceeding max tension which is typically hard to achieve without additional fulcrums or wrench extensions. Having said that, if you know that you need one simply search google for cable tensioning gauges. There are a few others like this one https://www.checkline.com/product/136-3E , pricing is not easily apparent and may be excessive for your needs.
My recommendation is that if you have a good local rigger have them do a static dock-side tune and perhaps sail-tune in the boat’s ideal conditions. Perhaps they can provide a tutorial on their process for you to be able to make rigging adjustments over time.
Hope that helps.
Hi. Nice article. I have a Mirage 27 (the Bob Perry design). It’s a masthead rig with single spreaders and the shrouds on each side come to the same chainplate. I have been tuning so that tension on the lower and uppers is the same and trying to set them so that (as you say) the leeward shrouds are just slightly slack. But how do I induce mast rake? I have a split backstay with a 6:1 purchase on the adjuster; should the mast have rake even with the adjuster off? or do I just haul on it? or should the tension on the inners and outers be different?
HI Michael,
You will need to lengthen the headstay and shorten the backstay. This can be done a few ways either with turnbuckle adjustment or actually shortening and lengthening cables, sometimes you can add or remove toggles also.
Hope that helps!
- Pingback: Buying a second-hand luxury yacht? Here’s what you need to look for - Phuketimes news
I recently purchased a 1988 Catalina S&S 38 and experienced my first launch this season, including stepping the mast and tuning the rig. As we prepared, we found that the Cap Shroud and Intermediate Shroud were clamped together at the four spreader ends. The folks at the yard had never seen that, and I certainly didn’t know why it was there … possibly to keep the spreader ends and shrouds consistent? Anyway, as I am learning how to tune my rig, it seems to me that these clamps would prevent me from tuning the cap shroud and intermediate separately and correctly Thoughts? Should I remove them and re-tune the rig?
So it is a double spreader rig I take it? The upper shroud wire should run freely through the first spreader, or the closest one to the deck, and be clamped at the top spreader. The intermediate shroud wire should be clamped at the lower spreader.
Before stepping, if this was done correctly, both upper spreader and lower spreader should be clamped equal distance from the mast attachment point, when looking at the mast from port and starboard.
In other words, you should measure the distance from where the upper shroud attaches to the mast to the end of the upper spreader and it should be the same distance on the other side, port to starboard. Then the same goes for the intermediate shroud and the lower spreader. The upper shroud should run freely through the lower spreader although it is covered by the clamp, but not actually clamped at the lower spreader, j ust the top one.
If all 4 spreaders are clamped equally port to starboard. You should be good to tune from there. The spreaders should show a slight up angle, to be specific slightly more up at the upper spreader than at the lower, but all of them should be just ever so slightly pointing up. You even want to think about clamping them slightly higher than that before tensioning, as this will pull them down and into their preferred angle, just slightly up. Specific angles are really only determined on the spar builders drawing and vary for manufacturer to manufacturer. Generally it is pretty clear where they want to sit. With the shrouds loose if you find that angle that appears to be the right one, and push them up slightly from there then clamp. This will allow them to be pulled down slightly once tensioned.
Kind of a tricky thing to explain in writing but hopefully it helps.
Have further questions? Give us a call 443-847-1004, or email us [email protected]
I have a Catalina 275 fractional rig with single swept back spreaders and an adjustable backstay. My questions are: how much rake, tension on cap and lower shrouds and on chain plate should cap shroud be forward and lower aft. I am racing and want the best performance. Thanks for any help. Bill
If the two shrouds are on the same plate, right next to each other, and the pin holes are the same diameter, and the plate is configured in a fore and aft configuration, I would choose the aft hole for the lower shroud and the forward one for the upper shroud.
In terms of specific rake, you will need to look towards the maker of your sails and or the boat manufacturer. I discuss how to measure rake in the preceding comments.
“You can measure rake by hanging a small mushroom anchor from the main halyard, with the boat floating on its lines, if you wish”
For racing I would start off with a good static tune at the dock by following the points in the article. If you know it’s going to be light day, start off with light rig tension. Be sure to use either Velcro wrap style cotter pins or simply lash the upper and lower shroud turnbuckles together to secure them. This will give you access to removing the pins or lashing while sailing and adjusting the stays.
From there you will need to sail tune for that days specific conditions, your shrouds will tell you what needs to be tighter and looser. I have answered how to do this a few times already in the comments below, please take your time to peruse the comments section to see what sail tuning entails. Doing this will always ensure that the cable tensions are set up ideally for the conditions and the boat can be sailed at maximum potential.
“For racing, ideally once the static tune at the dock (the part we just talked about) is done, go out and sail tune. Do this by going hard on the wind and checking to see if the leeward shrouds are just starting to dance, this is ideal. If they are swaying about they are too loose for the current conditions. If the leeward shrouds are tight, they may be a touch to tight. Tension and loosen as needed; count what you did and to what shroud, then tack and do the same to the other side.
ALWAYS secure the turnbuckles when you are finished adjusting them.”
Just hit ‘Ctrl F’ and search the page for “sail tune” and “rake”
I am trying to tune a Hallberg Rassy HR36 masthead rig. The rig has two in-line spreaders. The cap shroud is 3/8 inch and terminates at the lower spreader. From the lower spreader, the cable transitions to a 5/16 inch cable passing over the upper spreader to the masthead. A second 9/32 inch cable runs from the lower spreader to the mast (just below the upper spreader). The Selden rigging suggests that the “upper shroud” be at 15 percent of the breaking strength of the cable. In this situation, is it 15 percent of the 3/8 inch lower portion? If so, how should the upper 5/16 inch and 9/32 inch cables be tensioned?
Thanks for your help.
Hi Bryant, good question. Once proper alignment and centering of the spar has happened (static tune), and you are perhaps a hair tighter than hand tight on all shrouds, you can begin to tension things to a percentage of breaking strength. Do this by using the cables at the deck and use their diameters to determine the tensioning amount.
The V1 (aka cap shroud) in your case is a 3/8″ cable which supports the two cables above ii, hence its large diameter. The 5/16 V2,D3 and the 9/32 D2 total 19/32. So if 15% of the 3/8 cable is achieved you will below that threshold for the cables aloft. Does that make any sense?
With that in mind there is a range of acceptable tension from light air to heavy air. 15% sounds like a good middle of the road tension. Generally you do not want to exceed 30%. Sail tuning in ideal conditions is generally the best way to determine the right tension, but 15% of breaking strength sounds like a good place to start.
Don’t forget your cotter pins and tape, especially aloft.
Hope that helps and thanks for the question.
T.R.C. Thanks you for the clarification regarding the V2,D3 and D2 load distribution. When I set the V1 tension to 15%, the tension on the V2,D3 was at 8 %. I then tensioned the forward shroud to 12 % and the aft shroud to 10 %. Then I tensioned the backstay to 14 %. After doing this, I measured the tension on the V1 to be 10 %. The only information I could find regarding tension on the D2 was that is did not have to be tensioned much. I tensioned it to 5%. The mast sights straight and I used a bossen seat on a halyard to measure to the lower part of the V1, which also indicated that the mast was straight. Did I overtension the fore and aft stays? Is the tension in the D2 too much or too little? Again, I appreciate your advice.
When you tighten the backstay it usually induces a bit of aft bend in the mast which will soften the upper shroud (V1) a bit. You can just take up on it again to get it back to 15% if you like. As I said there is a acceptable range for all of the stays, which you are well within. Everything else sounds like you did a pretty good job. Next up sail tune and see if there is excessive waggling on the leeward side, but in moderate breeze. The shrouds will begin to sway as the breeze builds, this could be a telltale to either reduce sail a bit or you can add some tension to the shrouds all the way around.
Should be all good as they say.
Cheers, ~T.R.C.
T.R.C., your advice has been invaluable. I took her out in 12-15 knots and was very happy with the sail luff and stiffness of the rig. Thanks for you help!😁⚓️
Hi , can you provide any tuning guides for a Swan 38 Tall mast single spreader rig with baby stay, I am keen to set the rig up for new North sails and race her competitively. The mast is an exact Nautor factory replacement in 1998. She shall not have furling sails.
Hi Peter and thanks for the comment.
Unfortunately we do not have a guide for that boat. I would ask the sailmaker however to see what info he or she might have. Alternatively you can always start with a good static tune and then sail tune the boat as I describe in some of the comments below. This is the best way. I may use a Swan 45 Tuning guide as the template and then just fill in my own numbers over time. This is ideal, but infidelity start with asking the sailmaker you are working with, he should have some good info.
This may seem like a silly question, but it has me perplexed. How long should my cotter pins be? Long enough to ‘jam’ against the surrounding body, to prevent rotation? Otherwise, I don’t see how they’ll prevent my stays from loosening.
The length should be the minimum amount to just be able to bend the legs. Too long and they get caught up on things, too short and you can’t adequately bend the legs to keep the pin in place. The head of the pin is a actually providing the security.
Does that help?
Great article to get me started, thanks! I just have a few questions…
I originally owned a Tanzer 7.5. Her mast was rigid and simple to tune with a LOOS and an eyeball. I however now own a Mirage 33 (1982) and things are a bit more complex (but not too much). When I bought her the mast was already stepped and the owners said they replaced the forestay (inside the furler) 1 season ago. I went about the boat tuning the rig as best I could but I started second guessing the rake. I found noticeable rake in the mast with virtually no backstay tension on. So I think my forestay stretched (being “new”) and I need to bring it forward.
How do I measure how much rake (at rest on the tensioner) is enough? With my rig as is I felt worried that if I pulled down on the backstay tensioner I might buckle my mast by bending it too far. It seems to me it’s ALOT of downward pressure on the column when you pull down on her especially if the mast was already raked or maybe in my case leaned too far back to start? She has a babystay too, I wasn’t sure how far to tension that other than to assist adding bend\rake but since I had too much already I just lightly tightened it and hoped for the best!
Thanks for the question. With the backstay tensioner completely off, you should be able to adjust the static/ base tension of the backstay with a turnbuckle (s). Loosen the Baby Stay so that it is completely loose, sloppy, to take it out of the equation. Then mark furling line spool direction and remove the line. Next, open the furler up to gain access to the turnbuckle inside, if present. Remove all cotter pins or locking nuts to free the turnbuckles on the headstay and the backstay. You should then loosen things so that the headstay and the backstay can be adjusted by hand. Close the headstay turnbuckle and open the backstay turnbuckle to reduce rake, and vice versa if wanting to add rake.
You can measure rake by hanging a small mushroom anchor from the main halyard, with the boat floating on its lines, if you wish. Then once you achieve the desired mast rake go ahead and tension the forestay and backstay a few turns equally with tools; not too tight, but a good base light air setting, or as loose as you can imagine the headstay ever needing to be. Lastly, tension the baby stay a bit until it just starts to tug on the mast, helping induce bend. From here the backstay tensioner will do the rest: wind it on and it will tension the headstay and induce mast bend via the baby stay. You may have to take the boat sailing and adjust things as you find out how it performs at various degrees of rake and bend.
I hope that’s not too wordy, but helps explain it all a bit. Feel free to email or call with further questions.
Regards, ~T.R.C.
Can you provide some specific information regarding rig for 1980 C&C 32. Looking to purchase new main and want to get the most from it for Wednesday nights. Boat currently does not have a pony stay, it has been removed. Can replace that track/car. What should initial bend look like, keel step is fixed so assume I need to some chock aft of mast at deck? Have rod rigging but no Loos gauge for same, should I acquire one? Love this site, very helpful RayK
Thanks for the compliment. This may be less technical than you might expect. I would start with the basic guidelines given in the article to ensure a good base, static tune setting. A Loos gauge is good but not needed. If you focus on getting the spar straight, side to side, with a slight aft bias and then the tension is set so that it feels fairly tight. I know that sounds vague, but keep this in mind: if you are anticipating heavier wind make things a bit tighter, and loosen things up if less windy. The order of tension, in regards to the which shroud (upper vs intermediate vs lower) is important; more so than the amount of tension. Make sure nothing is so loose it is just flapping about.
The headstay should have some good slack to it with the backstay adjuster totally off. Adjust the backstay and headstay turnbuckles, with them in the slack position until the masthead is favoring a slight aft lean or rake, but only slight. From there, tension the backstay adjuster very tight and see what the headstay tension feels like, should be very tight.
PLEASE NOTE: if the backstay adjustment is totally bottomed out at this point, the backstay needs to be shortened a bit. Just pay attention to how this affects the rake. …
This part is where the pony stay or the baby stay will play a critical part, for mast bend. You may even find the pony stay to be good for mast pumping in light air and waves. Making this baby stay removable is a good idea, as well as, we’ve found that Dynema rope is the best choice here.
So… a centered mast head, side to side. A straight, in column mast from the top on down. A slight aft rake to start with…and as you begin to wind on the backstay and the baby stay you will add some rake but also a good bit more bend.
Take this set up for a few test sails and see how things act, in different conditions. After that you can make some adjustments here and there as needed: weather helm, shroud tension, mast rake, pre bend, etc…Moving chocks and using a Loos gauge.
ADDT’L TIP: Chocks and mast step position affect bend and rake properties. Want more rake? Chock mast aft in collar and move step forward. Want more bend? Chock mast forward in collar and move mast aft. As all things, there is more to it than that, but that’s the gist of the whole chocks and mast step thing…
“Sail Tuning” is a blog we are in the works of, but the punchline is that if hard on the breeze, and the leeward shrouds are excessively loose, and you are sure you aren’t over canvased…then go ahead and take turns on the leeward side until they just stop waggling, count what you’ve done, tack and mirror the turns on the other side.
Once the boat is set up for that specific condition, and you return to the dock, you should take your loose gauge and record these settings…creating a tension gauge setting for various conditions.
Hi, Thanks for your information. I have a Dehler 34. 1986… How much mast prebend and rake is recommended? The boat is new to me in March. Raced ok but I want to get a new main and want it to fit a well tuned mast. What do you think of a 2 degree rake and 4″ prebend at the speaders? Also, I have a Harken furler, How do you measure the forestay tension? Thanks, Duke
The answer, this boat is pretty sporty so it should show some rake. The spreaders are swept slightly aft so this will produce some natural bend just to tension the headstay.
Head-stays are always tough to measure with any sort of gauge, there are some class specific tricks for using a gauge in funky ways in order to get data, but they aren’t really reliable in my opinion. If you live in a typically windy area, go for bit more shroud tension, headstay tension and mast bend, and see how the boat feels. This will take some trial and error. If the forestay feels too stiff, slot too tight, loosen the uppers a bit, thus reducing bend and slackening the headstay.
Once the boat is sailing well in the ideal conditions, record that bend and those tensions. This is where I would leave things set, record it, and then just adjust shroud tension to affect bend and headstay in order to compliment different wind strengths and sea states. It takes quite a bit of back and forth, and documentation to get it right. One designers have already worked all of this out and then they share it for others…..very helpful. The rest of us will have to be the trailblazers for this type of information for other boat owners with the same (similar) boats to benefit.
Hope that helps, thanks for the kind words, and good luck. Once you figure things out post a link here for others with the same boat…..would be helpful.
Hello, Thanks for all of this great info. I just purchased a 37′ boat with a 3/4 fractional rig and a tapered mast. I was wondering if there were any special considerations when tuning the fractional rig? Currently the stays and shrouds are a little loose and can be wiggled (borderline flopping) by hand although the mast stands and is visually centered. (We are in SW Florida and the boat went through a direct hit by hurricane Irma like this and still stands tall!) Also is it advisable to increase shroud tension in small increments first on one side and then do the same on the opposing side? Thanks so much for any info
Hi Nathan. There are some thoughts, so fractional masts are usually fitted with aft swept shrouds and spreaders. If so, this means that the uppers also tension the headstay and create mast bend. The lowers then also act to reduce mast bend, so the tighter you make them you are actually reducing mast curve, thus powering the mainsail up. So be conscious of these two thoughts when tensioning the shrouds. The rest is fundamentally the same as the guide suggests. Loose or wiggling shrouds (excluding the scenario where we are talking about the leeward shrouds under sail), should be tightened. Doing things in increments is definitely a good idea.
Hope that helps. Thanks for the questions.
Thanks!! Now that you say that about the swept spreaders helping create mast bend it makes perfect sense. I had an ‘oh duh’ moment. I’ll probably err on the side of looser lower shrouds knowing if we need more power we can always tighten them up. Thank you again this helped immensely!
I want to buy a tension gage. Most familiar with Loos. But do I need Pt 1 or 2? (Pretty sure I don’t need 3 or Pro.) I have two rigs to tune: a 1972 Morgan 27 and a Catalina 22, I think 73 or thereabouts. The Morgan 27 is mine, fresh water for life, and 99.9% most likely factory wire. The Catalina 22 is a borrower in the Gulf, but pretty sure the owner has never tuned it. My problem is I can’t find the gage of wire for either standing rigging anywhere! Any help?
I think this one will do… https://sep.yimg.com/ca/I/yhst-70220623433298_2270_120385950 . The Morgan is likely 3/16″ wire and the Catalina is likely 5/32″, that’s an educated guess. Hope that helps.
I just purchased a 1980 C&C 40. I was told that I need to replace the rod rigging as it is “too old”. The mast is down and the rod rigging seems ok but I have not done any penetration testing. Does rod rigging need to be replaced due to age? Thanks Rigging Co.
Not replaced, but re-headed. This can mean that some stays need to be replaced as a whole, but not typically not the whole set. There are instances where you’ve almost replaced all of it anyways, so full replacement just makes sense. Other than those scenarios, full replacement is due after a certain mileage with rod…60,000 NM. Please keep in mind these standards are very general recommendations. It sounds like in your case, you should send in the rod, tangs, and chainplates for service and inspection. once we receive everything we will make a quote for the recommended services and/or replacement.
Hope that helps and give us an email for more info.
I have had a problem with securing the spreaders to the shrouds, resulting in the spreaders dropping. I am using stainless wire to seize them but still having a problem. Any tips on how to do this properly?
Seizing the wire onto spreaders with hinged spreaders is a bit of a trick of the trade that requires some practice. We use the X’s and O’s method. The end result should be something that looks like this… https://theriggingcompany.files.wordpress.com/2011/11/2012-06-07_14-26-09_899.jpg?w=900 . A trick to make the wire bite into the spreader end a bit more is to wedge a small piece of leather between the spreader and the wire before seizing. Also parceling and serving the wire where it intersects the spreader will help create more bite too. Lastly, and I don’t like this method but you can install a bull dog cable clamp beneath the spreader, nuts facing in, to keep it from dropping when slack.
I hope that helps a little. Thanks for commenting.
I am struggling to get enough rake into my mast. 33 foot Charger 33 keel stepped. Have loosened forestay and moved mast foot forward by about 10 mm. Should the chocks in the collar be adjusted? Runners and 2 spreaders, and check spreader. Spreaders do not have much aft angle. Move mast step more forward? Outers are tight with inners looser. Thoughts?
Hey Bernard,
Yeah, it sounds like chocks are the last thing. Maybe remove the chocks with the rigging slack and see if you can get the mast to sit where you like it with just hand tension. Then chock it where it wants to sit. It sounds like you are on the right track everywhere else, perhaps add a toggle into the headstay and shorten the backstay is next. Good luck and I hope that helps somewhat.
Hi, We have a Lagoon Catamaran with fractional rig, upper and lower shrouds, fore stay and upper and lower diamonds. No back stay. The mast has a degree of pre-bend. I do not plan to drop the mast.
I may have to do some work on the port side upper diamond. Is it as easy as just undoing the turnbuckle? Or do I need to loosen the starboard one at the same time. If it needs replacement should I also replace the starboard one even if in good condition?
As a further question, what happens if a diamond breaks, does it result in mast failure?
You would need to loosen the other counterpart to that stay for sure. It is just good practice, will keep the mast straight, and also make your life easier for removal install. Now, do you replace both? I don’t know. How old is the standing rigging? Why are you replacing the one? If it is not all due for replacement and you are just replacing due to damage, just do the one, but loosen both sides to do this.
Hope that helps and thanks for the visit.
Hello! I recently purchased a keel-stepped 1982 Goman Express 30 which came with an Alado Furler. I have been sailing it since May of this year. My question is this: Despite relocating mast wedges at the cabin roof to bias the lower mast aft about 2″, I still have a pronounced backward bend (10 degrees or so) just above the highest spreader. When sailing on jib alone, most wave action causes the mast to pump right at the bend point. I have a split backstay that is as un-tensioned as possible and the forestay only has another inch of adjustment left. There is no baby stay.
How can I get the bend out of the mast? How concerned should I be that the mast might break at that point?
Thanks in advance for your reply!
Eric Hassam – Delta Flyer
Thanks for taking the time to comment on our site. It sounds like you are on the right track. So one other adjustment that you have is the mast step position. This greatly affects mast bend on keel stepped masts. For a stronger bend and less rake, move the mast butt aft. For more rake and less bend (probably what you need to try), move the mast step forward a bit. If neither of these help, you may be off to have your headstay shortened and this means it is too long. This is likely not the case, but it is a possibility.
Keep in mind….A mast should have a slight aft rake bias along with a small amount of mast bend. This is quite normal. You can send us a picture if you’d like a second opinion on if it is over-bent. Having said all of that, even if you remove all of the mast bend, the mast may still pump. This is a design flaw in many spar designs that lots of end users have experienced. This can be remedied by redesigning the stay lay out. Is there a place for a staysail stay and/ or runner backstays? If so add them. Is there a place for a baby stay? If not, that may be a consideration.
Thanks again and I hope that helps.
Hi, I have a 48 foot yawl with a 7/8 fractional rig, is the tuning procedure the same as a masthead rig? I seem to have trouble getting aft rake and proper headstay tension. Also, is there a particular tension number the upper shrouds should have? many thanks in advance
Hi Bill, thanks for taking the time. 7/8 is very close and I would treat it like a masthead rig, especially if the none of the spreaders are aft swept. Tesnsion the headstay using the backstay(s). This should pull the top of the mast aft. If there are any other forward stays, i.e. stay sail stay, forward lowers, or anything else that could be holding the mast forward, go ahead and loosen those completely. You then may need to tighten the Tri-attic (the stay that connects the top of the mizzen and top of the main) if present. OR if the mizzen needs more rake too, then lossen all forward stays and pull it back using the available aft stays for this as well.
Hope this helps and please email us and send some pictures if you need more help.
I have a 1972 Morgan 27, which has both forward and after lower shrouds. I wish to remove the forward lowers so I can trim a 110% jib inside the stays. I see a lot of boats without forward lowers and think this will work OK, but wonder if I should increase the size of the aft lowers and beef up the chain plates. Any suggestions?
THANKS FOR YOUR INPUT. I AM GOING TO REMOVE THEM ANYWAY AND SEE WHAT HAPPENS. “HOLD MY BEER, WATCH THIS….” FAMOUS LAST WORDS.
Lol! Good luck. Call us if you need assistance.
I have rod rigging on my Beneteau 32s5
Any other guidance on tuning them vs wire rigging
Hi and thanks for commenting.
Just follow the guidelines in the write up. The over all goal is that the mast needs to be straight and in-column when looking at it from side to side.
Fore and aft, the mast should show a very slight lean aft. Depending on whether or not the spreaders are in-line or aft swept; you should also see some slight bend if there is any aft sweep to the spreaders just from the tension of the uppers.
A Rod stay tends to run a bit tighter than wire, so keep that in mind.
For racing, ideally once the static tune at the dock (the part we just talked about) is done, go out and sail tune. Do this by going hard on the wind and checking to see if the leeward shrouds are just starting to dance, this is ideal. If they are swaying about they are too loose for the current conditions. If the leeward shrouds are tight, they may be a touch to tight. Tension and loosen as needed; count what you did and to what shroud, then tack and do the same to the other side.
ALWAYS secure the turnbuckles when you are finished adjusting them.
- Pingback: Tuning a Sailboat Mast | ChesapeakeLiving.com
- Pingback: Rig Tuned | middlebaysailing
Wow, I would hate to be charged by her for three trips up the rig and forget the screw driver the rubber plugs that are sacraficial and replaced everytime removed just to clean the stainless 1×19 rigging.
Username or Email Address
Remember Me
Lost your password?
Review Cart
No products in the cart.
- Privacy Overview
- Strictly Necessary Cookies
This website uses cookies so that we can provide you with the best user experience possible. Cookie information is stored in your browser and performs functions such as recognising you when you return to our website and helping our team to understand which sections of the website you find most interesting and useful.
Strictly Necessary Cookie should be enabled at all times so that we can save your preferences for cookie settings.
If you disable this cookie, we will not be able to save your preferences. This means that every time you visit this website you will need to enable or disable cookies again.
Sailboat Mast: A Comprehensive Guide to Understanding and Maintaining
by Emma Sullivan | Jul 14, 2023 | Sailboat Maintenance

== Short answer: Sailboat mast == A sailboat mast is a vertical pole or spar that supports the sails of a sailboat. It provides structural stability and allows for adjustment of the sail position to effectively harness wind power. Typically made of aluminum or carbon fiber, mast design varies based on boat size, sailing conditions, and intended use.
The Sailboat Mast: A Comprehensive Guide for Beginners
Title: The Sailboat Mast: A Comprehensive Guide for Beginners
Introduction: Ah, the majestic sailboat mast! Like the beating heart of a ship, it stands tall and proud, guiding us through the vast ocean. But what does it actually do? How does it work its magic to harness the power of wind and propel us across water? In this comprehensive guide for beginners, we’ll dive deep into the world of sailboat masts to unravel their secrets and discover why they are indeed a sailor’s best friend.
1. Anatomy of a Sailboat Mast: To understand how a sailboat mast functions, let’s start by dissecting its anatomy. The mast consists of several essential components such as: – Luff track: This vertical groove allows the mainsail to slide up or down smoothly. – Spreaders: These diagonal bars help strengthen and stabilize the mast. – Shrouds and stays: These supportive cables hold the mast in position while also countering sideways forces. – Sheave boxes: Found at strategic points on the mast, these small wheel-like mechanisms assist with hoisting sails or other rigging tasks. By familiarizing ourselves with these various parts, we can appreciate how each plays a crucial role in maintaining balance and stability.
2. Materials Matter: Masts can be constructed from different materials including wood, aluminum alloy, carbon fiber composite, or even stainless steel. While wooden masts exude classic charm, modern technologies have introduced lighter options like carbon fiber that enhance performance and durability. The choice of material depends on factors such as boat size, sailing purpose (racing or cruising), budget constraints, and personal preferences.
3. Setting Sail: Hoisting Techniques Hoisting your sails is an art in itself – a symphony between wind and rigging systems. When raising your main sail, you can rely on either external halyards run externally to pulleys at deck level or internal halyards hidden inside the mast. The former allows for easy maintenance and inspection, whereas the latter provides a sleeker aesthetic appeal. Whichever method you choose, proper hoisting techniques are crucial to avoid tangling or jamming.
4. Sail Control: Mast Dynamics Understanding how the sail interacts with the mast is essential for optimizing performance. Controlling sail shape is achieved through tensioning and releasing various lines such as halyards, cunninghams, and outhauls. These adjustments influence mast bend, which in turn affects the distribution of power and aerodynamic efficiency of your sails. A well-tuned mast ensures efficient sailing in different wind conditions.
5. Stepping Up: Installing a Sailboat Mast Stepping a mast may provoke anxiety among beginners, but fear not! With careful planning and some assistance, it can be an invigorating part of preparing your sailboat for action. From proper alignment to securely attaching shrouds and stays, following step-by-step procedures helps avoid mishaps during this critical process.
6. Maintenance Matters: Regular maintenance extends the lifespan of your sailboat mast while ensuring safety on the water. Frequent inspections for corrosion, cracks, or loose fittings are essential. Additionally, lubricating moving parts like sheaves and checking tension in standing rigging help guarantee smooth sailing adventures.
Conclusion: Congratulations! As you reach the end of this comprehensive guide on sailboat masts, you’ve gained invaluable insights into their anatomy, materials used in construction, hoisting techniques, dynamics correlation with sails – all topped off with stepping tips and maintenance reminders. Now equipped with this knowledge foundation, novice sailors can embark confidently upon their seafaring journeys armed with an understanding of just how crucial the majestic sailboat mast truly is – a steadfast partner harnessing wind power while propelling us towards endless maritime horizons!
How to Choose the Perfect Sailboat Mast for Your Vessel
When it comes to sailing, one of the most crucial components of your vessel is undoubtedly the sailboat mast. It serves as the backbone and lifeline of your boat, allowing you to harness the power of the wind and navigate through the vast open waters. Choosing the perfect sailboat mast is not a decision to be taken lightly; it requires careful consideration of various factors to ensure optimal performance and safety.
Firstly, before delving into the specifics, it’s important to understand that sailboat masts come in different materials, each with its unique set of characteristics. The most common options are aluminum and carbon fiber. While aluminum masts offer durability at a lower cost, carbon fiber masts are lighter and stiffer, providing enhanced performance on the water.
Now let’s embark on our journey to select the ideal sailboat mast for your vessel! The first crucial factor to consider is your boat’s size and weight. A larger, heavier vessel would require a mast with greater strength and rigidity to withstand increased loads from larger sails. On the other hand, smaller boats may benefit from a lighter mast that allows for more flexibility in sail adjustments.
Next up is understanding your sailing goals – are you more inclined towards leisurely cruising or competitive racing? If you’re an avid racer seeking top-notch performance, a carbon fiber mast might be your best bet due to its stiffness and superior response to wind conditions. However, if you prioritize comfort and relaxation during casual sailing trips, an aluminum mast could provide suitable stability without compromising on enjoyment.
Another aspect not to be overlooked is ease of maintenance. Aluminum masts generally require less upkeep compared to their carbon counterparts as they are less prone to damage from UV rays or accidental impacts. Carbon fiber masts demand regular inspection for any signs of wear or stress fractures since they can’t handle excessive bending or compression forces as well as aluminum.
Moreover, think about where you’ll primarily be sailing – will it be in open, unrestricted waters or areas with low bridges and height restrictions? Mast height plays a significant role here. Ensure your chosen mast fits within the clearance limits to avoid any unpleasant surprises during your journeys.
Sailboat masts come in various configurations, including single-spreader, double-spreader, and even triple-spreader setups. The number of spreaders – horizontal struts that help support the mast – affects overall stability and rigging options. Generally, single-spreader masts are easier to handle for casual sailors, while double or triple spreads offer higher performance but demand more meticulous tuning.
Lastly, it’s worth noting that the perfect sailboat mast doesn’t necessarily mean splurging on the most expensive option available. A comprehensive comparison of prices and features from different manufacturers can lead you to an ideal balance between affordability and quality.
At this point in our mast-selection odyssey, you should have a clearer picture of what to consider when choosing the perfect sailboat mast for your vessel. Remember to evaluate factors such as materials (aluminum vs. carbon fiber), boat size/weight, sailing goals (cruising vs. racing), maintenance requirements, clearance restrictions, spreader configuration, and cost-effectiveness.
Now set sail confidently with a mast tailored precisely to meet your vessel’s needs and embark on countless unforgettable nautical adventures! Bon voyage!
Step-by-Step Installation of a Sailboat Mast: A Beginner’s Guide
Are you a sailing enthusiast who has always been fascinated by the graceful movement of sailboats gliding through the water? Do you dream of owning your own sailboat and embarking on exciting adventures in the open sea? If so, then one of the essential skills you need to acquire is how to install a mast on a sailboat. In this beginner’s guide, we will walk you through the process step-by-step, ensuring that even if you have never done it before, you will be able to tackle this task with confidence and expertise.
1. Tools and Preparation: First things first – gather all the necessary tools for the job. You will need a crane or hoist (if available), a torque wrench, mast wedges, shims, sail track lubricant, an adjustable wrench or socket set, and plenty of patience! Before starting the installation, ensure that both your boat deck and mast are clean and free from dirt or debris.
2. Preparing the Mast Step: The mast step is where your mast rests on your boat deck. Start by inspecting it thoroughly for any damage or wear that may compromise its integrity. If needed, reinforce or repair it before proceeding further. Place mast wedges under the front part of the mast step to act as support when installing.
3. Attach Necessary Fittings: Now it’s time to attach various fittings onto your mast which are crucial for rigging control lines and sails effectively. These include halyard sheaves (for raising and lowering sails), spreader brackets (providing horizontal support), and any other attachments specific to your sailboat model.
4. Hoisting with Precision: Here comes the exciting part – hoisting your sailboat mast into position! Ideally, use a crane or hoist designed explicitly for this purpose so that you can easily control its vertical movement while minimizing the risk of damage. Carefully guide the mast toward the mast step, ensuring it is centered and aligned correctly.
5. Adjusting for Precision: Once your mast is in place, it’s time to make fine adjustments to ensure its vertical alignment. Use shims or wedges as necessary to eliminate any gaps between the mast and mast step. This step is crucial as it ensures that your sailboat will perform optimally on the water without any unnecessary stress on either the mast or your rigging.
6. Securing with Confidence: Now that your mast is perfectly aligned, it’s time to secure it in place. Start by cautiously tightening the bolts on each side of the base using an adjustable wrench or socket set. Remember not to overtighten, as this can potentially damage both your boat and mast. Once done, check all fittings once again and confirm they are securely attached.
7. Lubrication for Smooth Sailing: To ensure flawless movement of your sails along the track, apply a suitable sail track lubricant generously over your sail track after installation while closely following manufacturer guidelines. This lubrication will minimize friction when hoisting or lowering sails, resulting in a smoother sailing experience overall.
Congratulations! You have successfully installed a sailboat mast from start to finish! By following these step-by-step instructions with patience, attention to detail, and our witty guidance, you have gained valuable knowledge that will enable you to embark on countless sailing adventures confidently.
However, always remember that safety should be your number one priority whenever working with equipment related to sailing vessels. If at any point you feel unsure or overwhelmed during this installation process, do not hesitate to seek professional assistance from an experienced sailor or marine technician who can offer guidance specific to your sailboat model.
With newfound expertise in installing masts and pursuing many thrilling sea voyages ahead, set forth with confidence into uncharted waters – bon voyage!
Common FAQs about Sailboat Masts Answered
Sailing enthusiasts often find themselves captivated by the majestic beauty of sailboats gliding through the water. One key component that allows these vessels to harness the power of wind is the sailboat mast. However, many individuals who are new to sailing may have questions about masts and their importance in sailing. In this blog post, we aim to provide detailed and professional answers to some common FAQs about sailboat masts while injecting a touch of wit and cleverness along the way.
1. What is a sailboat mast? Ah, the central pillar of sailing prowess! A sailboat mast is essentially a vertical structure that stands tall and proud on a vessel, supporting the sails and imparting stability to your seafaring adventure. Think of it as the backbone upon which your nautical dreams come to life!
2. Why is choosing the right mast crucial for efficient sailing? Picture this: you’re in command of your trusty sailboat, ready to conquer the sea’s vast playground. But alas! Your hasty choice of an ill-suited mast has left you floundering like a fish out of water! The right mast offers optimal rigidity, balance, and strength necessary for efficient navigation regardless of wind conditions or sea state.
3. Aluminum or carbon fiber? Which material reigns supreme for masts? Ah, here lies one’s decision-making predicament! Does one opt for aluminum – sturdy like an old lighthouse but slightly heavier? Or does one embrace carbon fiber – lightweight as an albatross feather yet remarkably robust? Both materials have their merits; therefore, choosing between them boils down to personal preference and intended usage.
4. Can I upgrade my existing mast without breaking the bank? Fear not, fellow mariner! While pursuing that luxurious upgrade might conjure images of treasure chests filled with gold doubloons disappearing into Davy Jones’ locker, there are cost-effective options available. Opt for used masts in good condition, or explore local sailing communities where fellow sailors may be willing to part with their old but serviceable masts.
5. How can I ensure proper maintenance of my sailboat mast? Ahoy, matey! Maintenance is the key to keeping your mast shipshape and preventing any unwanted surprises on your voyage. Regular inspections for cracks, corrosion, or loose fittings are akin to swabbing your deck – tedious yet necessary. Additionally, ensuring proper storage and protecting your mast from harsh elements will keep it standing tall through the test of time!
6. Can a damaged mast be repaired or must it walk the plank? Nay, despair not as all hope is not lost! In cases of minor damage like small cracks or dings – worry not! Reliable craftsmen specializing in mast repairs can work their magic and have your trusty companion primed to conquer the waves once more. However, in more severe instances of structural compromise, replacing the mast might be the only option left.
7. How do I decipher the mysterious language of sailboat mast measurements? Approach ye with careful study, for understanding these mystifying dimensions requires an astute mind! Height measured from deck to tip (known as height aloft), length along its backside (called luff measurement), and even diameter play a significant role in determining compatibility with your vessel’s rigging system. Consult experts fluent in this ancient tongue to avoid any discrepancies on your nautical journey!
In summary, sailboat masts are no mere aesthetic addition; they are essential components that provide stability and sailing prowess to vessels at sea. Choosing the right material and maintaining them diligently ensures smooth sailing adventures without scuppering one’s budget. So set your sights high, dear reader, for these answers shall guide you towards a more enlightened understanding of sailboat masts!
Important Factors to Consider When Maintaining Your Sailboat Mast
Sailing is a thrilling and invigorating experience that allows us to connect with nature, challenge ourselves, and explore the vast open waters. However, as with any adventure, there are certain aspects that we must pay close attention to in order to ensure a safe and successful voyage. One such critical component of a sailboat that demands careful maintenance is the mast. The mast serves as the backbone of your vessel, providing structural integrity and supporting your sails. In this blog post, we will delve into some important factors to consider when maintaining your sailboat mast.
Structural Integrity: The first and foremost factor that you need to consider when maintaining your sailboat mast is its structural integrity. Any signs of damage or wear and tear should not be taken lightly, as it can compromise the overall stability and safety of your vessel. Regularly inspecting your mast for any cracks, dents, or corrosion is crucial to identify any issues early on before they escalate into major problems. Additionally, keep an eye out for loose or rusted fasteners and make sure all connections are secure.
Rigging Wear: Another vital aspect of keeping your sailboat mast in top condition is paying attention to its rigging components. Rigging includes various cables, wires, and ropes responsible for controlling the sails’ position and tension. Over time, these elements can experience significant wear due to exposure to sun, saltwater, intense winds, or simply general usage. To maintain rigging longevity and ensure safety while sailing, regularly examine all parts for fraying strands or broken wires. Furthermore, proper tensioning of rigging should be maintained as per manufacturer recommendations.
Cleanliness: Maintaining a clean sailboat mast may sound like an obvious consideration but is often overlooked by many boat owners. A dirty mast not only affects the aesthetics but can also lead to performance issues if left unattended for too long. Accumulated dirt, grime, salt deposits or marine growth can create unwanted drag, hindering the sailing experience. Regular cleaning with mild soapy water and a soft brush is generally sufficient to remove stubborn stains and prevent corrosion.
Painting: Maintaining the aesthetic appeal of your sailboat mast should also be on your priority list. A fresh coat of paint not only enhances its appearance but also offers added protection against corrosion. Prior to painting, ensure that the mast is thoroughly cleaned and all rust or peeling paint is removed. Use a high-quality marine-grade paint specifically designed for aluminum or wooden masts, depending on the material of your sailboat’s mast.
Inspections: Performing routine inspections by a professional is an essential factor in maintaining your sailboat mast. It is recommended to have an experienced rigger thoroughly inspect your mast at least once a year, or more frequently if you actively engage in competitive racing or regularly navigate harsh conditions. These experts have the knowledge and expertise to identify potential weaknesses that may go unnoticed by untrained eyes, providing peace of mind and preventing any unexpected mishaps on your sailing journeys.
In conclusion, maintaining your sailboat mast requires careful attention to detail and regular inspections. By prioritizing factors such as structural integrity, rigging wear, cleanliness, painting, and professional inspections, you can ensure that your vessel remains in excellent condition for countless captivating voyages ahead. So set sail with confidence knowing that you’ve taken every measure to maintain this vital component of your beloved sailboat!
Discover the Different Types of Sailboat Masts and Their Advantages
Sailing is an activity that combines the thrill of speed with the serenity of the open water. One crucial component of any sailboat is the mast, which not only provides structural support but also plays a vital role in determining a boat’s performance and handling characteristics. To help you dive deeper into this fascinating world, we will explore the different types of sailboat masts and highlight their advantages.
1. Fractional Masts: Let’s start with fractional masts, which are one of the most common types found on sailboats today. As the name suggests, these masts divide the rig into two sections: upper and lower. The ratio of the length between these sections can vary, offering flexibility depending on sailing conditions and desired performance.
Advantages: – Versatility: Fractional masts allow for fine-tuning your sails by adjusting halyard tension or configuring additional stays. – Better control in strong wind conditions: The longer lower section provides stability and prevents excessive heeling (tilting) usually encountered during high winds. – Improved balance: By placing more weight aloft, fractional masts offer better balance when tacking (changing direction against the wind).
2. Masthead Masts: In contrast to fractional masts, masthead masts have their forestay attached at or near the masthead rather than a fraction down its length. Traditionally seen on older cruising boats, they offer distinct advantages for particular sailing styles.
Advantages: – Strong downwind performance: With their design allowing for larger headsails like genoas or asymmetrical spinnakers, masthead rigs excel in reaching or downwind courses. – Easy to balance for autopilot usage: Due to a greater proportionality between mainsail area and foresail area when compared to fractional rigs, mastheads tend to require less manual adjustment while under autopilot control.
3. Keel-stepped vs Deck-stepped Masts:
3.a. Keel-stepped Masts: Keel-stepped masts are secured and supported by the boat’s keel, extending through the deck to connect with it at the base. This type of rig is commonly found on larger sailboats designed for offshore sailing.
Advantages: – Superior strength: The keel provides excellent support for the mast against heavy loads encountered during rough weather conditions. – Reduced deck compression: By transferring the load directly to the keel, stress on the deck is minimized, ensuring a longer-lasting and more reliable structure overall.
3.b. Deck-stepped Masts: Deck-stepped masts sit on top of a sailboat’s deck, rather than being connected directly to the keel. Typically seen on smaller boats and cruising vessels, they have their own set of advantages.
Advantages: – Easier maintenance: With no penetration through to the hull like keel-stepped masts, maintaining or replacing deck fittings becomes less complicated. – Cost-effective construction: As there is no need for precision alignment with a keel box, constructing a boat with a deck-stepped mast can reduce building costs. – Adjustable height: Deck-stepped masts offer flexibility in terms of adjusting their height based on clearance requirements for bridges or overhead obstructions.
Understanding these various types of sailboat masts empowers sailors to make informed choices when selecting or upgrading their vessel’s rigging. Each mast type brings its own set of advantages that can significantly impact your sailing experience depending on different conditions and preferences.
Recent Posts

- Sailboat Gear and Equipment
- Sailboat Lifestyle
- Sailboat Maintenance
- Sailboat Racing
- Sailboat Tips and Tricks
- Sailboat Types
- Sailing Adventures
- Sailing Destinations
- Sailing Safety
- Sailing Techniques
- Navigating the High Seas: A Comprehensive Guide to Sailboat Masts
Sailboat masts are the unsung heroes of the sailing world, silently supporting the sails and ensuring a smooth journey across the open waters. Whether you're a seasoned sailor or a novice, understanding the intricacies of sailboat masts is essential for a safe and enjoyable voyage. In this comprehensive guide, we will delve into the world of sailboat masts, discussing their types, maintenance, and everything in between.
Types of Sailboat Masts
Sailboat masts come in various configurations, each with its advantages and drawbacks. The two primary types are keel-stepped and deck-stepped masts.
Keel-Stepped Masts
Keel-stepped masts are the most common type, extending through the deck and resting on the boat's keel. They provide excellent stability and are suitable for larger sailboats. However, they require careful maintenance to prevent water intrusion into the boat's cabin.
Deck-Stepped Masts
Deck-stepped masts rest on the deck of the boat, making them easier to install and remove. They are commonly found on smaller sailboats and are more forgiving in terms of maintenance. However, they may offer slightly less stability than keel-stepped masts.
Components of a Sailboat Mast
To understand mast maintenance better, it's essential to know the various components of a sailboat mast. The key parts include the masthead, spreaders, shrouds, and halyard sheaves.
The masthead is the topmost section of the mast, where the halyards are attached to raise and lower the sails. It also often houses instruments such as wind indicators and lights.
Spreaders and Shrouds
Spreaders are horizontal supports attached to the mast to help maintain the proper angle of the shrouds (cables or rods that provide lateral support to the mast). Properly adjusted spreaders and shrouds are crucial for mast stability and sail performance.
Mast Materials: Choosing the Right One
Sailboat masts are typically constructed from three primary materials: aluminum, wood, and carbon fiber. Each material has its unique characteristics and is suited to different sailing preferences.
Aluminum Masts
Aluminum masts are lightweight, durable, and relatively easy to maintain. They are commonly used in modern sailboats due to their cost-effectiveness and longevity.
Wooden Masts
Wooden masts, while classic and beautiful, require more maintenance than other materials. They are best suited for traditional or vintage sailboats, where aesthetics outweigh convenience.
Carbon Fiber Masts
Carbon fiber masts are the pinnacle of mast technology. They are incredibly lightweight and strong, enhancing a sailboat's performance. However, they come at a premium price.
Mast Maintenance
Proper mast maintenance is essential for safety and longevity. Regular cleaning, inspection, and addressing minor issues promptly can prevent costly repairs down the line.
Cleaning and Inspection
Regularly clean your mast to remove salt, dirt, and grime. Inspect it for signs of corrosion, wear, or damage, paying close attention to the masthead, spreaders, and shrouds.
Common Repairs and Their Costs
Common mast repairs include fixing corroded areas, replacing damaged spreaders, or repairing shrouds. The cost of repairs can vary widely, depending on the extent of the damage and the materials used.
Extending the Lifespan of Your Mast
Taking steps to prevent damage is essential. Avoid over-tightening halyards, protect your mast from UV radiation, and keep an eye on corrosion-prone areas.
Read our top notch articles on topics such as sailing , sailing tips and destinations in our Magazine .
Stepping and Unstepping a Mast
Stepping and unstepping a mast is a crucial skill for any sailboat owner. This process involves removing or installing the mast on your boat. Here's a step-by-step guide for safe mast handling.
Step-by-Step Guide for Safe Mast Handling
- Gather the necessary tools and equipment.
- Disconnect all electrical and rigging connections.
- Use a crane or mast-stepping system to safely lower or raise the mast.
- Secure the mast in its proper place.
- Reconnect all electrical and rigging connections.
When and Why to Unstep a Mast
You may need to unstep your mast for various reasons, such as transporting your sailboat or performing extensive maintenance. It's crucial to follow the manufacturer's recommendations and ensure a safe unstepping process.
Sailboat Mast Boot: Protecting Your Mast
A mast boot is a simple yet effective way to protect your mast from water intrusion and damage caused by the elements. Here's what you need to know.
The Purpose of a Mast Boot
A mast boot is a flexible material that wraps around the mast at the deck level. It prevents water from entering the cabin through the mast opening, keeping your boat dry and comfortable.
Installing and Maintaining a Mast Boot
Installing a mast boot is a straightforward DIY task. Regularly inspect and replace it if you notice any signs of wear or damage.
Replacing a Sailboat Mast
Despite your best efforts in maintenance, there may come a time when you need to replace your sailboat mast. Here's what you should consider.
Signs That Your Mast Needs Replacement
Common signs include severe corrosion, structural damage, or fatigue cracks. If your mast is beyond repair, it's essential to invest in a replacement promptly.
The Cost of Mast Replacement
The cost of mast replacement can vary significantly depending on the type of mast, materials, and additional rigging needed. It's advisable to obtain multiple quotes from reputable marine professionals.
Yacht Masts: Sailing in Style
For those looking to take their sailing experience to the next level, upgrading to a yacht mast can be a game-changer.
Differences Between Sailboat and Yacht Masts
Yacht masts are typically taller and offer enhanced sail performance. They are often equipped with advanced rigging systems and technology for a more luxurious sailing experience.
Upgrading to a Yacht Mast
Consult with a marine professional to determine if upgrading to a yacht mast is feasible for your sailboat. It can be a significant investment but can transform your sailing adventures.
Sailboat Mast Steps: Climbing to the Top
Mast steps are handy additions to your mast, allowing easier access to perform maintenance or enjoy panoramic views. Here's how to use them safely.
Using Mast Steps Safely
Always use proper safety equipment when climbing mast steps. Make sure they are securely attached to the mast and regularly inspect them for wear or damage.
The Advantages of Mast Steps
Mast steps provide convenience and accessibility, making sailboat maintenance tasks more manageable. They also offer an elevated vantage point for breathtaking views while at anchor.
Mast Maintenance Tips for Beginners
If you're new to sailboat ownership, these mast maintenance tips will help you get started on the right foot.
Essential Care for First-Time Sailboat Owners
- Establish a regular maintenance schedule.
- Seek advice from experienced sailors.
- Invest in quality cleaning and maintenance products.
Preventing Common Mistakes
Avoid common pitfalls, such as neglecting inspections or using harsh cleaning agents that can damage your mast's finish.
Sailing with a Mast in Top Condition
A well-maintained mast contributes to a safer and more enjoyable sailing experience. It enhances your boat's performance and ensures you can rely on it in various weather conditions.
How a Well-Maintained Mast Improves Performance
A properly maintained mast helps maintain sail shape, reducing drag and improving speed. It also ensures that your rigging remains strong and secure.
Safety Considerations
Never compromise on safety. Regularly inspect your mast, rigging, and all associated components to prevent accidents while at sea.
Sailboat masts are the backbone of any sailing adventure, and understanding their intricacies is crucial for a successful voyage. From choosing the right mast material to proper maintenance and upgrading options, this guide has covered it all. By following these guidelines, you can sail the high seas with confidence, knowing that your mast is in top condition.
So what are you waiting for ? Take a look at our range of charter boats and head to some of our favourite sailing destinations .
BoatNews.com
How do you manage your sailboat when dismasting?
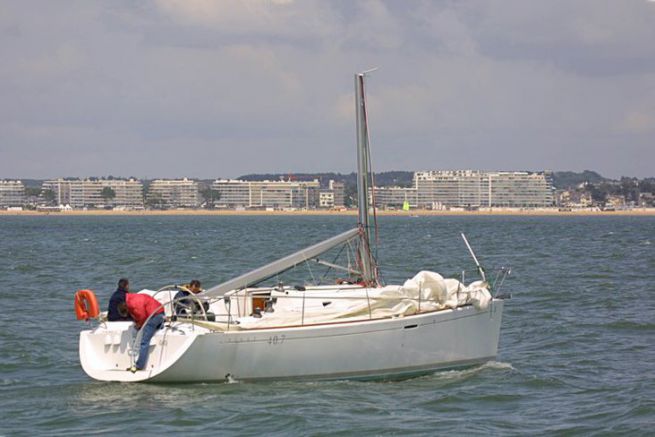
Accidental dismasting can quickly degenerate into a shipwreck if it is not well managed, or if bad luck gets in the way. It is better to have thought about it beforehand so as not to find yourself unprepared in the situation. Here's how this scenario can unfold.
This winter the Class 40 Crosscall was overturned by a wave off the Azores . The boat made a 360 and the mast pierced the cockpit creating a huge waterway . The boat remained between two waters for 11 hours before the two skippers were rescued by a Portuguese Navy helicopter.
Prevent to avoid dismasting
In order for a sailboat to dismast, one part of the rigging must be loose. When turning over, the pressure on the rotating mast underwater is such that it has a high chance of breaking. However, the majority of dismastings are due to broken cables or crimps. Insurers also advise, when not required, to change the standing rigging every ten years.
In addition to the crimps, the forestay, which is hidden by the furling tube, should be regularly monitored. In case of malfunction of the reefing-furling system, it can become dislodged. At the very least, a visual inspection of the rigging at the beginning and end of the season remains a good means of prevention.
What to do if the sailboat still dismasts?
The first thing to do is to ensure the safety of the crew . If no one is injured, you will not have to take any additional risks, as you will not be able to recover a man overboard with a mast hanging in the water. If you are within VHF range of the shoreline, try to notify rescue. Be careful, often the VHF antenna is placed at the masthead on a sailboat . It is very likely to be damaged. Call instead with a portable VHF . Notify CROSS of your situation. Then it's the safety of the boat that has to be taken care of.
Usually the mast breaks at one spreader stage. It is important to avoid at all costs that pieces of the mast ram against the hull. Depending on the sea state, you may therefore be forced to free the entire rigging and let it sink. Also resist the urge to start the engine as there is a high risk of getting a piece of the propeller.
Cut the shrouds that hold the mast to the deck with a pair of guy wire cutters or, failing that, a hacksaw. A good knife is often useful for cutting the genoa which is wound on the forestay. This will allow you to reach the furling line, which you will then have to cut as well. In the water the mast will act on the boat like a floating anchor , stabilising the daggerboard.
If you decide to retrieve it, secure it as soon as possible using the halyards and hoist it using the winches. Be aware that it can be very difficult to get it back on board with the sails still furled. Every situation is different, it will be up to you to decide whether it is worth saving all or part of the rigging and sails.
Once the housework is done, you can try to go home on your own, or wait for help if this is not possible.
- Forums New posts Unanswered threads Register Top Posts Email
- What's new New posts New Posts (legacy) Latest activity New media
- Media New media New comments
- Boat Info Downloads Weekly Quiz Topic FAQ 10000boatnames.com
- Classifieds Sell Your Boat Used Gear for Sale
- Parts General Marine Parts Hunter Beneteau Catalina MacGregor Oday
- Help Terms of Use Monday Mail Subscribe Monday Mail Unsubscribe
What are the factors that lead to a dismasting?
- Thread starter Ross
- Start date Jan 2, 2007
- Forums for All Owners
- Ask All Sailors

Loosing your mast is the second worst thing that can happen to a sailboat. But what is the common failure that causes it to happen.

sailortonyb Allied Mis
Accidental Jibe An Accidental Jibe will put incredible amount of Stress on all your rigging Not sure , but i think this is the No.1 Reason Anyone that has had an accidental jibe can tell you that it os a scarey split second. Tony B

Rigging failure From a cruising point of view, I would think that most dismastings are caused by a failure of one of the rig components, which is why these should be inspected yearly. I would guess most sailors, at one time or another, have suffered an accidental jibe, and unless it happens in heavy air, I would expect a properly designed rig to be able to withstand it. I know that racers on the Great Lakes break masts when thunder storms blow through with higher than expected gusts catching boats with too much sail up.
I think a violent 360 roll could cause a dismast Reading the conditions he was in in and the report that said "dismasted, lost steering and is has a hatch that is broken and leaking" and in the Southern Ocean I am thinking he got caught by a rogue wave and rolled the boat. That would also account for the dmamged steering and the broken hatch. My heart goes out to him and his family. I can't even imagine whats going through his mind. It sounds like he got into a a little "bad luck" weather. But this is a circumnavigation and that is to be expected. This being his first true blue water sailing sounds like he bit a little bit more off than he could chew. Good luck to him.

Larry Wilson
missing cotter pin The only time that I've come close to losing the mast was on the day I launched my first boat, a Columbia Sabre. We had stepped the mast (deck stepped) and were late getting away from the dock for a 3 hour transit to our home slip. In the rush, someone left a cotter pin out of a turnbuckle clevis pin, and on a hard tack, the pin fell out, and we lost the forward starboard shroud at the chain plate with a loud TWANG. Thank the Lord for double lowers. We were able to resecure the shroud, and secured the pin with seizing wire. I always check my turnbuckles now, before leaving the slip, and again, before I leave the boat. Larry Wilson
Several years ago..... during a race in a 7-10 knot breeze the mast on my Kittiwake 23 (a design by Carl Alberg similar to a Cape Dory) broke at the spreader. After a reach on the first leg, we round the mark and hardened up for the leg to windward. Moments later I happened to look up in time to see the mast undulating at the spreader....it fell to windward in a split second with no warning. Having prided myself on maintaining a well kept boat, I remain puzzled to this day as to why it broke. Even the insurance company's marine surveyor could not determine the failure reason; the adjuster tried to make it sound as if I had done something to cause the break in order to get a new mast. But the marine surveyor ruled against him, saying the boat demonstrated the proper care and maintenance by its meticulous owner. As he said, "Sometimes they just break." D. Dixon s/v CD EXPRESS
Rigging Not having your standing rigging properly tensioned is probably a big factor. If there is slack in the shrouds, each time the wind changes side on your sails, there is a great surge of pressure against the rigging, connection points, mas, and deck. Eventually something is going to break. If the rigging is properly tensioned, the impact load is greatly reduced. An accidental gybe is just another way to put the high impact onto your rigging. Care should be taken to prevent an accidental gybe by using a preventer (catchy name, eh?) when sailng on a dead run. Sailing with the wind on your quarter is another way to prevent an acidental gybe. I tie a stopper knot in my mainsheet so that when fully extended, my boom cannot touch my shrouds. If you have a gybe and the boom swings against the shroud, it's quite likely to break something.
Herb Parsons
Chainplates On my O'Day 25 (single lowers), the chainplates had been leaking, and rotted the bulkhead. The teak veneer covered up the poor condition nicely, and I didn't know enough to inspect under the chainplates. One day the chainplate gave way on a tack, and down came the mast.

Knock Down with Waves I believe that mast failures off shore are mostly the result of knock-downs in high seas. The reefed main is submerged and becomes a water tank. the next wave lifts the hull, but the submerged sail does not have lift, and puts high strain on the mast, which then fails. Many non-fiction accounts of rig failure have this kind of scenario in common. More ominously, if the broken mast is not quickly detached from the rigging, it can become a battering ram, which will smash the hull, leading to sinking.
rigging failure I guy was dismasted at my old marina and his chainplate pulled out of rotted wood. Broke off at spreaders. A Cape Dory that I was looking at had lost it's mast twice!!! Both times at the spreaders. This makes sense as the mast is usually well supported at the spreaders by the rigging. Supposedly if you have tight lower shrouds and looser uppers the mast will suffer metal fatique. I read that the uppers should be under greater tension since they are longer. My loos gauge has recommended tension based on the wire's diameter. Using these numbers my uppers are under greater tension because they are heavier wire. I had a cracked turnbuckle that I replaced. It was to an upper shroud and I imagine that if it broke under load the mast would have a lot of stress. Most masts are not very strong except in compression. The wires take all of the lateral loads. My older mast has heavy gauge metal and a wide cross section. Some of the newer masts are much thinner in the walls and in cross section. I guess this is why many have double spreaders. They would seem even more vulnerable to a broken wire. I saw an article on a failed mast. The boat's owner had installed a lot of hardwire which required a lot of holes. Then with disimular metals electrolysis further weakend the mast and it broke along the line of scew holes. They didn't mention it in the article but I bet loose stays were a contributing factor. Aluminum is particularly suspectible to metal fatique.

This discussion reminds me why I like to keep a bolt smasher on board. If the unthinkable happens and I have my wits about me I should be able to quickly sever the remaining shrouds and deal with the rest of a bad day.

newly anonymous
standing rigging It's not about crash gybes and rollovers. Most dismastings occur as the result of failure in the standing rigging. Several years ago I was crewing on a six-month-old Junneau 40 when the cap shroud jumped out of the upper spreader. The mast broke right at the spreader. This happened again last season to a J-24 that the junior sailors from my yacht club were racing. The plastic seizing cap simply wore through, and the stick came down in the middle of a tack. A five dollar part that should have been replaced years before cost them a stick. When shrouds and spreaders separate, masts break. When shrouds and stays part, masts break. Those who use seizing wire should check the integrity of the connection regularly. Turnbuckles, chainplates, shrouds and stays should be inspected at the beginning of each season. Standing rigging should be replaced every ten years.
Snagged shrouds ... I read an account of a couple who were heading south and were on the ICW in New Jersey. I think they were motoring along the waterway and for a moment of inattention they brushed past a bouy and snagged their shroud, bringing the whole mast down on their 32' boat.
capri 22 809
chain plates Standing rigging at the bottom swage. Water rust the wire expanding the fitting. Or the chain plates go due to leaks and the water rust them at the point where they go threw the deck. These are the most common that I see.
Moody Buccaneer

Lost a Few Missing cotter pins twice. The mast held once but had a bend. With deference to Moody, both times were following a re-rig. The third time was a lower eye letting go and the fourth was an upper swage fitting cracked. Two were my boat, one twice. I like free-standing rigs a lot. RD
John (et.al.) yes you are correct Typical dismastings are due to simple rigging failures like broken tangs or cotter pins falling out. Sorry, I read the question wrong, I was trying to figure out (guess) what might have happened to that boat solo sailing that got dismasted If anyone read "Red Sky in Mourning" its a true story of a woman that lost her loved one overboard due to a "HUGE" wave that rolled their boat and just snapped the tether he was on. She came to a day later in the salon very groggy with about a foot of water in the boat and the skipper and the mast gone. Incredible story of her survival Here is the book http://www.amazon.com/Red-Sky-Mourning-Story-Survival/dp/0786886765/sr=8-1/qid=1167858135/ref=pd_bbs_sr_1/105-7875417-7084405?ie=UTF8&s=books
Moody: You state some say to replace rigging evry 5- 7 years. Do you, as a rigger, think that is neccessary? What about fresh water boats? I took a 20 year old back stay used on fresh water into Plamer Johnson, and asked them to make me a new one because I thought it was time. They thought there was no reason to replace the stay.
Sandy Stone
What could have led to one... Years ago, racing my Pearson 26 One-design in 15-20 knot gusting winds, we put the chute up (against my better judgement). We went through a series of two or three spectacular broaches, with the chute collapsing then refilling with a shock like an explosion. The last fill/broach easily outdid the others, with water pouring over the coaming. I looked up at the rig, water around my ankles, expecting to see the chute split to confetti. What I saw instead was the windward upper shroud swinging loose. Ugh, and thank goodness for stout mast sections. After dropping the sails and rigging a halyard to a stanchion base, I got a chance to look at the shroud. The rigging screw had snapped, and looking at the fracture it appeared it had been cracked halfway through for some time before. In short, I got away with one.

Rich Stidger
My surveyor told me... that in the northern areas he would consider replacing rigging around the 30 year mark. In southern climates possibly 15 years would be a more appropiate time. I specifically asked this question when he was doing a 10-year survey for my insurance company. However, he did say that yearly inspections (or more often) should definately be done. End fittings should be checked for cracks and signs of degredation. Wires should be checked for broken strands. Anything suspicious should be reviewed by a professional.
- This site uses cookies to help personalise content, tailor your experience and to keep you logged in if you register. By continuing to use this site, you are consenting to our use of cookies. Accept Learn more…
Yachting Monthly
- Digital edition

Boat rig checks: 18 ways to refine your yacht
- Toby Heppell
- April 7, 2021
Does your boats weather helm bother you, or does she go better on one tack than the other? Toby Heppell explains how to iron out the foibles with proper boat rig setup

Sailing alongside another boat of the same class can reveal differences in how your boat is sailing.
Have you ever wondered why your boat seems to point better and sail faster on one tack that the other? Or found that the helm remains light in some conditions, but develops a mind of its own in others?
The answers to these and many other niggles with your boat’s handling, may lie in how you’ve got the boat rig set up.
Setting up your boat’s rigging can seem a complex task.
Each piece of rigging has a distinctly different effect on a boat’s balance, feel, and response, and each setting change can have a knock on effect, meaning a single adjustment often leads to something else being set up incorrectly.
Due to this, many of us tend to just set and forget our rigging settings.
When was the last time you thought about shroud tension for example?

Sighting up the mast track will show you if the mast is straight. Credit: Lester McCarthy
I’m willing to bet not recently, unless you’ve noticed your shrouds going slack when they usually would not.
But setting up your boat rig properly can make all the difference to how a yacht sails, whether she is manageable in heavy weather, or can keep making headway in light airs.
Get it right, and sailing is much more fun.
I spent my younger years competing at international sailing events in dinghies before moving on to racing keelboats.
In both of these sports, keeping track of boat rig settings in minute detail was a major part of the sport.
When I moved into the world of cruising for fun, I was amazed to discover so many people barely touched their boat rig setup from year to year, let alone morning to afternoon.
Having raced on a great number of keelboats and tested many new yachts for magazines over the years, my obsession with understanding the numbers has not gone away and continues to be one of the first places I look when a boat is not sailing as well as I might hope.
The subject can be seem endless, but a number of simple concepts can make all the difference between a boat feeling like a dream to sail and one feeling like a pig.
Here’s the list I look over when I first start setting a boat rig up.
Boat rig checks: Static set up
Changes in mast rake have an effect on the balance of the helm.
The more the mast is angled aft (adding rake) the more weather helm you will experience.
Standing the mast up straighter reduces weather helm by moving the sails’ centre of effort forward relative to the centre of lateral resistance of your keel.
Completely removing weather helm, however, will make the boat feel unresponsive and will be detrimental to pointing.
Changing the amount of rake may be as simple as adjusting the forestay and the backstay, but it might involve moving the mast step on some boats.
The aim of rake adjustment is to have enough rake to provide some weather helm upwind in light air but not so much that in the heavier winds – when weather helm increases – it becomes too pronounced.

When was the last time you adjusted your rigging? Credit: Colin Work
You want to aim for around 3-5° of weather helm.
It pays to adjust rake for the conditions.
Adding rake when the wind is at the top end helps the mainsail and jib to depower by allowing the air to more easily exit the top of the sail’s leech – often referred to in the racing world as the ‘fourth corner’.
This, combined with the opening of the leech by backstay and Cunningham, works in tandem to reduce power.
It’s a slightly tricky concept to get your head around, as moving the rake aft should, in theory, increase weather helm, but the benefits through depowering the mainsail are such that the net gain (reducing heel and so leeward drift and the boat’s want to round up around the keel) counters this.
This is a key reason adding backstay tension is important in heavier winds – it rakes the mast, depowers the mainsail and tightens the luff of the headsail.
If your rake is easily adjusted and does not involve changing the mast step it might be worth adjusting it based on conditions, but for most cruisers, once you have found the correct rake setting, it is easier to just leave it be.
Mast pre-bend
Pre-bend is achieved by a combination of compression (by increasing rig tension) and adding mast blocks at the mast collar on a keel-stepped mast, or by tensioning a baby stay.
A modern fractional rig on a lighter boat will typically use more pre-bend, perhaps a few inches, than a masthead rig with large overlapping headsail, where pre-bend will be very slight, maybe an inch.

Pre-bend is the amount of bend you have in the mast, usually created by the rig tension – which should match the luff-curve of the main sail. Credit: Maxine Heath
This can easily be measured by attaching the main halyard to the base of the mast, tensioning it and then looking at the bend characteristic.
If you have a tired mainsail that is starting to get too deep, consider adding a little more pre-bend.
It is worth noting that doing this with a tired mainsail will exacerbate the other problem of age – the draft creeping aft – but it is a good fix, on balance.
Boat rig checks: Masthead rig tuning
Shroud tension.
A masthead rig is the least complex option in terms of setup, though this simplicity does offer limited options in terms of adjustment.

With 15° of heel, check the leeward shrouds are still taut and use the baby stay to add bend if needed. Credit: Graham Snook
Firstly, you want to ensure your mast is upright, side-to-side.
A tape measure from the masthead, or simply use a halyard, taken to each shroud base in turn, will quickly show any discrepancy.
Adjust the bottle screws until the mast is straight.
You will want to ensure that the upper shrouds are firm to the touch.
If they feel loose, tighten them equally on each side to keep the mast straight.
A tension gauge is a really good investment to give you a decent idea of that sort of rig tension you are carrying.
Boat, and mast-specific tension levels can be obtained from your mast or boat manufacturer. These will vary depending on rig size.
The common advice is to wind shrouds up to hand tight then add a little more tension with a spanner.
Be careful not to over tighten as this could strip the turnbuckles.
It also pays to err on the side of caution initially as you can always tighten the rig when sailing upwind.
Having your rigging too loose will cause it to pant and jump around in waves, leading to fatigue.
Typically you can go up to, but never beyond, 20% of your rigging wire’s breaking load.
It’s important to tighten all intermediates and lowers evenly on each side, sighting frequently up the aft side of the mast to make sure it remains straight.
This is the initial setting, with mast centered and straight, and all shrouds firm.
When you tension the forestay and backstay, the mast should remain straight side-to-side.
Mast alignment under load
Once you have this basic setting locked in, when you next go sailing in moderate breeze, head upwind and take the slack out of the upper shroud on the leeward side (and count your turns so you can replicate the amount on the other tack).
Tack, and then tighten the other upper the same amount.
Keeping your work to the leeward side shroud ensures you don’t strip the turnbuckle by reducing the rigging tension.

A rig tension gauge will ensure you don’t over tighten your rigging. Credit: Graham Snook
Once the leeward uppers are tight, sight up the mast on each tack to check for side bend.
If the middle sags to leeward, tighten the lowers.
If the top appears to fall off to leeward, it could be the middle popping to windward; either loosen the lowers or tighten the uppers.
Over-tight lowers and loose uppers allow the masthead to fall off.
Proper tension will leave the leeward upper shrouds taut with 15º of heel.
The uppers should be tighter than the lowers; they have more load and stretch more due to being longer.
Check the rig periodically, particularly after sailing in heavy winds.
Look for stretch in the uppers and for over-tight lowers, which can overload upper spreaders.

A masthead rig, showing a small amount of pre-bend. Credit: Colin Work
Backstay tension will bend the mast through compression as well as tightening the forestay.
With a stiff mast, backstay tension translates into forestay tension, controlling how much the forestay, and the headsail luff, sag to leeward.
If you do have a baby stay, this can be utilised to add bend. The backstay also contributes to the bend, particularly once it has been initiated by a baby stay.
Fractional rig tuning
The procedures for tuning a fractional rig differ slightly from those for a masthead rig.
There are many varied configurations of fractional rigs, which makes it difficult to generalise.
The most common type of fractional rig on modern cruising boats is with spreaders swept aft.

Backstay tension will help to reduce forestay sag, which will hamper pointing
Fractional rigs with straight spreaders sit somewhere between masthead and fractional rigs in terms of setup and flexibility.
Swept back spreaders mean that shroud adjustments made will affect lean, side bend, pre-bend, sag, and mast bend.
For the most part, spreader sweep will be fixed on most boats, and their angle (if adjustable) is a level of complexity most of us will not need to worry about.
The first thing you will need to do is to ensure that the mast is centered and stands vertically.

If you tighten the backstay on a masthead rig, but still have forestay sag, you may need to tighten the lowers. Credit: Graham Snook
This can be done by taking the main halyard and measuring down to the same point on either side of the boat to check it is centred.
Use a spirit level to check it is even vertically.
Then, with lowers loose, pull the backstay fully on.
Tighten the upper shrouds, keeping the rig centered and mast straight side-to-side.
If the mast tends to bend sideways, ease the backstay slightly.
Release the backstay. The mast will still have some bend.
Tighten the lowers to remove bend as necessary to match your mainsail.
You can get a good indication of luff curve by laying your sail on a flat floor, running a straight edge (or piece of string) from head to tack of the mainsail and measuring the difference along its length.
This does actually measure a bit of luff round (the shape cut into the sail by sticking), but it’s close enough.
The rig is now tuned for maximum headstay tension. Additional backstay tension will bend the mast and add some headstay tension.
To get the mast to bend more easily, ease off the lowers. To make backstay tension affect the headstay tension as much as possible, tighten the lowers.
Upwind in a breeze the top of the mast will fall off to leeward, and the middle will bow out to weather.
This side bend de-powers the rig to a greater degree than fore and aft bend.
Easing the lowers may reduce side bend, but it will allow more headstay sag and fore and aft mast bend.
In a perfect world, we would adjust shrouds each time we go sailing to achieve proper mast bend and headstay sag characteristics for varied conditions.
But realistically, that is not going to be something anyone will want or be able to do.
As such, aim for a setup which errs towards a slightly less bent, and so more powered-up mast and rig setup on the assumption that when cruising we are more inclined to reef earlier.
Using your boat rig
How your rig helps upwind.
In light winds:
Pointing is not important, moving is. As such the main thing you are looking for in light conditions is to increase depth in the sail.
Easing backstay will straighten the mast and allow the mainsail to be a little deeper.

As you apply more backstay tension, also pull on the cunningham to stop heel-inducing draught moving too far aft. Credit: Colin Work
It will also increase forestay sag and allow the headsail to power up.
Both of these will mean you point less close to the wind, but you will only lose a degree or so and the increase in speed will more than make up for it.
Easing halyards and outhaul will allow for plenty of twist and depth in the sails by moving the genoa car forward and easing the sheet, then bring the boom to windward of the centreline and ease the mainsheet and vang, or leave it on the centreline and haul on the topping lift if you have one.
In medium breezes:
Tighten halyards and outhaul and flatten the sails. Also, with the main, use backstay and mainsheet tension.
‘Bending the mast is what you are after as you move into mid-range wind condition,’ explains Bill Gladstone from North Sails.

Ease backstay tension for fuller sails off the wind. Credit: Graham Snook
‘As you bend the mast, three things happen. First the sail gets flatter as the middle of the mast goes forward. The second is you increase twist and the third is that the draught moves aft. As you bend the mast to keep the same twist profile you might need to adjust the mainsheet and then pull on more halyard or downhaul.
‘With the genoa, move the car back a couple of notches and add some sheet tension but don’t let the leech touch the spreaders. If the wind builds, tighten everything further until you’re up to maximum luff tension, outhaul and backstay. Make sure the leech isn’t hooked, as that will also sag the forestay.’
In heavy winds:
You’ll need to reef . In theory increasing mast rake will help to decrease weather helm and keep the boat better on its feet.
As the boat rig moves aft, so the balance point moves aft, but the mainsail will be driving less hard, due to twist so you are reducing the effect of a full headsail overpowering a depowered mainsail.

Pulling on the backstay will bend the mast and flatten the sail. Credit: Lester McCarthy
That is the theory, but without easy access to adjusting mast rake, reefing is the easier option.
As pointing can be dependent on the mainsail maintaining proper leech tension, it is easier to keep the boat pointing well with a reefed main that can be sheeted than with a main that does not have enough leech tension.
When sailing downwind sailing, essentially we want the mainsail to be as full as possible.
Removing backstay tension is a great way to do this, straightening the mast and making the sail deeper.
Taking tension out of your halyards will help here too.

A straighter mast will give a fuller sail with the draught further forward. Credit: Lester McCarthy
Easing the backstay downwind will also have the added bonus of keeping the rig further forward and so reduce headsail tension and increase the depth of your genoa (or spinnaker of you are flying one).
However, if you are using a cruising chute (and so not sailing dead downwind) it might be worth keeping a fair amount of backstay tension on and therefore increasing the luff tension of the chute, helping it to fly a bit more effectively.
Boat rig checks: Troubleshooting
Unequal tacks.
The most easily noticeable issue that can come about from your rig setup being incorrect is the boat performing differently from tack to tack, which can cause much head-scratching and exasperation.
The large numbers of variables, such as wind strength, direction and tide can make it tricky to spot.

Keep an eye on boat speed and wind angle. Credit: Lester McCarthy
Typically the issue will present in a number of different ways.
It might be that you cannot make the same angle on one tack as you can on the other, or that speed through the water is different on each tack (remember to check if your paddle wheel is offset).
This intuition that you have a ‘bad tack’ is developed over time and with experience.
Chainplates
You might imagine a yacht built by a professional yard with modern construction techniques would mean everything lines up, therefore ruling out chainplate position as a possible cause, but it’s worth checking.
You could be surprised how much difference there can be in position from side-to-side.

Measure from the bow and the centreline to check chainplate position isn’t an issue. Credit: Lester McCarthy
A discrepancy doesn’t mean your boat is a dud, or in need of repair, but it means you can trim your sails differently to account for your boat’s idiosyncrasies.
To check, tie a tape measure or anything else that will not stretch to the forestay, then run it aft to each shroud base. Are they the same distance from the forestay?
Next, measure the distance between the two shrouds and half it to find the centerline, then run a tape measure perpendicularly from the centreline to each shroud base.
The distances should be the same.
If not, and you have a keel-stepped mast, you can centre it with chocks next time it’s re-stepped.
Are you genoa tracks symmetrical?
When you roll away some genoa, you need to move your genoa cars forward to keep the leech under control.
You might note that the leeward car is now a certain number of holes from the forward end of the track and move the windward one to match, but if the tracks aren’t positioned symmetrically, or you have a different type of track to windward, that won’t be the case.

Check your genoa car reference points by measuring from the genoa tack or bow. Credit: Lester McCarthy
Measure from the forestay to the forward end of each genoa track.
Do both sides match?
Weather helm
A bit of weather helm helps the boat point and tells you when it’s in the groove.
Too much and the rudder will be slowing you down.
Setting the correct amount of sail can reduce weather helm.

If weather helm is an issue, look up at your leech tension. Credit: Graham Snook
If it persists, look at your boat rig.
The centre of effort from the sails should be aft of the centre of lateral resistance.
The further aft, the more weather helm.
At a basic level, moving the mast forward, by moving the mast step forwards, or by reducing rake by easing the backstay and tightening the forestay, will bring the two points closer.
However, pulling on backstay tension will flatten the main and open the leach, spilling power and moving the centre of effort forwards.
Inducing mast bend, with shroud or baby stay tension, will also depower the main.
Continues below…

How to check your rigging – video guide
A screwdriver, a straight edge and a good set of eyes are all that’s required for a basic rig check.…

Spinnaker masterclass: tailored downwind sailing
There’s more than one way to rig, hoist, set and drop your spinnaker. Choosing the right setup and skills is…

Bowsprit power for downwind sailing
Bowsprits are all the fashion on new boats these days, but do you need one? Graham Snook looks at how…

How to reef to sail safely through any weather
Pete Goss delivers his masterclass on when to reef, and explains why it is critical to keeping control of your…

Can I test my own rigging?
Send your questions to [email protected] for an expert answer. This month - can you do your own rigging checks?…
Having the mast further forward or will reduce weather helm, but doing so by easing the backstay has the knock on effect of powering up the mainsail such that it will increase weather helm.
To reduce this, stand the mast upright via your shorts or mast step, but increase mast bend via the backstay to reduce the mainsail’s power.
Check you mast is straight
By sighting up the mast as in the previous set up information we covered, you can check that your mast is straight.
Check that it is vertical too and that the pre-bend settings have not changed.

The main halyard, pulled to each chainplate, will give a good indication of whether the mast is upright. Credit: Lester McCarthy
Newly fitted rigging or re-fitted rigging does take some time to bed in and can do so at different rates.
If you stepped your mast at the start of the season, it could have changed over time, now giving you an asymmetric setup.
Replacing standing rigging
Some insurance policies insist on new rigging every 10 years, while others are satisfied with a professional rig inspection.
If you are replacing your rigging, you face the choice of whether to go for the cheapest option or to upgrade to something that will give you better performance.
The key characteristic is the amount the rigging will stretch, and sagging rigging leads to masts that flex more than they should, forestays that bag to leeward, and less control over the mainsail shape.
Wire is still the primary option for most of us, but there are three different kinds you can opt for:
- 7×19, or wire rope, is the most old- fashioned, and is suitable for running rigging where it needs to be highly flexible, but is not often used in standing rigging nowadays.
- 1×19, a single bundle of 19 thicker wires, is the standard wire for most rigging uses.
- Compact dyform wire is pressure-treated. It weighs a little more for its size but offers reduced stretch, increased breaking loads and with it significantly more cost.
Life expectancy for all three is very good with regular inspection, 7-20 years or 15-25k nautical miles, depending on use and region.
‘Wire does have its advantages,’ says Gordon Bonnay of Performance Rigging.

7×19 wire is the most flexible, but only used for running rigging now
‘The biggest thing that wire has going for it is that it will advertise its failure. Generally a strand will pop out, and as soon as you see it you know the wire is compromised.’
Rod rigging has also been around a long time now. It has low stretch characteristics, a very long lifespan, and a minimum breaking strength beyond that of its wire counterpart.

1×19 wire is standard on many cruising boats
‘Principally the thing that goes wrong with rod rigging is only really if there is a fault in the hydraulically attached fitting forcing the rod into a different shape, or if it is pulled out of line repeatedly,’ explains Bonnay.
Rod rigging has extremely long life expectancy attributed to design (mono strand) and the composition of the alloy making it very corrosion resistant.

Compact dyform wire is stronger, lighter and has less stretch
However, it does require a more in-depth service protocol during recommended intervals, which includes unstepping the mast to inspect and re-head the rod as needed.
Therefore, rod clearly gives better performance, but its high cost and servicing requirements isn’t affordable for most cruisers.
Essential rigging checks
Check and tape split pins.
They may seem insignificant but, properly fitted split pins can save your mast.
Without them, bottlescrews and clevis pins work loose and you’ll lose the lot.
Use the biggest split pin that will fit the hole, pack any space with stainless steel washers, insert the pin, spread both its legs into an anchor shape and secure with tape or a blob of silicone to prevent snagging on clothing, sails or skin.
Check shroud terminals
Securing mooring lines to shroud bases is never a good idea because the loading can deform rigging toggles and weaken bottlescrews, creating uneven loading and increasing the chances of failure through fatigue.
If there isn’t a cleat handy, use genoa cars, winches or padeyes instead.

Hairline fractures in terminals can cause rig failure. Time for new rigging. Credit Graham Snook
For standing rigging, check the top of the swage and look for any broken strands.
If you find some, replace that shroud and its opposite.
Check your furler and line
Make sure the lead onto the drum is fair and that there are no chafe points.
If it’s looking tired, replace it.
Remember, if the furling line breaks on a windy day, you’ll have far too much sail up for the conditions, and the loads will be critical.

The furling line and drum is a crucial part of the rig to be checked
Also, check the grub screws on the collar where the drum meets the luff tube.
The forestay shakes tremendously during tacks and those grub screws can easily come loose.
Check mainsail track sliders, cars or bolt rope
Just as a snapped furling line will leave you with far too much sail up, losing a few mainsail track sliders or tearing out your main’s bolt rope can leave the sail bulging to leeward.
In a matter of seconds the wind can strip out the others, leaving you with a spinnaker where your mainsail used to be.
Check the fastenings to both mast and sail are secure, and consider repairing if you’re in any doubt.
Send a rigger up the mast
There is no tension in the stays of an unstepped mast, and that means broken strands can creep back into the swage, giving the appearance that nothing’s wrong.

It’s worth taking a look at masthead rigging attachments when they are under load. Credit: Graham Snook
Once a season, send a rigger aloft.
They can check for broken strands at the top of shrouds, cracks in terminals, or in the mast around terminal fittings, and make sure your shackles are properly seized and your sheaves are in good order.
Enjoyed reading Boat rig checks: 18 ways to refine your yacht?
A subscription to Yachting Monthly magazine costs around 40% less than the cover price .
Print and digital editions are available through Magazines Direct – where you can also find the latest deals .
YM is packed with information to help you get the most from your time on the water.
- Take your seamanship to the next level with tips, advice and skills from our experts
- Impartial in-depth reviews of the latest yachts and equipment
- Cruising guides to help you reach those dream destinations
Follow us on Facebook , Twitter and Instagram.
What is a Sailboat Mast? Everything You Need to Know!

If you love boats and sailing as much as we do, then it’s essential to know your sailboat inside out. So you may be asking the question: What is a sailboat mast?
A sailboat mast is a cylindrical, long vertical spar mounted on the deck and supports the vessel’s sails. Masts are a distinctive feature of sailboats and hold the sails in place. Most masts for modern sailboats are made of aluminum or carbon fiber, while traditional boat masts are made of wood.
Masts are usually taller than the boat’s length, and the type of mast on sailboats depends on the type of sail plan they support.
Parts of the Sailboat Mast
The mast is just a pole and does not function without several important parts. The mast boom starts from the deck, which prevents water from flowing down the mast and into the cockpit.
The long ropes connected to the mast on each side are the stays that hold the mast upright under tremendous force. The boom is attached to the mast by a gooseneck. The halyard lines that run to the top of the mast are used to hoist and lower the sail.
How to Choose a Mast
If you have a production boat, then the choice will depend on the make and model. For a one-off boat without a designer’s sail plan, the main factors you will need to consider are:
- the characteristics of the mast step
- the vessel’s length and displacement
- the presence of backstays and running backstay
- the number and location of chainplates
If the mast is stepped on deck instead of on the keel, a picture of the step might be helpful to the mast manufacturer.
If you race often, you should consider a carbon mast for less weight and improved performance.
Single-Mast Rigs
Single-masted sailboats are what most people think of as modern sailing vessels. Single-masted boats are popular because they are cheap to manufacture and easy to operate with one hand.
The most common types of single-masted rigs are cutters, sloops, and catboats.
Sloop-Rigged Mast
Sloop-rigged boats are the most common type of sailboat today. Sloops have a single mast attached somewhere on 3/5 of the deck, but some boat designs deviate slightly from this. Generally, the mast of a sloop occupies about half of the deck.
Sloop masts are equipped with a large mainsail and a jib. The less common sloops with wing rigging have a much shorter mast and a four-pointed mainsail.
Cutter Mast
Sailboats with cutter rigging have a single tall mast and multiple headsails. Visually, cutters are easily confused with sloops. However, the mast of a cutter is usually taller than a sloop of similar size because it is equipped with multiple headsails instead of a single jib.
Cutters with wing rigging are far more common than sloops with wing rigging in many areas. Cutters are easily distinguished from sloops, even when the sails are set. This is because cutters usually have a long bowsprit and two forestays.
Catboat Mast
Catboats are unique vessels with a single mast at the bow and a long boom. Unlike sloops, catboats are rigged for only a single sail. Catboat masts are usually attached almost to the front of the boat and are usually short and fairly thick.
Catboats are usually equipped with gaff rigs. Hooked sail plans take full advantage of short masts and are easy to steer in a single-mast configuration. Catboats with gaff rigging have shorter masts than similarly sized Bermuda rigged boats, but are generally taller than gaff rigged boats.
Multi-Masted Rigs
Multi-masted rigs are less common than single-masted rig configurations. However, multi-masted sailboats are often elegant and seaworthy. But they offer more than just good looks: Multimasts offer speed and precise control for experienced sailors. Most of these boats have two masts, which are usually shorter than single-masted boats of comparable size. The most common varieties are the dinghy, ketch, and schooner rig.
Yawls are sturdy multi-masted vessels ranging in length from 15 feet and longer. A yawl has a long mainmast at the bow and a short mizzenmast at the stern of the boat. Yawls are usually gaff-rigged and were formerly used as supply boats.
Yawl-rigged sailboats can use the mizzen mast and sail as a form of self-steering. The dinghy is easily distinguished from other two-masted vessels because the mizzen mast is short and often only half the size of the main mast. In addition, the mizzen mast is located aft of the rudder mast.
Ketch Masts
At first glance, a ketch can be confused with a yawl. But the ketch has two masts of similar size and a much larger mizzen. The mizzen mast of a ketch is located forward of the rudder. Ketch-rigged boats are often also gaff-rigged and use topsails on both masts. Some ketch-rigged boats have triangular sail plans that reduce the need for topsails.
Like the dinghy, the ketch has a headsail, a mainsail, and a mizzen sail comparable in size to the mainsail. Ketch-rigged vessels can sail with one or more staysails.
Schooner Masts
Schooners are among the most elegant types of multi-masted sailing yachts. Schooners are much more similar to ketches than to dinghies. However, upon closer inspection, a schooner has a shorter foremast and a longer mast behind it.
Schooner masts are tall and thick, but usually shorter than those of similarly sized single-masted boats. This is because two-masted boats spread the sail plan over two masts and do not need the extra length to compensate for the loss of sail area. Schooners are usually gaff-rigged and often use topsails and spars that extend the height of the mast.
The Masts Of Large Ships
Tall ships are the classic sailing vessels that ruled the oceans for hundreds of years before the age of steam.
Large ships have three or more huge masts, often made from whole logs. Some of the larger ships have five or more masts. Tall ships are usually 100 feet or more in length, as the size and complexity of these square-rigged vessels make them practical only in scale. Tall ships have one or more main masts, mizzen masts, a foremast, and a gull mast behind the mizzen mast.
Sailboat Masts Materials

Sailing yacht masts are usually made of aluminum or certain types of wood. Until the 1960s, almost all sailboat masts were made of wood. This changed at the same time that boats made of fiberglass became popular. Today, aluminum is the most commonly used mast material.
Wooden Masts for Sailboats
Wood is the traditional material for many sailboat masts and is still used today for some specialty boats. Wooden masts are heavy but strong, and a well-maintained wooden mast can last over a hundred years. Wooden masts are common on boats with gaff rigging, as wood is an ideal material for shorter masts.
The most common wood used for masts comes from the spruce family. Douglas fir is widely used, but regional varieties are also well suited. Some sailboats use pine or redwood as mast material. Some varieties of cedar including Oregon cedar and white cedar are also excellent for masts and spars.
Aluminum Masts
The most common material for modern masts is aluminum. Aluminum masts are hollow and therefore lightweight and easy to fabricate. Aluminum masts are also very strong relative to their weight and less costly than other mast materials.
One of the disadvantages of aluminum poles is galvanic corrosion. This occurs very quickly when salt water comes in contact with aluminum and other metals such as steel. Aluminum masts are most commonly found on sloops with Bermuda rigging.
Carbon Fiber Masts
Carbon fiber masts are a recent development in boatbuilding and offer several advantages over wood and aluminum masts. Carbon fiber is lightweight and extremely strong, making it ideal for large-masted racing yachts. Boats competing in the America’s Cup use the highest quality carbon fiber masts in the industry.
Unlike wood, carbon fiber masts are not particularly flexible. The stiffness of carbon fiber makes them strong, but stiffness is also a weakness. Under extreme conditions, carbon fiber masts can break and are difficult to repair once damaged.
Maintenance of the Mast
Maintenance of the mast and associated accessories is essential. Mast stays, lines, and halyards should be checked regularly, adjusted, and replaced periodically. Wooden masts should be painted and checked for signs of rot.
Aluminum masts are generally low maintenance, but signs of corrosion warrant immediate repair. Work with your local boat mechanic or boating expert to develop a comprehensive maintenance plan. And remember, preventive maintenance is always cheaper and easier than repairs.
By now you know what a sailboat mast is, the different types and materials of masts, and how to maintain them.
Masts are an imposing feature of sailboats because they are vertical and often longer than the sailboat. Masts also have the essential function of holding the sails in place so you can continue sailing to your favorite destinations.
- What Is A Boat With 2 Masts Called?
- How Much Does It Cost To Wrap A Boat?
- How to Sail Against The Wind?
- 1 Parts of the Sailboat Mast
- 2 How to Choose a Mast
- 3.1 Sloop-Rigged Mast
- 3.2 Cutter Mast
- 3.3 Catboat Mast
- 4.1 Yawl Masts
- 4.2 Ketch Masts
- 4.3 Schooner Masts
- 4.4 The Masts Of Large Ships
- 5.1 Wooden Masts for Sailboats
- 5.2 Aluminum Masts
- 5.3 Carbon Fiber Masts
- 6 Maintenance of the Mast
- New Sailboats
- Sailboats 21-30ft
- Sailboats 31-35ft
- Sailboats 36-40ft
- Sailboats Over 40ft
- Sailboats Under 21feet
- used_sailboats
- Apps and Computer Programs
- Communications
- Fishfinders
- Handheld Electronics
- Plotters MFDS Rradar
- Wind, Speed & Depth Instruments
- Anchoring Mooring
- Running Rigging
- Sails Canvas
- Standing Rigging
- Diesel Engines
- Off Grid Energy
- Cleaning Waxing
- DIY Projects
- Repair, Tools & Materials
- Spare Parts
- Tools & Gadgets
- Cabin Comfort
- Ventilation
- Footwear Apparel
- Foul Weather Gear
- Mailport & PS Advisor
- Inside Practical Sailor Blog
- Activate My Web Access
- Reset Password
- Customer Service

- Free Newsletter
Ericson 34-2 Finds Sweet Spot

How to Sell Your Boat

Cal 2-46: A Venerable Lapworth Design Brought Up to Date

Rhumb Lines: Show Highlights from Annapolis

Leaping Into Lithium

The Importance of Sea State in Weather Planning

Do-it-yourself Electrical System Survey and Inspection

Install a Standalone Sounder Without Drilling

When Should We Retire Dyneema Stays and Running Rigging?

Rethinking MOB Prevention

Top-notch Wind Indicators

The Everlasting Multihull Trampoline

Check Your Shorepower System for Hidden Dangers

DIY survey of boat solar and wind turbine systems

What’s Involved in Setting Up a Lithium Battery System?

The Scraper-only Approach to Bottom Paint Removal

Can You Recoat Dyneema?

Gonytia Hot Knife Proves its Mettle

How to Handle the Head

The Day Sailor’s First-Aid Kit

Choosing and Securing Seat Cushions

Cockpit Drains on Race Boats

Re-sealing the Seams on Waterproof Fabrics

Safer Sailing: Add Leg Loops to Your Harness

Waxing and Polishing Your Boat

Reducing Engine Room Noise

Tricks and Tips to Forming Do-it-yourself Rigging Terminals

Marine Toilet Maintenance Tips

Learning to Live with Plastic Boat Bits
- Inside Practical Sailor
Pondering Options for Varnishing a Mast

As a mast and rigging overhaul creeps toward the top of the refit list on my 1971 Yankee 30, Opal , I’m thankful I’m no longer the custodian of wooden spars, as I was on my old Atkin ketch, Tosca . It’s not that a wooden spar is any less capable than an aluminum one, and a well-kept wooden spar is far more lovely to look at, in my view. However, wooden spars have gone the way of the Walker taffrail log for a reason.
In the tropics at least, taking wood out of the equation offers some relief from the unending battle against the elements. In short, aluminum does not rot. The best weapon against mast rot is to truck the boat off to Sedona, AZ or some other arid place where each exhalation turns instantly into dust. Since the name of this publication suggests we are supposed to offer practical solutions for sailors, this clearly is not an option.
In the “ Exterior Wood Finish Update ” in the July 2021 issue of Practical Sailor, we revisit clear wood finishes, looking specifically at ease of application, gloss, color retention, and durability after two years. If you have questions about which varnish looks great after two years in the sun, that’s the place to look. Another important factor to consider is hardness—a feature that is particularly important for those areas that see a lot of foot traffic, abrasion, or impact from halyards or shackles. Masts, spars, tillers, and classic wood blocks and cleats probably see the most banging out of any wood component on the boat. As anyone who has decided to refinish their spars will tell you: there is no shortage of opinions on what product to use.
Last month’s report on reviving aluminum masts also revived one of the most common questions we get regarding marine varnish: What kind of finish is best for a wood mast? Even though aluminum has long since replaced Sitka spruce as the material of choice for a sailboat mast, there are plenty of wooden masts still in service. Many of the Taiwanese-built boats of the 70s and 80s had wooden masts, and of course, a wide range of U.S.-built classics still have their original wooden masts. And there are plenty of aluminum masts with spruce spreaders—my Yankee 30 among them.

Why Not Paint?
Clear-coating wood is more than an aesthetic preference. One of the main reasons a sailor would choose to clear-coat a wood component is to make any potential rot visible as soon as possible. Warding off fungus becomes particularly important in your spars, where any significant weakening could have disastrous consequences.
Although a high-quality paint will provide excellent protection to a wooden mast or boom, the paint can often hide cracks and seams where water is penetrating, creating a fertile ground for rot to take hold. Without frequent, careful inspections, these seemingly harmless dings and chips in your coating can open the door to more serious damage that can go unseen.
By comparison, when moisture penetrates a clear coating, the wood usually darkens, making any failures in the coating more obvious, allowing you to quickly head off more serious damage.
The most persuasive argument in favor of a painted mast is the ease of maintenance — but this, too, is based on some common misconceptions. Yes, it is generally easier to slap on another coat of alkyd enamel paint than it is to apply another varnish top-coat, but the time and effort advantage is not so significant once one adopts a clear-coat maintenance regimen. In both cases, re-coating generally means going aloft with a can and a brush, so the pace of application is already handicapped.
Depending on where you are cruising, both coatings will need a new top coat every three years at least. With today’s easy-flowing, quick-drying varnishes, you can refinish a spar with varnish at nearly the same pace as you can with paint.
If you are refinishing your spar “from scratch” (removing hardware, stripping down to bare wood, etc.), spray coating can further close the ease-of-application gap between paint and varnish. In the end, they are both coatings, and the prep work required of a quality finish is not much different. And when it comes time to recoat, varnish’s tendency to be less forgiving of application flaws works in its favor during annual inspections.
Sealing with Epoxy
Undoubtedly, when you begin any wood refinishing project—especially one involving a mast, spar or caprail — someone will tell you that they had great results sealing the wooden member with epoxy before recoating with varnish. While we do not doubt that the initial results from this application can be impressive, we are not big fans of sealing wood with epoxy. Here’s the gist of a previous PS Advisor that we wrote on this topic.
For those who have read our in-depth report on epoxy finishes “Stuck Like Glue” , it would seem that epoxy would be a logical choice for keeping moisture at bay and dealing with abrasion from halyards. But there’s more to this question than simply finding a material with good adhesion and a durable, abrasion-resistant bright finish.
Soft woods see a lot of moisture-induced surface movement, so coatings must be able to cope with the physical surface changes linked to dry, hot weather and the wet, cooler times of the year. That is why many people prefer relatively flexible spar varnishes for such applications. Although they’re less durable from an abrasion-resistance perspective than hard coatings like epoxy, they do give the wood that elegant amber look.
Epoxy resin is the vise-grip of all coating materials, but it has poor handling characteristics (flow, leveling, brushability) and no UV inhibitors. Mas Epoxies, however, are less viscous than most epoxies and tend to penetrate the substrates surface, making their flow out a little easier to control.
Using any epoxy as a base for an attractive wood finish is tricky. For one thing, its hard to sand without burning through, which will cause noticeable color changes when the topcoat is applied. And when the surface does fail, 85 percent of it will still be solidly stuck to the soft wood, and its removal or repair will be a major pain.
In our opinion, coating a mast with epoxy prior to varnishing and then topping off with a two-part coating is asking for more work down the road. The epoxy’s best attribute, its adhesive tenacity, is also its bane.
We recommend sticking with a good spar varnish. In our upcoming report in the July 2021 issue, testers noted that after two years of direct exposure, three traditional spar varnishes faired extremely well, showing exceptional gloss, and little signs of weathering. Testers also observed that three of the top-shelf synthetic acrylic urethane, and polyurethane finishes looked almost as good as new.

Doubling-up Protection
The most recent round of woodfinish testing did not combine different products (although some products were multi-component), so it did not look at the multi-product method many pros use to protect spars. This two-product method, which we’ve discussed previously, entails first applying a penetrating phenolic tung-oil based varnish (usually one-part) and then following it with a clear acrylic urethane, or polyurethane (usually two-part). This two-product approach results in a flexible clear coating that provides three layers of protection: sealing the wood from water penetration, providing UV protection, and enhancing the finish hardness. All of the major marine coating manufacturers, including Pettit, Epiphanes and International (Interlux), offer products that adapt well to this two-step method protection.
A classic example of this approach is Interlux’s Awlspar/Awlbrite system still used by many pros: Apply a few coats of Awlgrip’s Awlspar, an amber-hued phenolic tung-oil varnish, and then overcoat with Alwgrip Awlbrite, a clear acrylic urethane with three-component (base, converter, activator). Given the outstanding results of our most recent testing with newer, easier to apply products (including Interlux’s relatively new line of Awlwood products), this approach might not be best for the do-it-yourselfer, but it has a long track record among professionals.
In addition to our most recent report in the soon-to-be published July issue, Practical Sailor subscribers can see results of our long-term test of varnishes and other wood finishes in the May 2009 , January 2011 , and September 2011 issues. Our initial reports on one-part varnishes and two-part varnishes that appeared the August 2007 and December 2007 issues are available to all sailors, as is our January 2011 guide to selecting varnish types and December 2009 guide to maintaining varnish . To search our complete archives for past reports on varnishes and clear wood coatings, search under wood coatings, wood finish, or specific product names like Cetol.
And if varnish is just part of a more extensive cosmetic overhaul for your boat, then our four-volume series “ Painting Your Boat from Bottom to Top ,” offers details on every aspect of a complete makeover–from stripping old paint or varnish, to choosing new coatings and applying them for a professional finish.
RELATED ARTICLES MORE FROM AUTHOR
I have a Atkin schooner with 2 sitka spruce masts and the two gaffs that are both varnished. I agree that annual inspections are critically required. (I have a self climbing system). Maybe 15 years ago, I stripped the masts when they were on the ground and put on 12 coats of varnish. After that I put one coat of Epifanes’s Woodfinish gloss then 1 coat of their traditional clear varnish. I follow Rebecca Wittman “The Brightwork Companion” for instructions on what to do when going up and back down the masts. The main mast takes a beating especially during panic reefing. But the varnish is flexible and you can monitor the damage. The main negative is you need a few days temperature to be over 70 F.
You mentioned Awlspar/Awlbrite with an overcoat with Alwgrip Awlbrite. What are your thoughts on Awlwood?
Awlwood did very well in our testing, earning a Recommended product rating. We’ve not used it — yet — on spars. https://www.practical-sailor.com/boat-maintenance/diy-projects/exterior-wood-finish-update-at-2-years
I have a Friendship Sloop and use Awlwood on everything, including spars (clear primer, then yellow primer added to gloss, then gloss), dug out all checks and filled with Sikaflex 201, tan, which is hard to see from 10′ and cures with the same chemistry as Awlwood, so no problems with adhesion of finish. Stuff lasts forever — 8 years and counting on lazarette hatches, horizontal to sun and never covered, looks brand new. I built roller sawhorses to ease spar finishing, cutting a slot in the top and fitting small (8″) rubber wheels on 1/2″ axles which are fastened to the top with 1/2″ copper plumber’s pipe fasteners and a small piece of 1/2″ copper pipe into which the axle fits. Made working on mast and finishing easy, just roll the mast which sits on two wheels per sawhorse. I would send a picture of mast and sawhorses, but can’t figure out how to.
LEAVE A REPLY Cancel reply
Log in to leave a comment
Latest Videos

40-Footer Boat Tours – With Some Big Surprises! | Boat Tour

Electrical Do’s and Don’ts

Bahamas Travel Advisory: Cause for Concern?

Island Packet 370: What You Should Know | Boat Review
- Privacy Policy
- Do Not Sell My Personal Information
- Online Account Activation
- Privacy Manager
What is a Sailboat Mast?

Last Updated by
Daniel Wade
June 15, 2022
A sailboat mast is the towering pole mounted to the deck. It attaches the length of the sail to the boat and supports the shape of the sail.
Sailboat masts are the most distinct feature of sailing vessels, and they hold the sails in place. Masts are often taller than the length of the boat. Most modern sailboat masts are made of aluminum, though traditional boats use wood. Sailboat mast type varies based on what type of sail plan they support.
Table of contents
Parts of the Mast
The mast itself is simply a pole and won't function without several essential parts. Starting from the deck is the mast boot, which keeps water from draining down the mast and into the cabin. The long wires connected to the mast on each side are the stays, and they keep the mast upright under tremendous force. The boom connects to the mast using a gooseneck fitting. Halyard lines, which run to the top of the mast, are used to raise and lower the sail.
Single-Mast Rigs
Single mast sailboats are what most people picture when they think of modern sailing craft. Single mast boats are popular because they're inexpensive to produce and relatively easy to operate singlehanded. The most common kinds of single-mast rigs are sloops, cutters, and catboats.
Sloop rig boats are the most common kind of sailboat today. Sloops feature a single mast mounted somewhere on the forward 3/5 of the deck, but some boat designs differ slightly. Generally speaking, a sloop mast lies somewhere in the middle to the forward-middle of the deck.
Sloop masts are rigged for a large mainsail and a jib. Bermuda-rigged sloops utilize a tall single mast and triangular sail. Gaff-rigged sloops, which are less common, use a much shorter mast and a larger four-point mainsail.
Catboat Mast
Catboats are unique vessels common to New England and feature a forward-mounted single mast and a long boom. Unlike sloop-rigged boats, catboats are only rigged for a single sail. Catboat masts are generally mounted almost at the very front of the boat, and they're often short and quite thick.
Catboats are almost often gaff-rigged. Gaff-rigged sail plans make the most of short masts and are relatively easy to control in a single-mast configuration. Gaff-rigged catboat masts are shorter than Bermuda-rigged boats of similar size but generally taller than similar gaff-rigged craft.
Cutter Mast
Cutter-rigged sailboats feature a tall single mast and multiple headsails. Visually, cutters are easy to mistake for sloops. But the mast of a cutter is usually taller than a comparably-sized sloop, as it utilizes multiple headsails instead of a single jib.
Gaff-rigged cutters are much more common than gaff-rigged sloops in many areas. Cutters are easy to distinguish from sloops, even when the sails are stowed. This is because cutters often feature a long bowsprit and two front stays (forestay and jib stay).
Multi-Mast Rigs
Mult-mast rigs are less common than single-mast configurations. That said, multi-mast sailboats are often elegant and seaworthy. Though they offer more than just good looks—multiple masts offer speed and precise control for experienced sailors. Most of these vessels feature two masts, which are often shorter than masts on comparably-sized single-mast craft. The most common variations are yawl rigs, ketch rigs, and schooner rigs.
Yawls are robust multi-mast vessels that vary in length from 20 feet to well over 50 feet. A yawl features a long forward mainmast and a short mizzen mast located towards the back of the boat. Yawls are often gaff-rigged and were once used as utility boats.
Yawl rigged sailboats can use the mizzen mast and sail as a form of self-steering. The yawl is easy to distinguish from other two-masted vessels, as the mizzenmast is comparably short—often about half the size of the mainmast. Additionally, the mizzen mast is positioned aft of the rudder post.
Ketch Masts
At first glance, a ketch can be mistaken for a yawl. But the ketch features two similarly-sized masts and a much larger mizzen. The mizzen mast on a ketch is positioned forward of the rudder post. Ketch-rigged boats are often gaff-rigged as well, utilizing topsails on both masts. Some ketch-rigged boats have triangular sailplanes, mitigating the need for topsails.
Like the yawl, the ketch utilizes a headsail, a mainsail , and a mizzen sail, which is comparable in size to the mainsail. Ketch-rigged boats can be sailed with one or more aft sails stowed.
Schooner Masts
Schooners are among the most elegant multi-mast sailboat types. Schooners are visibly closer to ketches than yawls. But upon closer inspection, a schooner will have a shorter foremast and a longer (or almost equally-sized) mast behind it.
Schooner masts are tall and thick but usually shorter than similarly-sized single mast boats. This is because two-masted vessels distribute the sail plan over two masts and don't need the extra length to make up for lost sail area. Schooners are usually gaff-rigged and often utilize topsails and topmasts that extend the height of the mast.
Tall Ship Masts
Tall ships are the classic large sailing vessels that dominated the oceans for hundreds of years before the age of steam. Famous vessels such as the U.S.S. Constitution and the H.M.S. Victory feature this enormous and complex rig configuration.
Tall ships have three or more enormous masts, which are often made from entire tree trunks. Some of the largest tall ships have five or more masts. Tall ships are usually 100 feet in length or greater, as the size and complexity of these square-rigged ships make them only practical at scale. Tall ships utilize one or more mainmasts, mizzenmasts, a foremast, and a gaff-rigged jigger mast aft of the mizzenmast.
Sailboat Mast Materials
Sailboat masts are usually made out of aluminum or certain varieties of wood. Up to the 1950s, virtually all sailboat masts were made of wood. That changed around the same time that fiberglass boats became popular. Today, aluminum is the most common mast material.
Aluminum Sailboat Masts
The most common modern mast material is aluminum. Aluminum masts are lightweight, hollow, and easy to manufacture. These relatively inexpensive masts hold up well to salt water. Aluminum masts are also strong for their weight.
One downside to aluminum masts is galvanic corrosion, which occurs frightfully fast when saltwater comes into contact with aluminum and another metal (such as steel or copper). Aluminum masts are most common on Bermuda-rigged sloops.
Wood Sailboat Masts
Wood is the traditional material for sailboat masts, and it's still used today on many custom boats. Wood masts are heavy but strong, and a well-maintained wood mast can last over a hundred years. Wooden masts are common on gaff-rigged boats, as wood is an ideal material for shorter masts.
The most common mast wood comes from the Fir family. Douglas fir is common, but regional varieties (such as British, Columbian, and Yellow fir) are perfectly suitable. Some sailboats (particularly tall ships) use pine or redwood as a mast material. Some varieties of cedar (such as Port Orford cedar, Oregon cedar, and white cedar) are also excellent materials for building masts and spars.
Carbon Fiber Masts
Carbon fiber masts are a new arrival to boatbuilding, and they offer some advantages to wood and aluminum masts. Carbon fiber is lightweight and extremely strong, which makes it ideal for tall-masted racing sailboats. Vessels that compete in America's Cup races utilize the most premium carbon fiber masts in the industry.
Unlike wood (and aluminum to some extent), carbon fiber masts aren't particularly flexible. The rigidity of carbon fiber makes it strong, but stiffness is also a weakness. Under the right conditions, carbon fiber masts can break violently and are impossible to repair once broken.
Mast Maintenance
It's essential to maintain your mast and all of its accompanying hardware. Mast stays, lines, and halyards should be inspected regularly, adjusted, and replaced at regular intervals. Wooden masts should be varnished and checked for signs of rot.
Aluminum masts are generally low-maintenance, but signs of corrosion warrant immediate repair. Work with your local boat mechanic or sailing expert to develop a comprehensive maintenance plan. And remember, preventative maintenance is always cheaper and easier than repairs.
Related Articles
I've personally had thousands of questions about sailing and sailboats over the years. As I learn and experience sailing, and the community, I share the answers that work and make sense to me, here on Life of Sailing.
by this author
Sailboat Parts
Learn About Sailboats
Most Recent

What Does "Sailing By The Lee" Mean?
October 3, 2023

The Best Sailing Schools And Programs: Reviews & Ratings
September 26, 2023
Important Legal Info
Lifeofsailing.com is a participant in the Amazon Services LLC Associates Program, an affiliate advertising program designed to provide a means for sites to earn advertising fees by advertising and linking to Amazon. This site also participates in other affiliate programs and is compensated for referring traffic and business to these companies.
Similar Posts

Affordable Sailboats You Can Build at Home
September 13, 2023

Best Small Sailboat Ornaments
September 12, 2023

Discover the Magic of Hydrofoil Sailboats
December 11, 2023
Popular Posts

Best Liveaboard Catamaran Sailboats
December 28, 2023

Can a Novice Sail Around the World?
Elizabeth O'Malley

4 Best Electric Outboard Motors

How Long Did It Take The Vikings To Sail To England?

10 Best Sailboat Brands (And Why)
December 20, 2023

7 Best Places To Liveaboard A Sailboat
Get the best sailing content.
Top Rated Posts
Lifeofsailing.com is a participant in the Amazon Services LLC Associates Program, an affiliate advertising program designed to provide a means for sites to earn advertising fees by advertising and linking to Amazon. This site also participates in other affiliate programs and is compensated for referring traffic and business to these companies. (866) 342-SAIL
© 2024 Life of Sailing Email: [email protected] Address: 11816 Inwood Rd #3024 Dallas, TX 75244 Disclaimer Privacy Policy
Global Solo Challenge : Mast breakage again in regatta around the world
Kristina Müller
· 14.02.2024

According to the organiser Marco Nannini, Simpson was not injured in the accident. However, as a storm was brewing and he saw no chance of reaching the coast under his own power, Simpson activated his Epirb and sent out a distress call. The MRCC Buenos Aires is responsible for coordinating search and rescue operations in this part of the world.
The mast apparently broke when the boat crashed into the trough of a wave. In order not to jeopardise the hull, Simpson detached the rig from the boat and sank it, even though this deprived him of any chance of setting up an emergency rig.
As a precautionary measure, the organiser had also informed another participant in the Global Solo Challenge, Andrea Mura, about the situation. However, he was still sailing 600 nautical miles away from the scene of the accident at the time and would have needed at least 48 hours to reach the position.
Solo sailor rescued from bulk carrier
Finally, the Taiwanese bulk carrier "Sakizaya Youth" was informed by the MRCC. It was on its way to Necochea in Argentina after travelling from Australia to India and Pakistan. The captain then changed course and headed back towards the stricken skipper at a speed of 14 knots in order to reach him before sunset if possible. On the same day, the Global Solo Challenge organiser reported that the rescue operation had been successful and that Simpson had arrived safely on board the "Sakizaya Youth".
"Shipyard Brewing is an Open 50 designed by David Lyons in 1994 and has participated in two BOC Challenges, once as Newcastle Australia under Alan Nebauer and then as Balance Bar under Brad Van Liew.
The damage to the racing yacht was the second mast breakage in this non-stop regatta: at Christmas 2023 the Finn Ari Känsäkoski was caught in the Indian Ocean . However, he made it back to Cape Town in a remarkable odyssey on his own keel under emergency rigging.
About the Global Solo Challenge
Since the end of August 2023, 14 solo sailors, including one female sailor, have started the race around the world on yachts of different sizes in A Coruña, Spain. One boat flying the German flag is not taking part. The Düsseldorfer Philipp Hympendahl originally wanted to compete with a Comfortina 38 but had to abandon the project.
This might also interest you:
- Ocean Race Europe: Kiel will be the starting port - Boris Herrmann: "The jackpot for us!"
- Shipbuilding of the future: students from Kiel build sustainable skiff
- Ocean Globe Race: Triumph in Cape Horn leg for Marie Tabarly
Most read in category Regatta

LLC ESTO-Vacuum

TIN 7735123298
ADDRESS 4, bld.1, driveway 4806, Zelenograd, Moscow
PHONE +7 (499) 710-60-00, +7 (499) 710-60-11
www.esto-vacuum.ru

Zelenograd Moskva, Moscow, Russia Share or Save
Zelenograd, exact time.
Zelenograd, Moscow is located in Russia. UTC offset is +3 h . Here you can find the exact time in the city of Zelenograd and difference in time at your location.
Zelenograd in other languages: Russian
Zelenograd, location.
The geographical coordinates of the Zelenograd city: latitude: 55.987153, longitude: 37.202151. The geographical coordinates of the Zelenograd city in the Universal Transverse Mercator (UTM) coordinates: X (easting): 387841.796355, Y (northing): 6206108.515674, zone: 37, northern hemisphere.
Zelenograd, distance between cities
Find the most popular ways to Zelenograd from other cities or use the distance calculator on this page.
The information about the distances between cities is not yet available. Please try to use the distance calculator on this page.
Have you ever wonder how to calculate the distance between cities in miles or in kilometers when planning a trip. How to plan expenses on fuel, petrol, or gas? Would you agree that good trip planning is very important for an excellent journey!
Save & Embed
Embed this html code on your page
IMAGES
COMMENTS
Dismasting is when a sailboat's mast breaks or is removed from the boat. What causes broken masts? A broken mast can be caused by a variety of factors, including: Overloading: Too much weight on the mast or the rigging can cause it to fail. Fatigue: The continuous movement of the boat can cause the mast to weaken over time. Impact: Collisions ...
Dos and Don'ts. Do: Preserve everything you can - boom, lines, sails, blocks, clips etc. Rig loss claims are huge: ours was a £55,000 claim which didn't include the boom or sails that we ...
Stepping the mast on the deck eliminates leaking at the partners. Some consider it a safety issue - with less potential for damage to the deck or interior if the mast breaks. Pulling the mast sideways. On our J/35, the mast is stepped belowdecks and must be supported and sealed at the partners. The best way to do this with any mast is by ...
The boat stopped hard, as if it had an emergency break, and the owners popped their heads up from beneath the carnage like stunned meerkats on the Serengeti. ... A rig below the hull can foul rudders and propellers and act as a sea anchor for the boat. With no mast, a sailboat becomes either a vessel not under command or a power boat, so if you ...
1. Check by sighting up the backside of the mast to see how straight your spar is side to side. You can take a masthead halyard from side to side to ensure that the masthead is on center. Do this by placing a wrap of tape 3′ up from the upper chainplate pin hole on each upper shroud. Cleat the halyard and pull it to the tape mark on one side ...
These masts are secured on the boat's deck itself, with a lower support or compression post transmitting the mast's loads to the keel. Deck-stepped masts offer advantages like simplified installation and removal, making them particularly favorable for smaller boats or those frequently transported by trailer.
The mast step is where your mast rests on your boat deck. Start by inspecting it thoroughly for any damage or wear that may compromise its integrity. If needed, reinforce or repair it before proceeding further. Place mast wedges under the front part of the mast step to act as support when installing. 3. Attach Necessary Fittings:
Published: April 24, 2022. 0. The crew at the Yacht Rigger of Salt Creek Marina in St. Petersburg, Florida prepares to re-step a newly rigged mast. Unobtainium is the metal at the top of every Naval Architect's wish list. It's a perfect marine material; light, strong, stiff yet flexible—it's as inert as gold, but costs only pennies per ...
Yacht masts are typically taller and offer enhanced sail performance. They are often equipped with advanced rigging systems and technology for a more luxurious sailing experience. Upgrading to a Yacht Mast. Consult with a marine professional to determine if upgrading to a yacht mast is feasible for your sailboat. It can be a significant ...
The boat made a 360 and the mast pierced the cockpit creating a huge waterway. The boat remained between two waters for 11 hours before the two skippers were rescued by a Portuguese Navy helicopter. Prevent to avoid dismasting. ... Usually the mast breaks at one spreader stage. It is important to avoid at all costs that pieces of the mast ram ...
The plastic seizing cap simply wore through, and the stick came down in the middle of a tack. A five dollar part that should have been replaced years before cost them a stick. When shrouds and spreaders separate, masts break. When shrouds and stays part, masts break. Those who use seizing wire should check the integrity of the connection regularly.
Most masts have a conduit for the wires to protect them from the halyards and keep them from slapping around inside the mast. An electricians' snake will allow you to pull a wire through, but you really want it inside the conduit. The antenna bracket mounted with three 10-24 bolts tapped (with Duralac) into the aluminum.
Without her mast, the yacht was rolling like a fairground ride. Nail pincers around £4. The ability to clamp the jaws over a clevis pin gave these an advantage over pliers. ... The break was at the point where the coquille terminals for the fore and aft lowers were positioned. These require four apertures in the mast and, once the cap shroud ...
This month we take our Crash Test Boat out and dismast her in 30 knots of breeze. Then we see which methods work for removing the rigging, and how much of th...
Boat rig checks: Static set up Mast rake. Changes in mast rake have an effect on the balance of the helm. The more the mast is angled aft (adding rake) the more weather helm you will experience. ... Remember, if the furling line breaks on a windy day, you'll have far too much sail up for the conditions, and the loads will be critical.
A sailboat mast is a cylindrical, long vertical spar mounted on the deck and supports the vessel's sails. Masts are a distinctive feature of sailboats and hold the sails in place. Most masts for modern sailboats are made of aluminum or carbon fiber, while traditional boat masts are made of wood. Masts are usually taller than the boat's ...
Even though aluminum has long since replaced Sitka spruce as the material of choice for a sailboat mast, there are plenty of wooden masts still in service. Many of the Taiwanese-built boats of the 70s and 80s had wooden masts, and of course, a wide range of U.S.-built classics still have their original wooden masts.
Daniel Wade. June 15, 2022. A sailboat mast is the towering pole mounted to the deck. It attaches the length of the sail to the boat and supports the shape of the sail. Sailboat masts are the most distinct feature of sailing vessels, and they hold the sails in place. Masts are often taller than the length of the boat.
Single-handed sailor Ronnie Simpson's mast breaks: the Global Solo Challenge participant had to be rescued from the South Atlantic. ... The damage to the racing yacht was the second mast breakage in this non-stop regatta: at Christmas 2023 the Finn Ari Känsäkoski was caught in the Indian Ocean. However, he made it back to Cape Town in a ...
TIN 7735123298. ADDRESS 4, bld.1, driveway 4806, Zelenograd, Moscow. PHONE +7 (499) 710-60-00, +7 (499) 710-60-11. www.esto-vacuum.ru. ABOUT. The company "ESTO-Vacuum" specializes in the development and manufacture of automated vacuum systems. The production facilities of the company allow the production of up to 50 serial units per year and ...
Zelenograd, exact time. Zelenograd, Moscow is located in Russia. UTC offset is +3 h. Here you can find the exact time in the city of Zelenograd and difference in time at your location. Zelenograd in other languages: Russian. PLACE YOUR FREE AD NOW!
JSC "research Institute "ELPA" is a leading Russian developer and manufacturer of specific high-tech piezo technical products such as piezoceramic materials and based on devices, acoustoelectronics products. Basing on scientific research and company developments the following production was organized: More than 30 types of different ...