- Forums New posts Unanswered threads Register Top Posts Email
- What's new New posts New Posts (legacy) Latest activity New media
- Media New media New comments
- Boat Info Downloads Weekly Quiz Topic FAQ 10000boatnames.com
- Classifieds Sell Your Boat Used Gear for Sale
- Parts General Marine Parts Hunter Beneteau Catalina MacGregor Oday
- Help Terms of Use Monday Mail Subscribe Monday Mail Unsubscribe

Tiller extension
- Thread starter Tom Hoffman
- Start date Aug 16, 2010
- Forums for All Owners
- Trailer Sailors

Tom Hoffman
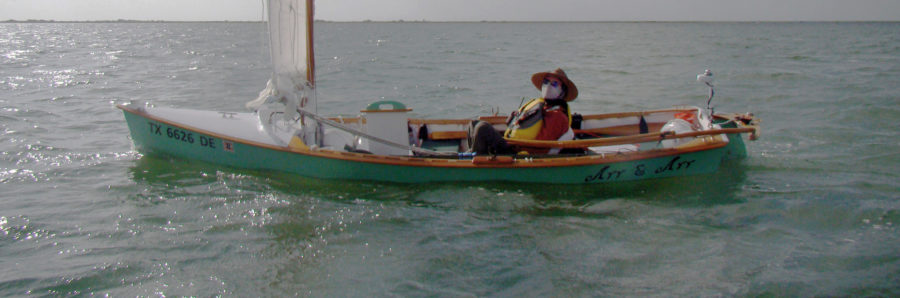
Good afternoon. I am making a tiller extension. I got to thinking that it might be helpful, if I knew how long to make it. My cockpit is about 5' wide. Other than sitting on one side and pushing the tiller over to the opisite side, I don't need something really long as I won't perching on the windward side trying to hold the boat down. I am not heavy enough. HaHa.... It is nice not to be heavy enough for at least one thing... Any help would be appreciated. Tom...
Keep in mind that you'll be sitting in different positions depending on how much the boat is heeling, whether you have others in the cockpit, whether you need to stand or sit, etc. So either you need to make it long enough for your farther position (you can always choke up if you're closer) or make it adjustable. I had an adjustable one and was constantly changing its length, sometimes just to accommodate right hand vs left hand on a long sail.
I decided at least for this first one to make it 30" seemed like a good compromise. I should be able to reach the cabin bulkhead and open it or get a drink out of the drink holders on the cabin bulkhead. We are going to take our boat up to the river again this weekend and it will be a series of test runs for a lot of stuff. Thanks for the imput. Any one else please chime in. Tom...

I'm using this one- http://www.defender.com/product.jsp?path=-1|118|297677|103258&id=103259 Most of the time I use the minimum length. Rarely have I needed to extend it full length. Rich

Similar but different. 24 years ago, we were expecting our first son. Being a finish carpenter by trade and a cabinet maker by nature, we decided that I would make the crib. We didn't know exactly what we wanted so we shopped a lot. Once we found a crib similar in style, I went in with a tape measure and a sketch pad. Sorry Sears and Roebuck! It's now in our closet waiting to be refilled. Head to WM with a tape measure.
My first thought is to always make it myself. I have it all turned out now. 34" 2"X2" hard maple blank. Left over scrap. $6.00 for a pivot hinge. I will say this, it has been at least 5 years since I turned on a lathe. I have definitely lost my touch for it. Just couldn't seem to get comfortable holding the roughing gouge. Kept digging in. Took lots of sanding to get rid of the errors. I will post a picture when I am done. Tom...

I'd make it long.... use it.... the cut it down if it's too long.
Why not adjustable? Here's my $12 Walmart hiking stick. I used the connection from an old non-adjustable extension I had. I did have to add a screw to hold the handle on because it is made for downward pressure only and pulled off.
Attachments

We experimented with tiller extensions this year. I bought and mounted a decent extension pivot on the tiller, then used some junk tubes of various lengths to see which we liked the best. On our small boat the extension has to fit, and to also be stored by clipping onto the tiller without hanging up anywhere. We've found the length we like, this week I'm cutting a proper aluminum tiller extension to the desired size and doing the final install.
- This site uses cookies to help personalise content, tailor your experience and to keep you logged in if you register. By continuing to use this site, you are consenting to our use of cookies. Accept Learn more…

- Forum Listing
- Marketplace
- Advanced Search
- About The Boat
- Gear & Maintenance
- SailNet is a forum community dedicated to Sailing enthusiasts. Come join the discussion about sailing, modifications, classifieds, troubleshooting, repairs, reviews, maintenance, and more!
DIY tiller extension?

- Add to quote
Anyone make one? I am thinking the type on a swivel so you can move around the cockpit a little. Eric

Use an old golf club shaft (from a second hand store/charity shop) and purchase a swivel mount from a chandler that's meant for the 'real' tiller sticks. The shaft diameter will be small so you'll need to adapt it with a collar of some sort to accept the swivel mount. Let me know if you work something out. I'd be interested.

- ?
- 174K members
Top Contributors this Month

- AROUND THE SAILING WORLD
- BOAT OF THE YEAR
- Email Newsletters
- Best Marine Electronics & Technology
- America’s Cup
- St. Petersburg
- Caribbean Championship
- Boating Safety
Sailboat Racing Tips: Tiller Extension Technique
- By Mike Ingham
- May 31, 2022
- More: Sailing How To
- More How To

The Wisdom of Augie Diaz

Why S-Turns, Roll Jibes and Roll Tacks Are Fast

The Path to Consistent Boatspeed

Headsail Trim Tips For Floating Leads

Brauer Sails into Hearts, Minds and History

Anticipation and Temptation

America’s Offshore Couple

Jobson All-Star Juniors 2024: The Fast Generation
- Digital Edition
- Customer Service
- Privacy Policy
- Cruising World
- Sailing World
- Salt Water Sportsman
- Sport Fishing
- Wakeboarding
Replacement Tiller Extension

Introduction: Replacement Tiller Extension

Recently I was given a small secondhand sailing dinghy. It was pretty much complete but was missing the tiller extension which allows you to steer the boat while sitting up the front.
Now boats being boats everything about them seems to be more expensive than they need to, so of course to replace the tiller extension was more than I wanted to spend. (I'm cheap). For example
Tiller extension
So I wondered if there was a cheaper way of doing it and it turns out there was! I made this for less than half of what a new one would cost.
This is my first instructable and I forgot to take pictures for most of it! Sorry about that.
Step 1: Parts Needed
- The first thing I needed to find was the universal joint. These are rubber connectors that allow the extension to move around. My boat had a fitting for what looked like a Ronstan tiller extension so I purchased one of these: Universal Joint
You could also use a piece of rope if you wanted to.
- I also picked up a 1m length of 16mm Aluminium tubing from my local hardware store. Aluminium tubing
You could also use some carbon fibre tubing if you wanted for lightness, but the aluminium seems pretty light.
- Now the genuine tiller extensions have some nice foam padding on the end, for comfort I guess. I wanted something similar but couldn't figure out how to do it. Then one day while searching for quadcopter parts (another hobby) on bangood I found these Landing skid foam
- I also got some chair end caps for the end of the tiller extension to keep water out and to help it float. I think they were 16mm end cap
Tools needed:
- An electric drill and drill bits
- A heat gun or lighter
Step 2: Cut the Tubing (Optional)
I used a hacksaw to cut the tubing to 840mm which is the length of the original tiller extension. But if you want to keep the 1m length I'm sure that is fine.
Step 3: Install the Universal Joint

Ok so to install the universal joint, you need to first slide the plastic cap pictured over the rubber joint itself.
Then insert the round end of the rubber joint into the aluminium tubing.
Included with the universal joint kit will be a metal pin. Find a drill bit just slightly larger than it. Drill a hole through the side of the aluminium tube at the end where the rubber joint is inserted, making sure you drill through the rubber to the other side of the tube. Don't remove the drillbit from the tiller extension! Remove the drillbit from the chuck instead.
Now if you left the drill bit in the extension you can use the metal pin to push out the drill bit. This will make it easier to install the pin.
Once the pin is installed take the included heat shrink and slide it over the extension to cover the pin and joint between the rubber and the aluminium tube. Take your heat gun or lighter and shrink the heat shrink.
Here is a link to a good video (not mine) on how to install the universal joint https://youtu.be/Q60qyJ0hVLc
Step 4: Foam Handle and End Cap

On the other end of the tiller extension slide on one of the foam landing gear cover thingys and then put on the end cap.
Now your new tiller extension is finished! Time to attach it to the rudder.
Step 5: Installing the New Tiller Extension!

So if your tiller still has the socket attached like mine, installing the tiller extension is as simple as sliding the rubber end into the side of the socket as in the second picture. Then clip the plastic cap into place!
Step 6: Finished!

And there you have it a finished tiller extension! Go forth and sail!

Participated in the Brave the Elements Contest
Recommendations

Books and Bookshelves Contest

Big and Small Contest

Green Future Student Design Challenge

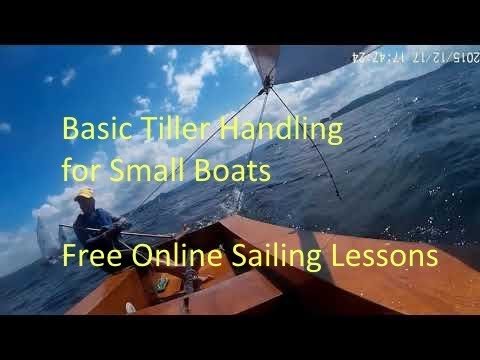
Home » Sailing Fundamental Lesson 1 – Correct Tiller Extension Grip makes Boat handling much easier
Sailing Fundamental Lesson 1 – Correct Tiller Extension Grip makes Boat handling much easier
Before the sailing lessons start there are two very important fundamentals. Poor tiller extension technique makes sailing ten times more difficult. If you hit your head on the boom, get stuck head to wind, are scared by stronger winds … it is usually because you are not holding the tiller extension properly. This is an important introductory lesson for our free online sailng lessons
This is the correct method for most sailing dinghies. It can be different for catamarans, but often it is correct there too.
The tiller extension goes across the front of your body so you can handle it and use both hands together to control the sail using the sheet. In the photo below the sailor is holding both the mainsheet and tiller in one hand.
If you are still sailing with the tiller extension between your body and the back of the boat then it is what is hampering your sailing improvement and making many parts of sailing much more difficult than they need to be.
All Free Online Sailing Lessons – Index
- Sailing Upwind with less effort
- Increase confidence in Stronger Winds
- Downwind with less distress
- Gusts, Gybes and tacks easily
- Not hitting other boats and more
Every boat handling problem is reduced by correct tiller grip
One of the Women Olympic Sailors demonstrates how the important first principle of holding the tiller extension correctly so both hands can control the sail. See how the tiller extension is held across the body.
It can feel unfamiliar at first. But if you only steer with the extension it will soon feel the most natural way.
It is the only way because your two hands are close. So both hands can be used for handling the sail and steering at the same time.
The men do it too.
All the videos use this technique. And look at the Olympics – there is no other way used by dinghy sailors.
Everyone uses it! So please get used to it when starting your sailing lessons – you will learn faster and won’t have any roadblocks to further learning
VIDEO – So how does this tiller handling work in reality?
- One Both or Either hand can be used for handling the sheet – hands don’t get tired.
- Can move sheet in and out under control. If hold tiller the wrong way the hands are too far apart and the sailor will use teeth (dental bills) or wrap sheet around hand to take up slack (Circulation gets cut off)
- Sheet can be moved very fast in and out or slow and controlled or can be dropped instantly in an emergency.
- One hand can be free for balance or to do something important.
Later you will find that this method is the basis of every single boat manoeuvre and every crew movement. We will have some videos by Olympic medallists too – and they will always hold the tiller this same way
Link to Our Structured Sailing Lessons
Our Quickly growing online sailing lesson list is here.
2 thoughts on “Sailing Fundamental Lesson 1 – Correct Tiller Extension Grip makes Boat handling much easier”
The end of the extension is poking him in the face. This is not comfortable or safe. Surely it would be better under his right arm (still in front of the body).
Not sure which image or clip you are looking at Allan.
Normally both hands are in front of the body once you are used to the method. It might look like the tiller extension is near the face in some of the video, but wait for the sailor to move or twist the body and it becomes clear that the extension is actually in front of their chest a good foot away from the face. Plus it is the end of the extension that can hurt … not the side.
Have a look at the fleet racing photos – these are high level regattas with world’s best sailors.
All are sailing this way so both hands have freedom of movement to work together to sheet in and sheet out. The key to gaining control in stronger winds. The two hands can only do that if they are in front of the body and the tiller extension can move freely with the hand that is holding it.
The extension under the arm would be too restrictive for the sheeting action of the two hands.
Sorry if I am misunderstanding.
Leave a Comment Cancel reply
This site uses Akismet to reduce spam. Learn how your comment data is processed .
A Simple Tiller Tender
Hands-off sailing
From Issue September 2017

The bungee doesn’t need to be removed to use the tiller. Just push or pull the tiller and the bungee will hold it at the new angle.
I n my years of solo cruising in small boats I’ve found that there are many times when it’s helpful to have both hands free while sailing. I can free one hand by securing mainsheet with a cam cleat or slippery hitch, and then I just need something to hold the tiller in place so I can grab a bite to eat, take a compass bearing, or pull on a jacket.
There are a number of tiller tenders available commercially, but they tend to be bulky, overly complicated, and come at an added expense; from what I’ve seen, many of them also require you to engage and disengage them or adjust their tension.
On a recent cruise, though, my brother showed me a tiller tender that eliminates all those problems. It’s cheap, simple, and utterly reliable. It doesn’t need adjustment and there’s nothing to engage or disengage; you can steer the boat normally with the system in place, and whenever you need to let go of the tiller, it stays where you positioned it.
To set this system up for a conventional tiller, run a line athwartships under your tiller from rail to rail. If your boat has open gunwales or a pair of cleats well aft on the gunwales, you don’t need to add anything to anchor the ends of the line. This line needs to be just taut enough to minimize play in the tiller when the system is in use.

The tiller tender requires only a short line run across the boat under the tiller an toggled bungee loop to squeeze that line to the tiller.
Next, take a short bungee loop with a plastic ball on the end and pass the looped end around both the tiller and the loop you just rigged. Take enough turns with the bungee around both the tiller and the loop of line to pull them tightly together before tucking the plastic ball through the bungee to finish the wrap. You can always adjust the tension if you find the bungee is not tight enough and not providing enough friction to hold the tiller in place, or too tight and making the tiller hard to move.
That’s it. Your tiller tender is ready for action. You will still be able to steer normally, but the friction of the system will hold the tiller in place when you let go. You can set the tiller to hold a steady course or push the tiller hard over to tack or jibe while you tend to the sheets.
After rigging this system on my own boat, I found myself sailing hands-free most of the time, with just a slight nudge of the tiller now and then. I doubt I’ll ever go cruising again, or even daysailing, without having this simple tiller tender in place.
Tom Pamperin is a freelance writer who lives in northwestern Wisconsin. He spends his summers cruising small boats throughout Wisconsin, the North Channel, and along the Texas coast. He is a frequent contributor to Small Boats Monthly and WoodenBoat.
Editor’s note:

A bungee loop can also be used as a tiller tender on a Norwegian tiller.
To give this system a try, I made a standard tiller that I could attach to the rudder of my Caledonia Yawl (pictured here in the photographs above) and sailed without the mizzen mast in place. I was impressed how well the bungee worked with a standard tiller and wanted to use the same method to create a tiller tender for a Norwegian tiller. I first thought about using the same length of line but set fore and aft instead of athwartships, but a thole pin presented itself as a better place to start. I put the bungee loop over the push-pull tiller and then wrapped it around both tiller and thole.

With a Norwegian tiller, the bungee can be looped onto a thole pin or other upright fixture. If the bungee loop has the tiller running through it before it is wrapped, the tiller can be lifted to disengage the tiller tender without loosing the bungee.
That’s all it took, and the bungee worked just as well in this new arrangement. I could change course by pushing or pulling the tiller and leaving it to make the boat come about or hold a straight course. I could also disengage the tiller by lifting it—along with the bungee—from the thole and have complete freedom of motion. The tiller follows me after I tack and gets wrapped with a thole pin on the windward rail.

The tiller should be held on the weather rail where it is accessible when the boat heels in a gust.
You can share your tricks of the trade with other Small Boats Monthly readers by sending us an email .
Share this article
Join The Conversation
We welcome your comments about this article. If you’d like to include a photo or a video with your comment, please email the file or link.
Comments (13)
One thing to consider is that the two legs of the line sure look like they are the radii of an ellipse. Accordingly there needs to be some slack in the system to get full range of motion for the rudder, either from the bungees around the tiller, a loose line or by using a bungee-tensioned cross line. The latter is what I have used for a while. The cross line is anchored just ahead of the rudder at small pad eye on the port gunnel, makes a turn through a small shackle attached to the forward part of the rudder, then through a pad eye on the starboard side. A bungee connects the line back to the port pad eye, creating an isosceles triangle when the rudder is centered. It is handy. Having a way to adjust the tension from the bungee is also nice.
Sure glad that wasn’t totally confusing. KISS
Ole thanks for the comment. I’m not sure I follow you about needing a cross line, or about needing adjustments to get full range of motion for the rudder–the system as described is dead simple, and works really well with just an athwartships line and a bungee holding it to the tiller. No need to adjust tension; you can use the tiller normally, but it will stay wherever you leave it when you let go. Works brilliantly.
Ole,thanks. That’s pretty much what I was picturing from your description, then. I think the system described in the article is simpler, though. Once rigged, there is no need to adjust tension in the system at all, and no moving parts (other than the tiller itself), and no hardware. The tight bungee wrapped around the tiller and athwartships line holds the tiller reliably in place (just with friction) whenever you take your hand off the tiller, but you can still steer normally, too, with full range of motion for the rudder. Try it for yourself sometime if you’re curious, and you might well find you like it better.
Or is there some advantage to your system that I’m not seeing? I admit to being biased in favor of simplicity, so maybe there’s something there I haven’t considered. Thanks for the discussion!
Sorry for the late reply. I’m glad the system is working for you. I have been really happy with how well it works, how simple it is, and how easy it is to rig. I doubt I’ll ever have a boat without it now that I’ve used it for a couple of years.
Brilliant! I like it so much I think I might remove my regular factory-made tiller tamer and use yours instead, because it allows convenient “foot-tillering”, while not having to use either hand to disengage and then re-engage the taming mechanism.
This is great! I used to just tie the tiller to an horizontal line every time I need my hands free. The idea of the bungee is definitely worth a try. 🙂
Yes, it works really well as described. The one drawback I’ve discovered is that the friction does wear out the bungee loop eventually. Depending how often you sail, you might find yourself replacing it every year, or even several times a year. Still cheap, though.
Tacos at 60 knots? LOL, just happened to notice the plate mounted on the gunnel on the CY
That plate caught the eye of one of our other readers in a photo in my review of the Gas One Mini stove. Here’s the reply I posted:
Great story. Thanks for sharing and clearing up that inside joke. Best regards and Happy Holidays!
Leave a Reply Cancel reply
Your email address will not be published. Required fields are marked *
Stay On Course
More From This Issue
From The Editor
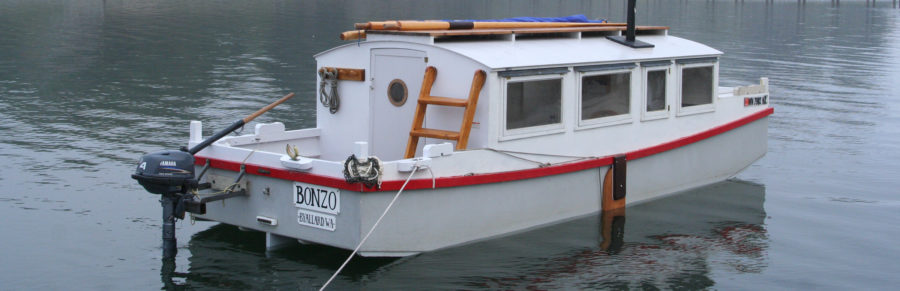
A Leeboard for a Motorboat
Our canal boat, BONZO, wanders in the wind like on off-leash dog. The design, Phil Thiel’s Escargot, is intended for narrow waters that aren’t likely to be subject to breezes,…
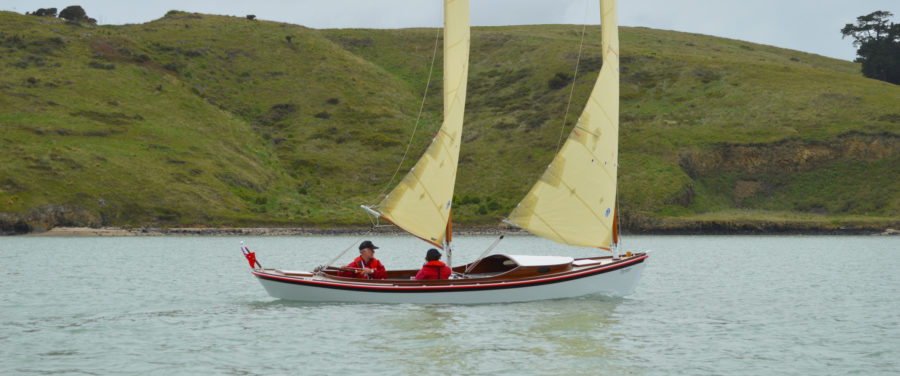
Boat Profile
The diminutive yacht OYSTER, a Milford 20, is a modern take on the early New Haven sharpies that worked the oyster beds along Long Island Sound’s Connecticut shores. Inspired by…
Drake Raceboat
Clint Chase of Chase Small Craft wrote of the Drake Raceboat: “This was the first boat that I designed totally from the numbers.” It’s the third in his series of…
The Texas 200
The chop stirred up the bottom across miles of shallows, turning the water gold under the midday sun. I closed on the windward shore until I was in calmer water,…

Back-Country Baking
I once looked forward to camp sweets just as much as our young daughters do now. Pineapple-cherry dump cake baked in a Dutch oven was a staple of my Boy…

In my years of solo cruising in small boats I’ve found that there are many times when it’s helpful to have both hands free while sailing. I can free one…

Product Reviews
Pioneer Swag Tent
The nights I slept in the Outback Swag Tent, I was just camped in the back yard. After one night in it I had the information I needed and could…

Caledonia Yawl
Reader Built Boats
At the ramp, GYPSY SOUL slipped into the water for the first time. Scotty and Juilio hadn’t sailed a lug rig before, but hauled in the main sheet and took…
More Technique

Water-based Wood Dye
The outboard runabout, WORK OF ART, often stops people in their tracks when they see the deck with its beautiful, natural-looking wood color with sparkling grain highlights. No one has…
LED Shop Lighting
LEDs—light-emitting diodes—have gotten dramatically better in the last few years, and the tubular lights made with LED strips are significantly better than the best fluorescents. They don’t flicker or hum,…

Shop-Made Riveting Hammers
Rivet hammers come with cross-peen or ball-peen heads. This hammer’s head is fashioned from 5/8″ stainless-steel rod, the handle is turned from a 12″ chunk of 1-3/4″ square maple, and…
Subscribe Today!
Become a subscriber today and you’ll recieve a new issue every month plus unlimited access to our full archive of backlogged issues.
Already a subscriber? Sign In
Subscribe For Full Access
Flipbooks are available to paid subscribers only. Subscribe now or log in for access.
Please verify you are a human
Access to this page has been denied because we believe you are using automation tools to browse the website.
This may happen as a result of the following:
- Javascript is disabled or blocked by an extension (ad blockers for example)
- Your browser does not support cookies
Please make sure that Javascript and cookies are enabled on your browser and that you are not blocking them from loading.
Reference ID: e8895513-f465-11ee-85e9-f13877824c3a
Powered by PerimeterX , Inc.
× You are using an outdated browser. Please upgrade your browser to improve your experience.
We Ship Worldwide! | FREE SHIPPING! for US Continental orders over $99. Click for details.

Shopping Cart
Your cart is currently empty..
FREE SHIPPING! for US Continental orders over $99 click for details
Sailboat Tiller Extensions

Keep control of the boat in your reach no matter where you are with the top extensions from your preferred brand. Tiller extensions are sold in varying sizes to extend your usable reach to where you operate. Telescoping extensions are also available for size adjustments on the fly. Technical assistance is available to help find the right size.
MAURIPRO Sailing, your direct access to Sailboat Tiller Extensions and all your other sailing and boating needs.
Copyright © 2024 MAURIPRO Sailing LLC.
- Shopping Cart 0
Sailboat Tiller Extensions

Featured Brands

Related Categories
- New Sailboats
- Sailboats 21-30ft
- Sailboats 31-35ft
- Sailboats 36-40ft
- Sailboats Over 40ft
- Sailboats Under 21feet
- used_sailboats
- Apps and Computer Programs
- Communications
- Fishfinders
- Handheld Electronics
- Plotters MFDS Rradar
- Wind, Speed & Depth Instruments
- Anchoring Mooring
- Running Rigging
- Sails Canvas
- Standing Rigging
- Diesel Engines
- Off Grid Energy
- Cleaning Waxing
- DIY Projects
- Repair, Tools & Materials
- Spare Parts
- Tools & Gadgets
- Cabin Comfort
- Ventilation
- Footwear Apparel
- Foul Weather Gear
- Mailport & PS Advisor
- Inside Practical Sailor Blog
- Activate My Web Access
- Reset Password
- Customer Service

- Free Newsletter
Tartan 30: An Affordable Classic

Ericson 34-2 Finds Sweet Spot

How to Sell Your Boat

Cal 2-46: A Venerable Lapworth Design Brought Up to Date

Solar Panels: Go Rigid If You have the Space…

Leaping Into Lithium

The Importance of Sea State in Weather Planning

Do-it-yourself Electrical System Survey and Inspection

When Should We Retire Dyneema Stays and Running Rigging?

Rethinking MOB Prevention

Top-notch Wind Indicators

The Everlasting Multihull Trampoline

What Your Boat and the Baltimore Super Container Ship May Have…

Check Your Shorepower System for Hidden Dangers

DIY survey of boat solar and wind turbine systems

What’s Involved in Setting Up a Lithium Battery System?

Waste Not is the Rule. But How Do We Get There?

The Scraper-only Approach to Bottom Paint Removal

How to Handle the Head

The Day Sailor’s First-Aid Kit

Choosing and Securing Seat Cushions

Cockpit Drains on Race Boats

Re-sealing the Seams on Waterproof Fabrics

Safer Sailing: Add Leg Loops to Your Harness

Waxing and Polishing Your Boat

Reducing Engine Room Noise

Tricks and Tips to Forming Do-it-yourself Rigging Terminals

Marine Toilet Maintenance Tips

Learning to Live with Plastic Boat Bits
- Marine Electronics
- Systems & Propulsion
Tiller Extensions: Forespars Cobra and Spinlocks E-series
An evaluation of fixed and extendable tiller extensions from forespar, rwo, ronstan, spinlock and wichard finds the forespar oceanracer most robust for offshore work, and rwos mighty stik very favorable for coastal cruising..
Wheel steering or tiller? If theres an option, which should you choose? Which is better?
Wheel steering once was for large yachts and big ships.
The oldest restored warship in the world, the Swedish Wasa, built in 1628, had wheel steering.
And Nelsons H.M.S. Victory had twin wheels with the manila tiller hawser wound on the hub between them. Sometimes, it took four helmsmen to enable the real-life Horatio Hornblower to cross the T.
The J-Class boats, the Americas Cup giants of the 1930s, had wheel steering (and immediately to mind come names like Herreshoff, Charlie Barr, J.P. Morgan, Lord Dunraven, Fife and Thomas Lipton, probably the worlds most popular loser), as did the 12-Meter boats that (via the likes of Ted Turner, Baron Bich, Ted Hood, Allan Bond and Ben Lexcen) brought the resurrected Americas Cup to the masses…or at least produced a following larger than the cheering section at the croquet nationals.
For ships and big yachts, wheel steering produces a compact mechanical advantage preferable to a simple, deck-sweeping lever. On big, beamy old Dutch barges with barn-door rudders tillers are so long the helmsman literally takes a hike to come about.
Perhaps it was the 12-Meter boats that, about 25 years ago, caused wheel steering to become the rage on sailboats, even those ranging down in length to 26 feet or so.
The Tiller Strikes Back Despite the proliferation of wheel-steering for small sailboats, the traditional tiller is making a comeback.
Tillers always have been the choice for small-boat racing, catboats and multihulls.
But now, tillers are found on the popular J-Boats, the vigorously-raced Mumm 36s, the big round-the-world single-handed racers like Cray Valley and many cruising boats that use auto-steering devices…or know how, with a bit of surgical tubing and a couple of blocks, to make almost any boat self-steering.
Tillers have some advantages. They are quick, virtually foolproof and visually obvious as to whether the rudder is amidships, hard-over or in-between. No king spoke, fancy ropework, counting turns or checking the quadrant, cable or worm is needed.
A rudder position indicator coupled to a wheel is great when backing down or theres nothing but a zephyr, but they are rarely fitted to small boats. They still are made, however-electronic versions by Autohelm (800/539-5539) and Vetus Den Ouden (410/712-0740) and a mechanical type by Summer Equipment in Vancouver, B.C. (604/873-4545).
Theres nothing quite so reassuring as a big outboard rudder hung on heavy gudgeons and pintles, connected via a stout rudder head to a tiller with which you could pry loose Plymouth Rock. Not only is the rudder extremely effective, the whole works can be easily inspected with a stretch of the neck.
For the purist, a tiller also provides that heralded feel which tells you if the boat is making way gracefully or is struggling-constantly falling off or griping. However, be careful backing down; unless you keep the tiller close to amidships, that feel can alter your orientation.
A Tiller Needs Help To give a helmsman more choices about where to plant his weight-as ballast, for good visibility or just for plain old comfort-a tiller usually needs an extension.
Whether called a tiller extension or a hiking stick, what a techy might call an athwartships facilitator should have a universal joint and a good handle. One marine dictionary in our library says tiller extension is a British term and hiking stick is US. Others say the terms are interchangeable.
For clarity, perhaps PS readers will not mind if, for this evaluation, we very arbitrarily say hiking stick for the slender ones generally used on small boats and tiller extension for the more robust versions, most of which have ladder handles.
Practical Sailor gathered up 16 of them for a close examination. Several are brand new on the market. All are slicker than the hiking stick we once made of an old laminated wood Slazenger tennis racquet. (We also once crewed on a Great Lakes Mackinaw Race boat that had wheel steering but used a custom-made, clamp-on hiking stick on the wheel rim.)
The method of attaching them to tillers varies considerably, and thats vital-because the joint will get extraordinary wear. Also of interest is the manner in which the stick or extension is prevented from dropping below horizontal. Still another consideration is a means of snap-stowing the device along the tiller when not being used, to prevent it from flopping around and perhaps getting jammed in a corner, as surely will happen when most disastrous. (Those with a ball on the end have even been known to grab a cockpit combing.) A final thought: Do you want it to demount for stowage?
The tiller extension competition is international, with one US manufacturer (Forespar), two British (Spinlock and RWO), one Australian (Ronstan) and one French (Wichard). A third British maker, Barton, has a US distributor that does not stock the companys tiller extensions. There also are a few long hiking sticks-GRP Arribas and aluminum Silver Sticks-in the catalog published by Murrays, a California firm that caters to fast catamaran owners.
The Joint With almost any brand of tiller extension you prefer, the manner in which the joint is attached to the tiller is a choice .
There is a good range of joints, which must swivel 360 in a hemisphere above the tiller.
The simplest and cheapest is an elastic joint (rubber, urethane or elastomeric polymer) that tends to make the tiller, when not in hand, stand straight up or wave around in a generally vertical position. Its there for the grabbing; one usually feels for it near the tiller end. The elastomer versions claim to be good for millions of bends before failing. RWO even offers two densities of the elastomer to provide more or less flexibility.
Next comes a stainless steel universal joint, a U-shaped hinge on a base with a post. Theres a hang-up point, but its rarely a bother. These two-hinge-post joints will outlast the wood into which are driven the customary two mounting screws (bolts are better).
Finally, there are, mostly on the more robust tiller extensions, the double-U joints; one with adjustable tension to make it stay where you last left it; the post-and-socket types; and several ball joints, all of which usually have one or more through-bolts.
A further refinement is the means used, usually an elastic pad or collar, to prevent the stick from dropping much below a horizontal position, where it can jam up against a coaming or a corner of a seat. The ideal is full-unfettered articulation through a hemisphere.
The Grip? As with the optional joints, there is on most of the straight sticks a choice of grip.
Dubbed variously by the manufacturers as straight, button, ball or golf (a tapered shape), the grip usually has urethane foam padding.
The foam wont last forever, but as is well-known by owners of boats steered with metal wheels, there are many days when its not pleasant to hang onto cold bare metal.
However, the foam is primarily to provide the secure grip needed to handle any tiller-steered boat.
Some makers use quite soft foam; others use very hard foam. It seems likely that the harder stuff will last longer. However, the softer foam will be appreciated if the tiller and extension, when not in hand, decide to do something downright vicious.
One manufacturer, Wichard, uses a closely woven fabric cover over the foam. Its a quality touch.
Three of the four sturdier tiller extensions-the ones with what are called ladder grips-have hard plastic grips.
Fixed Length Sticks Getting to work now on the collection, perhaps the first consideration is whether to have a simple fixed-length hiking stick or one whose reach can be varied-quickly and easily while underway.
The fixed-length sticks, starting for as little as $25 or $30, are generally the cheapest way to go. Forespars very serviceable Swivel Stick, a black anodized aluminum tube with a foam-ball grip and an elastomer joint, is an example. Others are Ronstans X-10 fixed, RWOs Fastac and several new blue and white models from Wichard.
The fixed-length aluminum sticks usually come in several sizes, with optional swivels and grips.
Choosing between an elastic joint and one of several metal swivels is a matter of preference.
If you don’t trust the trendy, thin, black-anodized aluminum tubes, there are fatter tubular models and even stronger sticks of man-made materials. Various sizes and even do-it-yourself cut-to-length-and-glue models are included in the more exotic straight sticks, whose prices get up around $100 or more.
Included in these premium versions are Ronstans Battlestik, a carbon fiber/Kevlar extension that can set you back $145; RWOs carbon fiber/GRP Carbo Stik, another hot-dog stick that lists for $85; Forespars Ultimate Graphite for $65, and Forespars husky carbon fiber/Kevlar Cobra, whose price ranges from $78 to $165.
These and all other prices stated and shown on the chart are retail list. Most are discounted close to 20% by marine catalogs.
Twist Locks In between the simple, light, straight hiking sticks are twist-lock adjustables.
We found but two makes-Forespar and Ronstan.
Forespar, one of the worlds premier makers of poles, has a white-powder-coated aluminum stick in several sizes, with either a quick-release swivel that is first class or the patented StaFAST joint mentioned above. It has a good foam grip plus a foam ball.
Ronstan sells three sizes of its black anodized aluminum X-10 extendibles with several grip options and either elastomeric or stainless steel joints.
It has been reported to Practical Sailor that twist-lock sticks do not enjoy an enviable reputation because, like twist-lock boat poles, they sooner or later fail. One veteran small-boat sailor said he gave them up in favor of a stick made from an old golf club. We forgot to ask whether he used an iron or wood-probably a putter.
Twist-locks should never be lubricated. If we were to use one on a boat, wed make sure it was demountable and stowed in a protected place when not in use-to prevent the accumulation of dirt, salt and other crud that is bad for any twist-lock joint. Considering the options, twist-lock does not seem the best way to go with something that gets the continual stress involved with steering a boat.
Ladder and Saddle Grips Although theres no reason (except price) that they can’t be used on small boats and on cruising boats of any size, the powerful ladder and saddle grip tiller extensions generally are seen on powerhouse racers.
The eight in our collection run in price from $86 up close to $300.
The manufacturers make them brutally strong and seem to concentrate on comfortable grips on which the helmsman can use two hands, when needed. Also important, the tiller extensions for larger boats are, with one exception, extendible.
Ronstans X-10 ladder extension comes in two fixed lengths and has a three-step ladder for gripping at different lengths. The black-anodized aluminum shaft is fluted for extra strength. The fairly hard Hyperlon on the three handle positions feels like it would last a long time. For the money, this simple Australian product is a lot of tiller extension.
The very new Wichard comes in two sizes, is moderately priced, has a comfortable molded saddle handle, plus a nice intermediate foam grip. The one-finger trigger, cleverly recessed in a crescent in the handle, works stainless steel stop pins. Both parts of the arm are powder-coated and it seems likely that the paint on the smaller one will get worn and a bit unsightly. It comes with but one simple swivel.
The old reliable (but with a newly designed handle and a great new joint option) is Forespars OceanRacer. Available to three extending ranges, this US-made tiller extension has stainless steel adjustment pins; the adjustment mechanism is rugged but a little balky (you might call it firm). The OceanRacer is available with Forespars new StaFAST joint, which can easily be adjusted to have just enough tension to stay put when temporarily released. Its moderately priced.
Somewhat similar (in that they use very modern, light materials) are the two British tiller extensions-RWOs Mighty Stik and the Spinlock, a new design that uses a common shaft, many joint options and interchangeable handles to produce a range of extensions.
RWOs Mighty Stik, with a trigger-finger extension mechanism with Torlon balls, is slick, the smoothest operating of the lot. It has a carbon-reinforced ball joint (they call it an Omniball) that rotates in any direction, has a rubber collar to preclude drooping and even has a push-button Quickpin for easy demounting. The Mighty Stik comes in four extendible ranges and two fixed-length models.
The new Spinlock tiller extension, available in four lengths, is a shaft system with three easily changed handles (one straight, one saddle and one asymmetrical saddle) and several stainless-steel-in-plastic-sleeve joints, all with two through-bolts (a good idea) and rubber cushions to prevent the handles from drooping. The extension mechanism is smooth, with push-button controls and Torlon balls.
The Bottom Line Fixed-length tiller extensions made of aluminum tubing may well be adequate to the job. If price is important, any of the fixed-length models would do, as long as its equipped with whatever grip and swivel you prefer.
However, if youve ever seen aluminum tubing collapse when kinked even slightly, you might be, as are we, inclined to favor a straight stick made of sterner stuff-like carbon fiber, GRP or Kevlar. Among such sticks, we favor Forespars fat Cobra, for its modest weight and price, but even more because it looks indestructible. Wed prefer it equipped with the StaFAST swivel. (The one shown on the cover is elastomeric, which happens to have a push-button snap-off design that is the best of its type.)
However, unless we were still sailing a small one-design, the choice would be one of the extendible ladder/saddle models. The rugged, proven Forespar OceanRacer would get our vote if we were going to sea and absolute reliability ranked first. If it was coastal cruising, it would be tough to pass over RWOs very slick Mighty Stik with Omniball joint, but our choice is the new Spinlock, because of its excellent asymmetrical handle and the rubber-cushioned, stainless steel quick-release swivel.
Contacts- Barton/Imtra, 30 Samuel Barnet Blvd., New Bedford, MA 02745; 508/995-7000. Forespar, 22322 Gilberto, Rancho Santa Margarita, CA 92688; 949/858-8820. Murrays, Box 490, Carpinteria, CA 93014; 800/786-7245. Ronstan,7600 Bryan Dairy Rd. N., Largo, FL 33777; 727/545-1911. RWO, 3000 Park Way Industrial Dr., Buford, GA 30518; 770/945-0564. Spinlock, Maritime Supply, 42 Grandview Terrace, Essex, CT 06426; 860/767-0468. Wichard, 507 Hopmeadow, Simsbury, CT 06070; 860/658-2201.
RELATED ARTICLES MORE FROM AUTHOR
Leave a reply cancel reply.
Log in to leave a comment
Latest Videos

Fuel Contamination? The Baltimore Francis Key Bridge Collapse

Safety At Sea For You & Your Family – The Joe...

What’s The Best Vinyl Window Cleaner for Your Boat?

40-Footer Boat Tours – With Some Big Surprises! | Boat Tour
- Privacy Policy
- Do Not Sell My Personal Information
- Online Account Activation
- Privacy Manager
IMAGES
VIDEO
COMMENTS
To make your DIY tiller extension: 1. Measure the outside diameter of the universal joint tenon with a set of calipers where it inserts into the tiller extension tube. You want to cut off the tip of the ski pole right where the inside diameter of the pole is this size or slightly smaller for a tight fit. 2.
A second clamp backs it up. Cover the hose clamps with athletic tape to prevent scratching. Slide the webbing loop onto the tiller and tape it in place with 1½-inch athletic tape (see photo 3). The webbing will stretch for a snug fit. Cut the extension to the proposed length, leaving it a little long to start.
In part eighteen of this series on how to build a wooden Snipe class sailboat I show how to make a tiller and tiller extension for the rudder. I mill the rou...
From Issue September 2020. Boats perform best floating at their designed waterlines. Many small sailing boats force you to sit at the tiller with your weight too far aft for proper trim, and the tiller can't be reached if you want to sit to windward. If the bow is aimed at the sky, out of the water, you lose waterline length and sail slower.
Hey guys!This week I show you how I built the tiller extender while reducing the tiller extension. The tiller extension on my GIS was long since I solo sai...
My ancient stock tiller extension bent and broke when my boat flipped in a storm gust... which is another story, but now I'm looking to replace with a simple (i.e. cheap) and effective tiller extension. I'm thinking of just ordering some 6061-T6 AL tubing, 0.75" O.D., and .065" wall to keep the weight down.
We experimented with tiller extensions this year. I bought and mounted a decent extension pivot on the tiller, then used some junk tubes of various lengths to see which we liked the best. On our small boat the extension has to fit, and to also be stored by clipping onto the tiller without hanging up anywhere.
Tacking. If the tiller and helmsman are in front of the traveler, start the tack holding the extension in the same hand as before the tack in a dagger grip. Facing forward, push the tiller across. As soon as the rudder is hard over, pass the extension across forward, being careful not to mow down your crew.
250 posts · Joined 2006. #2 · Mar 20, 2009. Use an old golf club shaft (from a second hand store/charity shop) and purchase a swivel mount from a chandler that's meant for the 'real' tiller sticks. The shaft diameter will be small so you'll need to adapt it with a collar of some sort to accept the swivel mount.
Sailboat Racing Tips: Tiller Extension Technique. The feel on the tiller extension is your direct link to the boat's performance, so how you hold it is more important than you might think. By Mike ...
Tacking. If the tiller and helmsman are in front of the traveler, start the tack holding the extension in the same hand as before the tack in a dagger grip. Facing forward, push the tiller across. As soon as the rudder is hard over, pass the extension across forward, being careful not to mow down your crew.
We will show you have to remove an old sailboat tiller extension universal and install a new one with basic hand tools.
Replacement Tiller Extension: Recently I was given a small secondhand sailing dinghy. ... And there you have it a finished tiller extension! Go forth and sail! Participated in the ... Eco-Enthusiasts and Creative Cooks by Do-Or-Diy in Survival. 53 15K DIY Electric Kayak by BradenSunwold in Boats. 131 13K RAV4 Car Camping Platform ...
Every boat handling problem is reduced by correct tiller grip. One of the Women Olympic Sailors demonstrates how the important first principle of holding the tiller extension correctly so both hands can control the sail. See how the tiller extension is held across the body. It can feel unfamiliar at first.
Keel. Five Swing Keel Maintenance Blunders and How to Prevent Them. Refinish Your Swing Keel for Best Performance - Part 1: Removing. Refinish Your Swing Keel for Best Performance - Part 2: Cleaning. Refinish Your Swing Keel for Best Performance - Part 3: Fairing. Refinish Your Swing Keel for Best Performance - Part 4: Sealing and Painting.
288. On top of the tiller are two pieces of 3/8″ x 3/4″ hardwood about 5″ long. The two pieces are drilled horizontally, at the joint line, about 2″ from the end to accommodate a 3″ length of split neoprene which has an inside diameter slightly less than the diameter of the braided line which runs to the coamings.
The tiller tender requires only a short line run across the boat under the tiller an toggled bungee loop to squeeze that line to the tiller. Next, take a short bungee loop with a plastic ball on the end and pass the looped end around both the tiller and the loop you just rigged. Take enough turns with the bungee around both the tiller and the ...
sailboat steering. tillers & tillers extensions. CONTACT WEST MARINE. Live Chat. 1-800-262-8464. Store Locator. Shop the best selection of Tillers & Tillers Extensions from West Marine. Visit for products, prices, deals and more!
The swiveling grip allows the hand to rotate for best comfort. The the grip and action are similar to holding the tiller directly. A folding hook fits into a slot in the Spinlock EA D-grip tiller extension. This can help keep the rudder locked at anchor, or keep the helm steady when the helm is balanced and the boat will hold a course on its own.
Technical assistance is available to help find the right size. MAURIPRO Sailing, your direct access to Sailboat Tiller Extensions and all your other sailing and boating needs. Shop sailboat Tiller Extensions at MAURIPRO Sailing Store. Complete selection and technical information on all. Free shipping on orders over $99.
Sailboat Steering; Tiller Extensions; Sailboat Tiller Extensions. Sorting. Sort by. 1 - 29 of 29 results. Ronstan® Batlestick™ Grip Fixed Tiller Extension. 0 # 4860231476 ... Black Tiller Extension End Knob for 5/8" D Tube by Ronstan®. If you're an avid sailboat enthusiast looking to enhance your experience on the water, then top-quality ...
A Tiller Needs Help To give a helmsman more choices about where to plant his weight-as ballast, for good visibility or just for plain old comfort-a tiller usually needs an extension. Whether called a tiller extension or a hiking stick, what a techy might call an athwartships facilitator should have a universal joint and a good handle.