- New Sailboats
- Sailboats 21-30ft
- Sailboats 31-35ft
- Sailboats 36-40ft
- Sailboats Over 40ft
- Sailboats Under 21feet
- used_sailboats
- Apps and Computer Programs
- Communications
- Fishfinders
- Handheld Electronics
- Plotters MFDS Rradar
- Wind, Speed & Depth Instruments
- Anchoring Mooring
- Running Rigging
- Sails Canvas
- Standing Rigging
- Diesel Engines
- Off Grid Energy
- Cleaning Waxing
- DIY Projects
- Repair, Tools & Materials
- Spare Parts
- Tools & Gadgets
- Cabin Comfort
- Ventilation
- Footwear Apparel
- Foul Weather Gear
- Mailport & PS Advisor
- Inside Practical Sailor Blog
- Activate My Web Access
- Reset Password
- Customer Service

- Free Newsletter

Bob Perrys Salty Tayana 37-Footer Boat Review

Tartan 30: An Affordable Classic

Ericson 34-2 Finds Sweet Spot

How to Sell Your Boat

Preparing A Boat to Sail Solo

Solar Panels: Go Rigid If You have the Space…

Leaping Into Lithium

The Importance of Sea State in Weather Planning

When Should We Retire Dyneema Stays and Running Rigging?

Rethinking MOB Prevention

Top-notch Wind Indicators

The Everlasting Multihull Trampoline

Taking Care of Your 12-Volt Lead-Acid Battery Bank

Hassle-free Pumpouts

What Your Boat and the Baltimore Super Container Ship May Have…

Check Your Shorepower System for Hidden Dangers

Waste Not is the Rule. But How Do We Get There?

How to Handle the Head

The Day Sailor’s First-Aid Kit

Choosing and Securing Seat Cushions

Cockpit Drains on Race Boats

Re-sealing the Seams on Waterproof Fabrics

Safer Sailing: Add Leg Loops to Your Harness

Waxing and Polishing Your Boat

Reducing Engine Room Noise

Tricks and Tips to Forming Do-it-yourself Rigging Terminals

Marine Toilet Maintenance Tips

Learning to Live with Plastic Boat Bits
- Boat Maintenance
Building a Faster Rudder
Boost performance with a bit of fairing and better balanced helm..

We’re cruisers not racers. We like sailing efficiently, but we’re more concerned with safety and good handling than squeezing out the last fraction of a knot. Heck, we’ve got a dinghy on davits, placemats under our dishes, and a print library on the shelf. So why worry about perfection below the waterline?
The reason is handling. A boat with poorly trimmed sails and a crudely finished rudder will miss tacks and roll like a drunkard downwind when the waves are up. On the other hand, a rudder that is properly tuned will agilely swing the boat through tacks even in rough weather, and provide secure steering that helps prevents broaching when things get rolly. The difference in maximum available turning force between a smooth, properly fitted rudder and the same rudder with a rough finish and poor fit can be as much as 50% in some circumstances, and those are circumstances when you need it the most. It’s not about speed, it’s about control.
It Must Be Smooth
Smooth is fast. That’s obvious. But it makes an even bigger difference with steering. Like sails, only half of rudder force comes from water deflected by the front side of the blade. The rest results from water being pulled around the backside as attached flow. How well that flow stays attached is related to the shape of the blade, which we can’t easily change, and to the surface finish of the blade, which we can.
Remember the school experiment, where you place a spoon in a stream of water and watched how the water would cling to the backside of the spoon? Now, try the experiment again as a grown-up, but with a different set of materials.
Try this with a piece of wood that is smooth and one that is very rough; the water will cling to the smooth surface at a greater angle than the rough surface. Try piece of smooth fiberglass or gelcoat; the water will cling even better because the surface is smoother. Try a silicone rubber spatula from the kitchen. Strangely, even though the surface is quite smooth, the water doesn’t cling well at all. We’ll come back to that.
Investigators have explored this in a practical way, dragging rudders through the water in long test tanks (US Navy) and behind powerboats.

If we are trying to climb to windward, it’s nice to get as much lift out of the rudder as practical, before drag becomes too great or before it begins to stall with normal steering adjustments. If the boat has an efficient keel and the leeway angle is only a few degrees, the rudder can beneficially operate at a 4-6 degree angle. The total angle of attack for the rudder will be less than 10 degrees, drag will be low, and pointing will benefit from the added lift. If the boat is a higher leeway design—shoal draft keels and cruising catamarans come to mind—then the rudder angle must stay relatively low to avoid the total angle (leeway + rudder angle) of the rudder from exceeding 10 degrees. That said, boats with truly inefficient keels but large rudders (catamarans have two—they both count if it is not a hull-flying design) can sometimes benefit from total angles slightly greater than 10 degrees—they need lift anywhere they can get it.
How can you monitor the rudder angle? If the boat is tiller steered, the tiller will be about 0.6 inches off center for every degree or rudder angle, for every 3 feet of tiller length. In other words, the 36-inch tiller should not be more than about 2 inches off the center line. If the boat is wheel steered, next time the boat is out of the water, measure the rudder angle with the wheel hard over. Count the number of turns of the wheel it takes to move the rudder from centered to rudder hard over, and measure the wheel diameter. Mark the top of the rim of the wheel when the boat is traveling straight, preferably coasting without current and no sails or engine to create leeway.
The rim of the wheel will move (diameter x 3.146 x number of turns)/(degrees rudder angle at hard over) for each degree of rudder angle. Keep this in the range of 2-6 degrees when hard on the wind, as appropriate to your boat. It will typically be on the order of 4-10 inches at the steering wheel rim. A ring of tape at 6 degrees can help.
How do we minimize rudder angle while maintaining a straight course? Trimming the jib in little tighter or letting the mainsheet or traveler out a little will reduce pressure on the rudder and reduce the angle. Some boats actually sail to weather faster and higher, and with better rudder angles, by lowering the traveler a few inches below the center line.
On the other hand, tightening the mainsheet and bringing the traveler up, even slightly above the center line on some boats, will increase the pressure and lift.
Much depends on the course, the sails set, the rig, the position of the keel, the wind, and the sea state. Ultimately, some combination of small adjustments should bring the rudder angle into the appropriate range. Too much rudder angle and you are just fighting yourself.

- Turn this rudder just 10 degrees and the end plate is lost, reducing the amount of lift generated.

- This rudder might as well be transom hung, the way that the end cap just disappears.

- Stern-hung rudders, and spade rudders with large gaps between the hull and the top of the rudder will lose their lift at the “tip” of the blade near the surface.
Surface roughness affects the lift from the rudder in two ways. A rougher surface has slightly lower lift through the entire range of angles, the result of a turbulent boundary layer instead of smooth flow over the entire surface. More dramatically, rougher blades stall at lower angles and stall more completely. The difference between a faired rudder with a polished finish and a rudder carrying a 10-year accumulation of rolled-on antifouling paint can be as much is 35 percent (see “Rudder Savvy to Boost Boat Performance,” above).
What can we do? If your rudder is a lift up type, don’t use bottom paint. Fair the blade within an inch of its life and lay on a gloss topside paint as smoothly as possible, sanding between coats. If you use a brush, stroke the brush parallel to the waterline, not along the length of the blade.
Which is faster, a gloss finish or one that has been dulled with 1000 grit sandpaper? Opinions go both ways, and we believe it may depend on the exact nature of the paint, which leads to the question, “Should we wax the blade?” The answer is a resounding, no.
Wax is a hydrophobic (readily beads water), like the silicone rubber spatula you tested, and as a result, water doesn’t always cling as well. Thus, whether the paint should be deglossed or not depends on the chemistry of the paint, but in all cases the final sanding should be 1000 grit or finer.
If the rudder stays in the water, antifouling paint is required. Sand the prior coat perfectly smooth. There should be no evidence of chips, runners, or any irregularity at all. Using a mohair roller, lay the paint on thin, and apply multiple coats to withstand the scrubbing you will give your rudder from time to time.
Even if you use soft paint on the rest of the boat, consider hard paint for the rudder. Sure, it will build up and you will have to sand it off periodically, but the rudder is small and no part of your boat is more critical to good handling. Take the time to maintain it as a perfect airfoil.
Close the Gap
Ever notice the little winglets on the tips of certain airplanes? As we know, those are intended to reduce losses off the tip of the wing. The alternatives are slightly longer wings or slightly lower efficiency. At the fuselage end of the wing, of course, there is no such loss because the fuselage serves as an end plate. The same is true with your rudder.
There’s not much you can do about losses from the tip; making the rudder longer will increase the chance of grounding and increase stress on the rudder, rudder shaft, and bearings. Designers have experimented with winglets, but they the catch weeds and the up-and-down motion of the transom makes them inefficient. However, we can improve the end plate effect of the hull by minimizing the gap between the hull and the rudder.
In principle it should be a close fit, but in practice the gap is most often wide enough to catch a rope. Just how much efficiency is lost by gap of a few inches? The answer is quite a lot. A gap of just an inch can reduce lift by as much as 10-20 percent, depending on the size and shape of the rudder and the speed. A gap of 1-2 mm is quite efficient, but normal flexing of the rudder shaft may lead to rubbing.
If the gap is tight, the slightest bend from impact with a submerged log can cause jamming and loss of steering, though in my experience once the impact is sufficient to bend the shaft, a small difference in clearance is unlikely to make much difference; the shaft will bend until the rudder strikes the hull. Just how tight is practical depends on the type of construction, fitting accuracy, and how conservative the designer was in their engineering.
Carbon shafts, tubular shafts, and rudders with skegs flex less, while solid shafts generally flex more, all things being equal. Normally a clearance of about 1/4-inch per foot of rudder cord is practical, and performance-oriented boats often aim for much less. If you can reach your fingers through, that’s way too much. Hopefully the hull is relatively flat above the rudder so that the gap does not increase too much with rudder angle.
Practical Sailor’s technical editor Drew Frye is the author of the books Keeping a Cruising Book for Peanuts and Rigging Modern Anchors. He blogs at his website, sail delmarva.blogspot.com .
RELATED ARTICLES MORE FROM AUTHOR
What your boat and the baltimore super container ship may have in common, 22 comments.
How happy to see good technical information about the science of boat speed and control. This information is valuable to everyone, but the “mainly just cruising” cohort usually doesn’t get enough in an easily understandable form. I always suggest some club level racing as the best way to learning how to sail, but many prospective racers have been put off from the sport or haven’t had good opportunities to join the fleets. Technical seminars are generally either too advanced for beginners to understand properly, and the beginner classes are frequently too basic to inspre those who would benefit from a deeper knowledge base in the science of sailing. Good on you, Practical Sailor, for your technical stories hitting the “sweet spot,” getting this information to those we’ll benefit most.
Great article. How about considering modifying a rudder to make it a hydrodynamically balanced rudder. I did it to my boat and the difference is outstanding. If I remember correctly 7% of the rudder area is forward of pivot center. It is a skeg hung rudder that now turns like it’s a spade rudder.
I’m “skeg hung” also. Would you be so kind as to posting a link or providing info as to you accomplished this feat. Thanks!
A very clear explanation of some quite complicated hydrodynamics – thank you! I am surprised by the US Navy results showing benefit of sanding further than 400 grit. Most other experimental data suggest there is negligible advantage in going beyond about 360 grit. Is the original reference publicly available? On Michael Cotton’s comment, a couple of points: Firstly, the amount of balance (i.e how far back you put the stock in the blade) has no impact on the hydrodynamic performance of a spade rudder. What it does do is change the feel of the rudder; a well balanced rudder will be easier to use, thereby probably allowing the steerer to sail the boat better. For a skeg rudder, the hydrodynamic impact of changing the balance depends very much on how the skeg/blade combination is configured. Secondly, 7% of rudder area forward of the stock is not enough for most rudders. The position of the centre of pressure is dependent on a lot of factors (aspect ratio, rudder angle etc.), but it is usually at least 15% back from the leading edge on a spade rudder, more often 20%. A balance somewhere between 10% and 15% is likely to give just enough feel without too much weight. However, rudder balance is still a bit of a black art, it really does depend on the rudder geometry.
the statement that one doesn’t want a silicone/silane coated ( super-smooth, hydrophobic: silicone-silane is just the example I am choosing, since it is now in use as a massively-speeding hull-coating, ttbomk ), as it *induces* flow-separation…
looks to me like conflating cavitation with flow-separation.
People have no problem teflon/ptfe-coating aviation-wings, as a means of *preventing* flow-separation.
the super-slick shape of a Cirrus’s composite wing, if made super-smooth/polished & super-slippery, “air-phobic”, as it were, *improves* its performance, not detracts from it….
Flow is always 1. laminar, then 2. turbulent, then 3. flow-separation.
unless the angle-of-attack ( AoA ) is small-enough to prevent separation.
The Gentry Tufts System, for *seeing* when a separation-bubble begins, on a sail, is brilliant ( Arvel Gentry was a fluid dynamicist, & realized that once one has a *series* of tufts, from luff on back, about 1/4 up the luff, one can *see* the beginning of a flow-separation-bubble, & tune the sail to keep it *just*-beginning, because *that* is MAX lift. Wayback Machine has his site archived, btw )
The aircraft designer Jan Roskam wrote of a DC-10 crashing because pebbled-ice as thick as the grit on 40-grit sandpaper had formed on the upper wings…
obviously, engineered to require laminar, there, but having turbulent, cost all those lives.
iirc, it was Arvel Gentry, or “Principles of Yacht Design”, that stated it takes a ridge of about 0.1mm, only, to trip the flow around a mast from laminar to turbulent…
Given how barnacles & such are generally 100x or more as thick as that, when removed from a hull, I think laminar-flow is something that exists only for the 1st day or so after launching!
I now want to see experiment showing polar curves for rudders coated normally, uncoated, & ailicone-silane coated, to see if it is the coating that induces separation-bubbles, or if it is AoA exceeding functional angle, for that surface & foil,, while the boundary-layer is in specifically turbulent flow, as opposed to the ideal laminar, as aviation’s results indicate…
just an amateur student of naval-architecture & aircraft-design ( Daniel P. Raymer’s “Conceptual Aircraft Design” is *brilliant*, btw ), who happens to study this stuff autistically, as that is the only way to make my designs become absolutely-competent, is all…
I got a pearson and the rudder broke. Can I just replace with a outboard rudder mount it off set for room for outboard need info.
You could but it will not work very well. How badly it would perform is difficult to say. It might be just poor or disastrous. Things really need to be balanced on sail boats.
Polished rudders stall at low angles of attack and ask any hobie cat racer.
Pi is NOT 3.146
3.1416 maybe
Yup, 3.1416. Typo.
Before 2005 , when I fully retired and went cruising 10 months per year, I changed auto pilots, the hydraulics of which reduced the maximum rudder angle. “Someday” had always been difficult to steer in marinas, so I added 30% more rudder area to the Gulfstar 41′ by deepening and following the existing angles. (the pivot was unchanged, as all added area was aft of that.) It increased rudder effort noticeably, but not excessively, improved motor maneauvering and allowed being able to hold a close line better. Noticeably, it caused a lot more stalling of the rudder whenever it was turned very much. A recent tangle with a Guatemala fish net damaged the extension, which I had intended to be sacrificial. I cleaned up the separation somewhat, but have not replaced the extension. The boat again now requires more steering correction when heading at all upwind, but the rudder does not stall as easily.
This is not a scientific study, just my personal non-scientific observations. The added rudder area was quite low, and the fairing quality was…well! modest.
I’ve seen data suggesting ~ 400 grit is best, and I’ve seen data suggesting polished is best. They were both smart, respected guys that I would not second guess. My conclusion is that other factors, such as the specific foil profile and the type of coating, are involved. Let’s just agree that many layers of rolled bottom paint with a few lumps and chips is sub-optimal! We’re talking about cruising boats.
Thanks for great article. I’m convinced enough to go sand my bottom paint off the lifting rudder of my Dragonfly Tri.
Absolutely! No lifting rudder should have bottom paint. My Farrier rudder was sanded fair and painted with gloss white.
Dagger boards and center boards that retract still need antifouling, since they do not lift clear of the water, but because they are in a confined space with little oxygen or water flow, fouling is very limited. Because the space is tight and paint build-up can cause jamming, sand well and limit the number of coats. For my center board I go with two coats on the leading edge (exposed even when lifted) and one coat on the rest.
I do remember a comment directed to cruisers a few years back suggesting that a faster cruiser would be more likely to get out of the way of dirty weather, especially with modern forecasting. I reckoned that this concept would gain traction, but I haven’t seen it. Can anyone weigh in on this opinion?
I would agree ONLY for coastal crusing when a safe harbor is always no more than a day away. OR ocean racing where speed matters and the boat is kept light. We all know weather reports past 24hours are a guide not a guarantee. Once a storm is bearing down NO boat even a fast one is going it out run a storm. Also we sail on boats that need wind and it’s always a balance between a course between high pressure systems (doldrums) and low pressure systems (high likelyhood of a storm) so because we seek wind sometimes we get more then we want. Try and avoid that and you risk venturing too far into the high pressure system and NO wind. So yes weather forecasts can give you a 1-2 day weather window and a fast boat that can get the hell out of dodge and put a few miles between itself and the oncoming weather could avoid a storm. BUT we are usually not talking about a world ocean race boat vs an old full keel tank. We are talking a faster but still rather slow loaded down cruising boat. It may be only the difference of 7knot average vs 9 knots average. Even a faster cruiser/racer is not a stripped down Volvo series racer. And even those super fast ocean racers pushing the edge of technology get caught in storms and frankly I would not want to use one of those boats as my floating home on the water. They are a thrilling ride but far from comfortable. And they STILL can’t sail fast enough to out run a storm and guarantee you you will never have to sail in big waves and high winds. There is not a cruising SAIL boat that is as fast as a center console fishing boat with 1200hp in outboards on the back and guess what when a squall is coming even they get caught and can’t out run it. And no it’s not a hurricane and it won’t last long but it’s enough when it hits you if your on a light boat over canvased because trying to outrun the oncoming squall it’s enough to get scary. And then there is comfort. Even when there is no storm near you the swell from a storm hundreds of miles away can make for a uncomfortable ride in a boat designed to go fast vs a heavy displacement boat that just pushes threw waves and Has the tonnage not to get knock around. So much of this article screams weekend coastal sailing as even a week on anchor all that work to smooth your rudder will be canceled out by bottom growth todays antifoul paints don’t work as good as the older but far more toxic formulas so even the most meticulously cleaned cruising boat picks up growth ya you can dive and clean it regularly but I often it’s like Sisyphus pushing that rock up the hill. And besides if your sailing on a fullkeel with a keel hung rudder most of this is mute. yes a clean smooth bottom makes a difference on any boat but it’s the full keel and its tendency to track straight the over all weight and momentom of the boat it’s not fast and never will be but they can maintain their hull speed and track a comfortable ride threw chop and be unaffected by the swell. I’ll take a old full keel boat with a protected rudder I know is very unlikely to ever hit something to bend it or loose my rudder ever over a spade rudder or even worse duel rudders both hung exposed with a long but thin bolted on keel that if you hit a coral head means a haul out to inspect it as it more then likely cause a lot of expensive damage. And if not fixed right could lead to a future disaster (Cheeki Rafiki).
As interesting as the article reads, I wonder how it helps a prospective buyer of a used boat. Pictures will not do, and neither will taking several boats out of the water to examine them; it’s too expensive. It would be more helpful to indicate which boat manufacturers have the type of rudder the author recommends. After all, the buyer usually cannot be expected to change a rudder prior to buying it; it is also expensive. By the way, these types of very sophisticated articles are seen when it comes to hulls, keels, or rigging but without identifying the boats that carry the wrong equipment. If a specific rudder or keel configuration is not the proper one for efficient sailing, the author ought to state which boats carry the proper ones so that the buyer will concentrate on the whole (the boat) rather than the part.
I was describing the opportunity to improve the existing rudder. As I think back, I have modified the rudder of every boat I have owned in order to improve efficiency. The first two got small changes in balance and improved trailing edge sharpness. On the third I tightened the the hull clearance and changed the section. On my current boat I adding an anti-ventilation fence to improve high speed handling. https://4.bp.blogspot.com/-2ZGPzKdj_tE/WyF9G2mHtLI/AAAAAAAAOwE/r6zgQEr4vkcDB4ciMLcgboFdazDAseDBgCLcBGAs/s1600/ian%2Brudder%2Bfence.jpg None of these tasks was overly difficult, and none was undertaken until I had sailed the boat for a season and learned what balance she liked and noted her habits.
For me, I buy a boat based on reputation, a test sail, and in most cases, a survey. As you imply, it is the whole boat you are buying. Does it have good bones? Do you feel happy at the helm? Then comes the fine tuning. I’ve been told that I sell a boat when I run out of things to tweak.
wow, so now case reports/medical reports/evidence don’t count as “evidence”, but certain remedies, even if they are cited in medical journals but do not work in the real world, count as evidence to you?? Maybe we need to redefine evidence based on your philosophies.Anyway, i’ve wasted enough time here. goodbye.
Weight 2.5 tonnes
Do you have any articles on the ideal cross section shape for an outboard rudder mounted 50mm from the transom vertically The yacht is a 26 ft trailer sailer weight 2.5 tonnes
The most common choice would be NACA 0012. http://airfoiltools.com/airfoil/details?airfoil=n0012-il
There are many ways to build a rudder, including laminated solid rot-resistant wood and fiber glass covered foam with a metal armature core. For the DIY, laminated wood is probably the most practical.
LEAVE A REPLY Cancel reply
Log in to leave a comment
Latest Videos

Tartan 30 | Boat Review

Fuel Contamination? The Baltimore Francis Key Bridge Collapse

Safety At Sea For You & Your Family – The Joe...

What’s The Best Vinyl Window Cleaner for Your Boat?
- Privacy Policy
- Do Not Sell My Personal Information
- Online Account Activation
- Privacy Manager

Small Craft Advisor

Build Your Own Kick Up Rudder
William mantis offers up plans for a creative and effective diy rudder.
by Bill Mantis
I built a rudder for my 8.5’ x 4.5’ sailboat—named City Slicker 2. 0—the same time I built the boat itself, two years ago . Since I was in a hurry to get it done, I didn’t bother designing a kick-up rudder, figuring I could make the modification at a later date. But then I lost it. I lost my rudder. How does one lose a rudder? I can’t explain how it happened. I only know I had it when I came ashore one day, and didn’t have it the next time I tried to launch. Fortunately, I’d been designing a kick up rudder before suffering the loss, and I had the necessary epoxy and lumber on hand. Only the material for the rudder blade and new pintles had to be ordered. As a result, I lost only one week of the sailing season.

Continue reading this post for free, courtesy of Joshua Colvin.
How to Build a Sailboat Rudder From Scratch

Introduction: How to Build a Sailboat Rudder From Scratch

This particular rudder is built off of the original rudder for a ~20' Bayliner Buccaneer sailboat. The original had cracked and rotted pretty badly. The owner of the sailboat cut the top of the rudder off and made a wooden 'boot' to cap the rudder. However, it wasn't water sealed with fiberglass, and over time more and more moisture got in until it became so flimsy that it wasn't reliable. While this instructable is specifically for this Bayliner sailboat with a tiller-style rudder, the instructions should be general enough for you to modify it to work for many sailboats. With that said, there are many many nuances to fiberglass/composite marine construction, so this type of build will require more research beyond what is covered here.
Step 1: Previous Rudder

In these photos you can see the extent of the damage. The rudder was foam-core/fiberglass sandwich. Think of it as a Big Mac; the three buns of the Big Mac were layers of fiberglass, and the meat was the foam (the yellow stuff). The only difference was that the buns would have all been connected and fully enclose the meat. First, I cut apart the rudder along its perimeter with an oscillating saw, so that I could use the pieces as templates for the build. In the fifth image you are seeing a piece of balsa (I think) at the edge of the rudder where the mounting hardware was located so as to provide compressive stability for the tightened hardware. In the last image, if you look at the top of the image you can see where the previous owner had chopped off the top of the rudder. There was a rudimentary wooden cap on that, so you can see how easy it would have been for water to get in.
Step 2: Rebuild

Because of the difficulty of rebuilding the rudder the same way, I chose to use two sheets of 3/4" solid plywood. While this increased the overall weight of the rudder, it ensured maximum strength and stability. There is a good reason that I chose to do it in two pieces: I wanted to be able to sand the exterior faces of the rudder in order to get a tapered surface, and by doing it in two pieces allowed me to have the piece be level on one side. In the first image below, you can see the old pieces of the rudder all stripped of foam next to the new plywood pieces. In the background you can see the middle fiberglass 'bun' of the whole kit 'n caboodle. I scraped away all of the foam because I had originally wanted to save the exterior pieces and reuse them, but the Big Mac style construction made it more difficult to reuse them. Simply place the old pieces on your sheet of plywood, trace, then cut out with a jigsaw. If for some reason, you only have one template to work with, and you are using two pieces of ply that will later get glued together, be sure to flip the template over before tracing, so you have mirrored pieces. The customer asked for a little more material at the top of the rudder, as you will see in the last images of the Instructable. It ended up making it look a little strange, however.
Step 3: Sanding

Unfortunately, I only took one image of the sanding process, shown below. As I mentioned, it is good to sand the two pieces separately, although this picture is of the two already glued together. A handy trick is to imagine your surface and the lines of ply as the lines on a topography map. The curved edge of the rudder closest to us in the image is the narrowest edge, from the little notch all the way down the side to the very bottom of the rudder. This is because it is the edge of the rudder that points forward when it is on the boat. I started by using a disc sander, but it was too slow, so I switched to a grinder. The grinder worked well, but it was a bit too fast, so if you decide to use one, be very judicious in your use of it, otherwise you will end up with big divots.
Step 4: Fiberglass Layup

As I already alluded, there are many many variations to fiberglass construction. For this project I used chopped strand mat (which you can see in the first image), and a woven fiberglass cloth on top of that, with vinylester resin. Later on in the project I switched to West Systems Epoxy 105 and 205, because it was on hand. This type of layup requires you to use both the mat and the cloth in one process. The general idea is that you cut your mat to about the same size as your rudder, pour your resin on top, spread it and around, then immediately lay on the cloth (that you have also already cut to size), and the resin underneath should be enough to saturate the cloth. Often, however, it wasn't, and I had to mix more up really quick and pour it on top of the cloth to get it fully saturated. This is where you will need to conduct more research on mixing ratios of resin, temperature, amount per surface area, etc. Generally, I was able to get about 30 minutes of working time out of each batch. In the back is a finned roller that you use after you mix and start pouring the resin to remove the air bubbles from under the chopped strand mat and to spread the resin around. After a while the roller gets all gummed up, and I ended up using just my gloved hand to push out the bubbles, and I found that a simple plastic spreader worked best for spreading. Don't worry about the stuff that hangs over the sides. Originally I wanted to have it fold over and seal the edges at the same time, but this was near impossible, as we will see soon, and I just let it hang and harden from any of the spilled over resin. I dealt with it later with a lot of sanding.
Step 5: First Layer and Sanding

The order I used was as follows: Glass one side of the rudder, let cure. Cut off excess edge stuff and rough sand/grind. Glass other side of rudder, let cure. Cut off excess, sand until flush. Glass edges based upon which were generally 'up' when clamped in a mostly horizontal way (images 4 and 5). Glass the remaining edges. Sand the nasty edges until flush. The first image is after the glass on the faces have cured, showing the excess. The third image was after sanding the excess from the faces. The following images were taken doing first layers of the edges, after the faces.
Step 6: Additional Layers and Difficult Spots

I don't remember exactly how many layers went on total, because after sanding where necessary, sometimes more wood gets exposed, and all that's required is a simple patch. The first image is after fully sanded face and edge layers. There are some really difficult spots that you need to pay attention to. Generally, corners are the spots you need to look out for. It's like trying to wrap a piece of paper over a 3D form without letting any edges lift. They will tend to lift up one end of your saturated cloth and allow air to get right in there, which means you'll have to sand that air bubble out and re-do it later. The very bottom tip of the rudder was one of them. Although the second picture is after I had drilled the holes for the hardware, it's useful to see the method for tackling those difficult spots. Visibile at the tip of the rudder is a bit of blue painter's tape. For that spot and others, which I will mention later, I basically taped the heck out of it, making a small well, and poured in enough resin to cover it. You can also see in this picture, how it has started to get thick/bulky. That's normal as layers build, you just need to sand it down flush later. Sometimes the tape gets sealed in there, so I just left it in.
Step 7: Notes of Caution

If, after a good amount of sanding, your rudder has patches of white at the surface and you can feel a clothy texture when you run your fingers over them, it means the cloth did not get fully saturated and means the surface is not fully sealed. When this happens, it is sufficient to mix up a new batch of epoxy/resin, and spread it over the surface(s) without the need for another layer of cloth. The entire surface is sealed when all of it feels smooth/looks glossy and hard, although some spots may still be bumpy. After you think you've sealed the whole rudder and you go to sand it smooth, you may uncover more white patches or air bubbles. It's extremely frustrating to think you're almost done and find another one of those, but it pays off to patch them properly. If there are some air bubbles or pockets that just don't seem to patch up and keeps reappearing after you sand this product is really helpful: http://www.marinetex.com/marinetexepoxyputty.html. It's a putty-like marine epoxy, so it serves the same purpose as regular epoxy, but it is much more workable and can be packed into a hole to completely seal it. The is the best product for repairs of deep scratches or small punctures in a fiberglass surface. The notch at the top of the first image was one spot that I taped significantly in order seal every spot with epoxy. This is the point where I switched to epoxy from resin, as I had run out. The purple is the natural color of the epoxy after it hardens.
Step 8: Hardware Holes

This step is extremely important and tricky. If, by chance, you have the previous hardware which mounts the rudder to the transom of the boat, great. Use them as guides as you don't want to make your rudder thicker than the original and not fit into the hardware. If you don't have previous hardware and your boat needs a very specific bracket, go buy it early so you can make sure to construct your rudder to fit into those, otherwise, just buy some to suit. Use this tutorial to help you get the holes right: http://www.boat-project.com/tutorials/drill.htm. Basically, you need to drill your holes bigger (1.5x, I think. The tutorial with specify this.) than the hardware needs. You then fill the hole with epoxy and let cure. Then you drill your holes again with a bit sized for your hardware. After painting, get some sealant (specified in the tutorial) and coat the bolts, holes and the inside face of the bracket immediately before placing them on the rudder. It's really important to drill your holes square through the rudder. If you don't, you'll find when putting the bolts through, that they won't meet with the bracket holes. If you're slightly off (like I was), you can just enlarge the hole at the problem end. If you're really off, you'll have to sand the paint away, drill the new hole, fill with epoxy again, re drill, then paint.
Step 9: Painting

Painting a boat or any underwater surface is another realm that has a large amount of nuance, specificity, and also varying opinions. It is still a bit unclear to me, but the most ideal situation is to find a marine paint that actually bonds with your fiberglass/epoxy surface. Interlux makes really good products and they have tutorials on which paints to buy and how to apply them: http://www.yachtpaint.com/usa/diy/default.aspx. Before painting, you must 'cut' the surface (a light sanding), so there is surface for the paint to bond to, and you will need to remove any oils or chemicals that are on the surface with acetone or a similar product. The paint will usually specify a total thickness of paint required to be considered sealed, and will allow you to calculate the number of coats from the average thickness per coat. Next use a top-side paint (I think we used an auto-body paint) to cover the surfaces above the waterline to make it look nice. Lastly, apply a bottom paint (also called anti-fouling paint) below the waterline of the rudder. Bottom paints, especially, vary greatly by geographical location, type of water, EPA legal restrictions, etc. Their purpose is to prevent organisms from attaching to the submerged surfaces, so naturally, they will contain certain chemicals and/or metals. Copper is a common ingredient in anti-fouling paint, as it slowly leeches from the paint, preventing any organisms from attaching permanently.
Step 10: The End!

Attach the hardware and tiller, and you're ready to put it on the boat!!! (That's my pops holding the rudder.)
Recommendations

Remake It - Autodesk Design & Make - Student Contest

Making Time Contest

Books and Bookshelves Contest


Learn the Basics of Dinghy Sailing: A Beginner’s Guide
Alex Morgan
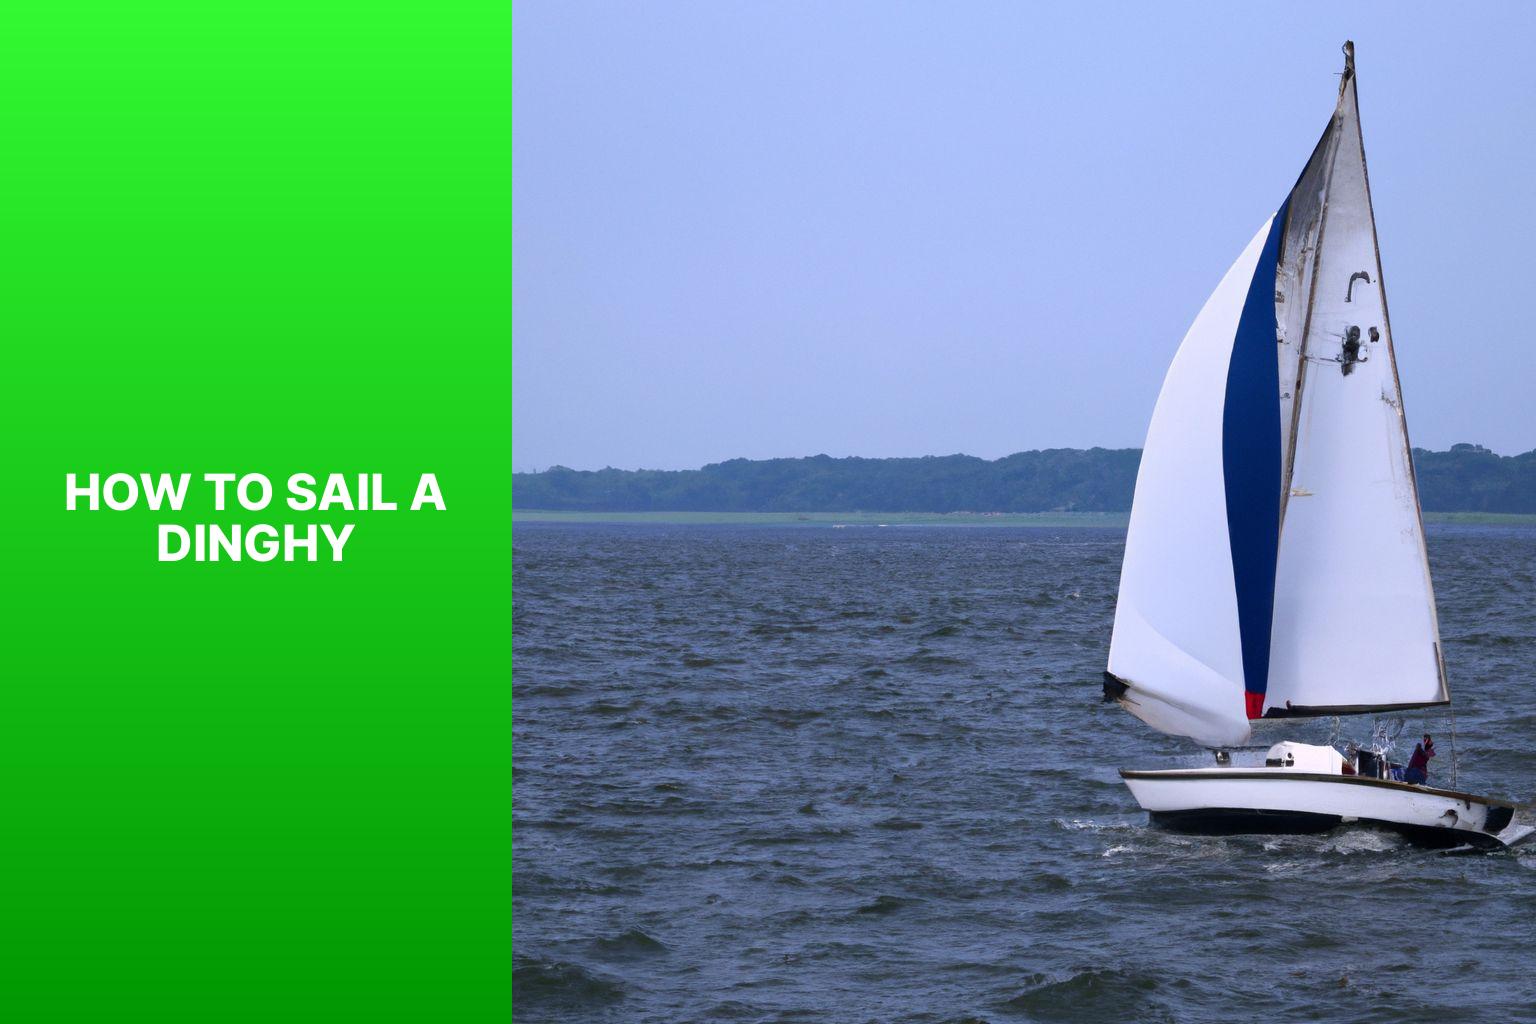
Sailing a dinghy can be an adventurous and rewarding experience, allowing you to navigate the water and harness the power of the wind. Whether you’re a beginner or looking to improve your sailing skills, understanding the fundamentals of sailing a dinghy is essential. In this guide, we will delve into the different aspects of sailing a dinghy to help you get started and sail with confidence.
Sailing dinghies are small sailboats that are designed to be sailed by one or two people. They are versatile and can be used for leisure sailing, racing, or even as a training vessel. Dinghies come in a variety of shapes and sizes, each with its own unique characteristics and sailing capabilities.
Before setting sail, it’s important to choose the right dinghy that matches your skill level, sailing goals, and local weather conditions. Factors to consider include the type of dinghy, hull design, size, and rigging options.
To ensure a safe and enjoyable sailing experience, it’s crucial to have the right equipment on board. This includes sailing gear such as life jackets, wetsuits, and appropriate footwear, as well as safety equipment like a whistle, signaling devices, and a first aid kit.
To effectively sail a dinghy, it’s important to familiarize yourself with its various components. These include the hull, rigging and sails, centerboard or daggerboard, and tiller and rudder. Understanding how these parts work together will help you maneuver the dinghy more efficiently.
Mastering basic sailing techniques is essential for any aspiring dinghy sailor. This involves understanding wind and weather conditions, launching and landing the dinghy, steering and maneuvering, and becoming familiar with different points of sail.
Once you have a solid foundation in basic sailing, you can explore more advanced techniques. These include tacking and gybing, sailing upwind, using sail controls to optimize performance, and adjusting your technique according to different wind conditions.
Safety should always be a top priority while sailing a dinghy. We’ll cover basic safety rules, collision avoidance, right of way rules, and how to respect the environment while out on the water.
Sailing a dinghy is a skill that can be continually improved upon with practice and experience. As you gain more confidence, consider taking lessons, joining a sailing club, or participating in races to further enhance your skills and enjoyment of this exhilarating sport.
Key takeaway:
- Choosing the right dinghy is crucial: Consider factors such as size, stability, and intended use when selecting a dinghy for sailing.
- Master the basic sailing techniques: Understanding wind, launching and landing the dinghy, steering and maneuvering, and knowing the points of sail are essential for successful dinghy sailing.
- Prioritize safety and etiquette: Follow basic safety rules, learn collision avoidance and right of way rules, and respect the environment while sailing a dinghy.
Choosing the Right Dinghy
When it comes to choosing the right dinghy , there are crucial factors to consider. From the size and weight to the sailing conditions you’ll be facing, this section dives into the key elements that will help you make an informed decision. So, before you set sail, let’s explore the essential aspects that can make or break your dinghy sailing experience. Get ready to navigate the waters in style and with confidence!
Factors to Consider
When choosing a dinghy for sailing, there are several factors to consider. You should think about the size and weight of the dinghy. A smaller, lighter dinghy is easier to maneuver and launch, which makes it perfect for beginners or sailors who will be sailing solo.
It’s important to assess your skill level as a sailor. If you are a beginner, you should opt for a dinghy that is stable and forgiving . On the other hand, more experienced sailors may prefer a high-performance dinghy that offers a thrilling sailing experience.
Next, consider the intended use of the dinghy. Will you be using it for racing or cruising? It’s crucial to choose a dinghy that is specifically designed for your intended purpose.
Of course, cost is another important factor to take into account. Dinghies come in a range of prices, so you should choose one that fits within your budget. Remember to factor in the cost of any additional equipment and maintenance.
Another consideration is the availability of spare parts and accessories for the dinghy. It’s advisable to choose a reputable manufacturer that offers a wide range of support and resources.
Think about where and how you will store and transport the dinghy. Assess whether you have enough space at home or if you will need to rely on a boatyard or marina for storage.
A pro tip is to try out different dinghies before making a final decision. This hands-on experience will help you determine which dinghy feels the most comfortable and suits your sailing style.
Essential Equipment for Dinghy Sailing
When it comes to sailing a dinghy, having the right equipment is essential . In this section, we’ll explore the must-have gear for an enjoyable and safe sailing experience. From top-of-the-line sailing gear to crucial safety equipment, we’ll cover everything you need to know to be fully prepared on the water. So, get ready to gear up and sail with confidence in your trusty dinghy !
Sailing Gear
When it comes to sailing gear, every sailor should have these essential items:
Having the right sailing gear is essential for comfort, safety, and enjoyment while on the water. Invest in quality gear and always check its condition before setting sail.
Safety Equipment
When sailing, prioritize safety. Here are essential safety equipment items to consider for dinghy sailing:
- Life Jacket: All sailors must have a properly fitting and Coast Guard-approved life jacket. Wear it at all times while on the water.
- Personal Flotation Device (PFD): Similar to a life jacket, a PFD provides extra buoyancy and is a lightweight option.
- Whistle or Horn: Use these signaling devices for emergencies or to communicate with others on the water.
- Throwable Flotation Device: A buoyant object thrown to someone in distress to assist with their flotation until help arrives.
- First Aid Kit: Keep a well-stocked first aid kit onboard for injuries or medical emergencies while sailing.
- Anchor: Essential for stopping the boat’s drift in case of engine failure or strong currents.
- Fire Extinguisher: Have a fire extinguisher onboard to handle potential fires caused by fuel or electrical problems.
Remember, safety equipment is effective with proper use and regular maintenance. Regularly inspect and replace damaged or expired safety equipment. Familiarize yourself with each item’s use and ensure everyone onboard knows the location and operation of the safety equipment.
Understanding the Parts of a Dinghy
Get ready to set sail as we dive into understanding the different parts of a dinghy. We’ll be exploring the hull , rigging and sails , centreboard or daggerboard , and the tiller and rudder . Each sub-section sheds light on a crucial component of a dinghy, taking you one step closer to mastering the art of sailing. So grab your life jacket and join us on this nautical adventure!
The hull, an integral part of a sailing dinghy, provides both buoyancy and stability . Constructed from materials such as fiberglass , its purpose is to withstand the forces of wind and water.
The performance of a dinghy is greatly influenced by the shape of its hull. For novices or when sailing in calm waters, a flat-bottomed hull offers exceptional stability. Conversely, a V-shaped hull is more adept at slicing through waves, enhancing speed and maneuverability.
To facilitate orientation and communication, a dinghy’s hull is divided into distinct sections: the bow (front), stern (rear), port (left), and starboard (right). These sections help sailors easily identify different areas of the boat and provide precise instructions.
Maintaining the hull’s condition necessitates regular cleaning and inspection. This practice ensures the early detection of any cracks or damage that may compromise the hull’s integrity. Proper storage and transportation are equally vital to prevent unnecessary stress or wear.
When selecting a dinghy, it is crucial to consider both the hull design and the appropriate material that aligns with your specific needs. Whether your purpose is leisurely sailing or competitive racing, seeking guidance from experts or experienced sailors can aid you in making the right hull choice.
Rigging and Sails
The rigging and sails on a dinghy are crucial for supporting and controlling the sails.
The mast , boom , and standing rigging all play a part in this process.
The mast , which is a tall pole, holds up the sails and can be securely attached to the hull of the dinghy.
The boom , on the other hand, is a horizontal pole that extends from the mast and holds the foot of the mainsail.
The standing rigging consists of wires or cables that provide support to the mast and keep it upright.
This includes the forestay , backstay , and shrouds .
The forestay helps in supporting the mast and controlling its movement, while the backstay provides additional support and stability.
The shrouds prevent the mast from leaning too much to one side.
One particular day, John found himself sailing in his dinghy when he suddenly encountered a fierce storm.
The powerful wind and massive waves made it incredibly challenging to control the sails.
It was in this difficult situation that John truly recognized the significance of well-rigged sails.
The proper tension and positioning of the rigging allowed him to swiftly adjust the sails, enabling him to navigate through the turbulent waters.
Thanks to the robust rigging and well-maintained sails, John safely guided his dinghy back to shore.
This experience served as a constant reminder of the crucial role that rigging and sails play in enhancing the performance and safety of a dinghy.
Centreboard or Daggerboard
The centreboard or daggerboard is an essential component of a dinghy, and it plays a crucial role in enhancing its sailing performance. Understanding its significance and how to utilize it effectively can greatly enhance your sailing skills and maneuverability. Here are some key points to consider about the centreboard or daggerboard:
– The centreboard or daggerboard is positioned in the center of the hull and functions as a retractable fin-like structure.
– Its primary function is to prevent the boat from drifting sideways while sailing upwind.
– Depending on the wind conditions and sailing direction, the centreboard or daggerboard can be raised or lowered accordingly.
– By retracting the centreboard or daggerboard , the dinghy can sail in shallow waters without the risk of grounding.
– The size and shape of the centreboard or daggerboard have a significant impact on the boat’s stability and its ability to point into the wind.
– Smaller dinghies typically have centreboards , while high-performance racing boats commonly use daggerboards .
– When sailing upwind, it is advisable to fully lower the centreboard or daggerboard to maximize resistance and minimize leeway.
– Regularly inspecting the centreboard or daggerboard for any damage or signs of wear is essential, as it may affect the boat’s overall performance.
– Having a proper understanding of how to use and adjust the centreboard or daggerboard will contribute to optimizing your dinghy sailing experience.
Considering these aspects and incorporating the centreboard or daggerboard effectively will ensure that you make the most out of this crucial sailing component.
Tiller and Rudder
The tiller and rudder are necessary parts of a sailing dinghy that assist in steering and maneuvering the boat efficiently.
Both the tiller and rudder collaborate to provide control and stability to the sailing dinghy. They enable the helmsman to navigate the boat smoothly, making precise turns and adjustments based on wind and water conditions.
It’s crucial for the helmsman to understand how the tiller and rudder function and how their movements impact the boat’s direction. Mastery of the tiller and rudder requires practice, as different sailing techniques, like tacking and gybing, demand precise control over these components.
Always maintain a firm grip on the tiller while sailing and remain cautious of any obstacles in the water. Proper utilization of the tiller and rudder ensures a safe and enjoyable sailing experience.
Basic Sailing Techniques
Get ready to set sail! In this section, we’ll dive into the basic sailing techniques that will turn you into a skilled dinghy sailor. From understanding wind and weather conditions to mastering the art of launching and landing the dinghy, we’ll cover it all. Get ready to learn about steering and maneuvering techniques, as well as the crucial concept of points of sail. By the end, you’ll have the knowledge and skills you need to confidently navigate the waters with your dinghy.
Getting Familiar with Wind and Weather Conditions
When getting familiar with wind and weather conditions for dinghy sailing, it is important to consider the following key factors.
You need to determine the wind direction in order to make the right maneuvers and select the appropriate course. Assessing the wind speed, which is measured in knots , is crucial. Light winds typically range between 5-10 knots , while stronger winds can exceed 20 knots .
It is also essential to stay informed about the weather conditions, including any changes in wind speed, gusts, or the possibility of storms. Observing cloud formations can provide valuable indications of approaching storms or strong winds.
It is important to take note of the sea state, as choppy or rough seas require extra caution. Considering the temperature is necessary for both comfort and ensuring appropriate clothing or sun protection.
Seeking advice from experienced sailors or locals can provide valuable insights on wind patterns or any peculiar weather conditions. It is crucial to be adaptable and prioritize safety by adjusting your plans based on the changing weather conditions.
Launching and Landing the Dinghy
Prepare the dinghy by securing all equipment and adjusting the rigging. Check the wind direction and current conditions to choose the best spot to launch. Lower the dinghy carefully into the water, making sure it floats freely.
Climb into the dinghy while holding onto the dock or shore. Release the dinghy and use a paddle or oar to push away if needed. Paddle or row to navigate away from obstacles and into open water.
Once a safe distance from shore, raise the sails if applicable, following proper procedures. Adjust the sails and tiller as necessary to control the direction and speed of the dinghy.
When returning to shore, steer the dinghy towards the desired landing spot, considering currents and obstacles. Gradually slow down the dinghy by adjusting the sails and tiller for a smooth approach.
If necessary, lower the sails and use oars or a paddle to maneuver into a suitable landing location. Guide the dinghy towards the shore, being mindful of other boats and people.
Once close enough to the shore, step out of the dinghy onto solid ground. Secure the dinghy to a dock, anchor, or other object to prevent drifting away.
Last summer, I went sailing with friends in a beautiful coastal area. We explored clear waters and enjoyed a warm breeze. One day, we anchored the dinghy near a secluded beach for a swim.
Upon returning, we faced challenges with launching and landing the dinghy due to the wind making it difficult to get back in. With careful maneuvering, we successfully landed the dinghy on the beach. This small victory added to the excitement of our sailing trip.
Launching and landing the dinghy require attention to detail and adaptation to changing conditions. Following safety precautions and being prepared ensures a smooth and enjoyable sailing experience.
Steering and Maneuvering
Steering and maneuvering a dinghy requires specific steps:
1. Hold the tiller firmly with both hands.
2. Push the tiller away from you to execute a left turn.
3. Pull the tiller towards you to execute a right turn.
4. Shift your weight to maintain balance in the boat and facilitate smooth turns.
5. Utilize gentle tiller movements to avoid excessive steering.
To ensure effective steering and maneuvering, it is important to practice and coordinate your actions. Be mindful of the wind direction and make adjustments to your steering accordingly. Take into consideration that the size and weight of the boat can influence its responsiveness to your commands.
Throughout history, dinghies have served a variety of purposes, ranging from transportation to recreational activities. The term “dinghy” stems from the Bengali word “dingi,” which refers to a small boat used for fishing and coastal transportation. These boats have played a significant role in maritime history, particularly in areas with shallow water or limited dock access. Over time, dinghies have evolved into versatile and maneuverable vessels, popular for sailing, racing, and rescue operations. Today, dinghy sailing is not only a recreational pastime but also a competitive sport enjoyed worldwide. To achieve success in sailing a dinghy, it is imperative to master the techniques of steering and maneuvering.
Understanding Points of Sail
The concept of points of sail is key for understanding sailing techniques. Points of sail are the angles at which a boat can sail in relation to the wind. The main points of sail are upwind or close-hauled, reaching, and downwind. Upwind or close-hauled means sailing as close to the wind as possible, with the wind coming from the front. Reaching is when the boat is sailing at an angle to the wind, either on a broad reach or a beam reach. Downwind means sailing with the wind coming from behind the boat, either on a broad reach, running, or dead downwind. Each point of sail requires different sail trim and steering techniques to optimize boat speed and efficiency. When sailing upwind or close-hauled, it’s important to trim the sails in tightly to create a close-hauled sail shape and ensure the boat can sail as close to the wind as possible. When reaching , the sails can be eased out slightly, and the boat can pick up more speed by being slightly off the wind. When sailing downwind , the sails are eased out even more, catching as much wind as possible to propel the boat forward. Understanding points of sail allows sailors to navigate different course directions effectively and make the most of available wind conditions.
Advanced Sailing Techniques
Ready to take your dinghy sailing skills to the next level? In this section, we’ll dive into the exciting world of advanced sailing techniques . From mastering the art of tacking and gybing to fine-tuning your sail controls , we’ll cover it all. Learn how to sail upwind like a pro and navigate through various wind conditions with confidence. Get ready to enhance your sailing prowess and sail with style !
Tacking and Gybing
Tacking and Gybing are important sailing maneuvers for changing direction efficiently.
Tacking is turning the bow of the dinghy through the wind to change its sailing direction. The sailor brings the bow into the wind by turning the tiller towards the wind. As the dinghy passes through the wind, the sail switches sides. Then, the sailor adjusts the sails and steers the dinghy on the new tack. Tacking is used when sailing upwind or changing the boat’s direction.
Gybing is changing the dinghy’s direction while sailing downwind. During a gybe , the stern of the dinghy passes through the wind, causing the sails to switch sides. To gybe , the sailor turns the tiller away from the wind, steering the dinghy downwind. It is crucial to control the movement of the mainsail during a gybe to prevent an accidental gybe, which can result in a sudden shift of the boom and potential injury. Gybing is used to change the direction of the dinghy when sailing with the wind.
Sailing Upwind
Sailing upwind requires specific skills and techniques to navigate against the wind. When sailing upwind, it is important to consider the following key points:
1. Angle of Attack: To optimize forward momentum, adjust the sail angle by pointing the bow slightly off the wind, around 30-45 degrees. This will ensure the best performance while sailing upwind.
2. Trim the Sails: Properly adjusting the sails is crucial for maintaining tension and shape. Make sure to tighten the leech, which is the back edge of the sail, to prevent fluttering. It is also important to ensure that the sails are not over or under trimmed.
3. Weight Distribution: When sailing upwind, position your body weight towards the front of the boat. This will counterbalance the wind pressure and help keep the boat upright, ultimately reducing drag.
4. Use Your Centerboard: To minimize sideways drifting caused by the wind, deploy the centerboard or daggerboard. Adjust the depth of the board based on the prevailing conditions in order to maintain stability and control.
5. Tacking Technique: To maintain momentum when changing direction, use a proper tacking technique. This involves turning the bow through the wind while coordinating the movements of the sail and crew.
Remember, sailing upwind can be challenging, especially in strong winds. Regular practice and gaining experience will enhance your proficiency in handling different wind conditions. Keep refining your skills by experimenting with sail controls and techniques in order to fully master the art of sailing upwind.
Using Sail Controls
Using sail controls is crucial for maneuvering a dinghy and maximizing its performance. Here are the necessary steps to properly utilize the sail controls:
- Adjust the mainsheet: Utilize this control to alter the angle of the mainsail in relation to the wind. Tighten the mainsail to increase power or loosen it to decrease power.
- Operate the boom vang: This control allows you to adjust the tension of the boom, preventing it from rising. Alter it accordingly to control the shape of the mainsail and stabilize the boom.
- Tweak the cunningham: This control enables you to adjust the tension of the luff of the mainsail. Utilize it to flatten the sail and decrease power in stronger winds.
- Manage the outhaul: This control influences the depth of the sail along the foot. Tighten it to flatten the sail or loosen it for more power.
- Utilize the jib sheets: These controls regulate the angle of the jib relative to the wind. Pull them in to trim the jib for enhanced power or let them out to reduce power.
- Engage the jib halyard: This control allows you to adjust the height of the jib. Raise it to increase the power of the sail or lower it to decrease power.
- Operate the jib fairleads: These controls determine the position of the jib sheets. Adjust them to achieve the proper sail shape and optimize performance.
By effectively utilizing these sail controls, you can enhance the performance of your dinghy and maximize your sailing experience.
Sailing in Different Wind Conditions
To effectively sail in different wind conditions, follow these steps:
- Assess the wind direction and strength before setting sail.
- Adjust the sail trim according to the wind direction. Trim the sails tight when facing a headwind and let them out when facing a tailwind .
- Stay alert for wind shifts and gusts. Watch for changes in the water’s surface and the movements of other boats.
- When sailing upwind, trim the sails tightly and steer close to the wind.
- When sailing downwind, use the sails to maximize speed and maintain control.
- Manage the boat’s heel angle by adjusting the sails and the distribution of body weight.
- Understand the concepts of “ tacking ” and “ gybing .” Tack to change direction by turning the boat into the wind, and gybe to turn away from the wind.
- Be prepared for varying wind strengths by adjusting the sail area. Decrease the area in stronger winds and increase it in lighter winds.
By following these steps, you can confidently sail in different wind conditions and adapt your strategy to optimize speed and control.
Sailing Safety and Etiquette
Navigating the open waters on a dinghy can be an exhilarating adventure , but it’s crucial to prioritize safety and respect for fellow sailors and the environment. In this section, we’ll explore the essential guidelines and rules that encompass sailing safety and etiquette . From basic safety rules to collision avoidance and right of way protocols , we’ll ensure you have the knowledge to sail with confidence. Plus, we’ll delve into the importance of respecting the environment, preserving the beauty of our precious marine ecosystems .
Basic Safety Rules
When sailing a dinghy, prioritize safety. Remember these basic safety rules:
- Wear a life jacket or personal flotation device (PFD) at all times.
- Check the weather forecast before sailing and avoid stormy or windy conditions.
- Maintain the dinghy properly, ensuring no loose fittings or leaks.
- Inform someone onshore of your sailing plans, including route and estimated return time.
- Stay alert and watch out for other boats, obstructions, and swimmers.
- Follow buoys and navigational markers to avoid dangerous areas.
- Understand and adhere to right-of-way rules to avoid boat collisions.
- Avoid areas with strong currents, undertows, or rough surf.
- If capsized, stay with the dinghy and try to climb back in. If unable, signal for help.
Pro-tip: Take a sailing safety course for more knowledge on safety procedures, navigation rules, and emergency protocols relevant to dinghy sailing. Preparedness and knowledge are crucial before venturing onto the water.
Collision Avoidance
Collision Avoidance is crucial for the safety of sailors and their boats. Here are some key points:
1. Awareness: Sailors must constantly be aware of their surroundings, including other boats, obstacles, and navigational markers.
2. Right of Way: Understanding the right of way rules defined by the International Regulations for Preventing Collisions at Sea (COLREGS) is crucial. For example, a boat on starboard tack has right of way over a boat on port tack.
3. Communication: Using appropriate signals, such as horn blasts or hand signals, helps communicate intentions to other sailors, especially in busy areas.
4. Predicting Actions: Sailors should anticipate the actions of other boats by observing their course, speed, and relevant signals to avoid potential collisions.
5. Maneuvering: When approaching another boat, it’s important to maintain a safe distance and adjust speed and heading if necessary to avoid a collision. This requires good boat handling skills.
In a true story, two dinghies were sailing closely during a regatta. Both sailors followed the right of way rules and effectively communicated their intentions. As they approached a narrow mark, a collision seemed imminent. One sailor quickly altered course, narrowly avoiding a collision. This incident emphasized the importance of situational awareness, quick thinking, and skilled maneuvering in collision avoidance.
Right of Way Rules
Understanding and following the Right of Way Rules is crucial for safety when sailing a dinghy. These rules prioritize certain situations to avoid collisions and accidents.
1. Sailboats have priority over powered vessels. If you encounter a motorboat while sailing, the motorboat should yield and avoid interfering with your course.
2. When two sailboats approach each other on opposite tacks , the boat on the starboard tack has priority. The boat on the port tack must keep clear and change course to avoid a collision.
3. If two sailboats are on the same tack , the leeward boat should keep clear. The leeward boat is the one positioned downwind and behind the other boat. It is the responsibility of the leeward boat to adjust their course and avoid potential collisions.
4. If two sailboats are on the same tack and overlapped , the windward boat must keep clear. The windward boat is the one positioned upwind and in front of the other boat. It is their responsibility to maintain a safe distance and avoid hindering the progress of the other boat.
Remember, these Right of Way Rules are essential for safety on the water. Understanding and following them will help prevent accidents and create a harmonious sailing environment.
Respecting the Environment
Respecting the environment is crucial when sailing a dinghy. It is important to follow these guidelines to minimize your impact on the ecosystem while enjoying the sport.
1. Dispose of waste properly: Avoid throwing trash or waste overboard. Make sure to carry a designated trash bag and dispose of it responsibly on land.
2. Avoid damaging marine life: It is essential to be mindful of your surroundings and to avoid hitting or disturbing marine animals, such as dolphins, turtles, or birds. Always keep a safe distance and never harm wildlife.
3. Use eco-friendly cleaning products: When it comes to cleaning your dinghy, choose biodegradable and environmentally friendly cleaning products. This practice helps to prevent harmful chemicals from polluting the water.
4. Respect marine protected areas: Take the time to learn about designated marine protected areas and follow their rules and regulations. By avoiding entering restricted zones, you contribute to the preservation of fragile ecosystems.
5. Minimize noise pollution: Keep noise levels low to avoid disturbing marine life and other sailors. It is recommended to avoid loud music, shouting, or unnecessary engine revving.
6. Reduce your carbon footprint: Whenever possible, choose sustainable transportation methods. Consider carpooling, using public transportation, or sailing to your destination in order to reduce carbon emissions.
Pro-tip: Always remember that the environment is a shared resource. Leaving it as pristine as you found it not only contributes to the preservation of marine ecosystems but also promotes sustainable sailing practices.
Some Facts About How To Sail A Dinghy:
- ✅ Balance is an essential control in sailing a dinghy. (Source: Our Team)
- ✅ Sail setting is crucial and involves adjusting the mainsheet to achieve optimal positioning. (Source: Our Team)
- ✅ Boat trim is necessary to keep the dinghy level from front to back, preventing submersion of the bow. (Source: Our Team)
- ✅ The centreboard is used to correct sideways drift, with different positions required depending on the point of sail. (Source: Our Team)
- ✅ Choosing the most appropriate course and compensating for factors like tide and leeway are important in sailing a dinghy efficiently. (Source: Our Team)
Frequently Asked Questions
How do i maintain side to side balance while sailing a dinghy.
To maintain side to side balance while sailing a dinghy, you can lean out or in depending on the wind conditions. Leaning out helps counterbalance the force of the wind and keeps the boat level. Adjusting the mainsheet is also crucial for sail setting to ensure it is not too loose or too tight. The luff of the sail should just stop flapping for optimal positioning.
What is a zigzag course and when should I use it?
A zigzag course, also known as beating or tacking, is used when sailing upwind. It involves sailing in a diagonal pattern, alternating between a close-hauled course and a reaching course. This allows the boat to make progress against the wind direction and reach a desired destination. Use a zigzag course when the wind blows directly towards you or at an angle.
How do I maintain fore and aft boat pitch?
To maintain fore and aft boat pitch, also known as boat trim, you need to keep the boat level from front to back. Different positions are required depending on the point of sail. When the wind is blowing from behind, sitting well back in the boat is necessary to prevent the bow from submerging. Proper boat trim helps prevent the boat from dragging in the water.
What is “Neue Funktionen testen” in the sailing context?
“Neue Funktionen testen” refers to testing new features or updates being developed for sailing equipment or technology. This allows sailors to try out and provide feedback on these new features to improve their sailing experience, such as high-speed sails or advanced navigation systems.
What should I do if the wind dies while sailing a dinghy?
If the wind dies while sailing a dinghy, you can resort to alternative techniques to maintain your course made good. This may include using a paddling technique with oars or a paddle, or even manually towing the boat to a desired destination. It is also important to keep calm and patient, as the wind may pick up again.
How does YouTube work in relation to sailing?
YouTube is an online platform that allows users to upload, share, and view videos, including sailing-related content. Sailors can use YouTube to access a wide range of resources, including tutorials, tips from experienced sailors, and coverage of sailing events. YouTube’s recommendation algorithms also help users discover relevant sailing videos based on their interests and viewing history.
About the author

Leave a Reply Cancel reply
Your email address will not be published. Required fields are marked *
Save my name, email, and website in this browser for the next time I comment.
Latest posts

The history of sailing – from ancient times to modern adventures
History of Sailing Sailing is a time-honored tradition that has evolved over millennia, from its humble beginnings as a means of transportation to a beloved modern-day recreational activity. The history of sailing is a fascinating journey that spans cultures and centuries, rich in innovation and adventure. In this article, we’ll explore the remarkable evolution of…

Sailing Solo: Adventures and Challenges of Single-Handed Sailing
Solo Sailing Sailing has always been a pursuit of freedom, adventure, and self-discovery. While sailing with a crew is a fantastic experience, there’s a unique allure to sailing solo – just you, the wind, and the open sea. Single-handed sailing, as it’s often called, is a journey of self-reliance, resilience, and the ultimate test of…

Sustainable Sailing: Eco-Friendly Practices on the boat
Eco Friendly Sailing Sailing is an exhilarating and timeless way to explore the beauty of the open water, but it’s important to remember that our oceans and environment need our protection. Sustainable sailing, which involves eco-friendly practices and mindful decision-making, allows sailors to enjoy their adventures while minimizing their impact on the environment. In this…
Using the rudder
Changing direction on a dinghy or yacht bears little resemblance to steering a car. The rudder is likely to be the primary control when you want to change direction, but it must be used with secondary controls, such as the sail trim, and the boat has to be balanced.
STEERING A DINGHY
A dinghy rudder assembly has four main parts: the rudder blade, rudder stock, tiller, and tiller extension. The blade is attached by hinges to the stock, which is in turn attached to the transom of the dinghy. The tiller is attached to the stock and enables you to turn the blade from side to side. The tiller extension lets you steer while sitting on the sides of the boat. Turning the blade causes it to act like a brake as turbulent water builds up in front of it. Most of the time, only small rudder movements are needed to change direction, and the faster the boat moves, the more sensitive the rudder becomes.

BALANCED RUDDER
If sailing a straight course, balance the boat and sails so the rudder feels neutral (see opposite). Rectify any excess weather helm (see p.69) by lowering the rudder blade fully.
STEERiNG TOWARD THE WiND
To steer into the wind, push the tiller away only slightly. You can help the boat to turn by pulling in the mainsail and letting the boat heel to leeward.
Boat turns to leeward

steering away from the wind
To turn to leeward, pull the tiller very slightly so that the rudder does not act as a brake. To help the turn, let out the mainsail and let the boat heel to windward.
gently does it
The rudder blade is vertical when sailing, but it can be lifted for bringing the dinghy ashore. The rudder stock holds the blade in place and allows it to swivel from the up position to fully down. Tiller
Tiller extension
Rudder stock
Rudder blade

STEERING A YACHT
Most larger yachts use a wheel connected to the rudder by cables to control steering. Unlike a dinghy rudder, the blade is sited beneath the hull and often sits behind a fixed fin called a skeg. This helps direct water flow over the rudder blade, helping to keep the yacht balanced when the blade is turned.
The response of a rudder depends on the speed of water flow over the blade. At slow speeds, a yacht may lose steerage; if it stops altogether, the rudder will have no effect at all. When motoring, the phenomenon known as "prop walk" (see Maneuvering under power, pp.192—193) can have a major effect on the rudder when going astern.

NEUTRAL RUDDER
Sailing straight ahead in very light winds, the wheel can be centered. If the boat is heeling, it will tend to head into the wind and you need to steer slightly away from it.
Turning the wheel to the right turns the boat to starboard, which here is toward the wind. Pulling in the mainsheet will encourage the boat to turn.
STEERiNG AWAY FROM THE WiND
Turning the wheel to the left turns the boat to port, which here is away from the wind. If the boat is heeling, let out the mainsail to allow the boat to turn.
Continue reading here: Sail trim
Was this article helpful?
Recommended Programs

Myboatplans 518 Boat Plans
Related Posts
- Basic maneuvers - Sailing Techniques
- Rigging a singlehanded dinghy
- Rudders - Catamarans Guide
- Dropping the mainsail - Sailing Techniques
- Auxiliary rudder systems - Wind Steering Systems
- Keel and Rudder Design Ftv
Readers' Questions
How a tiller should be attached to rudder of sailing dinghy?
Place the tiller in its proper position on the rear of the boat, typically aligned with the rudder blade. It should fit snugly in the rudder post, which is the round bar that sticks out of the bottom of the boat and is held in place with a mounting bracket. Secure the tiller to the post using two stainless steel clamps. These need to be tightened with a wrench but should not be over-tightened. Attach the tiller arm to the tiller using two pins and a pair of cotter pins. The pins should fit securely in the holes in the tiller arm, and the cotter pins should be inserted into the holes on the sides of the pins to hold them in place. Connect the tiller to the rudder blade by running a line from the tiller arm to the rudder blade. The line should be snug but not too tight. Secure the line to the rudder blade and tiller arm by tying several knots. Check the tiller and rudder connections to make sure they are secure, and that the tiller is moving freely and the rudder blade is not obstructed in any way.
How does a rudder work on a ship?
A rudder is a device that is used to steer a boat or ship. It is usually located at the back of the vessel and is controlled by a helm. The rudder is used to deflect the water, causing the boat to turn in the opposite direction. When the helm is turned to the right, the rudder is pushed to the right. This causes the water to push the stern of the boat to the left, turning the bow of the boat to the right. The reverse is true when the helm is turned to the left.
How to steer a sailboat?
Secure the tiller so that the boat is on a course that will take you in the direction you want to go. Make sure that the mainsail is properly trimmed to help the boat maintain its desired course and speed. Keep an eye on the sails, the rudder and the wind to ensure the boat is sailing in the right direction and speed. Use the tiller to make minor adjustments to help keep the boat on course. If the wind changes direction, make sure to adjust the sails and the tiller accordingly. Keep an eye on the compass to ensure you’re on the correct course and make any necessary adjustments.
Phone: +371 22-33-0100 Email: [email protected]
Dotan Maritime Industries Ltd. Gailu 4a, Ulbroka, Stopini, Latvija, LV-2130
- Tiller Extension & Fitting
- Rudder Construction
- Video gallery
- Eurostars-2 products

Currently there are no products in your shopping cart!
Go to shop!
Flick of the Wrist MAGIC
Watch the video - how it's easy, huge summer sale, take your best rudder ever, more than 17 rudder models available, dotan rudder - quick rudder, welcome to the innovative kick-up rudder, perfect for optimist, your dreams our solution, magic for optimist boats help your child to sail easier than before, dotan's revolutionary kick-up rudder - perfect for optimist, catamaran, dinghy, sailing boats., welcome to dotan's smart, innovative, and unique kick-up optimist rudder. dotan's rudder will make your optimist sailing experience much more enjoyable than your previous optimist sailing experiences., ok, so why dotan rudder, yes, it's really simple .
LATEST NEWS

Read More +
The simultaneous interaction of two rudders..

The international class 470 is trying on a new rudder kick-up system.

Optimist Sailing Boats
Related products.

Sprenger tiller extension
Tiller extension is best suited for the learning process in sailing schools of higher craftsmanship because of its high quality and related functionalities. Tiller extension (black) 600 mm with cell caoutchouc handle, Joint: rubber with ro

Epoxy Optimist Racing Daggerboard
Our marine engineers have developed a daggerboard for a promising racer in the Optimist class. The special design of the dagger will help the future champion achieve a better result faster. Our daggerboards are made using our know-how technology. In

Rudder 20 Blade 1
The Dotan® Kick-Up rudder has a unique mechanism that allows the rudder blade to be raised or lowered instantly. Cast-off from shore (beach) is extremely easy with Dotan® Kick-Up rudder. If the rudder blade hits underwater obstacles such

Rudder 20 Blade 2

Rudder 25 Blade 1

Dotan's Kick-Up Rudder Wooden blade racing version
The Dotan® Kick-Up was designed for Optimist sailboats.The set includes a UV-protected rudder box made of polyamide with fiberglass reinforcement. The blade is made of high-quality Okoumé plywood and is covered three times with varnis

Dotan® Kick-Up Rudder, GRP* Blade

Epoxy Optimist Racing Rudder
The rudder blade has manufactured using the special know-how of high-pressure technology with simultaneous thermal shock. This technology gives the rudder blade necessary resilient properties that are very important, especially wh

Rubber joint
Rubber joint (detachable) with rope inlay, incl. rivet 4 mm Beschreibung Pinnenausleger sind immer noch das flexibelste System zum steuern und lenken. Bewegen Sie die Pinne auch dann noch, wenn Sie sich zur stärkeren Gewichtsverlagerung nach

Rudder 25 Blade FD
Dotan`s rudder benefits, flick-of-the-wrist magic, rudder box: constructed of non-corrosive, rudder blade .
The rudder blade is lightweight and yet durable thanks to the integrated spar and special know-how of high-pressure technology with thermal shock. The Dotan rudder blade's profile is designed on the basis of the STEINER and NACA 0009 hydrodynamic profile (National Advisory Committee for Aeronautics). The Dotan rudder blade's shape minimizes wave and inductive resistance ( more info . )
Rudder Adjustment
Encountering obstacles.

We`ll do everything we can to make your experience better!
Feel free to contact us using this contact form or write us directly to [email protected]
What is a Sailboat Rudder?

Last Updated by
Daniel Wade
June 15, 2022
A sailboat rudder steers the boat. A rudder is a hinged fin or blade mounted on the stern of the vessel that turns side to side, and it's controlled by a tiller or a helm.
A rudder is one of the primary controls of a sailboat. When the boat moves forward through the water, the rudder causes friction on one side and changes the direction of the boat. Rudders are controlled by moving a tiller side to side or by a helm and a complex linkage system. Rudders are delicate and sometimes flush with and protected by the keel.
Table of contents
Identifying the Rudder
Rudders are connected to the sailboat using a hinge or a shaft. The rudder is always located in the water behind the boat, but some rudders have part of their structure exposed above the waterline. Rudders that aren't visible above the waterline are usually underneath the stern and controlled by a vertical shaft that descends through the bottom of the boat.
Rudder Design
Rudder design varies widely between boats. Some vessels have large, ornate rudders that are exposed above the waterline. Large rudders are common on catboats, canoe yawls, and other traditional designs.
Many modern boats use small, blade-like rudders that are hidden from view. The size of a rudder doesn't necessarily correlate with its effectiveness, but an improperly sized rudder can cause significant issues.
How Does a Sailboat Rudder Work?
Sailboat rudders are simple devices. Rudders are essentially deflectors, as they deflect water to port or starboard as the boat moves along. When the rudder is amidships or in the middle and aligned with the keel, the boat goes straight. Rudders also help keep the boat on a straight track as they increase the area of water moving down the length of the boat.
Rudders only work when the boat is moving. If there's no moving water to deflect, the rudder can do little to direct the vessel. Rudders also don't work when the boat is blown sideways. Maneuvering is only possible when the boat is moving forward.
Can a Sailboat Rudder Steer in Reverse?
But what about moving in reverse? Rudders can be used to steer the boat in reverse, but they're significantly less effective when pushed backward through the water. The distance required to make a turn in reverse is usually much higher than when moving forward, and steering input is less precise. In some cases, sailboat rudders can break off when moving too quickly in reverse.
Sailboat Steering Characteristics
Sailboats steer much differently than cars, and there aren't any brakes to slow down with. Sailboats tend to steer from the middle; picture a fan blade spinning slowly on a motor, and you'll get the picture. As a result, steering too aggressively in tight quarters can cause your bow or stern to hit something that's beside you.
Speed is generally helpful for steering, especially when you want to make precise movements quickly. However, speed is a double-edged sword, as slight rudder movement at speed can dramatically and rapidly alter the course of the boat. But remember, you can't steer without moving forward.
Tiller Steering
Sailboat rudders are often controlled by a tiller. Tillers are a long rod connected to the rudder. Sailors move the rod side to side from the cockpit to turn the rudder directly. Tillers are the simplest form or rudder control, and they're highly reliable. Tillers point in the opposite direction that the boat will travel.
Tiller steering is found most often on small boats. This is because the forces involved in steering boats of greater size can be too difficult to manage with a tiller. That said, there are some relatively large boats with cockpit configurations that allow for the use of a tiller. Sailboats with tillers range in size between 10 feet and 30 feet.
Benefits of a Tiller
Tillers have numerous benefits. Tillers offer precise control of the boat because they connect the rudder directly to the person steering the boat. Additionally, tillers are extremely simple and robust. Many blue water sailors prefer tiller steering, as it's difficult to break and easy to repair.
Over the years, sailors have developed many creative ways to make tillers more useful. Many boats feature tiller extensions that allow the sailor to steer from further away. Tillers also respond much faster than helms, which is great for racing and pushing the limits of the boat.
Tiller Self-Steering
Bluewater sailors developed an extremely useful way to multitask onboard a tiller-equipped sailboat. Self-steering is possible on vessels with a tiller, and no electronics or complex machines are necessary. Self-steering involves connecting the jib sheet to a series of pulleys and opposing bungee cord (or surgical tubing).
As the tension on the jib increases, it'll tighten the jib sheet and pull the tiller and change the course of the boat. The opposite is also true. This keeps the boat at the right angle to the wind and is useful for solo travel. GPS-guided self-steering equipment is also available for tiller-equipped sailboats, and it's relatively easy to install.
Helm Steering
A helm is essentially a large nautical steering wheel. Steering a boat with a helm is somewhat similar to driving a car, as the boat moves in the direction that you steer (unlike a tiller, which moves in the opposite direction). Sailboats equipped with tillers are usually larger. Some larger sailboats have two helms placed side-by-side in the cockpit.
The helm consists of a steering wheel and a pedestal which is mounted to the deck. Helm pedestals often feature a marine compass to make navigation possible from one location. Engine controls are often located nearby as well. Sailboat helms are often large in diameter, sometimes 30 inches or more. Large wheels make steering easy and precise.
Helm-equipped sailboats are generally 30-feet long and larger. Tillers are excellent for large boats, as they enable precise movement and require little effort to use. This is especially important at speed when the force of water rushing by a large rudder can be too difficult to overcome with a tiller.
The helm is connected to the rudder mechanically or hydraulically. Some high-end sailboats incorporate power steering, but this is unusual on most consumer vessels. Mechanical helm linkage typically utilizes a cable (or multiple cables and pulleys) that stretches from the helm to the rudder.
Hydraulic Rudder Control
Most sailboat helms are hydraulic. These helms use pressurized hydraulic fluid and small diameter lines to replicate the wheel movements at the rudder. Hydraulic systems often include a fluid reservoir and a pressure cylinder, along with mechanical parts to transfer the force at the wheel and the rudder.
Rudder Maintenance
Rudder maintenance is fairly simple and should be performed regularly. As with the hull, rudders are an ideal habitat for all kinds of unwelcome marine life. Within a year or less, your rudder can be completely encapsulated in barnacles, plants, and other organisms. Marine growth will negatively impact your speed and steering, so it must be scraped off regularly.
Maintaining the steering system is also essential. Tillers are relatively easy to maintain, as they use very few moving parts. Look for grease fittings, and make sure your tiller and rudder are fastened tightly. Helms are more complex, and the hydraulic system should be inspected, repaired, and topped off if necessary.
What to Do if the Rudder is Damaged
Rudder damage is a sailor's worst nightmare, and it's akin to a hole in the hull or losing a mast. So what should you do if your rudder gets damaged or breaks off? First, call for help! But if help isn't available, there are a few makeshift ways to steer the boat without the rudder.
If you have an outboard motor, use it to steer. If not, then a run-of-the-mill rowboat oar makes an excellent rudder substitute. Simply lash the oar to the back of the boat with the end in the water, and use it like a tiller. It's not ideal, but it worked for the Romans, and it should work for you. Some sailors have fashioned makeshift rudders from interior cabinet doors, hatches, scrap metal, and whatever else is on hand.
Losing a rudder is a worst-case-scenario, and it doesn't often happen when sailors keep up with maintenance and stay away from dangerous water. Preventative maintenance and proper navigation are the best ways to keep your rudder in good shape.
Related Articles
I've personally had thousands of questions about sailing and sailboats over the years. As I learn and experience sailing, and the community, I share the answers that work and make sense to me, here on Life of Sailing.
by this author
Sailboat Parts
Learn About Sailboats
Most Recent

What Does "Sailing By The Lee" Mean?
October 3, 2023

The Best Sailing Schools And Programs: Reviews & Ratings
September 26, 2023
Important Legal Info
Lifeofsailing.com is a participant in the Amazon Services LLC Associates Program, an affiliate advertising program designed to provide a means for sites to earn advertising fees by advertising and linking to Amazon. This site also participates in other affiliate programs and is compensated for referring traffic and business to these companies.
Similar Posts

Affordable Sailboats You Can Build at Home
September 13, 2023

Best Small Sailboat Ornaments
September 12, 2023

Discover the Magic of Hydrofoil Sailboats
December 11, 2023
Popular Posts

Best Liveaboard Catamaran Sailboats
December 28, 2023

Can a Novice Sail Around the World?
Elizabeth O'Malley

4 Best Electric Outboard Motors

How Long Did It Take The Vikings To Sail To England?

10 Best Sailboat Brands (And Why)
December 20, 2023

7 Best Places To Liveaboard A Sailboat
Get the best sailing content.
Top Rated Posts
Lifeofsailing.com is a participant in the Amazon Services LLC Associates Program, an affiliate advertising program designed to provide a means for sites to earn advertising fees by advertising and linking to Amazon. This site also participates in other affiliate programs and is compensated for referring traffic and business to these companies. (866) 342-SAIL
© 2024 Life of Sailing Email: [email protected] Address: 11816 Inwood Rd #3024 Dallas, TX 75244 Disclaimer Privacy Policy
Building, restoration, and repair with epoxy

How to Build Rudders & Centerboards
by Captain James R. Watson
When the centerboard of my Searunner trimaran broke in the middle of a windy race around the Black Hole, the question I kept asking was “Why now, after working fine all of this time, and when we were leading the race?”
“Guess it just wore out” was my excuse to myself. This centerboard was built of laminated layers of plywood, resulting in a thickness of 2″. It was then covered with two layers of 6-oz woven fiberglass fabric. It was a deep and wide board with a lot of area, and like any rudder or centerboard on a boat that is sailed hard, it was exposed to a fair amount of stress.
The answer to “Why now – while leading the race?” could have been fate. But there is a more scientific answer. Extensive laboratory testing at Gougeon Brothers, Inc. defines why the centerboard failed. Understanding why can help us design and construct components that will perform more efficiently and last much longer.
The plywood centerboard did, in fact, wear out – or more accurately – it failed from rolling shear fatigue. Fatigue cracks in a material result from repeated (cyclic) stress. Fatigue is a reality of all structures and materials and eventually culminates in structural failure. Repeated loading and unloading or even worse, loading one way and then the other (reverse axial), rapidly reduces a material’s physical integrity and accelerates degradation. The higher the load is as a percentage of the material’s ultimate strength, the more rapid is the deterioration.
Some materials have a greater fatigue life than others. Ounce per ounce, wood is capable of operating at a much higher percentage of its ultimate stress level than most other materials. That is why such wonderfully efficient structures can be built with wood. However, plywood is not a good choice for cantilevered structures such as rudder blades and centerboards. This is because plywood is susceptible to rolling shear, shearing forces that roll the structural fibers across the grain. Plywood’s unidirectional wood fibers are laid in alternating layers, approximately half of them are oriented 90 degrees to the axis of the loads. Like a bundle of soda straws, which resist bending moments quite well one way, they simply lack cross-grain strength laterally and can roll against one another and fail under relatively low stress, especially in a cyclic environment. Therefore, when anticipated loads are primarily unidirectional, it is ideal to use a material with good unidirectional strength. Since only half of the plywood’s wood fiber is used to advantage, a plywood rudder blade or centerboard going from tack to tack (reverse axial loads) will fatigue much more rapidly than one built as described in this article.
If you were to look at the end of the board, say a fish’s view of a centerboard or rudder blade, you’d view its cross-section. A section that has a faired airfoil shape is preferred over one that is flat with parallel sides. This is because the airfoil shape produces lift when moving through the water, thereby counteracting the sideward forces exerted by the sail rig. A flat section produces less lift and at a great expense of drag, slowing the boat and making it more difficult to steer.

“Turn every other ripping end-for-end to neutralize the effects of any grain that does not run exactly parallel to the blank, and to reduce tendencies to twist. Rotate the rippings 90 degrees to expose the vertical grain and to permit easier shaping with a plane.
The selection of a proper camber and section can be a subject of great theoretical debate. One can become intimidated with technical terms such as thickness distribution, Reynolds number, boundary layer, and so on. These terms do relate to the subject, however, for the builder/sailor whose boat floats forlornly in need of a rudder blade the following will do just fine. In fact, the best designers and builders will be hard-pressed to do better.
An excellent choice for most craft is a realistically accurate and fair NACA (National Advisory Committee for Aeronautics) 0012 airfoil, where maximum board thickness is 12% of the fore/aft length (chord length). Maximum thickness is located about 30% of the chord length measured from the leading edge (see sketch). The dimensions used to establish a specific shape (called offsets) are given in the appendix of Abbott & Doenhoff’s The Theory of Wing Sections. You’ll also find further information in my article How to loft Airfoil Sections.
From offsets make a good drawing of half the section on transfer paper.
Western red cedar and redwood are good choices of wood to use for rudder blades and centerboards for boats up to 25 feet. Both of these woods bond very well are generally clear and straight-grained, have good dimensional stability, are easily worked and affordable. Cedar is just a little heavier than the foams used for rudders, is much stiffer, and has far greater shear strength values. On larger craft, a higher-density material like African mahogany is a better choice. Oak is not a good choice.
Buy flat-grained 2’x6″s or 2’x8″s, and then rip them to the designed board thickness. Turn every other ripping end-for-end to neutralize the effects of any grain that does not run exactly parallel to the blank, and to reduce tendencies to warp or twist (see sketch). Rotating the rippings 90 degrees to expose vertical grain will permit easier shaping with a plane. The last trick is to rip the end pieces of the nose and tail in half. Bonding with a couple of layers of glass tape between keeps the fine edge of the tail from splitting too easily and offers a precise centerline.
Bond the ripping with a slurry of epoxy and 404 High-Density filler. Plastic strips prevent inadvertent bonding to leveled sawhorses (see sketch). With both sawhorses leveled, you’re positive no twist exists in the laminated blank. Bar clamps should be snugged until excess glue squeezes from the joints. Over tightening only stresses joints and tends to squeeze all the adhesive from them. When the laminate is cured, a light planing to clean the surfaces is all that is needed before shaping begins.

Centerboards and rudder blades are often overlooked components that are vital to a boat’s performance.
First, tack the 1/8″-thick plywood template that describes the cross-section shape to the blank’s ends. This is sawn from the impression made when traced with the transfer paper you originally drew it on. The key to producing an accurate and symmetrical board is maintaining a systematic removal of material from one side, then from the other. To do this, mark the shape to be removed, stick to straight-line shapes (see sketch). Use a smoothing plane to remove the wood.
After planing to the guidelines on one side, flip the blank over and plane the same shape on the other side. The procedure is similar to producing a round shape from a square by first forming an octagon, and then flattening the resulting eight corners to produce a 16-sided shape and refining that until very minute flat surfaces exist. Fifty-grit sandpaper bonded with 3M brand feathering disc adhesive to a 1/2″-thick by 11’x4.5″-wide plywood sanding block is a good tool to use for fairing this out.
Now you should decide if the board needs reinforcement. Your board requires reinforcement if the chord thickness is at or below 4% of the unsupported span. The unsupported span of a daggerboard or centerboard is that measurement from where it exits the hull, to its tip when fully lowered. The unsupported span of the rudder blade is the distance from the rudder case to the tip. If it is a non-retracting blade, measure from the waterline to the tip. So, if the board extends 48″ below the bottom of the hull and is 2″ thick, .04″, it should be reinforced for strength and stiffness.
If the board needs reinforcement, graphite fibers are a good choice as the strain-to-failure values of wood and graphite fiber are quite similar, hence they enhance each other’s performance. The high-modulus qualities of the graphite fibers provide stiffness. The addition of graphite will efficiently increase stiffness and ultimate strength. Don’t be intimidated by the high-tech qualities of graphite fibers, they are easy to work with.
The amount of reinforcement needed is usually figured at 10% chord thickness. Using the same board for our example, the board is 2″ thick, then 10% equals .20″ total reinforcement, .10″ per side. Graphite fiber tows are .01″ thick, so 10 tows per side should give the necessary reinforcement to do the job.

The graphite fibers will be laid into a channel routed into the shaped centerboard.
The graphite fibers will be laid into a channel that is routed into the shaped board (see sketch). The specific depth of the channel is determined by the above rule. Make the channel a little deeper than what’s required (1/16″) so you won’t be sanding the graphite fibers.
The profile of the channel is similar on all boards. The centerline of the channel is usually located at the point of maximum chord thickness (about 30% from the leading edge). The widest point of the channel is where the board exits the hull when completely lowered. The channel width at this point should be about 16% of chord length. Toward the ends of the board, the width of the channel narrows by about one-third that of the widest dimension. Keeping this in mind, more graphite can be laid in that area, a little above and more below that point that exits the hull. Maintain a consistent channel depth throughout.
Take a one-inch-square stick to serve as a router guide. It’s best to bevel the edge of the channel to reduce stress concentration. A rabbet plane serves best for this task. A layer of 6-oz fiberglass cloth is laid in the channel first (this serves as an interface between the wood and graphite fiber), followed by the schedule of graphite. You can complete the entire bonding operation for a side in one session. Try to do the other side the next day. Finally, fair the reinforcement area with WEST SYSTEM brand epoxy and a low-density filler.
A layer of 6-oz woven-glass fabric should then be bonded to the faired board to improve the cross-grain strength and abrasion resistance. The radius of the leading edge should be about a 1% radius of the chord length, and may not permit the fiberglass fabric to lie flat around the radius. In that event, cut a strip of woven glass fabric on the bias (which will lie around a tighter radius) and bond it around the leading edge.
It is better to leave the trailing edge slightly squared rather than razor-sharp. This will cause less drag and the centerboard will be less vulnerable to damage. Flatten the trailing edge to 1/16 or 1/8 of an inch on small boards, and closer to 1/4 of an inch on larger boards.
Any board, no matter how stiff, will deflect. To prevent the axle hole that the centerboard pivots on from binding when deflection occurs, make the hole somewhat larger than the pin diameter. The perimeter of the axle hole should be thoroughly protected with fiberglass, as exposed end grain can absorb moisture.

To prevent the axle hole from binding when deflection occurs, make the hole a little larger than the pin diameter.
Abrasion of the axle against the axle hole dictates that you should bond fiberglass into the hole’s perimeter. To do that, wrap fiberglass tape around a waxed (use auto paste wax) metal rod that is about 10 to 15% larger in diameter than the actual axle pin. The hole should be heavily chamfered on each side, so when the wet layup is placed in the hole and the nuts tightened, the fiberglass is pressed by the large washers into the chamfers on both sides of the board (see sketch). The same procedure may be used on retractable rudder blades, but the tolerance between axle hole diameter and the diameter of the axle pin should be closer.
You can bond control lines for centerboards and rudders-in-place by wetting a slightly oversized hole (about 1.5″ to 2″ deep) with epoxy/404 High-Density filler mixture. It helps to mark the hole’s depth on the rope with vinyl electricians tape to serve as a guide. Then, after soaking that end of the rope to be bonded in epoxy for a minute or so, shove it in the full depth of the hole.
Centerboards and rudder blades are often overlooked components that are of vital importance to a boat’s performance. Built correctly, they will reliably operate with the efficiency of a fish’s fin, and you should note a measurable improvement in the quality of pointing and steering of your windship.
References:
1. Jozset Bodig, Ph.D., Benjamin A Jayne Ph.D., Mechanics of Wood and Wood Composites 2. Johnston, Ken, Some Thoughts on Rudder Sections , Multihulls Magazine (Jan/Feb 1980) 3. Eck Bransford, Everything You Ever Wanted To Know About 505 Fins 4. Lindsay, Mark, Centerboards and Rudders , Yacht Racing/Cruising Magazine (April 1981) 5. Abbott and Doenhoff, Theory of Wing Sections, Dover Publications, Inc. New York (1959) 6. Captain James R. Watson, How to Loft Airfoil Sections , Epoxyworks 1 (Fall 1992)
- Practical Boat Owner
- Digital edition

How to build a rudder for your boat
- August 30, 2023
Hitting a submerged object destroyed Mike Gudmunsen’s rudder...so he set about making a new one

The rudder horn on Mike Gudmunsen's yacht had parted company from the palm, leaving the two sides of the palm still bolted to the hull. Credit: Mike Gudmunsen Credit: Mike Gudmunsen
How to build a rudder
The Blackwater estuary above Osea island dries at low water, writes Mike Gudmunsen .
Over the years, wooden jetties, fish traps and even barges have been left to decay at the margins, presenting hazards for the unwary – along with more recent man-made obstacles such as the causeways to Osea and Northey islands.
The spring tides were pretty big and the river had swelled, covering the surrounding salt mashes. Northey island had all but disappeared, apart from the hillock upon which the farm building sits.
I’d enjoyed a good sail around Osea island in my Pegasus and had time for a brew in Goldhanger Creek, but on leaving I became disorientated due to the unusually large expanse of water.
I strayed into an unfamiliar inlet and this was my undoing, as no sooner was I in than I was aground.
Frantic engine manoeuvres and rocking the boat on its keels released the boat, then as I proceeded back towards the main channel there was a resounding crash, the boat stopped dead and the tiller was wrenched from my grasp – I’d hit a submerged object and, whatever it was, it was pretty hard.

Although Mike had previously reinforced the hull around the rudder connection, the grounding still did damage. Credit: Mike Gudmunsen
From the tiller angle and the visible damage to the transom top in way of the upper rudder bearing, something was very wrong.
With minimal steerage, we limped back to our mooring further upriver to contemplate what to do next.
When we hauled the yacht out and inspected the damage, we found the rudder horn had parted company from the palm, leaving the two sides of the palm still bolted to the boat hull .
I’d reinforced the hull around this connection back in 2009 as I was concerned about the potential effects following an impact on the rudder – fortuitously, as it turned out.
Without this additional reinforcement, I suspect the bolts would have been pulled through the GRP and I could have been looking at a total loss.

The remains of the palm. Credit: Mike Gudmunsen
Pegasus yachts have a rather unusual rudder arrangement.
A cast aluminium rudder horn, which forms the leading edge of the rudder for about half its depth, is bolted via a palm to the hull.
At its lower end, a pintle bearing supports the rudder and takes most of the lateral rudder force.
A hollow stainless steel shaft passes through the pintle bearing and terminates above the transom at the tiller head.
Having removed the rudder and unbolted the remaining bits of the palm, I toured various boatyards and marinas hoping to get the rudder repaired.
The builders of Pegasus yachts went out of business many years ago, and it was evident that a replacement cast rudder horn was as rare as hen’s teeth.
So, the only option was to design and fit a spade rudder and move away from the original ‘mariner’-style rudder arrangement.
Designing a new rudder
The helm has always been light and responsive, so I was anxious to maintain those qualities in the new rudder.
I kept the original rudder dimensions and aspect ratio and also the rudder stock position relative to the leading edge.
The original rudder had a chord of 410mm and a maximum thickness of 63mm.
A NACA 0015 aerofoil is very close to these requirements, and I was able to get the section offsets from a site on the internet.
There are important differences between the original ‘mariner’ rudder and the proposed spade rudder .

A cast aluminium rudder horn, which forms the leading edge of the rudder for about half its depth, is bolted via a palm to the hull. Credit: Mike Gudmunsen
The original carried the rudder lateral force via the pintle bearing and into the rudder horn which resists bending at the bolted connection to the hull.
With this arrangement, the rudder stock essentially only carries the rudder torque and, as a consequence, the shaft can be hollow and of modest diameter.
Mine was 38mm diameter with a 3mm wall thickness.
For a spade rudder, the stock itself has to resist bending, shear and torsion, and would clearly need to be a lot thicker and possibly solid.
Calculating the loads on the rudder
A quick trawl on the internet will give numerous references to methods to calculate the forces on a rudder.
They basically all use the blade area (Ar) and the boat speed (V) in knots, together with a few other parameters such as lift coefficient, blade aspect ratio and so on.
For my chosen aerofoil section, I took the design lateral force (Dlf) on the rudder blade, measured in Newtons, to be:
Dlf =100A(V+3)2
The eagle-eyed will notice that lift coefficient and aspect ratio don’t figure in this equation as my 3-knot augmentation of the speed may be considered to compensate for these effects.
The original rudder was 980mm high with a chord of 410mm, giving an area of 0.4018m2.
I took the design speed of my 26ft yacht to be 5 knots. Hence, the lateral force came out to be 2,572N (262kg).
This force acts at the vertical centre of the blade area and, for the NACA section I had selected, at 1⁄3 of the chord from the leading edge.
Continues below…
Do you know your rudders?
Do you know rudders? Boatyards are a great place to get to know different types of keels, rudders and other…
Adding a rudder to a small outboard
Jim Miller suggests a neat way to add a rudder to a Honda BF2.3 outboard motor to aid steering at…

How do you close the gap between the rudder and propeller?
Practical Boat Owner reader David Blackborow is trying to find out the best way to close the gap between the…

Orcas left us rudderless! Yacht couple tell of terrifying ordeal off Spain
Zoe Barlow shares her experience of losing a rudder during sustained attacks by orcas whilst sailing her Sun Odyssey 40…
Having decided on the location of the upper and lower bearings, a simple moment calculation about the top bearing gave the reaction force at the lower bearing (3,983N): likewise, taking moments about the lower bearing gave the reaction force at the upper bearing (1,411N).
By multiplying the lateral rudder force by the distance from the blade centre of area to the lower bearing, the bending moment was determined:
Mb = 0.483m x 2,572 N = 1,242Nm
The torque on the rudder (Mt) was calculated by multiplying the lateral force by the separation between the shaft axis and the centre of pressure.
For my rudder it worked out to be 2,572 x (0.41 x 0.33-0.10) = 91Nm; roughly 10kg.
Interestingly, classification societies set a minimum separation value of 0.12 x chord, which results in a larger torque of 127Nm.
Will the shaft be thick enough?
The rudder shaft would be of 316-grade stainless steel.
Although stainless does not exhibit a yield point, a value of stress for a defined percentage of plastic strain is generally used to represent the nominal yield.
Data from the internet gave a UTS (ultimate tensile strength) of 485N/mm2 and a nominal yield value of 210N/mm2.
The shaft diameter would be limited by the diameter of the existing rudder trunk and also the thickness of the rudder blade.
The rudder trunk had an internal diameter of 50mm.
The rudder blade thickness of 63mm, less two layers of 9mm ply, permits a maximum shaft diameter of 45mm, so it was clear that 45mm would be the largest diameter that could be accommodated in association with these physical limits.
In order to confirm the structural adequacy of the shaft, a few basic calculations needed to be undertaken.
A 45mm-diameter shaft has the following attributes:
The shear area A = π r2 = 1,591mm2 s
Section modulus Z = Ππ d3/32 = 8,946mm3
The torsional constant J = Ππ d4/32 = 402,578mm4
The bending stress in the shaft Mb/Z = 1,242 x 1,000/8,946 = 139N/mm2
The average shear stress F/As = 3,983/1,591 = 2.5 N/mm2.
The torsional stress Mtr/J = 91 x 1,000 x 22.5/402,578 = 5.0 N/mm2
From the results, the dominant stress is the bending stress, and this provides a factor of safety on the nominal yield of 1.5.
The shear and torsional stresses are so small I basically ignored them.
Now I had the shaft diameter, the bearing dimensions could be calculated.

A Delrin spacer ring had to be arranged below the rudder carrier ring in order to take up the clearance. Credit: Mike Gudmunsen
Delrin has a good track record for rudder bearings – it’s easy to machine and has a very low moisture absorption characteristic, particularly when compared with nylon.
Published data on bearing pressures for synthetic bearing material suggests that the design pressures should not exceed 5.5N/mm2.
Based upon the bearing forces of 3,983N and 1,411N, I needed bearing areas of 724mm2 and 256mm2 respectively.
From a purely practical point of view, the bearing depths finally selected were 16mm at the upper bearing and 45mm at the lower bearing, both of which resulted in more than double the minimum areas needed.
The rudder build
The rudder shaft would be subject to some significant machining, and tangs would need to be welded to it in order to transmit the rudder torque to the shaft.
A local marina workshop did the job.
The rudder blade would be laminated from 9mm marine-grade plywood which, after shaping and fairing, was skinned with GRP and finally epoxied.
The bolting location of the original palm provided a convenient location for the new lower bearing.

The bearing plate bolted in place. Credit: Mike Gudmunsen
Using a suitable mandrel as a dummy shaft, I fashioned a cardboard template for the lower bearing plate.
To be honest, I probably made three or four templates before I was satisfied that it was as dimensionally accurate as could possibly be.
A stainless steel tube carrying the lower bearing would need to be welded to this lower bearing plate at precisely the correct angle.
A local engineering shop produced the upper and lower bearing plates, the bearing tube, the Delrin bearings and the rudder carrier ring for me.

The final welding of the bearing tube to the lower bearing plate was carried out by a fellow club member using TIG welding. Credit: Mike Gudmunsen
A steel bush was used as a dummy bearing so the bearing tube could be tack-welded to the lower bearing plate while the rudder shaft was in situ.
Delrin apparently melts at around 160°, so it’s best kept away from the welding process.
Once removed, the final welding of the bearing tube to the lower bearing plate was carried out by a fellow club member using TIG welding.
Even though we left the dummy bearing in place, heat from the welding did cause the bearing tube to warp slightly, so the Delrin bearing had to be adjusted to fit.
The final fitting
The new spade rudder was considerably heavier than the old one and took two of us to offer it up through the rudder trunk, while another assembled the upper bearing components and carrier ring.
Once in place, the lower bearing plate was through-bolted to the hull.
When measuring the shaft length I’d added a 10mm margin to the overall length just in case things didn’t fit as planned.

The final rudder assembly. Credit: Mike Gudmunsen
In the end it proved 8mm over length, so a Delrin spacer ring had to be arranged below the rudder carrier ring in order to take up the clearance.
A club member donated the Delrin and carried out the machining for me.
Completion of the rudder replacement – including producing drawings for the marina and machine shops and calling upon a number of helpful club members to carry out machining and welding – took just over three months.
The whole project proved to be very rewarding and is well within the skills of most practical boat owners.
Enjoyed reading How to build a rudder for your boat?
A subscription to Practical Boat Owner magazine costs around 40% less than the cover price .
Print and digital editions are available through Magazines Direct – where you can also find the latest deals .
PBO is packed with information to help you get the most from boat ownership – whether sail or power.
- Take your DIY skills to the next level with trusted advice on boat maintenance and repairs
- Impartial in-depth gear reviews
- Practical cruising tips for making the most of your time afloat
Follow us on Facebook , Instagram and Twitter
- Manufacturing Process
- (714) 973-2878
- (949)646-0244
- Search for:
We build rudders with passion and precision since 1963.
Ships anywhere, cost effective, satisfaction guaranteed.
In the early sixties, an innovative man named Chuck Foss developed several polyurethane foam systems useful for a variety of purposes, including the production of surfboards. His new firm, The Foss Company, soon became one of the top U.S. suppliers of foam surfboard blanks, which he sold under the name of “Foss Foam.”
Later in the sixties, one of his Foss Foam systems used to make surfboard skags was found to be an excellent material for making sailboat rudders. It was not long before The Foss Company supplied rudders to most of the boat builders in Southern California through the seventies and eighties.
The Foss Company’s former headquarters. During the eighties and nineties, the company specialized in fiberglass and foam composites. High performance sailboards and paddleboards were some of the products produced. With an extensive inventory of rudder molds, the company now specializes in supplying sailboat owners and boat repair yards with replacement rudders.
In recent years, The Foss Company has formed a strategic partnership with FinCo Fabrication, a major fiberglass manufacturing firm based in Santa Ana, California. This partnership will assure that The Foss Company’s long tradition of quality products and service will continue for years to come.
CAL 20 CAL 25 CAL 28 CAL 34 CAL 40
CATALINA YACHTS
CAPRI 18 CATALINA 22 CATALINA 25 CATALINA 250 CATALINA 30 CATALINA 45
ERICSON YACHTS
Ericson 35 Ericson 38 Ericson 41 Ericson 46
Oceanis 37 Oceanis 46.1 Beneteau 56
Manufatures A-C
Balboa Yachts B-Boats Beneteau Catalina Yachts Cal Boats Coronado Yachts Columbia Yachts Coastal Recreation Chrysler Yachts Corsair Marine C & C Yachts
Manufatures D-L
Down East Yachts Ericson Yachts Hunter Hobie Cat Irwin Yachts Islander Yachts J Boats J24 Kirby Boats Kettenburg Marine Lancer Yachts Laguna Yachts
Manufatures M-R
Merit Marine Morgan Marine MacGregor Yachts Newport Boats Olsen Boats O’Day Boats Pearson Yachts Pacific Sea Craft Ranger Yacht Reynolds Sailing
Manufatures S-Z
Sam Morse Boat Company San Juan Boats Sidelmann Tarten Marine W. D. Schock Boats Westsail Marine Westerly Marine Willard Boats
Start your rudder with us now (714) 973-2878 or (949)646-0244
Great old boats - cal 40's new rudder, click to open video, our manufacturing process..
Working together with you the owner we select an exciting mold or sketch out a new design for a custom rudder. All based off years of experience and time tested best practices.
Prepping mold
Experienced Finco craftsmen begin the manufacturing process by sanding, polishing and waxing the rudder mold.
Gelcoat & first layer
After applying Gelcoat to the mold, they apply a layer of unidirectional fiberglass saturated with Vinylester™ resin.
Rudder Shaft Turned
A new rudder shaft is turned from the same material as the original (or stronger.) After it is cut to length and tapered, the tangs are welded into place.
Shaft set & foam+
Once the fiberglass has cured, the tapered stainless steel shaft is set into the mold. After the shaft is aligned, the halves are mated, clamped and sealed, and liquid foam is poured into the mold.
Sand to Smooth
When the foam has cured, the rudder is removed and the seams sanded smooth. Most OEM rudder fabrication stops here; we go farther .
Taped and cured
Fiberglass tape is laminated to the seams. After the tape has cured and has been sanded smooth, the rudder gets a final coat of gelcoat.
Faired & prepped
In the last step, the entire rudder is faired and sanded in preparation for you to apply a coat of bottom paint.
Packed in custom box
The finished rudder is packed in a purpose-built crate suitable for shipping to you anywhere in the world.
Why Select Us?
We have many of the original molds and tooling for production boats made over the mast 60+ years in our inventory and can replace damaged rudders with the exact factory replacement. If you would like a custom rudder, we can modify or design from scratch a rudder that meets your exact needs.
The original rudders originally were manufactured by “clam-shell” method and our exact replacements use the same tooling. Plus over the years there have been advances in glass cloth and in laminating resins making them stronger and more reliable. The closed cell foam core of the rudder remains the same, but the selective addition of unidirectional fibers has increased the strength of our rudders, and the use of Vinylester™ resins has eliminated blisters and the need for expensive barrier coats.
Newer designs to improve handling and directional control. This is most important when sailing very fast and can help prevent broaching and spin-outs. Most boats can use upgraded rudders without incurring a rating penalty. Some local PHRF boards will hit some designs with a 3 seconds-per-mile penalty so you should check with your local board before making your change.
Get in Touch
Here for you.
Phone: (714) 973-2878 (949) 646-0244 Email: [email protected]
Foss Rudders fondued in 1963 has partnered with FinCo Fabrication, a major fiberglass manufacturing firm in Santa Ana, California. We make precision rudders for you.
Where to find us
2520 South Broadway, Santa Ana CA 92707
Professional BoatBuilder Magazine
The rudimentaries of rudders.
By Steve D'Antonio , Jul 12, 2018

Even stoutly constructed rudders are vulnerable to deterioration over time, especially when mild steel or high-carbon-stainless steel is buried in composite foil sections, which inevitably become saturated with seawater.
Like other systems and gear aboard cruising and commercial vessels, rudders have terms to identify their parts and functions. When measuring a rudder, the span and chord are the vertical height and fore-and-aft width, respectively, while the top of portion closest to the hull is referred to as the root , and the bottom is called the tip . Another term frequently used when discussing rudder design, particularly for sailing vessels, is aspect ratio —simply the square of the rudder’s span divided by the rudder’s area. As a rule of thumb, longer, narrower rudders are more efficient than short, wide rudders, and the aspect ratio describes precisely this relationship. Thus, rudders on high-performance sailing vessels are said to have a high-aspect ratio. Walking around a boatyard one day and measuring a few cruising sailboat rudders, I came up with aspect ratios of between 1.7 and 2.1, while one high-performance sailing vessel’s rudder came in at 3.5. The 20-knot semi-displacement lobster yacht’s rudder I measured yielded an even 2.0 aspect ratio, which is considered respectable for this application.
More identifiable rudder components include the stock ; web or armature ; rudderport or log ; stuffing box or compression tube ; bearing ; gudgeon ; and pintle . Not every rudder has all these components.
Rudderstocks
The rudderstock is essentially a shaft or tube that protrudes from the top and sometimes the bottom, depending upon type, of many rudder designs. Because this component provides the primary connection between the rudder’s blade (the flat section that imparts the steering force) and the vessel’s steering system, its design, construction, and material are consequential.
Most stocks are made of stainless steel, bronze, or aluminum, while some are carbon fiber, and they may be solid or hollow. Stainless steel is by far the most common, but it has a penchant for crevice corrosion when exposed to oxygen-depleted water. Insidiously, corrosion nearly always occurs in places where it cannot easily be seen—such as inside many composite (fiberglass and core material) rudder blades and beneath flax-type stuffing-box packing (the problem is exacerbated when the vessel is used infrequently).
This all-stainless rudderstock and webbing is well crafted and ready to be covered with its composite shell.
Of the stainless steel alloys, some resist this corrosion better than others. Stainless-steel rudderstocks should be manufactured with strong, highly corrosion-resistant proprietary shafting alloys such as A22. The next best choice is 316L stainless steel, which also resists crevice corrosion well. Critically important is the L suffix, meaning “low carbon,” a requirement if it is to be welded, as nearly every rudderstock must be, to the support within composite rudders, or to all-metallic plate-steel rudders. Failure to source low-carbon stainless steel for the stock or the web leads to weld decay, sometimes referred to as carbide precipitation, where the region around the weld loses its resistance to corrosion and rusts when exposed to water.
Aluminum rudderstocks are nearly always tubular. Common on aluminum vessels to reduce the likelihood of galvanic corrosion, aluminum stocks are also relatively common on fiber reinforced plastic (FRP) vessels, particularly large ones. Rudder blades, particularly on aluminum vessels, are often fabricated from aluminum. Of the various aluminum alloys, only a few possess the necessary corrosion-resistance and strength necessary for use as rudderstocks. Of these, the 6000 series, and 6082 in particular—an alloy of aluminum, manganese, and silicon—are popular for this application.
Because aluminum, like stainless steel, suffers from corrosion, it should not be used as stock or web material in composite rudders. Referred to as poultice corrosion, it occurs when aluminum is exposed to oxygen-depleted water. Because oxygen is what allows aluminum to form its tough, corrosion-resistant oxide coating, the metal should never be allowed to remain wet and starved of air as it would be inside a composite rudder blade after water makes its way in around the stock and pintle.

Rudderstock material can corrode in way of the oxygen-starved environment around the packing in a stuffing box.
Bronze, a once popular rudderstock material, is no longer common in today’s production vessels. Although strong and exceptionally corrosion resistant (immune to crevice corrosion), bronze is not easily welded to attach to a rudder’s internal structural webbing, and has thus been supplanted by stainless alloys. Bronze rudderstocks, particularly those that have seen many sea miles, are also known for wearing, or hourglassing, within stuffing boxes, where the flax rides against the stock. If a bronze stock rudder is chronically leaky, disassemble the stuffing box and check for excessive wear. The same is true for stainless and aluminum stocks: chronic leakage is often an indication of corrosion at the packing. Finally, because of their galvanic incompatibility, neither bronze nor copper alloys should be used aboard aluminum vessels for rudderstocks or any other rudder or stuffing box components.
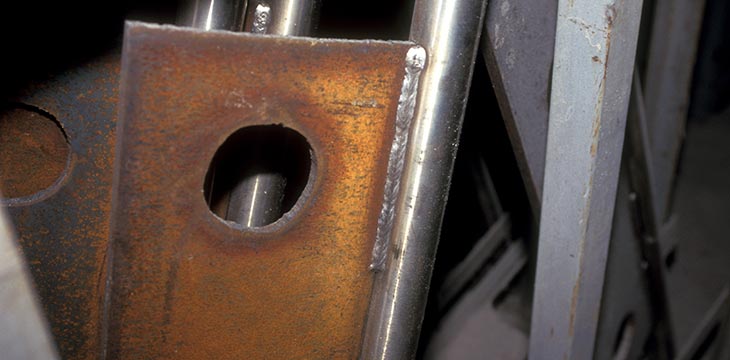
Mild-steel webbing welded to a stainless-steel rudderstock is a recipe for eventual corrosion and failure.
The webbing, or internal metallic support system, in most composite rudders must be strong enough to carry the loads of service and be made of the appropriate material. At one time, many rudders were built using stainless-steel stocks and ordinary, rust-prone mild or carbon-steel webbing. Inadvisably, some still are. The union between a stainless stock and FRP rudder blade is tenuous at best (the two materials expand and contract at different rates) and stainless steel’s slippery surface makes adhesion to the laminate resin a short-lived affair. Once water enters the gap between these two materials, it will reach the webbing and associated welds. Thus, all the materials within this structure must be as corrosion- and water-resistant as possible, and the core material must be closed-cell—often foam—and nonhygroscopic.

This destroyed foam-core and stainless-steel rudder reveals the conventional construction of such appendages.
Additionally, where possible, the stock should consist of a single section of solid or tubular material; i.e., it should not be sleeved, reduced, or otherwise modified or welded unless done so in an exceptionally robust manner. The webbing must be welded to the stock, but the structure of the stock should not rely on a weld that would experience cyclical, torsional loading.
The webbing in the form of a plate or grid should be welded to the stock with ample horizontal gussets (small wedges welded where the stock and webbing interface), which will reinforce welds 90° to the primary web attachment.
Whether the rudder is spade (supported only at the top) or skeg hung (supported at the top and the bottom), the stock must pass through and be supported by the hull. This is usually accomplished by a component known as a rudder log, or port. In its simplest form it’s a tube or pipe through which the stock passes. Nearly all logs incorporate two other components—a bearing and a stuffing box. The bearing may be as simple as a bronze or nonmetallic bushing or tube inside of which the stock turns; or it may be as complex as a self-aligning roller-bearing carrier that absorbs rudder deflection and prevents binding.
This rudder log is leaking, corroded, and poorly supported, with washers compressing into the backing plate and gelcoat cracking off.
The log transfers tremendous loads and must be exceptionally strong and well bonded to the hull. Fiberglass vessels should rely on a well-tabbed-in purpose-made tube (its filaments are wound and crisscrossed and thus quite strong) that is supported with a series of vertical gussets that distribute the load to the hull’s surrounding structure. On some spade rudder installations, particularly where the log is not, or could not, be long enough, an additional bearing is used at the top of the stock, above the quadrant, where it is supported by the vessel’s deck.
On metal boats the design is similar but with a metal tube welded in place, supported by substantial gussets. For vessels with skeg-hung rudders, the strength of the rudder log is still important. However, because the loads are not imparted by a cantilevered structure, logs used in these applications may be less substantially supported.
Stuffing Box
Unless the rudder log’s upper terminus is well above the waterline or on the weather deck, it is typically equipped with a stuffing box similar to those used for propeller shafts. But unlike a shaft stuffing box, the rudder’s stuffing box shouldn’t leak much, if any, seawater. Because the rudder turns slowly, friction and heat are not a problem. Packing (i.e., waxed-flax packing like that in traditional stuffing boxes) can typically be tight enough to stem all leakage, and lubricating it with heavy water-resistant grease will reduce friction and leakage.
Stuffing boxes that are above the waterline while the vessel is at rest, such as those on many sailboats, are often the most chronically leaky, because the packing tends to dry out and contract. To avoid this, liberally apply grease to the packing material itself; this requires partial disassembly of the stuffing box. Alternatively, a galvanically compatible (316 stainless or Monel for bronze stuffing boxes) grease fitting may be installed and periodically pumped with grease to keep the packing lubricated.
Rudder Bearings

Well-engineered rudder bearings support and lubricate the rudderstock.
Rudder bearings range from the basic rudderstock turning inside a bronze log, to the sophisticated aluminum, stainless, or nonmetallic roller bearings installed in a self-aligning carrier. For most cruising vessels, the choice of bearing is not as important as knowing which type of bearing is in use and its strengths, weaknesses, and maintenance needs. The simple shaft that turns inside a bronze log is durable and reliable but more friction-prone than roller bearings. If lubrication access or a grease fitting is available, it should be pumped with grease periodically, although most rudders rely solely on seawater for lubrication, which is perfectly acceptable.

This synthetic upper bearing worked fine in cool temperatures, but when it heated up in the sun, the material expanded and caused binding in system.
Nonmetallic sleeve and roller bearings, often made of ultra high molecular weight polyethylene (UHMWPE), require no maintenance, are extremely slippery, and will not absorb water, an essential attribute for nonmetallic bearings. Delrin and nylon, for instance, will absorb water, expand, and lead to rudder binding. On several high-performance sailing vessels, I’ve had to replace nylon or similar bearings with UHMWPE to restore the steering to its proper specification and effort level.
Propeller Removal
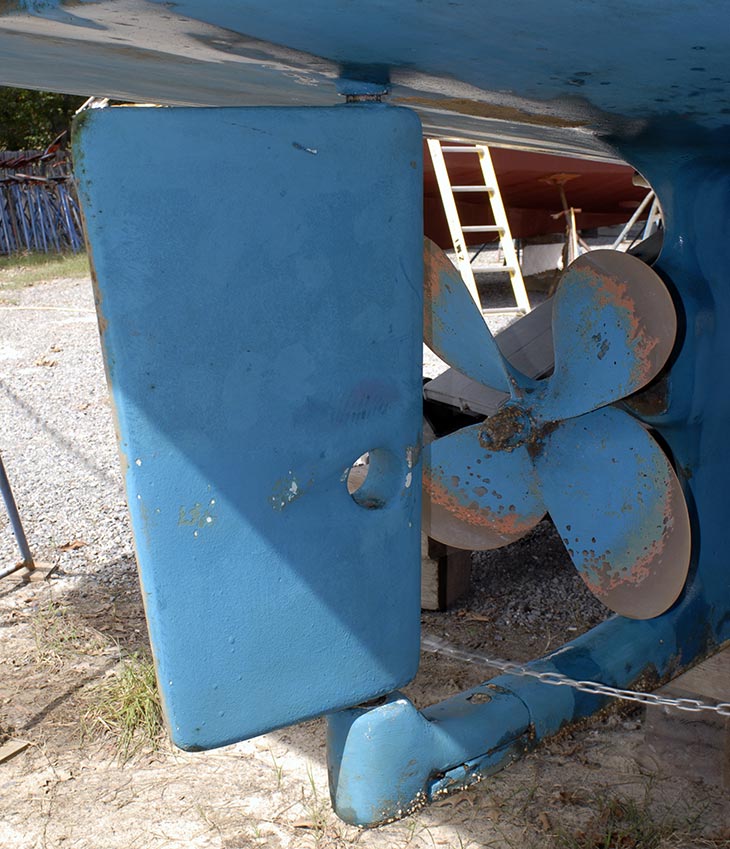
Shaft removal should be possible with the rudder in place. This conventional skeg-hung rudder has a hole to facilitate shaft removal when the rudder is swung hard to port or starboard.
Whether a rudder is a spade or skeg-hung design, it’s important to determine how it will affect the removal of the propeller or the propeller shaft. Is there enough clearance between the shaft’s trailing end and the leading edge of the rudder to allow the propeller to be removed or to use a propeller removal tool? Can the shaft be slid out without removing the rudder? Some rudders are equipped with shaft-removal holes, while others are installed slightly offset from the centerline; or the rudder’s leading edge has an indentation to allow the shaft to be removed. The propeller should be removable without having to unship the rudder. The dimensional rule of thumb calls for clearance of at least the prop’s hub length between the aft end of the shaft and the leading edge of the rudder.
Rudder Stops
The rudder’s movement should be unimpeded as it swings approximately 35° in either direction, making no contact with hull or propeller. Just as important as the rudder travel is how its movement is checked. Other than for the smallest runabouts with jacketed cables, all inboard rudders should rely on hydraulic cylinders to check rudder travel (provided they are designed to do so, and most are) or be equipped with robust stops. Stops must be integral to the hull, supported by substantial tabbing or a welded and through-bolted structure for fiberglass vessels, or by welded angle and shelves for metallic hulls.
About the Author: For many years a full-service yard manager, Steve now works with boatbuilders and owners and others in the industry as Steve D’Antonio Marine Consulting. He is an ABYC-certified Master Technician, and sits on that organization’s Hull and Piping Project Technical Committee. He’s also the technical editor of Professional BoatBuilder .
Read more Repair articles
Quick Custom Molds
Making one-off composite parts in the shop.
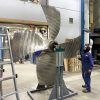
Repairing Bent Props with TrueProp Software
With all the advances in automation and electrification of boat propulsion systems, propellers remain critical to the task of converting power into propulsion. Made of bronze, nickel, aluminum, stainless steel,… Read more »

VacPuc Checks Your Vacuum Bags
It’s possible to monitor houses, cars, cats, and boats by smartphone, so why not check vacuum bags during resin infusion? Now composite technicians have this option with VacPuc, a new… Read more »

Recent Posts
- Find out how 3D printing can help your boatbuilding with MASSIVIT
- Van der Werff’s Curved Wood
- Departures: Carl Chamberlin
- SAFE Boats Regains Small-Business Status with Employee Ownership
- SNAME Powerboat Symposium Is Back
- Companies (85)
- Construction (106)
- Design (161)
- Drawing Board (10)
- Education (25)
- Environment (16)
- Events (21)
- Materials (50)
- Obituary (18)
- People/Profiles (49)
- Products (16)
- Propulsion Systems (32)
- Racing (16)
- Repair (37)
- Rovings (317)
- Short Cuts (3)
- Sponsored Partner News (14)
- Systems (80)
- Task Sheet (1)
- Uncategorized (26)
- Wood to Glass (7)
ProBoat.com Archives
- Types of Sailboats
- Parts of a Sailboat
- Cruising Boats
- Small Sailboats
- Design Basics
- Sailboats under 30'
- Sailboats 30'-35
- Sailboats 35'-40'
- Sailboats 40'-45'
- Sailboats 45'-50'
- Sailboats 50'-55'
- Sailboats over 55'
- Masts & Spars
- Knots, Bends & Hitches
- The 12v Energy Equation
- Electronics & Instrumentation
- Build Your Own Boat
- Buying a Used Boat
- Choosing Accessories
- Living on a Boat
- Cruising Offshore
- Sailing in the Caribbean
- Anchoring Skills
- Sailing Authors & Their Writings
- Mary's Journal
- Nautical Terms
- Cruising Sailboats for Sale
- List your Boat for Sale Here!
- Used Sailing Equipment for Sale
- Sell Your Unwanted Gear
- Sailing eBooks: Download them here!
- Your Sailboats
- Your Sailing Stories
- Your Fishing Stories
- Advertising
- What's New?
- Chartering a Sailboat
- Sailboat Rudders
Sailboat Rudders
The primary purpose of sailboat rudders is of course to give the helmsman the ability to steer the boat, but a well-designed one will also provide hydrodynamic lift to windward, in the same manner as does the keel.

Placing sailboat rudders into distinct categories is fairly straight forward - they're either:
- Outboard or inboard rudders, which can be
- Unbalanced, balanced or semi-balanced, and be
- Keel-hung, skeg-hung, transom-hung or spade rudders.
Take a stroll around any fair-sized boatyard during the lay-up season and you'll see examples of most of them...
Inboard & Outboard Sailboat Rudders
If the rudderstock passes through the underside of a boat's hull, it's an inboard rudder. Conversely, if it doesn't, it's an outboard rudder.
Most outboard rudders are turned by a tiller as there's no rudderstock to which a wheel-steering quadrant can be mounted.
The two rudders shown below are quite different examples of outboard rudders.
Fig 1 shows an example of a keel-hung outboard rudder that is seldom seen on today's cruising boats.
Outboard rudders like the one in Fig 2 can be easily removed for service or repair with the vessel afloat. You might struggle with trying to do that with the 'barn door' of a rudder in Fig 1 though!
Examples of inboard rudders can be seen in Figs 3, 4, 5, 6, 7 & 9.
Unbalanced Rudders
This unbalanced rudder is supported by a full-length skeg.
It is unbalanced because the entirety of the rudder is aft of its axis, the axis being on the centreline of the rudderstock.
When turned, the full force of the water flowing past the skeg acts on one side of the rudder - a fact that will be very much apparent to the helmsman, particularly on a tiller-steered boat.

Recent Articles
Wauquiez Gladiateur 33 for Sale
Apr 10, 24 05:40 AM
'Cabo Frio', a Catalina Morgan 43 for sale
Apr 01, 24 08:35 AM
Live Aboard Boats For Sale
Mar 30, 24 07:02 PM
Here's where to:
- Find Used Sailboats for Sale...
- Find Used Sailing Gear for Sale...
- List your Sailboat for Sale...
- List your Used Sailing Gear...
Our eBooks...

A few of our Most Popular Pages...

Copyright © 2024 Dick McClary Sailboat-Cruising.com
× You are using an outdated browser. Please upgrade your browser to improve your experience.

Shopping Cart
Your cart is currently empty., dyer rudder w/fittings, product details.
The staff of the Dinghy Shop diligently works with its suppliers and product manufacturers to ensure correct and updated pricing, information and availability of the products offered for sale. Occasionally, errors may be made -- we regret, but are not liable for these errors. Additionally, prices and specifications are subject to change.
Copyright © 2024 Dinghy Shop. | Ecommerce Shopping Cart Software by Miva, Inc.
My Cruiser Life Magazine
All About the Rudder on a Sailboat
The rudder on a sailboat is one of those important parts that often gets overlooked. It’s hidden underwater most of the time and usually performs as expected when we ask something of it.
But when was the last time you seriously considered your sailboat rudder? Do you have a plan if it fails? Here’s a look at various designs of sail rudder, along with the basics of how it works and why it’s there.
Table of Contents
How are sailboat rudders different than keels, how does the rudder work, wheel steering vs. tiller steering, full keel rudder sailboat, skeg-hung rudders, spade rudder, variations on designs, emergency outboard rudder options, looking to sail into the sunset grab the wheel, steer your sail boat rudder, and get out there, sail boat rudder faqs.

What Is a Boat Rudder?
The rudder is the underwater part of the boat that helps it turn and change direction. It’s mounted on the rear of the boat. When the wheel or tiller in the cockpit is turned, the rudder moves to one side or another. That, in turn, moves the boat’s bow left or right.
When it comes to sailing, rudders also offer a counterbalance to the underwater resistance caused by the keel. This enables the boat to sail in a straight line instead of just spinning around the keel.
Sailboat hull designs vary widely when you view them out of the water. But while the actual shape and sizes change, they all have two underwater features that enable them to sail–a rudder and a keel.
The rudder is mounted at the back of the boat and controls the boat’s heading or direction as indicated by the compass .
The keel is mounted around the center of the boat. Its job is to provide a counterbalance to the sails. In other words, as the wind presses on the sails, the weight of the ballast in the keel and the water pressure on the sides of the keel keeps the boat upright and stable.
When sailing, the keel makes a dynamic force as water moves over it. This force counters the leeway made by air pressure on the sails and enables the boat to sail windward instead of only blowing downwind like a leaf on the surface.
The rudder is a fundamental feature of all boats. Early sailing vessels used a simple steering oar to get the job done. Over the years, this morphed into the rudder we know today.
However, thinking about a rudder in terms of a steering oar is still useful in understanding its operation. All it is is an underwater panel that the helmsperson can control. You can maintain a course by trailing the oar behind the boat while sailing. You can also change the boat’s heading by moving it to one side or the other.
The rudders on modern sailboats are a little slicker than simple oars, of course. They are permanently mounted and designed for maximum effectiveness and efficiency.
But their operating principle is much the same. Rudders work by controlling the way water that flows over them. When they move to one side, the water’s flow rate increases on the side opposite the turn. This faster water makes less pressure and results in a lifting force. That pulls the stern in the direction opposite the turn, moving the bow into the turn.
Nearly all boats have a rudder that works exactly the same. From 1,000-foot-long oil tankers to tiny 8-foot sailing dinghies, a rudder is a rudder. The only boats that don’t need one are powered by oars or have an engine whose thrust serves the same purpose, as is the case with an outboard motor.
Operating the Rudder on a Sailboat
Rudders are operated in one of two ways–with a wheel or a tiller. The position where the rudder is operated is called the helm of a boat .
Ever wonder, “ What is the steering wheel called on a boat ?” Boat wheels come in all shapes and sizes, but they work a lot like the wheel in an automobile. Turn it one way, and the boat turns that way by turning the rudder.
A mechanically simpler method is the tiller. You’ll find tiller steering on small sailboats and dinghies. Some small outboard powerboats also have tiller steering. Instead of a wheel, the tiller is a long pole extending forward from the rudder shaft’s top. The helmsperson moves the tiller to the port or starboard, and the bow moves in the opposite direction. It sounds much more complicated on paper than it is in reality.
Even large sailboats will often be equipped with an emergency tiller. It can be attached quickly to the rudder shaft if any of the fancy linkages that make the wheel work should fail.

Various Sail Boat Rudder Designs
Now, let’s look at the various types of rudders you might see if you took a virtual walk around a boatyard. Since rudders are mostly underwater on the boat’s hull, it’s impossible to compare designs when boats are in the water.
Keep in mind that these rudders work the same way and achieve the same results. Designs may have their pluses and minuses, but from the point of view of the helmsperson, the differences are negligible. The overall controllability and stability of the boat are designed from many factors, and the type of rudder it has is only one of those.
You’ll notice that rudder design is closely tied to keel design. These two underwater features work together to give the boat the sailing characteristics the designer intended.
The classic, robust offshore sailboat is designed with a full keel that runs from stem to stern. With this sort of underwater profile, it only makes sense that the rudder would be attached to the trailing edge of that enormous keel. On inboard-powered sailboats, the propeller is usually mounted inside an opening called the aperture between the keel and rudder.
The advantages of this design are simplicity and robustness. The keel is integrated into the hull and protects the rudder’s entire length. Beyond reversing into an obstacle, anything the boat might strike would hit the keel first and would be highly unlikely to damage the rudder. Not only does the keel protect it, but it also provides a very strong connection point for it to be attached to.
Full keel boats are known for being slow, although there are modern derivatives of these designs that have no slow pokes. Their rudders are often large and effective. They may not be the most efficient design, but they are safe and full keels ride more comfortably offshore than fin-keeled boats.
Plenty of stout offshore designs sport full keel rudders. The Westsail 38s, Lord Nelsons, Cape Georges, Bristol/Falmouth Cutters, or Tayana 37s feature a full keel design.
A modified full keel, like one with a cutaway forefoot, also has a full keel-style rudder. These are more common on newer designs, like the Albergs, Bristols, Cape Dorys, Cabo Ricos, Island Packets, or the older Hallberg-Rassys.

A design progression was made from full keel boats to long-fin keelboats, and the rudder design changed with it. Designers used a skeg as the rudder became more isolated from the keel. The skeg is a fixed structure from which you can mount the rudder. This enables the rudder to look and function like a full keel rudder but is separated from the keel for better performance.
The skeg-hung rudder has a few of the same benefits as a full keel rudder. It is protected well and designed robustly. But, the cutaways in the keel provide a reduced wetted surface area and less drag underwater, resulting in improved sailing performance overall.
Larger boats featuring skeg-mounted rudders include the Valiant 40, Pacific Seacraft 34, 37, and 40, newer Hallberg-Rassys, Amels, or the Passport 40.
It’s worth noting that not all skegs protect the entire rudder. A partial skeg extends approximately half the rudder’s length, allowing designers to make a balanced rudder.

With higher-performance designs, keels have become smaller and thinner. Fin keel boats use more hydrodynamic forces instead of underwater area to counter the sail’s pressure. With the increased performance, skegs have gone the way of the dinosaurs. Nowadays, rudders are sleek, high aspect ratio spade designs that make very little drag. They can be combined with a number of different keel types, including fin, wing keels , swing keels, or bulb keels.
The common argument made against spade rudders is that they are connected to the boat by only the rudder shaft. As a result, an underwater collision can easily bend the shaft or render the rudder unusable. In addition, these rudders put a high load on the steering components, like the bearings, which are also more prone to failure than skeg or full keel designs. For these reasons, long-distance cruisers have traditionally chosen more robust designs for the best bluewater cruising sailboats .
But, on the other hand, spade rudders are very efficient. They turn the boat quickly and easily while contributing little to drag underwater.
Spade rudders are common now on any boat known for performance. All racing boats have a spade rudder, like most production boats used for club racing. Pick any modern fin keel boat from Beneteau, Jeanneau, Catalina, or Hunter, and you will find a spade rudder. Spade rudders are common on all modern cruising catamarans, from the Geminis to the Lagoons, Leopards, and Fountaine Pajots favored by cruisers and charter companies.

Here are two alternative designs you might see out on the water.

Transom-Hung or Outboard Rudders
An outboard rudder is hung off the boat’s transom and visible while the boat is in the water. Most often, this design is controlled by a tiller. They are common on small sailing dingies, where the rudder and tiller are removable for storage and transport. The rudder is mounted with a set of hardware called the pintle and gudgeon.
Most outboard rudders are found on small daysailers and dinghies. There are a few classic big-boat designs that feature a transom-hung rudder, however. For example, the Westsail 38, Alajuela, Bristol/Falmouth Cutters, Cape George 36, and some smaller Pacific Seacrafts (Dana, Flicka) have outboard rudders.

Twin Sailing Rudder Designs
A modern twist that is becoming more common on spade rudder boats is the twin sailboat rudder. Twin rudders feature two separate spade rudders mounted in a vee-shaped arrangement. So instead of having one rudder pointed down, each rudder is mounted at an angle.
Like many things that trickle down to cruising boats, the twin rudder came from high-performance racing boats. By mounting the rudders at an angle, they are more directly aligned in the water’s flow when the boat is healed over for sailing. Plus, two rudders provide some redundancy should one have a problem. The twin rudder design is favored by designers looking to make wide transom boats.
There are other, less obvious benefits of twin rudders as well. These designs are easier to control when maneuvering in reverse. They are also used on boats that can be “dried out” or left standing on their keel at low tide. These boats typically combine the twin rudders with a swing keel, like Southerly or Sirius Yachts do. Finally, twin rudders provide much better control on fast-sailing hulls when surfing downwind.
Unbalanced vs. Balanced Rudders
Rudders can be designed to be unbalanced or balanced. The difference is all in how they feel at the helm. The rudder on a bigger boat can experience a tremendous amount of force. That makes turning the wheel or tiller a big job and puts a lot of strain on the helmsperson and all of the steering components.
A balanced rudder is designed to minimize these effects and make turning easier. To accomplish this, the rudder post is mounted slightly aft of the rudder’s forward edge. As a result, when it turns, a portion of the leading edge of the rudder protrudes on the opposite side of the centerline. Water pressure on that side then helps move the rudder.
Balanced rudders are most common in spade or semi-skeg rudders.
Sail Rudder Failures
Obviously, the rudder is a pretty important part of a sailboat. Without it, the boat cannot counter the forces put into the sails and cannot steer in a straight line. It also cannot control its direction, even under power.
A rudder failure of any kind is a serious emergency at sea. Should the rudder be lost–post and all–there’s a real possibility of sinking. But assuming the leak can be stopped, coming up with a makeshift rudder is the only way you’ll be able to continue to a safe port.
Rudder preventative maintenance is some of the most important maintenance an owner can do. This includes basic things that can be done regularly, like checking for frayed wires or loose bolts in the steering linkage system. It also requires occasionally hauling the boat out of the water to inspect the rudder bearings and fiberglass structure.
Many serious offshore cruisers install systems that can work as an emergency rudder in extreme circumstances. For example, the Hydrovane wind vane system can be used as an emergency rudder. Many other wind vane systems have similar abilities. This is one reason why these systems are so popular with long-distance cruisers.
There are also many ways to jury rig a rudder. Sea stories abound with makeshift rudders from cabinet doors or chopped-up sails. Sail Magazine featured a few great ideas for rigging emergency rudders .
Understanding your sail rudder and its limitations is important in planning for serious cruising. Every experienced sailor will tell you the trick to having a good passage is anticipating problems you might have before you have them. That way, you can be prepared, take preventative measures, and hopefully never deal with those issues on the water.
What is the rudder on a sailboat?
The rudder is an underwater component that both helps the sailboat steer in a straight line when sailing and turn left or right when needed.
What is the difference between a rudder and a keel?
The rudder and the keel are parts of a sailboat mounted underwater on the hull. The rudder is used to turn the boat left or right, while the keel is fixed in place and counters the effects of the wind on the sails.
What is a rudder used for on a boat?
The rudder is the part of the boat that turns it left or right

Matt has been boating around Florida for over 25 years in everything from small powerboats to large cruising catamarans. He currently lives aboard a 38-foot Cabo Rico sailboat with his wife Lucy and adventure dog Chelsea. Together, they cruise between winters in The Bahamas and summers in the Chesapeake Bay.
Leave a comment
Your email address will not be published. Required fields are marked *
Save my name, email, and website in this browser for the next time I comment.

New Rudders
Replacement Sailboat Rudders and Centerboards
NEW!! Tanzer Rudders now available. See info under the News Tab.
Coronavirus notice.
At Foss Foam, we’re closely monitoring the COVID-19 situation and working to serve the needs of our customers. In response to the virus, we’ve implemented updated best practices in our workplace to help ensure the health and safety of our employees and customers.
Our rudder shop is still open and producing replacement rudders and swing keels that are shipped to boat owners across the U.S. and abroad.

In 1987, Bob and Maxine Walker’s son, Al, came to work in the family business. This allowed Bob and Maxine Walker to retire in 1994. In 2000, the Walker family moved the business to Williston, Florida. Williston is in the North Central Region of Florida, about 25 miles west of Ocala, Florida. Since moving to Williston, Foss Foam has seen a steady growth.
Al Walker has since been joined by his son David. He is currently head of production and quality control. David has made tremendous contributions to the growth and stability of Foss Foam Products of Florida, Inc. His addition will ensure that Foss Foam will continue as the leader in the sailboat rudder manufacturing industry in the future. Our quality and expertise is still unmatched today. While many companies cut corners to maximize profits, we are committed to making the best rudders money can buy.
Call today to learn how we can help you get back on the water. 352-529-1104
The Types of Sailboat Rudders
- Snowboarding
- Scuba Diving & Snorkeling
Full Keel Rudder
On a sailboat , as the rudder is moved to one side by means of the tiller or steering wheel, the force of the water striking one edge of the rudder turns the stern in the other direction to turn the boat. Different types of rudders have different advantages and disadvantages. The type of rudder is often related to the boat’s type of keel.
Rudder on Full-Keel Sailboat
As shown in this photo, the rudder of a full-keel boat is usually hinged to the aft edge of the keel, making a continuous surface. The engine’s propeller is usually positioned in an aperture between the keel and rudder.
Advantages of Full Keel Rudder
The primary benefit of this rudder configuration is the strength and protection provided to the rudder. It is hinged at top and bottom, well distributing the forces on the rudder. Rope (such as lobster pot warps) or debris in the water cannot snag on the rudder.
Disadvantage of Full Keel Rudder
Because the sideways force of the water on the rudder is entirely behind the rudder’s pivoting point at its leading edge, putting all the force on one side of the rudder, it takes more energy to move the rudder. This is one reason why larger boats seldom have tillers—because it can require much force to “push” the rudder out against the water streaming past the keel.
Spade Rudder
Most fin keel boats have a spade rudder, which extends straight down from the aft hull section. The rudder post comes down through the hull into the rudder itself, allowing the entire rudder to rotate to either side, pivoting around the post.
Advantages of Spade Rudder
The spade rudder is self-standing and does not require a full keel or skeg for its mounting. The rudder post inside the rudder can be moved aft from the leading edge (see next page on Balanced Rudder) so that the force of the water is not all on one side when the rudder is turned. This requires less energy to steer than with a keel- or skeg-mounted rudder.
Disadvantage of Spade Rudder
A spade rudder is more vulnerable to debris or objects in the water, which may strike the rudder and exert a force on the rudder post, the only structure supporting the whole rudder. Even the force of water when the boat “falls” off a wave can exert damaging stress on a spade rudder. If the rudder post is bent, the rudder may jam and become useless.
Balanced Spade Rudder
Note the clear air space at the top of the leading edge of this balanced spade rudder. The rudder post is several inches back from the front of the rudder. When the rudder is turned, the leading edge rotates to one side of the boat while the trailing edge rotates to the other side. While the turning action on the boat is the same, the forces on the helm are more nearly balanced, making it very easy to steer.
Skeg-Mounted Rudder
Some fin keel sailboats have a skeg-mounted rudder like the one shown. The skeg offers the same advantages as a keel mounted rudder: the rudder is protected from objects in the water and has more structural strength than a rudder mounted only on the rudder post.
It also has the same disadvantage: because it is not “balanced” as a spade rudder may be, with water forces distributed on both sides, it requires more force to turn the rudder.
Outboard Rudder
An outboard rudder is mounted outside the hull on the boat’s stern, such as shown in this photo, rather than below the hull using a rudder post or hinges to the keel or skeg. Most outboard rudders are turned with a tiller rather than a steering wheel since there is no rudder post to which to gear a wheel.
Advantages of Outboard Rudder
An outboard rudder does not require a hole through the hull for a rudder post and thus is less likely to cause trouble if damaged. The rudder can often be removed or serviced while the boat is still in the water. Hinges at the top and bottom of the rudder section may provide more strength than a single rudder post.
Disadvantages of Outboard Rudder
Like a spade rudder, an outboard rudder is vulnerable to being struck by or caught in objects or rope in the water. Unlike a spade rudder it cannot be balanced in the water flow, so the force of water is always on one side of the pivot point, requiring more energy for turning the rudder.
A rudder is often related to keel shape .
- Learn How to Sail a Small Sailboat – 1. The Parts of the Boat
- Choosing a Centerboard or Fixed Keel Sailboat
- How to Heave To a Sailboat
- Control Your Tiller Without a Tiller-Tamer
- 6 Types of Boat Engines
- Choosing an Inboard or Outboard Engine
- How to Tow a Dinghy Behind a Sailboat
- The What, Why, and How of Wheel Balancing
- Using AIS on Your Sailboat
- The Sunfish: A Perfect Lake or Urban Sailboat
- Mount Shasta Climbing Facts
- Inline Skate Wheels 101
- How to Anchor a Sailboat
- How to Not Damage Your Wheels
- Do It Yourself Boat Trailer Tongue Extension
- How Cambered Tires Work
Please verify you are a human
Access to this page has been denied because we believe you are using automation tools to browse the website.
This may happen as a result of the following:
- Javascript is disabled or blocked by an extension (ad blockers for example)
- Your browser does not support cookies
Please make sure that Javascript and cookies are enabled on your browser and that you are not blocking them from loading.
Reference ID: 39933478-f7d9-11ee-8a8b-b0dfeb906859
Powered by PerimeterX , Inc.

World Class Rudders, Tillers, and other Gear for Real Life Sailing
Sailboat rudders, sailboat tillers, custom rudders/ tillers, sailboat accessories, rudder repair worksheet, instructional handbook, looking for a product for your sailboat.
Can't Find your Sailboat?
Why Rudder Craft?
At Rudder Craft we build every sailboat rudder with the singular focus of improving your sailboat’s steering performance. In order to accomplish this our sailboat rudders incorporate a hydrofoil design, as a matter of course. Sailboats ranging from the West Wight Potter 15, all the way up to the MacGregor 36 and Catalina 42, will find a more accurate helm once a Rudder Craft hydrofoil sailboat rudder is installed.
Why Hydrofoil?
Operating on principles similar to airplane wings, the foiled sailboat rudder design generates lift as the sailboat makes way. By employing the sailboat rudder to reduce drag, and increasing the force the sailboat rudder is able to exert, any sailboat will find themselves performing better: weather helm is reduced, tacking is crisper, points of sail are easier to keep, and helm effort is greatly reduced in light and moderate air.
Why Use a Kick-up Rudder?
Subscribe to our blog.
Join our mailing list to receive the latest news and updates from our team.
You have Successfully Subscribed!
No results found.
The page you requested could not be found. Try refining your search, or use the navigation above to locate the post.
Blog Coming Soon!
Customer reviews.
IMAGES
VIDEO
COMMENTS
In other words, the 36-inch tiller should not be more than about 2 inches off the center line. If the boat is wheel steered, next time the boat is out of the water, measure the rudder angle with the wheel hard over. Count the number of turns of the wheel it takes to move the rudder from centered to rudder hard over, and measure the wheel diameter.
There are several different types of rudders in common use. Sailboats use full keel rudders, spade rudders, outboard rudders, and skeg-mounted rudders, plus variations on each type. What type of rudder is best depends on the shape of the hull and the boat's size.
Keel and Rudder Design There is an art and science to good appendage design, with the emphasis on science. Here, the ... the racing sailboat community, engine horsepower will produce higher speeds; (2) lighter-weight ... Modern dinghy classes such as the Moth, International 14s, or the
I built a rudder for my 8.5' x 4.5' sailboat—named City Slicker 2.0—the same time I built the boat itself, two years ago. Since I was in a hurry to get it done, I didn't bother designing a kick-up rudder, figuring I could make the modification at a later date. ... I built a rudder for my 8.5' x 4.5' sailboat—named City Slicker 2 ...
Glass one side of the rudder, let cure. Cut off excess edge stuff and rough sand/grind. Glass other side of rudder, let cure. Cut off excess, sand until flush. Glass edges based upon which were generally 'up' when clamped in a mostly horizontal way (images 4 and 5). Glass the remaining edges.
The tiller and rudder are necessary parts of a sailing dinghy that assist in steering and maneuvering the boat efficiently. The tiller: This long handle is attached to the rudder and allows the helmsman to control the boat's direction.
The rudder is likely to be the primary control when you want to change direction, but it must be used with secondary controls, such as the sail trim, and the boat has to be balanced. STEERING A DINGHY. A dinghy rudder assembly has four main parts: the rudder blade, rudder stock, tiller, and tiller extension.
After hull integrity, rudder integrity is the most vital component of a seaworthy vessel, yet most sailors pay more attention to LED lighting or smartphone apps than they do to their boat's rudder. Before you shrug off rudder failure as a remote concern, consider that the incidence of mid-ocean rudder failures is close to 1 percent.
Dotan kick-up rudder system perfectly suited to all classes sport catamaran, dinghy, light sailing boats, Optimist, sailboats, trimarans Phone: +371 22-33-0100 Email: [email protected]
A rudder is a hinged fin or blade mounted on the stern of the vessel that turns side to side, and it's controlled by a tiller or a helm. A rudder is one of the primary controls of a sailboat. When the boat moves forward through the water, the rudder causes friction on one side and changes the direction of the boat.
Flatten the trailing edge to 1/16 or 1/8 of an inch on small boards, and closer to 1/4 of an inch on larger boards. Any board, no matter how stiff, will deflect. To prevent the axle hole that the centerboard pivots on from binding when deflection occurs, make the hole somewhat larger than the pin diameter.
Explore Fisheries Supply's extensive selection of boat rudders and essential rudder parts. We partner with top sailboat rudder manufacturers to offer a comprehensive range of high-quality components, including Buck Algonquin rudder, angle indicators, tiller arms, sensors, marine rudder port bearings, and everything needed to ensure your rudder performs flawlessly.
Mb = 0.483m x 2,572 N = 1,242Nm. The torque on the rudder (Mt) was calculated by multiplying the lateral force by the separation between the shaft axis and the centre of pressure. For my rudder it worked out to be 2,572 x (0.41 x 0.33-0.10) = 91Nm; roughly 10kg.
With an extensive inventory of rudder molds, the company now specializes in supplying sailboat owners and boat repair yards with replacement rudders. In recent years, The Foss Company has formed a strategic partnership with FinCo Fabrication, a major fiberglass manufacturing firm based in Santa Ana, California.
Walking around a boatyard one day and measuring a few cruising sailboat rudders, I came up with aspect ratios of between 1.7 and 2.1, while one high-performance sailing vessel's rudder came in at 3.5. ... Professional BoatBuilder is written and edited for boat builders, repairers, designers, and surveyors. P.O. Box 78 41 WoodenBoat Lane ...
Sailboat Rudders. The primary purpose of sailboat rudders is of course to give the helmsman the ability to steer the boat, but a well-designed one will also provide hydrodynamic lift to windward, in the same manner as does the keel. These twin high-aspect ratio rudders on an all-out race boat are clearly optimised for their hydrodynamic ...
Additionally, prices and specifications are subject to change. Genuine Dyer Midget, Dhow, and Dink parts and accessories you need to get your Dyer back on the water. If you need help finding a specific part or have questions about a repair contact one of our experts for advice at 631 264 0005.
Obviously, the rudder is a pretty important part of a sailboat. Without it, the boat cannot counter the forces put into the sails and cannot steer in a straight line. It also cannot control its direction, even under power. A rudder failure of any kind is a serious emergency at sea.
Over 50,000 rudders since 1978. Foss Foam Products of Florida, Inc. is a family owned company that markets and manufactures sailboat rudders. Foss Foam has been an Original Equipment Manufacturer (OEM) for many sailboat companies for over 40 years. As a result Foss Foam produces replacement rudders as well as rudders for new sailboats.
On a sailboat, as the rudder is moved to one side by means of the tiller or steering wheel, the force of the water striking one edge of the rudder turns the stern in the other direction to turn the boat. Different types of rudders have different advantages and disadvantages. The type of rudder is often related to the boat's type of keel.
Sailboat tiller steering systems consist of a tiller that connects to a spade rudder or a keel- or transom- hung rudder. At least yearly, all tiller steering hardware should be checked and serviced. This includes checking the tiller head fitting for stress cracks, the rudder post for excessive play and for keel- and transom-hung rudders ...
At Rudder Craft we build every sailboat rudder with the singular focus of improving your sailboat's steering performance. In order to accomplish this our sailboat rudders incorporate a hydrofoil design, as a matter of course. Sailboats ranging from the West Wight Potter 15, all the way up to the MacGregor 36 and Catalina 42, will find a more ...