Hatteras Sailing
encouraging youth sailing and competitive opportunities

Opti Boat Parts and Terminology
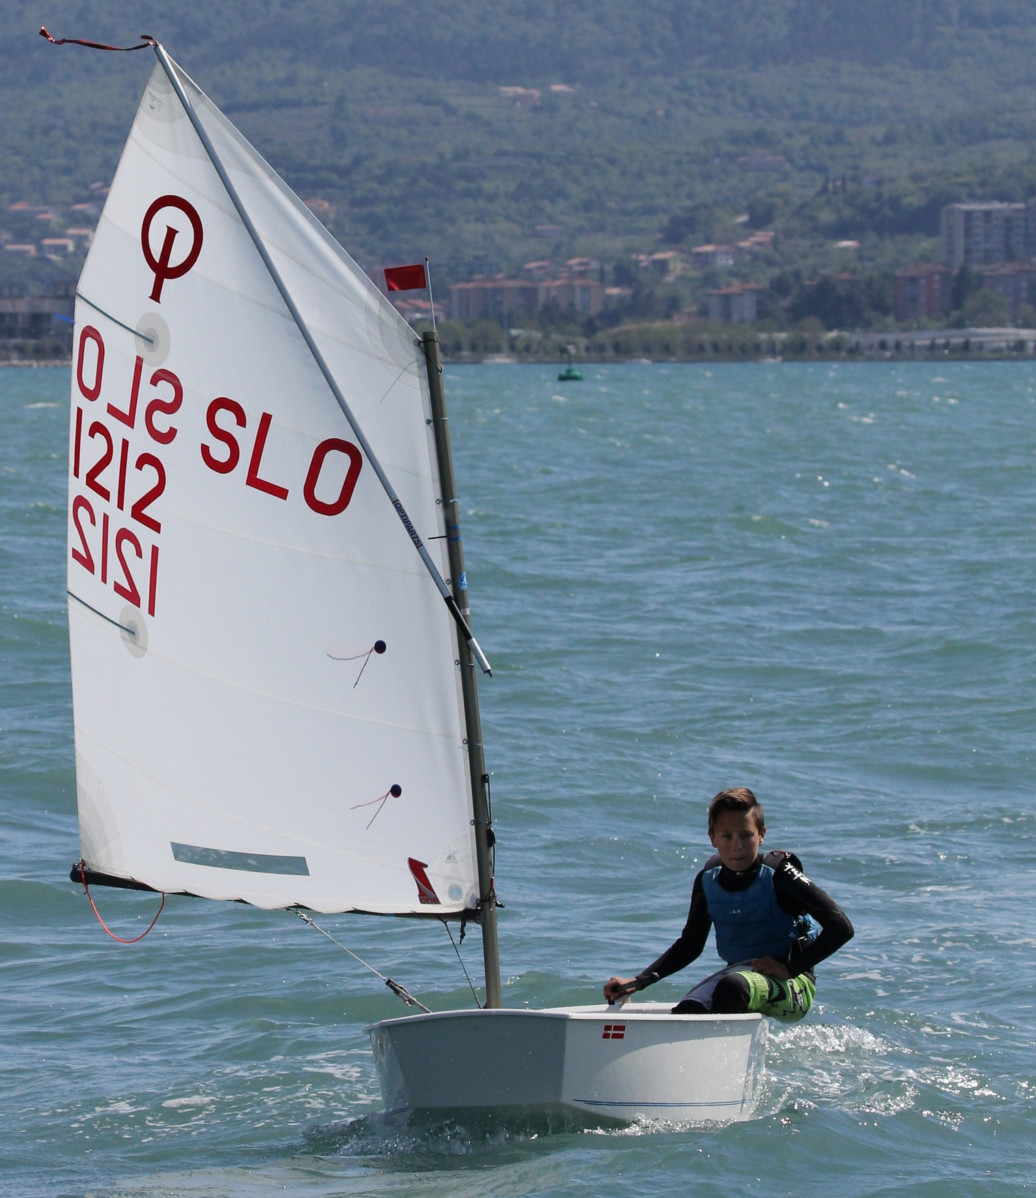
For our youth to understand anything the coaches are saying on the water, they need to understand what the parts of the boat are named. Sailing has its own language and terminology for really good reasons… so instead of our coaches blasting on the megaphone across the water on a windy day, “Pull the string thingy under the horizontal metal thing”, it is much more succinct for them to instruct, “Sheet In”. Our basic learning boat is the Optimist. Please study the parts of the boat and their names or labels…. for fun this diagram is multilingual!

- Hull Sides – Bow, Stern, Starboard and Port Sides
- Mast, Boom and Sprit are all Spars
- Rudder, Tiller and Tiller Extension Steer the Boat. The rudder can also be used to slow down the boat. The person steering is called the helmsman.
- Centerboard of Daggerboard helps the hull not slip sideways over the water
- Sails power the sailboat and make it move forward. The better the sails are trimmed, the faster your boat can sail, so understanding how the sail controls work and what to look for in your sail shape is extremely important on sailboats.
Here is a link to a video of an instructor explaining the parts of the Optimist Sailboat! – https://www.youtube.com/watch?v=LHhXD5jKL3w
Another good video on how to rig the Optimist Sail, Mast and Boom. – https://www.youtube.com/watch?v=BOPTCXSuevY
- EXPLORE Random Article
How to Sail an Optimist
Last Updated: April 7, 2023
This article was co-authored by Nitzan Levy . Captain Nitzan Levy is a Sailor, Social Entrepreneur, and the Founder of Sailors NYC, a recreational sailors’ club based in Jersey City, New Jersey that specializes in cruising boats and a variety of community programs. Capt. Levy has over 20 years of sailing experience and has sailed in many places around the world including: the Atlantic Ocean, the Mediterranean Sea, The Caribbean, and the Indian Ocean. Capt. Levy is a U.S. Coast Guard Licensed Master of vessels up to 50 Tons with Auxiliary Sail and Assistance Towing Endorsements. Capt. Levy is also a NauticEd Level V Captain Rank Chief Instructor, an American National Standards Assessor, an SLC instructor, an ASA (American Sailing Association) Certified Instructor Bareboat Chartering, and an Israeli licensed skipper on Boats for International Voyages. This article has been viewed 41,683 times.
Sailing is fun and easy if you know how. Optimists are safe, simple boats designed for children who are learning how to sail. Their main advantage is that there are extensive opportunities for children to take optimist sailing to a very advanced level. Hugely popular, there are optimist national teams in many countries and Optimist World Championships are held annually. On a more local level, there are thousands of smaller competitions available which are organized by yacht clubs and sailing programs.

- Keep in mind that a boat cannot sail directly into the wind.
Community Q&A
- Check the weather before you set sail. This way, you’ll have a general idea of which way the wind is blowing. Thanks Helpful 0 Not Helpful 0
- There are plenty of other small boats to choose from if you are an adult that are a lot easier to maneuver in. The most popular single-handed small boat is the Laser. These usually require you to be over 110 pounds to be able to sail properly. If you are under this weight, another similar boat is the Byte, which is smaller than the Laser and most popular in Canada. Thanks Helpful 0 Not Helpful 0
- If you are starting out, there is a plastic version available which is slower but more durable than fiberglass. Thanks Helpful 0 Not Helpful 0
- Sit on the opposite side of the sail. The fastest position for an optimist is when all four corners of the hull are in the water. If there is a light wind, you may find that you have to lean towards the sail in order to achieve this. This helps to keep the boom from coming towards you if the wind is not heavy enough to keep it out. Thanks Helpful 6 Not Helpful 0
- Ensure you have a bow line with a bowline knot at the end attached to your mast step. Do not thread this through the drain hole in the middle of the rail at the front of the optimist. Doing so will gradually wear away the rope during towing and may lead to it snapping undertow. The severed end will snap back and may lead to serious injury of the sailor, particularly risking eye injury. It will also prevent fast evacuation in the event of a thunderstorm. Thanks Helpful 4 Not Helpful 1
- As with all water sports, sailing can become dangerous when the weather is not favorable. If you are caught out in a thunderstorm, capsize (turn over) your boat immediately so that the mast is underwater and perpendicular to the sea floor. Stay with your boat. Do not go out if you believe that the wind conditions are too difficult for you, however, you should always push yourself to manage in conditions slightly more difficult than you are used to because this is how you will improve. Thanks Helpful 6 Not Helpful 3
- Even if there is light wind and clear blue skies, you should always wear a flotation aid. Thanks Helpful 2 Not Helpful 3
You Might Also Like

About this article

Reader Success Stories
Jun 6, 2016
Did this article help you?

- About wikiHow
- Terms of Use
- Privacy Policy
- Do Not Sell or Share My Info
- Not Selling Info

Australian International Optimist Dinghy Association
- About About About AIODA Life Members
- Australian Championships Australian Championships Australian Championships Charter Boats Media Opti Age Explained National Results Australian Champions
- Boat Registration Boat Registration Boat Registration Class Rules for Registration and Measurement
- Getting Started Getting Started Getting Started Secondhand Boats & Gear For Sale Opti Age Explained Rule 42 Rigging Guides Boat Insurance
Rigging Guides
Below is a table which has suitable sail and mast rake combinations according to weight. These may vary slightly depending on the conditions and skippers skill level but will serve as a good starting point: Sailor Weight (Kgs) – Mast Rake (metres)
Less Than 40kg– 2.79m
40-45kg– 2.80 – 2.83m
45-50kg– 2.83 – 2.84m
More than 50kg– 2.84 – 2.85m
In +20 knots, rake aft 2cm for all weights.
Remember this is only a guide and all mast lengths vary slightly which will affect your rake. Also make sure your mast is a firm fit in the collar and there is no sideways movement so energy is lost, fore and aft movement is good because it helps rake the mast the correct way to improve performance.
Once you have found a rake you like mark the mast step so you can repeat the setting and also check to see it has not moved. Some of the good sailors have two rake settings a heavy and a light setting which I think is a great idea because of the increased mainsheet tension you need to run in the breeze.
Below are several rigging guides you can download
Files available for download

How to Tie an Optimist Sail – Best Techniques
If you want to maximize performance and minimize frustration, it pays to learn the best techniques to tie an Optimist sail. We pulled tips from manufacturer’s tuning guides, books, and online sources to make the process easier. We added performance and rules notes to highlight the critical steps.
When we tie an Optimist sail, we’re trying to accomplish several objectives.
- Stay within class rules
- Tweak the sail shape for the existing wind conditions and the sailor’s weight and ability
- Make sure the sail ties don’t loosen on the water
The steps in this article assume you are tying the sail for the first time, and that you may want to de-rig and re-rig the sail periodically for travel.
Preparation
Make sure you have sail ties made of Vectran or Dyneema. These may be included with your boat or your new sail. It’s essential to have extra sail ties available. Here’s a table of what you need and sources.
You can get pre-cut sail tie kits from Colie Sails . You can also buy small spools of 1.2 mm and 3 mm Vectran from West Coast Sailing .
Tie the Foot of the Sail to the Boom
You can start by tying the sail to the boom before you attach the boom to the mast. Tie at the clew, along the foot, and at the tack, using these steps.
Performance note: Since the outhaul takes care of adjusting the foot of the sail, you don’t need to adjust the boom ties for different wind conditions. Therefore, you can tie the the foot of the sail to the boom once and leave it for the season.
Tie the clew

The clew is the aft end of the sail. There are two lines to attach: the outhaul and the clew tie. Do the outhaul first.
- Tie a figure eight knot in the end of the outhaul line and thread it through the boom end fitting.
- Pass the line through the clew grommet and then back again through the boom end fitting.
- Cleat the other end of the outhaul line loosely in the boom cleat.
- Thread a corner tie (3mm) through the clew grommet and around the boom, wrapping it twice around.
- Tie a square knot in the free ends so that the sail just touches the top of the boom, but does not overlap.
- Set the square knot by pulling both ends tightly and pulling up on the clew. Make sure there is no gap between the sail and the boom. Re-adjust if needed.
- Make sure the clew is not too tight so that it is free to slide along the top of the boom as you pull the outhaul line.
- Performance note: If the clew lifts off the boom, this loosens the leech of the sail, which reduces the ability to point.
Tie the foot

- Use 1.2 mm ties to tie the foot of the sail to the boom.
- Double wrap the ties through the grommets and around the boom. Double wraps make the gap between sail and boom easier to adjust.
- Performance note: The Opti sail is cut in a curve along the foot. This gives it a pocket when it is tied to the straight boom. The pocket produces lift as the air flows over it. The 5 mm gap lets the sail pocket flip from one side to the other.
- Rules note: The maximum gap allowed between the boom and sail is 10 mm.
- Set the square knots by pulling tightly on both ends and pulling up on the sail.
- For additional security, add a half hitch to one end of each square knot.
Tie the tack

The tack is the forward end of the foot. Attach it to the boom now and then also to the mast when you tie the luff of the sail to the mast.
- Use a 3 mm tie and double wrap it through the tack grommet and the boom as before.
- Adjust the square knot so the foot of the sail just touches the top of the boom at the tack.
- Set the knot.
Tie the Luff of the Sail to the Mast
The mast ties are not “set and forget.” Serious racers adjust the gaps between luff and the mast based on wind conditions. Therefore, it will pay dividends to develop your technique.
The steps below assume you have tied the sail to the boom and are now tying to the mast without pre-existing ties.
Attach boom to mast

- Thread the bottom of the mast through the loop of the boom preventer line and lay it alongside the rolled out sail.
- Make sure the boom preventer button on the mast faces away from the sail.
- Clip the boom fork onto the mast, below the preventer button
Tie the head of the sail

Tie the head first to set the sail measurement line within the bands on the mast.
- Align the grommet at the head of the sail with the top hole in the mast. This alignment puts the sail measurement line within the bands.
- Use a 3 mm corner tie and double wrap it.
- Press one or both strands of the corner tie into the hole on the forward side of the mast and insert the wind vane into the loop.
- Set the gap between the sail and mast according to the table below and tie a square knot.
- Set the square knot by pulling it tight and pulling on the sail.
- Add a half hitch to one end of the square knot for additional security.
- Tie the tack to the mast using a double-wrapped 3 mm corner tie.
- Adjust the gap according to the table below.
- Set the square knot.
Check the boom preventer

The boom preventer is a line on the boom that prevents the boom from sliding too far down on the mast. This regulates the tension in the luff of the sail. At this point, you want to check the length of the preventer line. Once this length is set, you won’t have to re-adjust it.
Rules note: The sail measurement line must be between the bands when sailing.
- Place the boom preventer line over the mast button without any twists.
- Check that when you push the boom down, the sail measurement line does not go below the lower band on the mast. If needed, shorten the boom preventer line to assure this.
Tie the halyard preventer

The halyard preventer keeps the sail from being pulled up too far when the sprit is tensioned. You can likely set this once and re-use it even after de-rigging.
- Use a 3 mm corner tie and single wrap it through the grommet and around the mast.
- Press the tie through the second hole on the mast to make a loop.
- Insert the wind vane into the loop.
- Tie a square knot so that the sail band stays below the top measurement band when the sprit is tensioned. Don’t over-tighten the halyard preventer line.
- Set the knot and add a half hitch for additional security if needed.
Tie the luff
Performance note: Like the foot, the luff of the sail is curved to add depth to the sail. On an Opti, you can regulate this depth by adjusting the gaps between the luff and the mast. The diagram below shows how this works and the typical gap measurements to power up or de-power the sail.

- Use 1.2 mm ties along the luff
- Double wrap the ties through the grommets and around the boom.
- Deeper sail, more power: In lighter winds, make the gaps equal (about 1 mm).
- Flatter sail, less power: In heavier winds, or with lighter or less experienced sailors, make the gaps at the top and bottom of the mast larger (perhaps 8 mm) and reduce the gaps gradually to 1 mm as you approach the center.
- Rules note: The maximum gap allowed between the mast and sail is 10 mm.
For travel or storage. it’s best to remove the sail from the mast and roll it up around the boom.
- Remove the wind vane to free up the head tie and halyard preventer.
- Untie the line from the tack to the mast
- Take the vang out of the cleat
- Unclip the boom fork from the mast
- Slide the mast down towards the foot, leaving the sail ties on the sail.
- Roll the sail on the boom, minimizing creases.
Optimist Sailmakers and Manufacturers Tuning Guides Optimist Class Rules Link
ILYA Champion Interview – Will Haeger
Keeping your lead, part 1: covering tactics at the leeward mark, you may also like, sailing terms from l-36.com, downwind sailing and gybing tips from sarah..., upwind sailing tips by sarah ayton &..., optimist sailmakers and manufacturers tuning guides, basic sailing skills board, sailing fleets: opti board, optimist mast rake and downwind heel –..., x-boat tuning guide – go fast in..., optimist class rules link, using a line sight to give you..., leave a comment cancel reply.
You must be logged in to post a comment.
This site uses Akismet to reduce spam. Learn how your comment data is processed .
Insert/edit link
Enter the destination URL
Or link to existing content
Optimist Sailboat Build

Introduction: Optimist Sailboat Build

Building the Wood/Epoxy Optimist In 1947 a gentleman named Clark Mills designed a small sail boat for kids to learn to build and sail called the Optimist. This boat was designed to be built from 3 sheets of plywood, with basic woodworking abilities. As time progressed, builders began to modify the boats to gain speed advantages - as happens with all vehicles. In 1995 the International Optimist Association took the boat back to its roots and a set of dimensions were compiled to retain an exact shape of the boat, so as to remove design advantages from one boat to another. The Optimist is tightly controlled now with over 60 measurements and tolerances of the hull are generally +/- 5 mm. The tolerances do not allow the builder to exploit the possible variations of shape of the hull, but do allow a competent builder to construct a legal racing hull. Half Moon Bay Yacht Club has a summer youth sailing camp. Through the years we have trained many a young boy or girl to rig and sail the small boats available to us. Normally in an older Laser or Coronado 15. In 2011, the sailing program decided that the Optimist had a place in our sailing fleet to allow the younger kids (7-15) to rig, launch, sail and retrieve the boats themselves while under adult supervision. We set about looking at the building of wood/epoxy Optimist sailing boats. We quickly focused on making racing legal hulls so as to be competitive with other surrounding sailing clubs. This is where the accuracy and repeatability of the ShopBot CNC router at TechShop of Menlo Park www.techshop.ws became an invaluable tool in our fleet building. I made it at TechShop. Due to the close tolerances allowed, and the desire to have an almost identical fleet of boats, the ShopBot fit the bill to the letter. Once I redrew the plans into CAD drawings and transferred to cut files the different parts of the boats were identical. Each group of people that wanted to build a boat only had small amounts of fitting, beveling and gluing to accomplish, with very little use of dangerous equipment needed and quick progress to show for their efforts, so kids fit right into the task of building boats.
Attachments

The jig produced on the ShopBot retains the correct shape and supports the boat, while it is being built, to retain the exact design measurements. The plans for the boat can be found from many sources for free on the internet. Plans are available in many languages, as well. One such source is http://www.optiworld.org/Woodguide05.pdf Another guide to building an optimist is http://www.burcotboats.co.uk/howToBuild.pdf , as well as half a dozen other well written articles on the internet. But none provide CAD quality drawings or files to work with modern computer controlled machine tooling. Well, here they are: The jig as well as the major parts of the boat. The jig sides , mast step, rudder, dagger board , dagger board case ends and doubler pieces are made from 18mm or 3/4" ACX or marine grade plywood; (1219.2mm x 2438.4mm) 48" x 96".
Now to get started, the jig we have designed is the exact dimensions of a finished hull shape. Both ends of the jig have interlocking pieces to allow for inserting and removing as needed during the building of the boat. The cross members are standard 2" x 4" cut to 44" long and with a 3/4" dado 8" to each side of center to fit into the grooves of the forms. These should be cut so as to be flush with the top of the form and screwed into place to prevent movement. The bottom boards provide a stable platform for the jig to sit on. The jig should be placed on a flat surface for the build, as distortion to the jig will transfer to the boat being built. Save the scraps for blocking.

The file for the hull bottom, midship frame, dagger board case sides and corner braces are cut from one 4' x 8' sheet (1219.2mm x 2438.4mm) of 12mm Marine grade plywood If you save your larger scraps for doubling plates and gunwale rails, you will have very little waste. The first cuts should be for the 6mm deep dado at both ends of the hull to join the bow and transoms to. The second cut should be for the dagger board trunk cut out. The third cut should be the outline of all the pieces. In order to fit both sides of the dagger board trunk on one sheet, one side will have a joint to be epoxied together to match the other side.

The next setup should be for 6mm plywood. Again a 4' x 8' sheet will make both ends, both sides, mast thwart frame and again scraps can be used for doublers and clamping pads. You now have a boat cut and ready for a little fitting. Bevel the edges of the bottom to the approximate angles of 15 degrees with a block plane and you are ready to start your build. I would recommend a dry fit of all parts prior to mixing epoxy. This doesn't take long and may save you a lot of trouble with messy epoxy.

Center the bottom in the jig, stand on it to bow it and hold it down, and temporarily screw it to the 2" x 4" 's 130mm each side of center line to allow for gluing of the doublers without covering the screws, so they can be removed later. The holes will be filled in when the boat is removed from the jig with epoxy. Rip a 4' x 8' sheet of 4mm plywood into 1- 240mm strip and 2-80mm strips with a 45 degree beveled edge. This can be done on the ShopBot or a table saw. These are the doublers for the bottom to meet design minimum thickness while saving weight. Once these are epoxied into place and trimmed you are ready to install the sides, mid ship frame, bow and transom. The mid ship bulkhead can be used to position the strips in the correct place on the bottom of the hull. Once these are epoxied in position, placing some weights on top, until cured, works well. You will be covering the dagger board slot, but that can be easily cut out once the hull is removed from the jig and turned upside down for fitting the dagger board trunk and filling of screw holes.

The plans show two temporary braces. These can be made from any scrap plywood and are used to hold the proper shape of the sides while doing the assembly and glue up. Once the gunwale rails are installed these will be removed and discarded. The bow and transom fit into the dado at the front and rear of the hull bottom panel. The sides wrap around the outsides. A couple small blocks of wood screwed onto the jig at the bow and stern help in keeping the sides in position while clamps are applied. A small slot cut into the two forward jig pieces to allow a small bar clamp of your choice works well to hold the two sides together tightly. Once you are comfortable with the fit of all the parts your ready to mix epoxy. Wet out each side with unthickened epoxy. Then add a small layer of thickened epoxy and assemble with the temporary braces and mid ship brace installed. Next is the mast deck and thwart. Fit and epoxy in place. Some of the scraps of 18mm can be used for the doubler in these areas. You can install the bow and transom doubler before or after this step.

Gunwale rails and rub rails are next. You can use layers of plywood or fancy colorful woods if you plan to use a clear finish to show off your work. Build up the layers until you get to the final thickness required, per the plans. Rip 1 for each side of boat starting with a 45mm wide piece stepping down 5mm for each 10mm of thickness. Cut out pockets for and install the corner blocks next. Form and shape the rails to the required shape and thickness and you are ready to remove the boat from the Jig. We used a hand planer for the rough shape and finished with a belt sander. It will now hold its shape and dimensions. The jig can be used as a cradle to support the boat as you work on it either upside down or right side up.

Once the boat is removed from the jig, it can be turned over and all joints filled with thickened epoxy. Install the dagger board trunk through the hull and epoxy in place. We choose to put our club logo and hull # on the sides of the dagger board trunk. Once again the ShopBot makes this a blank canvas for your artistry. Below one of the boys is rounding the edges before the dagger board trunk is installed. Shape the bottom of the dagger board trunk to conform to the hull bottom from the outside once it is cured in place. Install the doubler pieces on the inside to help support the dagger board trunk. We installed a few wood dowels into the midship frame to add strength as well. Sand, epoxy and finish the exterior of the hull as desired, with either paint or a clear finish. On the inside of the hull fillet the joints with thickened epoxy. Install the flotation attachment pads, and main sheet block pad. Sand, epoxy and finish the interior of the boat as desired and the hull portion of your sail boat is ready for hardware installation. We chose white enamel for the insides for a cleaner look. You will also find the plans from one of the internet sites below. Download these and print copies to have available as you work.
To build a race legal hull requires a measurement by a certified Optimist qualified measure person. Plan on 4 hours or more for this process. The PDF file is the list of measurements for the hull. The tolerances are close, but with the use of the CNC controlled cutting you should have a race legal hull that your kids can be fully involved in the building of. The dagger board piece and rudder that was cut will need to be shaped and profiled. Again we used a plane for the rough shape, followed by the belt sander. Hardware kits are available online as well as sails, spars, FRP rudders and dagger boards at very reasonable prices. One such site is : http://www.mauriprosailing.com/Optiparts-Optimist/Optiparts-Optimist.htm?gclid=CKHtt7O1t64CFQ9-hwodHBRhrA

Sail Plan The sail can be home-made, as well, but with mass production the prices just are hard to beat. Again the spars can be made from PVC pipe, Wood or Aluminum tubing, but most can be purchased for a cheaper price than your time and investment. You probably won't need the hottest racing level gear until you see if your kids are in for it. Then watch out if they catch the bug! You will be one proud parent to have started them out on such a great and rewarding life of sailing. http://www.mauriprosailing.com/Optiparts-Optimist/Optiparts-Optimist.htm?gclid=CKHtt7O1t64CFQ9-hwodHBRhrA

Finalist in the ShopBot Challenge

Participated in the Make It Real Challenge
Recommendations

All Things Pi Contest

Made with AI - Autodesk Design & Make - Student Contest

Engineering in the Kitchen - Autodesk Design & Make - Student Contest

Free Shipping Over $99* - 366 Day Returns - Dedicated Customer Support
- Call Us +1-503-285-5536
- Sign in & Register
- Recently Viewed
- One Design Parts
West Coast Sailing is your source for Optimist Sailboat Parts and Accessories . We offer a full range of Optimist sailboat racing sails, spar sets, blades, tillers, covers, accessories, and more. Find go fast upgrades for racers or durable parts for recreational and club sailors. Fast, free shipping on qualifying orders.
- Opti Sailboat Photo Gallery - Detailed photos of rigging and setup, including different upgrades.
- Opti Line Guide - Recommended line lengths and materials for halyard, mainsheet, and control lines.
- Opti Owners Manual - Rigging Guide and Owner's Manual from McLaughlin, an Optimist builder.
- Opti Rigging Guide - Rigging Guide for Pro and Advanced Racer from McLaughlin.
- Opti Spar Guide - Understanding Club, Silver, and BlackGold Spars.

- Qty in Cart

Optiparts Optimist Practice Sail

Opti Batten

Opti Mainsheet Clip Block
")
Opti Hiking Bench (Dynamic)

Optimax MK3 Medium Racing Mast Optimist

Optimax MK3 Flex Racing Mast Optimist
Optimax mk3 racing mast optimist.

Opti Lunch Container 6L

Opti Lunch Container 3L

Optiparts Sponge Stick
")
Opti Line Kit Pro (Optiparts)
")
2.2mm Vectran Line Spool 26 ft (Optiparts)
")
Opti Boom End Plug (45mm)
")
Opti Boom Jaw (45mm)
")
Opti Airbag 48 Liter (Grey/Blue)
")
Opti Glide Tape (8m Roll)
- Total: items /
- Add all to cart
Adding your products to cart
Subscribe to our newsletter.
Sign up for our newsletter to receive exclusive discounts, new product announcements, and upcoming sales.
× You are using an outdated browser. Please upgrade your browser to improve your experience.

Shopping Cart
Your cart is currently empty..
Optimist Airbag

Optimist Sail Tie Kit

Mast Collar White
Gray Racing Mast Collar w/ Sleeve

Harken 40mm Block w/ Vectran and Shackle

Outhaul Jam Cleat BlackGold

Harken 40mm Carbo Block w/ Shackle

Harken Ball Bearing Hook In Block

Optimist Boom Vang, Vectran

Optimist Mainsheet Bridle Ring

Optimist Safety Shackle

Optimist Sprit Adjuster Handle
Copyright © 2024 Dinghy Shop. | Ecommerce Shopping Cart Software by Miva, Inc.
Sailboat Parts Explained: Illustrated Guide (with Diagrams)
When you first get into sailing, there are a lot of sailboat parts to learn. Scouting for a good guide to all the parts, I couldn't find any, so I wrote one myself.
Below, I'll go over each different sailboat part. And I mean each and every one of them. I'll walk you through them one by one, and explain each part's function. I've also made sure to add good illustrations and clear diagrams.
This article is a great reference for beginners and experienced sailors alike. It's a great starting point, but also a great reference manual. Let's kick off with a quick general overview of the different sailboat parts.
General Overview
The different segments
You can divide up a sailboat in four general segments. These segments are arbitrary (I made them up) but it will help us to understand the parts more quickly. Some are super straightforward and some have a bit more ninja names.
Something like that. You can see the different segments highlighted in this diagram below:

The hull is what most people would consider 'the boat'. It's the part that provides buoyancy and carries everything else: sails, masts, rigging, and so on. Without the hull, there would be no boat. The hull can be divided into different parts: deck, keel, cabin, waterline, bilge, bow, stern, rudder, and many more.
I'll show you those specific parts later on. First, let's move on to the mast.

Sailboats Explained
The mast is the long, standing pole holding the sails. It is typically placed just off-center of a sailboat (a little bit to the front) and gives the sailboat its characteristic shape. The mast is crucial for any sailboat: without a mast, any sailboat would become just a regular boat.
I think this segment speaks mostly for itself. Most modern sailboats you see will have two sails up, but they can carry a variety of other specialty sails. And there are all kinds of sail plans out there, which determine the amount and shape of sails that are used.
The Rigging
This is probably the most complex category of all of them.
Rigging is the means with which the sails are attached to the mast. The rigging consists of all kinds of lines, cables, spars, and hardware. It's the segment with the most different parts.
The most important parts
If you learn anything from this article, here are the most important parts of any sailboat. You will find all of these parts in some shape or form on almost any sailboat.

Okay, we now have a good starting point and a good basic understanding of the different sailboat parts. It's time for the good stuff. We're going to dive into each segment in detail.
Below, I'll go over them one by one, pointing out its different parts on a diagram, listing them with a brief explanation, and showing you examples as well.
After reading this article, you'll recognize every single sailboat part and know them by name. And if you forget one, you're free to look it up in this guide.

On this page:
The hull is the heart of the boat. It's what carries everything: the mast, the sails, the rigging, the passengers. The hull is what provides the sailboat with its buoyancy, allowing it to stay afloat.
Sailboats mostly use displacement hulls, which is a shape that displaces water when moving through it. They are generally very round and use buoyancy to support its own weight. These two characteristics make sure it is a smooth ride.
There are different hull shapes that work and handle differently. If you want to learn more about them, here's the Illustrated Guide to Boat Hull Types (with 11 Examples ). But for now, all we need to know is that the hull is the rounded, floating part of any sailboat.
Instead of simply calling the different sides of a hull front, back, left and right , we use different names in sailing. Let's take a look at them.

The bow is the front part of the hull. It's simply the nautical word for 'front'. It's the pointy bit that cuts through the water. The shape of the bow determines partially how the boat handles.
The stern is the back part of the hull. It's simply the nautical word for 'back'. The shape of the stern partially determines the stability and speed of the boat. With motorboats, the stern lies deep inside the water, and the hull is flatter aft. Aft also means back. This allows it to plane, increasing the hull speed. For sailboats, stability is much more important, so the hull is rounded throughout, increasing its buoyancy and hydrodynamic properties.
The transom is the backplate of the boat's hull. It's the most aft (rear) part of the boat.
Port is the left side of a sailboat.
Starboard is the right side of a sailboat
The bilges are the part where the bottom and the sides of the hull meet. On sailboats, these are typically very round, which helps with hydrodynamics. On powerboats, they tend to have an angle.
The waterline is the point where the boat's hull meets the water. Generally, boat owners paint the waterline and use antifouling paint below it, to protect it from marine growth.
The deck is the top part of the boat's hull. In a way, it's the cap of the boat, and it holds the deck hardware and rigging.
Displacement hulls are very round and smooth, which makes them very efficient and comfortable. But it also makes them very easy to capsize: think of a canoe, for example.
The keel is a large fin that offsets the tendency to capsize by providing counterbalance. Typically, the keel carries ballast in the tip, creating a counterweight to the wind's force on the sails.
The rudder is the horizontal plate at the back of the boat that is used to steer by setting a course and maintaining it. It is connected to the helm or tiller.
Tiller or Helm
- The helm is simply the nautical term for the wheel.
- The tiller is simply the nautical term for the steering stick.
The tiller or helm is attached to the rudder and is used to steer the boat. Most smaller sailboats (below 30') have a tiller, most larger sailboats use a helm. Large ocean-going vessels tend to have two helms.
The cockpit is the recessed part in the deck where the helmsman sits or stands. It tends to have some benches. It houses the outside navigation and systems interfaces, like the compass, chartplotter, and so on. It also houses the mainsheet traveler and winches for the jib. Most boats are set up so that the entire vessel can be operated from the cockpit (hence the name). More on those different parts later.
Most larger boats have some sort of roofed part, which is called the cabin. The cabin is used as a shelter, and on cruising sailboats you'll find the galley for cooking, a bed, bath room, and so on.
The mast is the pole on a sailboat that holds the sails. Sailboats can have one or multiple masts, depending on the mast configuration. Most sailboats have only one or two masts. Three masts or more is less common.
The boom is the horizontal pole on the mast, that holds the mainsail in place.
The sails seem simple, but actually consist of many moving parts. The parts I list below work for most modern sailboats - I mean 90% of them. However, there are all sorts of specialty sails that are not included here, to keep things concise.

The mainsail is the largest sail on the largest mast. Most sailboats use a sloop rigging (just one mast with one bermuda mainsail). In that case, the main is easy to recognize. With other rig types, it gets more difficult, since there can be multiple tall masts and large sails.
If you want to take a look at the different sail plans and rig types that are out there, I suggest reading my previous guide on how to recognize any sailboat here (opens in new tab).
Sail sides:
- Leech - Leech is the name for the back side of the sail, running from the top to the bottom.
- Luff - Luff is the name for the front side of the sail, running from the top to the bottom.
- Foot - Foot is the name for the lower side of the sail, where it meets the boom.
Sail corners:
- Clew - The clew is the lower aft (back) corner of the mainsail, where the leech is connected to the foot. The clew is attached to the boom.
- Tack - The tack is the lower front corner of the mainsail
- Head - The head is the top corner of the mainsail
Battens are horizontal sail reinforcers that flatten and stiffen the sail.
Telltales are small strings that show you whether your sail trim is correct. You'll find telltales on both your jib and mainsail.
The jib is the standard sized headsail on a Bermuda Sloop rig (which is the sail plan most modern sailboats use).
As I mentioned: there are all kinds, types, and shapes of sails. For an overview of the most common sail types, check out my Guide on Sail Types here (with photos).
The rigging is what is used to attach your sails and mast to your boat. Rigging, in other words, mostly consists of all kinds of lines. Lines are just another word for ropes. Come to think of it, sailors really find all kinds of ways to complicate the word rope ...
Two types of rigging
There are two types of rigging: running and standing rigging. The difference between the two is very simple.
- The running rigging is the rigging on a sailboat that's used to operate the sails. For example, the halyard, which is used to lower and heave the mainsail.
- The standing rigging is the rigging that is used to support the mast and sail plan.
Standing Rigging

Here are the different parts that belong to the standing rigging:
- Forestay or Headstay - Line or cable that supports the mast and is attached to the bow of the boat. This is often a steel cable.
- Backstay - Line or cable that supports the mast and is attached to the stern of the boat. This is often a steel cable.
- Sidestay or Shroud - Line or cable that supports the mast from the sides of the boat. Most sailboats use at least two sidestays (one on each side).
- Spreader - The sidestays are spaced to steer clear from the mast using spreaders.
Running Rigging: different words for rope
Ropes play a big part in sailing, and especially in control over the sails. In sailboat jargon, we call ropes 'lines'. But there are some lines with a specific function that have a different name. I think this makes it easier to communicate with your crew: you don't have to define which line you mean. Instead, you simply shout 'mainsheet!'. Yeah, that works.
Running rigging consists of the lines, sheets, and hardware that are used to control, raise, lower, shape and manipulate the sails on a sailboat. Rigging varies for different rig types, but since most sailboats are use a sloop rig, nearly all sailboats use the following running rigging:

- Halyards -'Halyard' is simply the nautical name for lines or ropes that are used to raise and lower the mainsail. The halyard is attached to the top of the mainsail sheet, or the gaffer, which is a top spar that attaches to the mainsail. You'll find halyards on both the mainsail and jib.
- Sheets - 'Sheet' is simply the nautical term for lines or ropes that are used to set the angle of the sail.
- Mainsheet - The line, or sheet, that is used to set the angle of the mainsail. The mainsheet is attached to the Mainsheet traveler. More on that under hardware.
- Jib Sheet - The jib mostly comes with two sheets: one on each side of the mast. This prevents you from having to loosen your sheet, throwing it around the other side of the mast, and tightening it. The jib sheets are often controlled using winches (more on that under hardware).
- Cleats are small on-deck hooks that can be used to tie down sheets and lines after trimming them.
- Reefing lines - Lines that run through the mainsail, used to put a reef in the main.
- The Boom Topping Lift is a line that is attached to the aft (back) end of the boom and runs to the top of the mast. It supports the boom whenever you take down the mainsail.
- The Boom Vang is a line that places downward tension on the boom.
There are some more tensioning lines, but I'll leave them for now. I could probably do an entire guide on the different sheets on a sailboat. Who knows, perhaps I'll write it.
This is a new segment, that I didn't mention before. It's a bit of an odd duck, so I threw all sorts of stuff into this category. But they are just as important as all the other parts. Your hardware consists of cleats, winches, traveler and so on. If you don't know what all of this means, no worries: neither did I. Below, you'll find a complete overview of the different parts.
Deck Hardware

Just a brief mention of the different deck hardware parts:
- Pulpits are fenced platforms on the sailboat's stern and bow, which is why they are called the bow pulpit and stern pulpit here. They typically have a solid steel framing for safety.
- Stanchons are the standing poles supporting the lifeline , which combined for a sort of fencing around the sailboat's deck. On most sailboats, steel and steel cables are used for the stanchons and lifelines.
Mainsheet Traveler
The mainsheet traveler is a rail in the cockpit that is used to control the mainsheet. It helps to lock the mainsheet in place, fixing the mainsails angle to the wind.
If you're interested in learning more about how to use the mainsheet traveler, Matej has written a great list of tips for using your mainsheet traveler the right way . It's a good starting point for beginners.
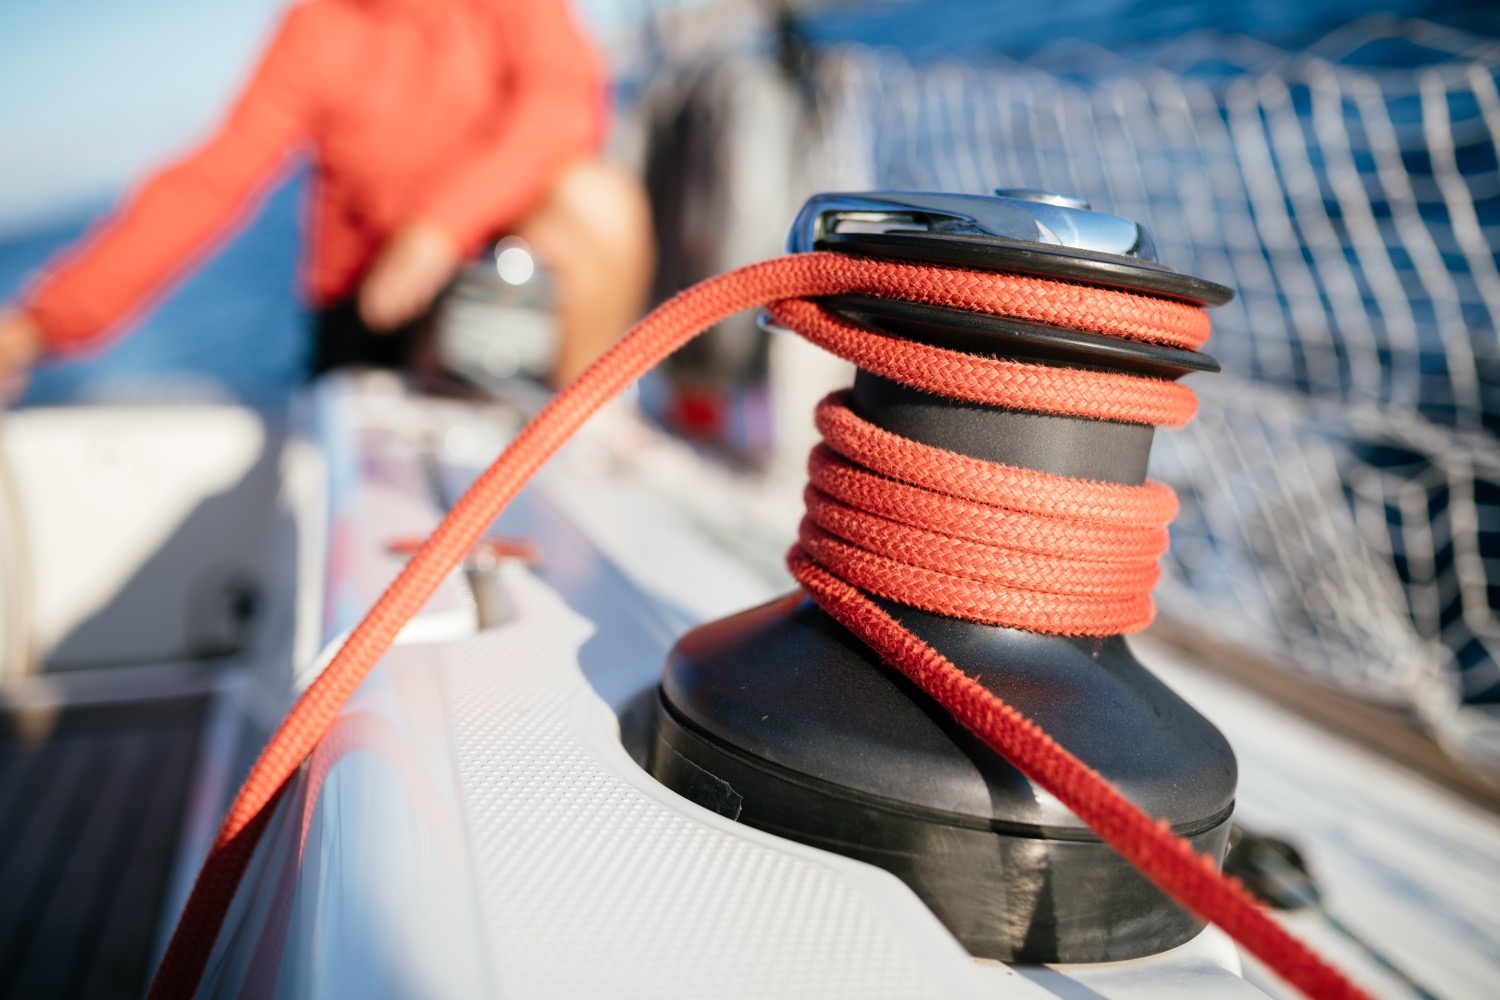
Winches are mechanical or electronic spools that are used to easily trim lines and sheets. Most sailboats use winches to control the jib sheets. Modern large sailing yachts use electronic winches for nearly all lines. This makes it incredibly easy to trim your lines.
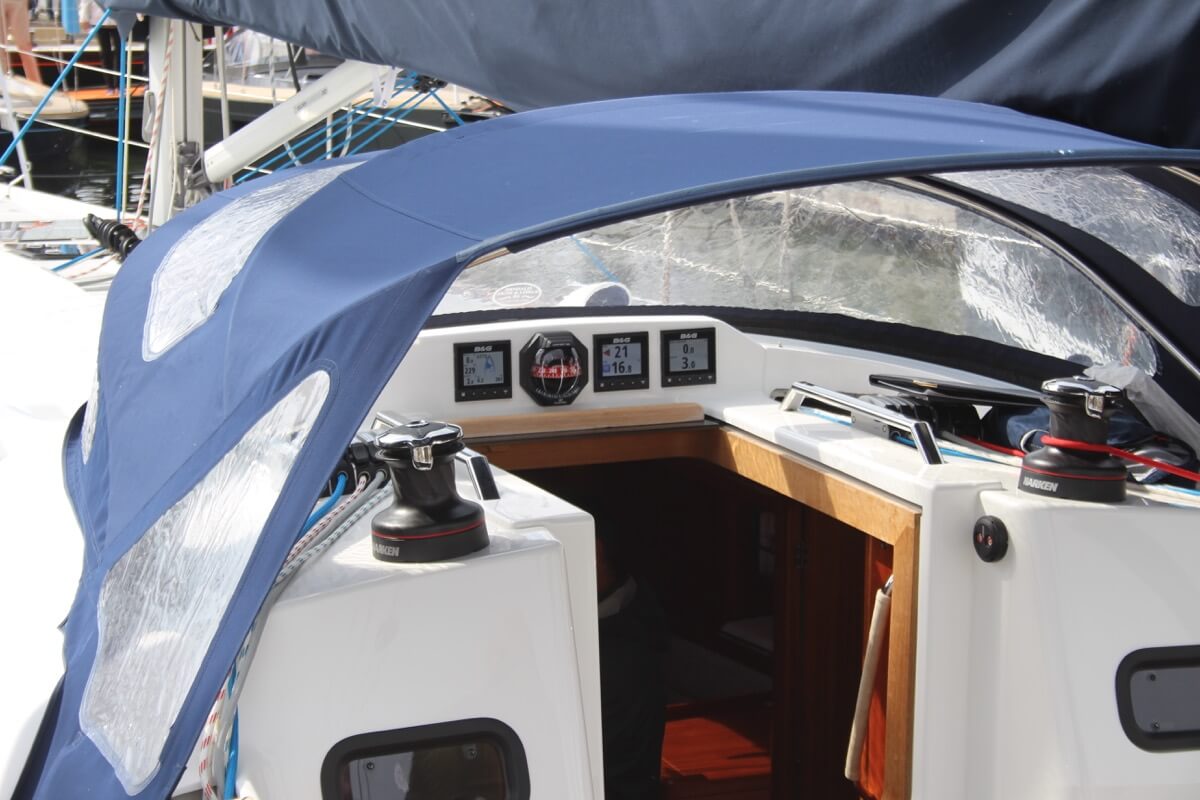
You'll find the compass typically in the cockpit. It's the most old-skool navigation tool out there, but I'm convinced it's also one of the most reliable. In any way, it definitely is the most solid backup navigator you can get for the money.
Want to learn how to use a compass quickly and reliably? It's easy. Just read my step-by-step beginner guide on How To Use a Compass (opens in new tab .
Chartplotter
Most sailboats nowadays use, besides a compass and a map, a chartplotter. Chartplotters are GPS devices that show a map and a course. It's very similar to your normal car navigation.
Outboard motor
Most sailboats have some sort of motor to help out when there's just the slightest breeze. These engines aren't very big or powerful, and most sailboats up to 32' use an outboard motor. You'll find these at the back of the boat.
Most sailboats carry 1 - 3 anchors: one bow anchor (the main one) and two stern anchors. The last two are optional and are mostly used by bluewater cruisers.
I hope this was helpful, and that you've gained a good understanding of the different parts involved in sailing. I wanted to write a good walk-through instead of overwhelming you with lists and lists of nautical terms. I hope I've succeeded. If so, I appreciate any comments and tips below.
I've tried to be as comprehensive as possible, without getting into the real nitty gritty. That would make for a gigantic article. However, if you feel I've left something out that really should be in here, please let me know in the comments below, so I can update the article.
I own a small 20 foot yacht called a Red witch made locally back in the 70s here in Western Australia i found your article great and enjoyed reading it i know it will be a great help for me in my future leaning to sail regards John.
David Gardner
İ think this is a good explanation of the difference between a ”rope” and a ”line”:
Rope is unemployed cordage. In other words, when it is in a coil and has not been assigned a job, it is just a rope.
On the other hand, when you prepare a rope for a specific task, it becomes employed and is a line. The line is labeled by the job it performs; for example, anchor line, dock line, fender line, etc.
Hey Mr. Buckles
I am taking on new crew to race with me on my Flying Scot (19ft dingy). I find your Sailboat Parts Explained to be clear and concise. I believe it will help my new crew learn the language that we use on the boat quickly without being overwhelmed.
PS: my grandparents were from Friesland and emigrated to America.
Thank you Shawn for the well written, clear and easy to digest introductory article. Just after reading this first article I feel excited and ready to set sails and go!! LOL!! Cheers! Daniel.
steve Balog
well done, chap
Great intro. However, the overview diagram misidentifies the cockpit location. The cockpit is located aft of the helm. Your diagram points to a location to the fore of the helm.
William Thompson-Ambrose
An excellent introduction to the basic anatomy and function of the sailboat. Anyone who wants to start sailing should consider the above article before stepping aboard! Thank-you
James Huskisson
Thanks for you efforts mate. We’ve all got to start somewhere. Thanks for sharing. Hoping to my first yacht. 25ft Holland. Would love to cross the Bass Strait one day to Tasmania. 👌 Cheers mate
Alan Alexander Percy
thankyou ijust aquired my first sailboat at 66yrs of age its down at pelican point a beautifull place in virginia usa my sailboat is a redwing 30 if you are ever in the area i wouldnt mind your guidance and superior knowledge of how to sail but iam sure your fantastic article will help my sailboat is wings 30 ft
Thanks for quick refresher course. Having sailed in California for 20+ years I now live in Spain where I have to take a spanish exam for a sailboat license. Problem is, it’s only in spanish. So a lot to learn for an old guy like me.
Very comprehensive, thank you
Your article really brought all the pieces together for me today. I have been adventuring my first sailing voyage for 2 months from the Carolinas and am now in Eleuthera waiting on weather to make the Exumas!!! Great job and thanks
Helen Ballard
I’ve at last found something of an adventure to have in sailing, so I’m starting at the basics, I have done a little sailing but need more despite being over 60 life in the old dog etc, thanks for your information 😊
Barbara Scott
I don’t have a sailboat, neither do l plan to literally take to the waters. But for mental exercise, l have decided to take to sailing in my Bermuda sloop, learning what it takes to become a good sailor and run a tight ship, even if it’s just imaginary. Thank you for helping me on my journey to countless adventures and misadventures, just to keep it out of the doldrums! (I’m a 69 year old African American female who have rediscovered why l enjoyed reading The Adventures of Robert Louis Stevenson as well as his captivating description of sea, wind, sailboat,and sailor).
Great article and very good information source for a beginner like me. But I didn’t find out what I had hoped to, which is, what are all those noisy bits of kit on top of the mast? I know the one with the arrow is a weather vane, but the rest? Many thanks, Jay.
Louis Cohen
The main halyard is attached to the head of the mainsail, not the to the mainsheet. In the USA, we say gaff, not gaffer. The gaff often has its own halyard separate from the main halyard.
Other than that it’s a nice article with good diagrams.
A Girl Who Has an Open Sail Dream
Wow! That was a lot of great detail! Thank you, this is going to help me a lot on my project!
Hi, good info, do u know a book that explains all the systems on a candc 27,
Emma Delaney
As a hobbyist, I was hesitant to invest in expensive CAD software, but CADHOBBY IntelliCAD has proven to be a cost-effective alternative that delivers the same quality and performance.
https://www.cadhobby.com/
Leave a comment
You may also like, guide to understanding sail rig types (with pictures).
There are a lot of different sail rig types and it can be difficult to remember what's what. So I've come up with a system. Let me explain it in this article.

The Ultimate Guide to Sail Types and Rigs (with Pictures)

The Illustrated Guide To Boat Hull Types (11 Examples)

How To Live On a Boat For Free: How I'd Do It

How To Live on a Sailboat: Consider These 5 Things
Own your first boat within a year on any budget.
A sailboat doesn't have to be expensive if you know what you're doing. If you want to learn how to make your sailing dream reality within a year, leave your email and I'll send you free updates . I don't like spam - I will only send helpful content.
Ready to Own Your First Boat?
Just tell us the best email address to send your tips to:
IMAGES
VIDEO
COMMENTS
Tie a small bowline in one end of the smaller of the two lines. Pass the other end downward through the block on the front of the mast. Tie the loose block onto the end with another bowline. Tie one end of the second piece of line to the bridge on the halyard cleat. Pass it through the block and down through the cleat.
Optimist Fleet of Optimists Typical Optimist storage Rigging on shore Optimist dinghies waiting to a wind. The Optimist is a small, single-handed sailing dinghy intended for use by young people up to the age of 15.. The Optimist is one of the two most popular sailing dinghies in the world, with over 150,000 boats officially registered with the class and many more built but never registered.
Tie the sail on: Lay the mast on the floor or grassy area. Next, slide the boom bling around the bottom of the mast and snap the boom jaw to the mast about 6" below the bling peg. Make sure the boom is right side up at this point as well and the vang cleat is directly under the boom.
6. Stepping the Mast: Lift the mast with sail and boom attached. Align the mast butt over the mast collar. Gently slide the mast through the thwart and into the metal mast step (fi gure 20). Make sure that the sprit halyard cleat is facing the bow while the cleat for the vang cleat is facing the stern (fi gure 21).
Our basic learning boat is the Optimist. Please study the parts of the boat and their names or labels…. for fun this diagram is multilingual! Hull Sides - Bow, Stern, Starboard and Port Sides. Mast, Boom and Sprit are all Spars. Rudder, Tiller and Tiller Extension Steer the Boat. The rudder can also be used to slow down the boat.
4. Position yourself on the rail so that you are facing the bow (the smaller end) of the boat. Your front foot should be up against the bulkhead (the foot high separator halfway up the boat). 5. Get hold of tiller extension with the hand closest to the stern (back) of the boat and hold it as if it is a microphone.
Optimist Sailmakers and Manufacturers Tuning Guides. by SailZing Editor. There are lots of Optimist tuning guides available. We've put together a collection of the most informative guides from major sailmakers and boat manufacturers. Optimist Tuning Guides North Sails Quantum Sails UK Sails Ullman Sails Olimpic Sails McLaughlin Boat Works….
Here's a look at six tips and secrets to your Opti Rig - it all comes down to setting a base sail shape for the conditions of the day.#opti_tv #optiworld #op...
World Sailing Learn to Sail Boat Optimist The International Optimist is sailed by under-16 sailors in over 200 countries. The boat in which 80% of Olympic boat skippers learned to sail. Technical Details: Length - m 2.3 Beam - m 1.12 Hull weight - kg 35 Mainsail area - m2 3.3 Jib area - m2 N/A Spinnaker area- m2 N/A Stayed rig No ...
starting point: Sailor Weight (Kgs) - Mast Rake (metres) Less Than 40kg- 2.79m. 40-45kg- 2.80 - 2.83m. 45-50kg- 2.83 - 2.84m. More than 50kg- 2.84 - 2.85m. In +20 knots, rake aft 2cm for all weights. Remember this is only a guide and all mast lengths vary slightly which will affect your rake. Also make sure your mast is a firm ...
see what happens; If the boat luffs too quickly we must move the mast forward. If, by contrast, the boat wants to go downwind, we must decrease the rake of the mast. Repeat this operation until the boat luffs gently. This is the balance we want. In medium or strong wind days we need to rake the mast forward to compensate for mast bend.
ing the plans, diagrams and the measurement forms. 2.1.4 The QNational Class AssociationR is the International Optimist Class Association in the country concerned. 2.2 Builders 2.2.1 The Optimist may be built by any professional or amateur builder. 2.2.2 Professional builders shall be responsible for supplying boats complying with the Rlass rules.
Tie the foot. Use 1.2 mm ties to tie the foot of the sail to the boom. Double wrap the ties through the grommets and around the boom. Double wraps make the gap between sail and boom easier to adjust. Tie the free ends (square knot) to make a 5 mm gap between the sail and the boom.
Building the Wood/Epoxy Optimist In 1947 a gentleman named Clark Mills designed a small sail boat for kids to learn to build and sail called the Optimist. This boat was designed to be built from 3 sheets of plywood, with basic woodworking abilities. As time progressed, builders began to modify the boats to gain speed advantages - as happens with all vehicles.
As a single-handed sailing dinghy, the Opti is perfect for beginner sailors. The Optimist was designed in Clearwater, Florida, sixty-nine years ago, by Clark Mills. Tom Coleman, often referred to as the guru of Optis, claims the boat has become "THE definitive teaching boat for hundreds of thousands of children the world over." ...
International Optimist Dinghy Association ... 4/5 Sail numbers, insignia and button 5/5 Positioning measurement band ALL MEASUREMENTS IN MILLIMETRES DIAGRAMS NOT TO SCALE. Clew point Mid foot point Tack point ... Sails shall be made and measured in accordance with the current ISAF Equipment Rules of Sailing, unless modified by the Class Rules
Next. West Coast Sailing is your source for Opti parts. We offer a full range of Optimist sailboat racing sails, spar sets, blades, tillers, covers, accessories, and more. Find go fast upgrades for racers or durable parts for recreational and club sailors. Fast, free shipping on orders over $49.
Optimist Sprit Adjuster Handle. $8.40. 1 2 3 … 7. Find all the Optimist sailboat parts, sails, blades, spars, upgrades, and accessories here.
5.2 [DP] Competitors sailing on charter boats shall report any damage or loss of equipment, however slight, to the Organising Authority's representative immediately after securing the boat ashore. 5.3 Failure or loss of chartered equipment will not be grounds for a request for redress. This changes rule 62.1(a).
The hull is what most people would consider 'the boat'. It's the part that provides buoyancy and carries everything else: sails, masts, rigging, and so on. Without the hull, there would be no boat. The hull can be divided into different parts: deck, keel, cabin, waterline, bilge, bow, stern, rudder, and many more.
Immensely popular youth trainer, designed for and built by a large number of home builders. The list shown here can only represent a small fraction of past and current professional builders. U.S. Optimist Dinghy Assn. P.O. Box 150127 222 E. Westmonte Dr. #101 Almonte Springs, FL 21401 407-774-7880 Fax: 407-774-6440