
- Boat Accessories
- Where to Buy
Special until April 30th: 30% off Solvent & Cleaner for the month of April. Use Code APR24 at checkout. *restrictions apply
Free ground shipping in the Continental US for any orders over $150!

Wooden Boat Restoration And Repair Guide...
Wooden boat restoration and repair guide.

When your wooden boat finds itself in need of repair, dealing with the wood can be an intimidating experience—particularly if this is your first time trying your hand at boat repair. Fortunately, we’ve put together a list of relevant tips and strategies for handling wooden boat restoration, even when you’re dealing with the difficult and often complex subject of marine wood.
Tips for Dealing with Wood

- When in doubt, ask an expert. There are lots of variables involved in assessing wood—including the age of the wood and the way in which your boat was constructed. Experts will know to look for certain signs of deterioration that may not get noticed during your own inspection.
- Not all wood is made the same. Plywood, for example, is a strong boating material but is also highly susceptible to dry rot, which means it’s vital to inspect for dry rot often if you have a plywood boat.
As one of the most common problems you’ll have to deal with, however, dry rot deserves its own section:
How to Handle Dry Rot
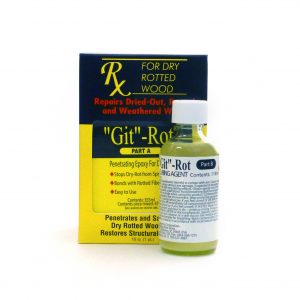
Dry rotted wood can be strengthened when you use a liquid epoxy to saturate the wood fibers and help restore strength. A product like the Git-Rot Kit can be used to saturate these fibers via capillary action. The key? You have to make sure the wood is dry first, which means that your repairs will require some forethought and planning. Then you’ll need it to remain that way for an overnight cure.
Find The Right Products
- Fix Repair Putty . Bonding not only to wood, but also to fiberglass, glass, and even concrete, this repair putty—once cured—can be sanded, drilled, tapped, screwed, and painted. That makes it an essential item in any basic boat repair kit, especially for those boat owners dealing primarily with wood.
- Git-Rot Kit . Dealing with dry rot can be a complicated process. It’s tempting to view the wood as unusable. But the Git-Rot Kit can make this wood strong again—especially if you follow the proper procedure for using the wood’s own capillary action to get the liquid epoxy deep into the rot.
For Your Other Boat Maintenance Needs
Want more tips and products for handling boat repair? Then visit all of the available boating products here at BoatLIFE to find the match for your specific needs.
Share this:
- Click to share on Twitter (Opens in new window)
- Click to share on Facebook (Opens in new window)
Featured Products
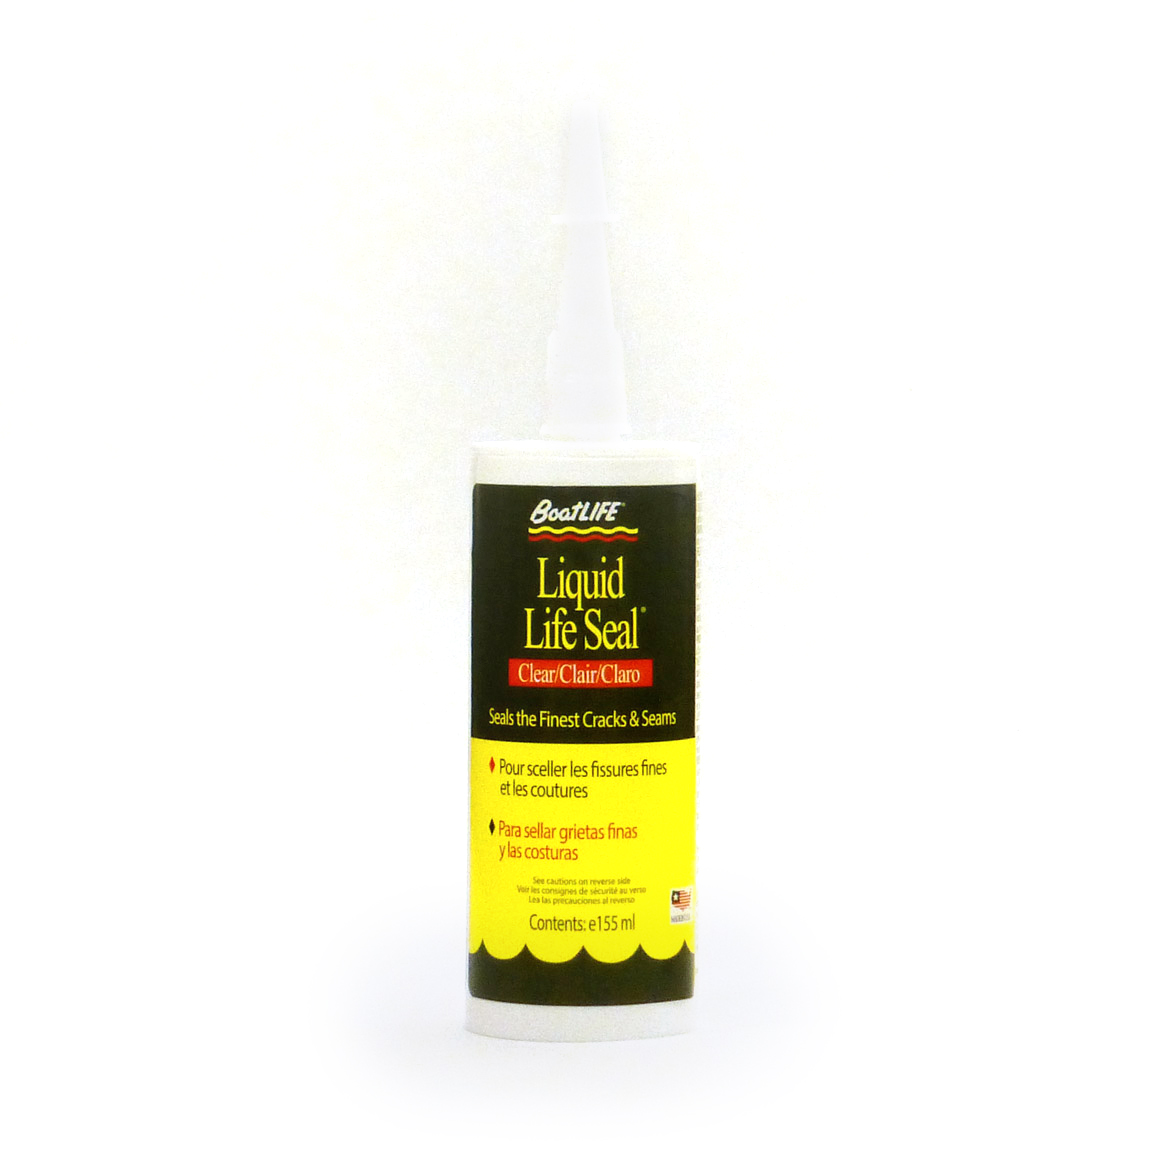
Liquid LifeSeal® Sealant 5.2 fl. oz. Clear

Stainless Steel Cleaner 16 fl. oz.
Related blogs, thanksgiving trivia.
Thanksgiving is one of America’s oldest and most loved holidays. Even though the story is steeped in a dark history […]
Detailing Your Boat
There’s nothing better than hitting the water in a beautiful boat. A warm summer day with the sun shining, there’s […]
How To Properly Clean Your Boat Trailer
We all know that cleaning your boat is important to not only keep it looking great, but to also ensure […]
All products proudly made in the usa
Members: Sign in Here --> Members: Sign in Here Contact Us
All Videos » Wooden Boat Restoration & Repair
We explore a broad range of practical approaches to wooden boat restoration and repair. Draw inspiration for your own projects as you watch shipwrights, pro boat builders and seasoned mariners tackle their own wooden boat repair and restoration projects.
Get a personal lesson from a master caulker, learn the ins and outs of refastening or follow the restoration of classics from Herreshoff S-Boats to a Grand Manan wooden lobster boat. We’re surrounded by masters bringing incredible vessels back to life, and we hope our wooden boat repair and restoration videos and posts inspire you to tackle your own projects with enthusiasm.
Related Guide Posts
Related flotsam.
Get access to all content Join Now
Browse by Topic

You are using an outdated browser. Please upgrade your browser or activate Google Chrome Frame to improve your experience.
Questions? Call Us:
Wooden Boat Restoration & Repair
Wooden Boat Restoration & Repair is an indispensable guide for anyone involved in—or even considering—renovating a wooden boat.
It explains how to do professional-grade repairs that can dramatically extend the boat’s life, and discusses techniques for repairing classic and more recently built wooden boats. It also covers wooden boat evaluation; dry rot damage; frame repairs; hull repairs for carvel-planked, lapstrake, plywood, and cold-molded hulls; teak decks; hardware installation and ventilation.
Restoration
Coeur Custom > Restoration
When you need classic wooden boat restoration services, Coeur Custom has the team of experts to match every project imaginable. Whether you’re looking for varnish restoration, woodwork, structural repair, or simply the best ways to make your aging beauty look like new again, we can help with a complete line of wooden boat services.
Our team also offers fiberglass, mechanical, canvas and upholstery repair. We make restoring classic wood boats our business. The Coeur Custom team is a proud member of and follows the standards set out by the ABYC, the American Boat & Yacht Council, and the United States Coast Guard.
If you have a vision or a desire, we can help you develop the plan, and have the experience and talent to bring your boat back to life.
Mechanical repair
Our team of certified technicians offers boat mechanical repairs and electrical repairs. We specialize in boat repowering projects. Our expertise includes stern drives, v-drives, direct drives, engines, and trailers, with particular attention to older boat engines.
We pride ourselves to take care of a vast range of services from the very small service like changing the spark plugs to very large tickets such as replacing engines and drivetrain systems.
Coeur Custom services and repairs or restores new or antique mechanical systems, engines, inboard, outboard, or inboard-outboard or (I/O) systems. We can work with direct drive, inline, v-drive, or hydraulic with mechanical, electronic, or cable controls transmission systems.
We also service naturally aspirated fuel delivery systems, ie; up-draft, down-draft, side draft carburetors, fuel injection, or throttle body. And our team can provide engine and drive repower services with new or rebuilt engines or drive units.
Electrical repair
Electrical systems on an older boat can be frustrating to figure out. Bring it to the experts at Coeur Custom, where we’ve seen just about every system – and fixed them. We also design and install entire wiring systems to your specifications and needs.
Our team will handle everything from a small item of analyzing a faulty electrical circuit, replacing a faulty switch or tackling a rewiring of an entire boat and all of the circuits and systems aboard.
We can analyze and repair any electrical system, such as bilge blowers, bilge pumps, horns, lights, battery chargers, onboard generators, A/C or heater systems, or engine instrumentation. The professional team is fluent with low voltage 12V, 24V, 48V DC as well as 120V AC electrical systems.
Plus we can install and repair shore power systems and their control panels.
Wood repair
Our team of wood boat experts has 150 years of woodworking experience. We’ll take a good look at the issue and give you a free estimate of what it will take to make things right again. You can feel confident about putting your beloved boat in good hands.
Our experience level and understanding of wood construction and practices used both new and old is unmatched in this region, and our ability to evaluate the condition of wood products and the process of making repairs to these products is the finest.
We can evaluate any given situation, then develop a proposal that best meets your needs for desired results and budget. We often find that most repairs or construction are not a black-and-white, or set-in-stone type of problem, we know you have a goal in mind for your restoration work and we will always be diligent to customize our repair to your vision.
Our experts evaluate for soft or dry rot ridden wood and work to find the extent of and replace these pieces of wood with new. With our in-house design capabilities, we have removed entire interiors of boats, designed and fabricated new interiors, or simply added to or subtracted from the existing interiors.
The projects we work on range from small repairs or replacement of a small fractured piece of wood or plank, or go as far as to remove and replace an entire bottom and bottom frames, or to remove and replace entire hull side or transom frames and planking.
Our team also uses epoxy resins and fiberglass cloth to cover the entire bottom of boats when situations warrant and our clients prefer a method other than replacement of the wood structures to repair excessive leakage and loss of structural support.
Refinishing
There’s nothing like a new finish to breathe life back into a classic wood boat and make it turn heads like she used to. We’re the professionals at stunning boat makeovers. Trust us to make her shipshape once again.
The Coeur Custom team is comprised of true craftsmen that are very competent and comfortable with many finishing techniques. From hand applied paints, varnishes or epoxies, to the spray application of high-end catalyzed yacht finishes – we have you covered.
Clients trust us with all sizes of work, from the repair of a small dent or scratch to complete removal of finishes and reapplying. We cater to your requests whether it’s a finish not designed to be entered in a boat show, or if you want a pristine finish worthy of national recognition. Either way and anywhere in between, the finishes are applied to look beautiful and applied to last utilizing techniques proven with many years of experience and a successful long-running track record.
We can also provide services to repair or replace boat names and registration numbers. Our team uses various mediums, such as vinyl materials, hand painting, vinyl overlaid with gold or silver leaf or the process of hand applying gold or silver leaf materials directly to the finishes to get the look you want.
Let us restore your damaged or unwanted upholstery coverings. Our team has the professional experience and expertise to analyze the condition of the upholstery products, their structure, construction, and the padding, and to develop a solution for the replacement products to meet your vision.
This may be something as simple as a repair of a scratch or tear to total replacement or fabrication of an entire interior. Coeur Custom also has experience with many flooring materials, such as teak and mahogany woods, woven plastic flooring materials, linoleum, vinyl, and carpets.

Next - Boat Models
Passion, precision & performance.
View our current Coeur Custom models that can be completely customized to your desires or use them as inspiration for something completely new and original.

- New Sailboats
- Sailboats 21-30ft
- Sailboats 31-35ft
- Sailboats 36-40ft
- Sailboats Over 40ft
- Sailboats Under 21feet
- used_sailboats
- Apps and Computer Programs
- Communications
- Fishfinders
- Handheld Electronics
- Plotters MFDS Rradar
- Wind, Speed & Depth Instruments
- Anchoring Mooring
- Running Rigging
- Sails Canvas
- Standing Rigging
- Diesel Engines
- Off Grid Energy
- Cleaning Waxing
- DIY Projects
- Repair, Tools & Materials
- Spare Parts
- Tools & Gadgets
- Cabin Comfort
- Ventilation
- Footwear Apparel
- Foul Weather Gear
- Mailport & PS Advisor
- Inside Practical Sailor Blog
- Activate My Web Access
- Reset Password
- Customer Service

- Free Newsletter
What You Can Learn on a Quick Test Sail

Cabo Rico’s Classic Cutter

Bob Perrys Salty Tayana 37-Footer Boat Review

Tartan 30: An Affordable Classic

Preparing Yourself for Solo Sailing

Your New Feature-Packed VHF Radio

Preparing A Boat to Sail Solo

Solar Panels: Go Rigid If You have the Space…

When Should We Retire Dyneema Stays and Running Rigging?

Rethinking MOB Prevention

Top-notch Wind Indicators

The Everlasting Multihull Trampoline

Taking Care of Your 12-Volt Lead-Acid Battery Bank

Hassle-free Pumpouts

What Your Boat and the Baltimore Super Container Ship May Have…

Check Your Shorepower System for Hidden Dangers

Waste Not is the Rule. But How Do We Get There?

How to Handle the Head

The Day Sailor’s First-Aid Kit

Choosing and Securing Seat Cushions

How to Select Crew for a Passage or Delivery

Re-sealing the Seams on Waterproof Fabrics

Waxing and Polishing Your Boat

Reducing Engine Room Noise

Tricks and Tips to Forming Do-it-yourself Rigging Terminals

Marine Toilet Maintenance Tips

Learning to Live with Plastic Boat Bits
- Boat Maintenance
Step-by-Step Deck Core Repair

Last month we looked at the effectiveness of injecting resin to repair damaged core sections (see “ Can Glue Injection Fix Rotten Core ,” PS July 2018. This month we’ll review the more robust repair option—replacing the bad core.
The factory skimped on resin when laying up the internal skin of the anchor locker hatch on our Corsair F-24 test boat. The goal was to save weight, but the result was hundreds of pinholes, which over the course of thousands of warming and cooling cycles, sucked in a substantial volume of humid anchor locker air. The core became damp, bacteria moved in, and the balsa decayed to the consistency of garden mulch. Small wonder the hatch bent noticeably under foot.
Fortunately, the skins had not yet cracked. The other positive was that the hatch could be taken home for renovation, and that makes any job easier.
When repairing deck core, work can proceed from either the interior side or exterior side. Working from the exterior means your repair will need to match surrounding skin, whereas interior work is usually hidden from view.
For deck repairs, working from the outside means that gravity is on your side. The old core doesn’t land on your face as you remove it, and bonding in new core material is straightforward.
Working from the inside requires removing interior liners and modifying your laminating technique. Larger jobs tend to favor working from above, while small jobs go faster from inside. It all depends on geometry. In our case, we just flipped the cover over.
We cut away the skin using delicate, shallow cuts with an angle grinder. A vibrating multi-tool with a carbide blade is handy for small areas. The skin was then peeled back using a dry wall knife and a pair of pliers.
If it is undamaged and you are working from the top side, save this for later reinstallation. It will preserve the non-skid pattern and smooth curvature in the corners. Even when you are careful, thin skins are often destroyed during removal process, which means you’ll have to laminate a new one—something to consider when deciding which side to work from.
Whichever method you choose, be sure to wear gloves while laminating. Change the gloves every 10 minutes or whenever they begin to get sticky; if glass fibers are sticking to your fingers, you need new gloves. Likewise, have a stack of disposable brushes and polyethylene spreaders available.

Cleaning Out Old Core
Some of the old core will fall out, bringing comfort that you are doing the right thing. Some will come out with a scraper. We’ve found a wire cup brush, in either a cordless drill or angle grinder, makes fast work, with less risk of cutting into the second skin than with vigorous use of a scraper or chisel.
You don’t need to remove undamaged core; when it gets really difficult to remove, you’re probably done. We left some core, after determining that it was like new and that we couldn’t remove it without damaging the skin. Allow the panel to dry.

1. A cutting wheel was used to trim the outer laminate to access the core.

Bonding New Core
You can use either polyester or epoxy resin (see Inside PS blog post “ Epoxy Versus Polyester Resin ”). If you’ve worked with neither before, practice on some sample laminates.
Some sections could be solid glass instead of core. Lay those areas up with cloth or possibly Coosa Bluewater 26 (see “ The Multipurpose Core ,” PS February 2020). For cored areas, coat the sections of replacement core with resin thickened with colloidal silica to a peanut butter consistency. Press into place with a grooved laminating roller.
Use lightweight cores for overhead panels. Plywood is not recommended. Marine core is typically scored with kerfs and attached to a scrim backing so that it can follow curves. If the curve is concave, the kerfs will open the blind side, so be certain to apply enough thickened resin to fill these kerfs as they open.
There is no reason to apply core in large sections, since it is scored anyway. Small sections, generally not much bigger than 6 inches square, are easier to manipulate. Cut smaller pieces to fill the larger gaps, and then spread thickened resin over the entire area using a flexible spatula, forcing it into the remaining hair line cracks. Allow to cure.
Use 60-80 grit on an orbital sander (or a disk grinder with a very light touch) to sand the new core smooth. Even if you matched the original core thickness, there will be irregularities resulting from bumps of old resin and angles from the core.
Laminate a replacement skin, matching the original schedule. Several layers of 17-ounce biaxial cloth with ¾-ounce mat attached (1708), followed by a single layer of 6-ounce finish cloth is common on cruising boats. Smaller boats may use only a few layers of 6-ounce finish cloth. Bevel the core edges to a 10:1 taper.
From the Inside
If you are working from the inside on an overhead panel, lay the cloth on a plastic disposable work surface and pre-saturate the fiberglass cloth, using a squeegee and roller, before placing on the ceiling. Some like to do this on a bench outside the boat and carry the sections in on waxed paper.
Don’t attempt to saturate the cloth directly on the surface; the resin will drip all over you and the glass will keep falling off.
Rub the pre-wetted laminate down firmly with gloved hands and a roller until it begins to cure. If applying more than a few layers overhead, allow the initial layers to gel. This prevents the whole mess from falling off in a sticky pile. Allow to cure.
Use vinegar to wipe surrounding areas that were not covered with drop cloths, being careful not to get any on the bond areas.
From the Outside
If you are reusing the old deck skin, carefully grind the core to fit the original skin, test fitting frequently. You will add thickened resin to bond and fill low areas, but there can’t be any high spots and it is best if the fit is very close.
Unlike a new skin, you won’t be able to roll it in for a perfect bond. This is why we dislike this method other than for very small sections. Press the skin in place, weight it down it with sand bags, and hope for the best.
Finishing and Cleanup
If you are working from the inside, all that remains is to grind it reasonably smooth and replace the liner or paint to match. If you worked from the outside, bevel the joints 10:1 with a hand grinder, add fiberglass tape to match the original thickness, and finish with gel coat or paint.
Clean your tools with vinegar. As long as the cure is not too far alone, vinegar stops the chemical reaction and eliminates the stickiness, allowing clean-up with soap, water, and a brush.
PS Technical Editor Drew Frye is the author of “ Circumnavigating the Delmarva—a Guide for the Shoal Draft Sailor ,” available for Kindle through Amazon.
RELATED ARTICLES MORE FROM AUTHOR
What your boat and the baltimore super container ship may have in common.
Injectadeck has very specific instructions, it looks like they used it like Git’Rot’ against wet wood? That was not a proper demonstration of the process of injectadeck. I have been using it for three years on several boats. The aforementioned product doesn’t work at all nothing can soak into wet wood or stick to its slime. Injectadeck adheres fiberglass layers together very well, displaces water, hardens in a void.
(Inject-a-Deck was reviewed in “Can Glue Injection Fix a Rotten Core,” July 2020)
Inject-a-Deck can work. There is no question it can firm up a mushy deck and that it is much easier to use than other methods. But we tested it a number of times, in several ways (wet and dry) and concluded that other products were stronger and better suited limited repairs and areas where great strength was required. In fact, we warmed up to the idea that injecting epoxy and Git-Rot is probably not the best method for larger areas of extensive damamge or rot, that the repair materials does not need to be strong like epoxy, only as strong as the original core, and that foaming products, including the original Gorilla Glue, have considerable advantages.
The best repair method is core replacement, but even that method must be approached circumspectly. We recently reviewed a “professional” repair to a PS test boat and found that the contractor had made critical errors, resulting in a repair that was far weaker than what he started with. He hid his tracks well enough that any surveyor could miss the hidden damamge. The result was a sudden failure of the core repair underway. * He reused the original skins by gluing and fairing the edges together, without scarfing in reinforcing lamination. Invisible joints that were very weak. * Cut through critical carbon fiber reinforcements buried within the laminate and did not replaced them. You never know what is inside the deck, and it apparently did not concern him when he got black sawdust, or when he pealed the deck up and saw the carbon plate.
So injecting foam, such as Inject-a-Deck can fall within the “do no harm” philosophy. You won’t hurt anything. It would have been much better, in this case, if the contractor had just injected foam, rather than cut through good laminate he was not committed to properly replacing. Sometimes you don’t know what you are getting into.
Bacteria do not cause core decay. The statement: “The core became damp, bacteria moved in, and the balsa decayed to the consistency of garden mulch.” is misleading because 1) the damage is caused by fungi, not bacteria, and 2) the fungal spores have inhabited the balsa ever since it was changed from being a tree to being small blocks. The spores are patiently waiting for the substrate to become damp to the degree that they can become active.
Good point on the fungi, although that is only true to a point. Rot results from a mixed community of bacteria and fungi, the fungi being more active in the presence of oxygen and during the initiation of rot, and the bacteria becoming more prevalent and active in anaerobic conditions (prevalent in cores) and as the core gradually becomes mulch. But yes, most of the damage is caused by fungi. I took too much literary license, and I knew better. In the end… wood rots. The distinction is mostly relevant when choosing a rot-preventative.
A good read. I’ve done everything from below with Vinylester resin. Of course, you need an excellent full facemask with the right cartridges. Good to know about the “professional” repair mentioned in the above comment. I’ve been “peg boarding” from the inside to dry out the core which did dry quite well with heat lamps (and a temperature gun to not get over 110 degrees). However, if the fiberglass flexed when pushing the drill to drill the hole, I just peeled that area and replaced the core. This winter I will work on the doghouse and this method of looking for some flex won’t work since the interior doghouse glass is thicker. Not sure what I will do.
The softening temperature of vinyl cores is about 190F and epoxy, gelcoat, and vinylester are are a bit higher than that. I would think 150F would be a safe temperature for drying core. I’m sure decks pass 110F in the sun all the time!
Drew I agree, and it’s good to know what you just wrote. And to your point on a hot sunny day in late August here in RI, in the afternoon, the deck was 116F on my temp. gun. The boat I’m working on came from Lake Lanier, Georgia, I’m sure it hit 110 air temp…
LEAVE A REPLY Cancel reply
Log in to leave a comment
Latest Videos

The Great Loop – The Basics

Bottom Paint Showdown – Six Paints, One Winner!

Tartan 30 | Boat Review

Fuel Contamination? The Baltimore Francis Key Bridge Collapse
- Privacy Policy
- Do Not Sell My Personal Information
- Online Account Activation
- Privacy Manager
Important Registration Information - 2024 Registration
Wooden Boat Repair & Restoration Methods
Strategies and techniques for common wooden boat repairs..
Walt Ansel is a long-time native of Mystic, Connecticut. He grew up running wild at Mystic Seaport Museum Shipyard and is still there after 35 years. Walt began sweeping out the Shipyard shop when he was 14; while he still does pick up a broom, he has graduated on to doing other jobs as well. One of his very favorite projects was building a Beetle whaleboat with his retired boatbuilder father, Willits Ansel, in 2002. Walt supervised the restoration of the Eatern rigged dragger ROANN and was able to go to sea on her for the Museum. Walt also worked on the whale ship CHARLES W. MORGAN on both her 1980’s and 2013 restorations and got the opportunity to sail with the whales on Stellwagan Bank on the MORGAN’s 38th voyage. Walt is married to Carol, a school librarian who is passionate about photographing birds and the seacoast. Together they enjoy birding, cruising in boats, and English country dancing as done in the time of Jane Austen. They are proud parents of Douglas, a filmmaker, and Evelyn, an author and ship caulker. Walt has built and restored boats at WoodenBoat School for 16 years.
Matt Morello grew up in Middletown, Connecticut. After high school he followed a passion for art and painting and attended the Hartford Art School in Hartford. During his time there, he was introduced to an ongoing restoration of an Atkin double-ender, and spent countless hours drawing and studying boats at the Mystic Seaport Museum. After building several models and learning to loft on his basement floor, Matt enrolled in the International Yacht Restoration School in Newport, Rhode Island. While a student there, he was involved in the restoration of a Herreshoff S-boat led by instructor Warren Barker. At the same time, Matt also interned at the Henry B. DuPont Preservation Shipyard at Mystic Seaport under the guidance of Walt Ansel. Since 2014, Matt has worked with East Passage Boatwrights in Bristol, Rhode Island, where he has contributed his woodworking and boatbuilding skills to many wooden boats both large and small, most notably the 1935 Olin Stephens–designed SANTANA. He now lives in Providence, Rhode Island, with his girlfriend Evelyn and their sardine-loving cat. Matt still draws and paints, and in his free time enjoys exploring the state on vintage bicycles he restores in their living room.
This course is appropriate for students with intermediate knowledge and skills. Confidence in using hand and power tools is required and previous experience is recommended. A working knowledge of sailing and confidence in soloing a small sailboat is required for waterfront courses.
This course involves a moderate level of activity throughout the week including: standing and working sometimes throughout the day, some hand planing or sanding, working on group projects that require occasional participation. Having adequate balance and agility to get in and out of boats on a moving float or other boats, ability to occasionally walk forward on the decks of larger boats.
This is a two-week course ending Friday
The repairing and rebuilding of wooden boats is a journey that can provide great personal satisfaction. In the process, you’ll become familiar with your boat’s intricate construction details, and come to appreciate the careful craftsmanship that transformed the original raw timber into the boat you love. Conquering the complications of “bringing her back” can be more rewarding than building new, especially when the result is to return a classic to its calling—sailing, cruising, rowing, or fishing.
WoodenBoat School has been offering this course for many years, and we’ve tackled a number of interesting, sometimes challenging, boat projects including a 24’ steam launch, a 25’ Henry Scheel centerboard cruising sloop, and a 13’ catboat. This season we offer students the chance to join master shipwright Walt Ansel and boatbuilder Matt Morello for the repair of an original Herreshoff 12 ½ built in 1928 (hull #1087) and a Cape Cod catboat.
During these two weeks, Walt and Matt will give several talks and demonstrations covering boatbuilding tools, appropriate woods, fastening, caulking, and tool sharpening, Careful disassembly, another important repair and restoration skill, will be taught and practiced. For anyone who’s looking at their own repair projects, these two weeks will be enlightening. Come join us for a dynamic and busy session as we bring two wonderful classics back to life.
This course is appropriate for students with intermediate knowledge and skills. Confidence in using hand and power tools is required and previous experience is recommended.
This course involves a moderate level of activity throughout the week including: standing and working sometimes throughout the day, some hand planing or sanding, working on group projects that require occasional participation.
What Our Students Are Saying
I’ve never had an instructor at WoodenBoat School who was not excellent but Walt Ansel is a step above. He’s an exceptional teacher, premier shipwright, and dedicated craftsman.
M.D., Everglade City, Florida

Register For This Course
Courses fill quickly, so don't delay if this is a course you want to take.
Related Courses
Build your own tenderly dinghy, build your own stitch-and-glue kayak, build your own sassafras canoe, build your own northeaster dory.

Wood Treatment and Preservation Products
We know wood rot and how to repair it!
Home > Wooden Boats- General Principles

General Principles for Wooden Boat Repair
Repairing and maintaining wooden boats involves many variables and procedures. We offer the following brief commentary as a very general introductory guide, and some comments regarding the use of preservatives, resins and coatings, and about the products we sell.
Our Research Lab… My wife and I bought Delta in 1995. There was a significant amount of rot in the horn timber which was a challenge. Delta became our research lab for the products we sell. Delta stays alive and functional through the magic of polymer chemistry. Read more about the repair of Delta’s Horn Timber: Fixing It On The Cheap. Dr. Rot
Most of the accumulated information on wood boat construction, repair and restoration is in books, and not on the web. At The Rot Doctor™ we do our best to provide you with guidelines, but we, like most others on the web, are market-driven and promote our products when appropriate. We try always to be honest and will recommend other products if we believe they are suitable. When contemplating wooden boat repairs, especially if they are structural, go to the library and check out books that will help guide you.

Where books are deficient is in the area of new chemistry and techniques that can speed up the repair/restoration/maintenance process. Most of the books were written and printed many years ago, before the newer products were developed. Here the web can be valuable. Some products are unique and produce outstanding results, such as the S-1™ Clear Penetrating Epoxy Sealer , and there are always new coatings and sealants available. Most will out-perform the older, established product if they are applied to properly prepared surfaces exactly as the manufacturer recommends. Here the more complete and enlightened website can be valuable to you.
The factors that make wooden boats endure or decay are complicated, and trying to describe them as they interrelate to any particular boat is difficult. We at The Rot Doctor™ have a significant amount of experience with old wood boats and their repair. We will help you when we can, and the more detailed information that you can give us will result in more complete replies. We will consult by phone or email, and we try and answer all email within 24 hours. We will examine photographs if they are sent to us as jpeg images via email. Here, in very general terms, are some of the factors that contribute to the condition and durability of wooden boats:
The age of the boat: Older boats will be more likely to have wood deterioration problems than newer boats. There are exceptions, but this is generally true.
The type of construction: Certain types of construction, such as carvel, are more likely to experience wood deterioration and structural problems than other types of construction, such as strip-planked. We list the basic construction techniques below.
The type of wood: Some woods, such as old growth teak, are almost totally resistant to deterioration, while others, such as white pine, will rot in an instant if conditions are right. Woods that used to be fairly rot-resistant, such as cedar, rarely are anymore. This is because the new wood is usually farm-grown and lacks the accumulated resins and tightness of grain that gave old growth wood its longevity.
The boat’s environment: Certain areas of the country, such as the Southeast, have warm weather, warm water, and lots of rain and humidity. These are the factors that encourage and support fungal and bacterial growth in wood. Other areas, such as the Southwest, have colder water and less moisture, and so wood deterioration is not as prevalent. Damage to the wood and the coatings by UV light is prevalent wherever there are long periods of bright sunlight.
The care of the boat: How the boat is used and stored is a significant factor in the longevity of the boat. Wooden boats that are stored under open cover will have significantly fewer wood deterioration problems than boats that are stored outdoors in open slips. Boats that allow free air movement through the interior will have fewer problems than boats that are tightly covered with canvas tarps. Boats that are stored in salt water will tend to have less rot than boats in fresh water. Boats that are inspected closely and treated with appropriate chemistry will have fewer wood problems than boats that are just used and stored.
Be aware of the factors that will encourage or discourage wood deterioration, and act accordingly.
Types of Construction

Click to enlarge
Carvel: With this technique the planks are fit together edge-against-edge. They do not overlap each other. They are fixed at the frames and the outside of the hull is smooth. The edges are beveled so that they meet (or almost meet) at the inside, leaving an open seam on the outside that is generally caulked with cotton and then filled with a filler to obtain a smooth surface. This was one of the earliest methods of boat construction and is still sometimes used today. The wood in carvel boats was intended to move, and will expand and contract as the hull absorbs and emits moisture and as temperatures change. The integrity of the framing and the fasteners is of the utmost importance. New carvel-planked boats will usually run and sail without leaking, but older boats will almost always leak at least a little, and sometimes a lot.

Double-planked: The hull is constructed of two layers of edge-butted planks, one layer on a diagonal to the other and almost always with a mastic or painted canvas between the planking layers to prevent leakage. This was a common method of construction for Chris Craft before they converted to fiberglass. The double planking added some structural rigidity to the hull, but hull integrity still depends on the integrity of the fasteners and the framing. There is also the cold molding method of construction which is basically a refined modification of the double planked method, using thin sheets of wood bonded to each other in complex curves.

Lapstrake: The exterior edges of lightweight planks are overlapped slightly, and then beveled and riveted or screwed to frames, giving the hull itself an integrated structure, allowing some reduction in interior framing as compared to carvel construction. This technique was developed in Scandinavia over 1000 years ago, and is still used today in contemporary boat building. The Lyman line was one of the most famous of the lapstrake constructed boats in the United States, and many Lyman boats are still in use.

Plywood: Plywood boats became popular in the 50’s and are still commonly built today, usually by small shops and individuals. Plywood boats generally have relatively light interior framing and a more integrated structure. There are a number of different methods of fastening the plywood, from screws to polymer adhesives to “stitch-and-glue”. Good plywood is an excellent material for boat construction, but is vulnerable to rot, deterioration, and delamination.

Strip-planked: Strip-planked boats also became popular in the 50’s and are still being built by contemporary boat builders. Square or almost square strips of wood are laid over relatively light framing and bonded together edge-to-edge, originally with marine adhesives such as resorcinol but more recently with epoxies. They are the most watertight of wood constructed boats, and relatively easy to repair. The strip-planking gives the hull great structural rigidity. These boats are sometimes fiberglass covered, an idea that works better in theory than it often does in fact.
Resin over wood: In new construction this is almost always resin and fiberglass cloth over strip-planked or plywood boats. It can work well if epoxy resin is used and applied to new or good wood under proper conditions. There have been many attempts to coat old hulls with cloth and resin, and most of the time they result in failure. Wood moves and resin doesn’t.
Crusse’n Classics Antique & Classic Wooden Boat Restoration
At Crusse’n Classics, we have been restoring antique and classic wooden boats for more than twenty years. We restore all types of wooden boats, including Chris Craft, Century, Correct Craft, and more. We have worked with clients across the U.S. and other parts of the world to restore their boats to their original working condition. In addition to restoring wood boats, we also service and repair classic glass boats, outboard boats, and service and repair engines, interiors, and trailers.

If you have a boat in need of repair, contact us to see how we can help. You can browse our Restoration Projects to see some of the boats we have restored and the possibilities that exist, no matter the current condition of your boat.
We also restore classic and unique cars and trucks, and sell brake kits for 1948 -1970 Chevy Trucks. In addition, we build custom Stand Up Paddleboards & Kayaks, and our own line of custom boats, Crusse’n Craft.
Call us at 704-351-8994 or email us .

The $tingy Sailor
Diy trailerable sailboat restoration and improvement without throwing your budget overboard.
How To Repair a Rudder
Rudders damage easily. Although they work similar to a keel, they aren’t nearly as tough. If you dry sail, the edges can accumulate nicks and dings in the fiberglass from loading and unloading. The rudders of some sailboats can hit the outboard motor’s propeller if you’re not careful. Add in accidental groundings, storage damage, and stress cracks and it doesn’t take much time in water to make the wooden core swell and damage the rudder even more. Without repairs, a weakened rudder can even break into pieces under stress. It pays to protect your rudder.
Before I continue, a bit of legal housekeeping. This post contains affiliate links. That means I receive a small commission if you make a purchase using those links. Those commissions help to pay the costs associated with running this site so that it stays free for everyone to enjoy. For a complete explanation of why I’m telling you this and how you can support this blog without paying more, please read my full disclosure .

If your rudder is showing any bare wood, has deep nicks in the edges, or has swelled and cracked the fiberglass at the edges, you should repair it while you still can. All of these kinds of damage are easily repairable by the do-it-yourselfer for a small fraction of the cost of a new rudder.
It’s just like doing auto body work
If you’ve ever done any auto body work, you know the goal is to build up and restore a smooth shape to damaged surfaces. It’s the same with your rudder but the finish quality doesn’t have to be as perfect.
Follow these steps to make your rudder smooth and watertight again:
1. Start with a 4″ handheld grinder or similar power tool to remove all of the rough and damaged fiberglass down to solid material. Also remove all damaged wood core material. This might seem overly aggressive but the repair won’t last unless it’s built on a solid foundation and a grinder will get you there fast. By removing the rudder’s skin, it will dry out faster.
2. Let the wooden core dry out as much as possible. You don’t want to trap moisture in the core where it will dry rot. If you lay up your sailboat for the off-season, that’s a good time to dry out your rudder. Finish the repair before the start of the next sailing season.
3. After the core has dried thoroughly, use a random orbital or similar power sander to feather the ground edges back a couple of inches all around and to remove any paint so that an epoxy patch will stick properly to the original fiberglass.

4. Mix some thickened West System or an equivalent epoxy and build up the ground and sanded areas to their original shape. Colloidal silica is a good thickener for this application.
5. With a power sander or sanding block, carefully smooth the patched areas to match the surrounding surfaces and edges.

7. Apply a barrier coat of one-part polyurethane or two-part (preferred) epoxy paint over the repaired areas.

6. Fill small cracks above the water line with Capt. Tolley’s Creeping Crack Cure .

7. Last, re-apply ablative paint or a polyurethane topcoat to match the rest of the rudder or hull. If you keep your sailboat in the water, ablative paint can minimize algae growth. If you dry sail or remove your rudder when you’re not sailing, ablative paint gives no benefit and will just transfer to everywhere you don’t want it. I reapplied ablative paint to this rudder but I sanded it off a year later and applied a gloss white polyurethane when Summer Dance got a different color bottom paint job .
8. Now is a good time to remove, clean, polish, and rebed all of the rudder hardware with butyl tape . If the tiller bushings are worn, read How to Replace Worn Tiller Bushings .
Now that you have a restored and sealed rudder, take good care of it and it will take good care of you!
Would you like to be notified when I publish more posts like this? Enter your email address below to subscribe to this blog and receive notifications of new posts by email. You will also receive occasional newsletters with exclusive info and deals only for subscribers and the password to the Downloads page. It’s free and you can unsubscribe at any time but almost nobody does!
Share this:
21 thoughts on “ how to repair a rudder ”.
Hello from the UK! The rudder on my Jaguar 22 is the pivoted type to cope with grounding when the keel is lifted. It’s made from dense dark wood (mahogany I think) and it weighs a TON! It worries me having all that weight hanging off the f/g transom plus the outboard – it flexes the hull… I’ve seen some of the Gucci lightweight racing replacements available in the States for mega-bucks, but I wondered if you’d ever considered making a replacement lightweight rudder $tingy-style from (say) stainless or aluminum frame,with glass fibre coverng over foam, or similar? It would be a fascinating project!
Keep up the good work!
Mike (Tamariu) Jag 22
Your description makes me wonder if a previous owner made your kick-up rudder blade himself. No factory C-22 rudder that I’ve ever heard of was made of hardwood. I can’t imagine why the UK builder would go to that expense and being a licensee of Catalina Yachts, they would be legally bound to stick to the factory designs, materials, and methods.
As a matter of fact, I do have tentative plans to make a balanced rudder similar to what you describe or possibly of solid, lightweight cedar, so stay tuned! $tingy
Sounds good – I’ll keep watching!
Great informative article. Enjoy all your postings, have learned a lot.
Has anyone ever made a new rudder solely out of wood?
I’ve seen one fella’s rudder that he made out of mahogany and it weighed a ton. Others have attempted to make balanced rudders to replace the stock one. Rudder Craft makes high performance replacement rudders but they’re pricey and they also aren’t class legal for racing. Building a balanced rudder with conventional techniques is on my to-do list so you might see it here someday!
Well, I am a novice sailer at best. I won’t be racing, so a little extra weight won’t hurt much. From the looks of the rudder I have, it is has a wooden core in it. I just aquired the sailboat with some restoration needed. The rudders bottom has the fiberglass rubbed off. I have access to some cedar planks the same size as current rudder, so I was thinking of a nice winter project. Boat stays trailered when not in use.
Cedar would be strong, lightweight, and rot resistant. Go for it and send me some pictures when you’re finished and I’ll add them to the Reader’s Gallery.
Here is a link that I hope will take you to my pictures of the Sage 17’s rudder system in the Google ‘Photos’ cloud: https://goo.gl/photos/ttvihZ2zxm5xsz58A (I prepared some comments before I searched for the photos and the text disappeared when I returned…maybe they got posted…)
I really appreciated and look forward to the clear and concise project posts!
Very nice. Can you describe how it works here? It looks like when you raise the tiller handle, the rod rotates the blade up and the bungee holds it in position. What did you make the blade out of, mahogany?
I think you understand it better than I do…and as described here:
http://sagemarine.us/sage_17.html (see tab on stern & rudder features)
As I recall, the Sage rep said it took some experimentation to get the balance just right for the length of and attachment points for the rod on blade and tiller. You will see the rudder is outsourced to another manufacturer…I wonder if they have branched out to other boats?! The blade is mahogany, they note…
It doesn’t look to like it would be that hard to replicated, if you have the capability to fabricate/locate stainless parts. I’ll be interested to read how you’d do it, when you’ve replicated a similar designed for your boat!
Ah, I understand now with your link to Sage Marine. I thought you made the rudder yourself.
I was planning to make a balanced, fixed-style rudder but now after seeing how yours is made, I just might make a kick-up rudder instead that will lock up for trailering!
You bet. Just a little payback for all your great info. If I hear back that J O Boatworks will customize the design to meet other boats, I’ll let you know!
Well, we are almost finished with the rudder out of cedar. Instead of one solid piece we had to use 3 pieces thick of varying lengths that we planed and glued together then molded and sanded then applied more that 10 coats of marine varnish. Hardware is basically all we have left. Only thing, we we got involved and forgot to take very many pictures until the almost the finished product…sorry I can’t figure out how to post a picture here…
Sounds fun, Jeff. Take the best pictures you can and enter the 2017 Stingy Sailor DIY Project Contest coming soon!
If you want to have a balanced kick-up rudder like JO Woodworking fabricates for the Sage, contact him from his website.
http://www.jowoodworks.com/archives/category/boat-parts/holder
We emailed numerous times to confirm he could get the system to work for my setup and pricing seems fair! I am hoping my tax refund can pay for one for my Venture 21!
Happy sailing in 2017!
Hey Stingy, another helpful post, thank you. I had my rudder snap off sailing day before yesterday thanks to rusted hardware.. Anyway you mentioned that you ended up sanding off the anti fouling paint, and as you know it is quite pricey and sold in quarts (way more than needed for rudder bottom half) so would you say that using it is a little overkill? Do you think the growth would be much more uncontrollable without using it? I’d rather save the $50 and skip the anti fouling paint if it’s not a massive difference in growth/cleaning. Thanks
Hi, Christian
If you leave your rudder in the water all the time, then antifoul paint will make it easier to keep clean of marine growth. If you have a kick-up rudder and retract it when not sailing or, like I do, take the standard rudder off unless you’re sailing, then the extra paint is overkill. I connect my tiller with a quick release pin so it takes less than a minute to mount and dismount. This way, I’m able to keep my rudder clean and drag-free. I just wipe it down occasionally. It also minimizes the amount of water that can penetrate into the core through pintle holes and cracks and weaken it, which can result in catastrophic failure like you’ve experienced.
If your rudder wasn’t badly softened from water intrusion, then you should carefully question why it broke. If you weren’t in a dangerously rough sea state but had extreme, prolonged weather helm in normal conditions, then you might not have balanced the sail trim properly. When properly trimmed, you should be able to steer with minimal effort in all but the worst conditions.
Hope that helps, $tingy
Hi there, I have a C-lark with an all-wood rudder that is starting to crack around the gudgeon (I think that is the correct term). The cracks are starting at the top and running parallel to the long axis of the rudder. I haven’t been successful finding an appropriate used replacement, so am thinking about trying to fix this one. With a few of the cracks full width (not length) at the top is it worth trying to re-work this one, or would it be better to start fresh using this one as a blue print? If so, any resources you could recommend on materials and considerations? Thanks!
I very nearly got a derelict C-Lark for free so I know what a fun little boat that is. I’m a little confused about the cracks you describe as running along the long axis of the rudder but also full width. At any rate, I’m a big proponent of fixing anything that can be fixed. Your rudder might take some creative joinery to make it solid again but you have nothing to lose by trying, right? Depending on the extent of the cracks, I would either use waterproof glue and clamp the cracks or cut the rudder along the cracks, square the pieces up on a joiner, and then glue and clamp it together again, possibly using dowels or biscuits for additional strength.
If the damage is too extensive to repair, there are lots of materials that make a good rudder. Probably the easiest is either a solid piece of HDPE, which would be impervious to moisture and should last forever but require a lot of hand shaping or clear grain cedar with a fiberglass shell, which would be strong and lightweight and easier to fabricate.
It would make a great DIY project, so keep us updated on your progress, $tingy
Thanks, I think I am going to give a go at making a new rudder with cedar and fiberglass as you suggested. I have a friend with some skills who is going to lend a hand, but I will take photos and post our progress. Thanks!
Leave a comment Cancel reply
This site uses Akismet to reduce spam. Learn how your comment data is processed .

- Already have a WordPress.com account? Log in now.
- Subscribe Subscribed
- Copy shortlink
- Report this content
- View post in Reader
- Manage subscriptions
- Collapse this bar
FAS | Nuke | Guide | Russia | Industry |||| Index | Search |
Khabarovsk shipbuilding yard.

Sources and Methods
Find Info For
- Current Students
- Prospective Students
- Research and Partnerships
- Entrepreneurship and Commercialization
Quick Links
- Current issue
- Faculty and Staff
- Purdue Pursuits
- Photo Galleries
- Submit News
April 16, 2024
Plan ahead for summer Grant Street Parking Garage closure; Wood Street Parking Garage to remain available for permit holders and visitors

The Grant Street Parking Garage will be closed May 14-Aug. 9, and the Wood Street Parking Garage will support permit and visitor parking during that time. (Purdue University photo).
The Grant Street Parking Garage will close starting May 14 so repair work can be completed over the summer. It is expected to reopen ahead of the fall semester on Aug. 9.
Throughout the closure, license plate recognition functionality and garage access cards will be disabled. Limited Union Club Hotel guest parking will remain available in the Grant Street Parking Garage, and locations will shift as work continues.
Faculty, staff, select students and campus visitors should plan ahead for temporary parking accommodations as follows:
- A, reserve and university vehicle permit holders: Alternative A permit, reserve permit and university vehicle permit parking is available in the nearby Wood Street Parking Garage or in other locations as identified on the downloadable parking map .
- Campus visitors: ParkMobile spaces in the Wood Street Parking Garage are available; see below.
Campus visitors and others with short-term parking needs should use existing and additional temporary ParkMobile spaces in the Wood Street Parking Garage for the summer. Download the ParkMobile app ( Google Play / Apple Store ), register and create an account including payment information to get started. Upon parking in a non-reserved space within the garage, select the desired length of time and complete payment through the app. Users have the ability to increase the amount of paid time via the ParkMobile app and do not need to return to the garage to complete that step. Hourly rates will mirror those of the Grant Street Parking Garage for the summer.
A brief video explains how to use ParkMobile , and a map of all ParkMobile spaces is available online or within the app.
To accommodate these changes, the Wood Street Parking Garage will be enforced 24/7 between May 14 and Aug. 9. Free after-hours or weekend parking will be unavailable in this location over the summer.
Parking Facilities staff are available until 4:30 p.m. Monday through Friday at 765-494-9497 or [email protected] , with the lobby at 700 Ahlers Drive open until 4 p.m.
Faculty-Staff News
Communication.
- OneCampus Portal
- Brightspace
- BoilerConnect
- Human Resources
- Colleges and Schools
Info for Staff
- Purdue Moves
- Board of Trustees
- University Senate
- Center for Healthy Living
- Information Technology
- Ethics & Compliance
- Campus Disruptions
Purdue University, 610 Purdue Mall, West Lafayette, IN 47907, (765) 494-4600
© 2015-24 Purdue University | An equal access/equal opportunity university | Copyright Complaints | Maintained by Office of Strategic Communications
Trouble with this page? Disability-related accessibility issue? Please contact News Service at [email protected] .
- Popular Professionals
- Design & Planning
- Construction & Renovation
- Finishes & Fixtures
- Landscaping & Outdoor
- Systems & Appliances
- Interior Designers & Decorators
- Architects & Building Designers
- Design-Build Firms
- Kitchen & Bathroom Designers
- General Contractors
- Kitchen & Bathroom Remodelers
- Home Builders
- Roofing & Gutters
- Cabinets & Cabinetry
- Tile & Stone
- Hardwood Flooring Dealers
- Landscape Contractors
- Landscape Architects & Landscape Designers
- Home Stagers
- Swimming Pool Builders
- Lighting Designers and Suppliers
- 3D Rendering
- Sustainable Design
- Basement Design
- Architectural Design
- Universal Design
- Energy-Efficient Homes
- Multigenerational Homes
- House Plans
- Home Remodeling
- Home Additions
- Green Building
- Garage Building
- New Home Construction
- Basement Remodeling
- Stair & Railing Contractors
- Cabinetry & Cabinet Makers
- Roofing & Gutter Contractors
- Window Contractors
- Exterior & Siding Contractors
- Carpet Contractors
- Carpet Installation
- Flooring Contractors
- Wood Floor Refinishing
- Tile Installation
- Custom Countertops
- Quartz Countertops
- Cabinet Refinishing
- Custom Bathroom Vanities
- Finish Carpentry
- Cabinet Repair
- Custom Windows
- Window Treatment Services
- Window Repair
- Fireplace Contractors
- Paint & Wall Covering Dealers
- Door Contractors
- Glass & Shower Door Contractors
- Landscape Construction
- Land Clearing
- Garden & Landscape Supplies
- Deck & Patio Builders
- Deck Repair
- Patio Design
- Stone, Pavers, & Concrete
- Paver Installation
- Driveway & Paving Contractors
- Driveway Repair
- Asphalt Paving
- Garage Door Repair
- Fence Contractors
- Fence Installation
- Gate Repair
- Pergola Construction
- Spa & Pool Maintenance
- Swimming Pool Contractors
- Hot Tub Installation
- HVAC Contractors
- Electricians
- Appliance Services
- Solar Energy Contractors
- Outdoor Lighting Installation
- Landscape Lighting Installation
- Outdoor Lighting & Audio/Visual Specialists
- Home Theater & Home Automation Services
- Handyman Services
- Closet Designers
- Professional Organizers
- Furniture & Accessories Retailers
- Furniture Repair & Upholstery Services
- Specialty Contractors
- Color Consulting
- Wine Cellar Designers & Builders
- Home Inspection
- Custom Artists
- Columbus, OH Painters
- New York City, NY Landscapers
- San Diego, CA Bathroom Remodelers
- Minneapolis, MN Architects
- Portland, OR Tile Installers
- Kansas City, MO Flooring Contractors
- Denver, CO Countertop Installers
- San Francisco, CA New Home Builders
- Rugs & Decor
- Home Improvement
- Kitchen & Tabletop
- Bathroom Vanities
- Bathroom Vanity Lighting
- Bathroom Mirrors
- Bathroom Fixtures
- Nightstands & Bedside Tables
- Kitchen & Dining
- Bar Stools & Counter Stools
- Dining Chairs
- Dining Tables
- Buffets and Sideboards
- Kitchen Fixtures
- Wall Mirrors
- Living Room
- Armchairs & Accent Chairs
- Coffee & Accent Tables
- Sofas & Sectionals
- Media Storage
- Patio & Outdoor Furniture
- Outdoor Lighting
- Ceiling Lighting
- Chandeliers
- Pendant Lighting
- Wall Sconces
- Desks & Hutches
- Office Chairs
- View All Products
- Designer Picks
- Side & End Tables
- Console Tables
- Living Room Sets
- Chaise Lounges
- Ottomans & Poufs
- Bedroom Furniture
- Nightstands
- Bedroom Sets
- Dining Room Sets
- Sideboards & Buffets
- File Cabinets
- Room Dividers
- Furniture Sale
- Trending in Furniture
- View All Furniture
- Bath Vanities
- Single Vanities
- Double Vanities
- Small Vanities
- Transitional Vanities
- Modern Vanities
- Houzz Curated Vanities
- Best Selling Vanities
- Bathroom Vanity Mirrors
- Medicine Cabinets
- Bathroom Faucets
- Bathroom Sinks
- Shower Doors
- Showerheads & Body Sprays
- Bathroom Accessories
- Bathroom Storage
- Trending in Bath
- View All Bath
- Houzz x Jennifer Kizzee
- Houzz x Motivo Home
- How to Choose a Bathroom Vanity

- Patio Furniture
- Outdoor Dining Furniture
- Outdoor Lounge Furniture
- Outdoor Chairs
- Adirondack Chairs
- Outdoor Bar Furniture
- Outdoor Benches
- Wall Lights & Sconces
- Outdoor Flush-Mounts
- Landscape Lighting
- Outdoor Flood & Spot Lights
- Outdoor Decor
- Outdoor Rugs
- Outdoor Cushions & Pillows
- Patio Umbrellas
- Lawn & Garden
- Garden Statues & Yard Art
- Planters & Pots
- Outdoor Sale
- Trending in Outdoor
- View All Outdoor
- 8 x 10 Rugs
- 9 x 12 Rugs
- Hall & Stair Runners
- Home Decor & Accents
- Pillows & Throws
- Decorative Storage
- Faux Florals
- Wall Panels
- Window Treatments
- Curtain Rods
- Blackout Curtains
- Blinds & Shades
- Rugs & Decor Sale
- Trending in Rugs & Decor
- View All Rugs & Decor
- Pendant Lights
- Flush-Mounts
- Ceiling Fans
- Track Lighting
- Wall Lighting
- Swing Arm Wall Lights
- Display Lighting
- Table Lamps
- Floor Lamps
- Lamp Shades
- Lighting Sale
- Trending in Lighting
- View All Lighting
- Bathroom Remodel
- Kitchen Remodel
- Kitchen Faucets
- Kitchen Sinks
- Major Kitchen Appliances
- Cabinet Hardware
- Backsplash Tile
- Mosaic Tile
- Wall & Floor Tile
- Accent, Trim & Border Tile
- Whole House Remodel
- Heating & Cooling
- Building Materials
- Front Doors
- Interior Doors
- Home Improvement Sale
- Trending in Home Improvement
- View All Home Improvement
- Cups & Glassware
- Kitchen & Table Linens
- Kitchen Storage and Org
- Kitchen Islands & Carts
- Food Containers & Canisters
- Pantry & Cabinet Organizers
- Kitchen Appliances
- Gas & Electric Ranges
- Range Hoods & Vents
- Beer & Wine Refrigerators
- Small Kitchen Appliances
- Cookware & Bakeware
- Tools & Gadgets
- Kitchen & Tabletop Sale
- Trending in Kitchen & Tabletop
- View All Kitchen & Tabletop
- Storage & Organization
- Baby & Kids

- View all photos
- Dining Room
- Breakfast Nook
- Family Room
- Bed & Bath
- Powder Room
- Storage & Closet
- Outdoor Kitchen
- Bar & Wine
- Wine Cellar
- Home Office
- Popular Design Ideas
- Kitchen Backsplash
- Deck Railing
- Privacy Fence
- Small Closet
- Stories and Guides
- Popular Stories
- Renovation Cost Guides
- Fence Installation Cost Guide
- Window Installation Cost Guide
- Discussions
- Design Dilemmas
- Before & After
- Houzz Research
- View all pros
- View all services
- View all products
- View all sales
- Living Room Chairs
- Dining Room Furniture
- Coffee Tables
- Home Office Furniture
- Join as a Pro
- Interior Design Software
- Project Management
- Custom Website
- Lead Generation
- Invoicing & Billing
- Landscape Contractor Software
- General Contractor Software
- Remodeler Software
- Builder Software
- Roofer Software
- Architect Software
- Takeoff Software
- Lumber & Framing Takeoffs
- Steel Takeoffs
- Concrete Takeoffs
- Drywall Takeoffs
- Insulation Takeoffs
- Stories & Guides
- LATEST FROM HOUZZ
- HOUZZ DISCUSSIONS
- SHOP KITCHEN & DINING
- Kitchen & Dining Furniture
- Sinks & Faucets
- Kitchen Cabinets & Storage
- Knobs & Pulls
- Kitchen Knives
- KITCHEN PHOTOS
- FIND KITCHEN PROS
- Bath Accessories
- Bath Linens
- BATH PHOTOS
- FIND BATH PROS
- SHOP BEDROOM
- Beds & Headboards
- Bedroom Decor
- Closet Storage
- Bedroom Vanities
- BEDROOM PHOTOS
- Kids' Room
- FIND DESIGN PROS
- SHOP LIVING
- Fireplaces & Accessories
- LIVING PHOTOS
- SHOP OUTDOOR
- Pool & Spa
- Backyard Play
- OUTDOOR PHOTOS
- FIND LANDSCAPING PROS
- SHOP LIGHTING
- Bathroom & Vanity
- Flush Mounts
- Kitchen & Cabinet
- Outdoor Wall Lights
- Outdoor Hanging Lights
- Kids' Lighting
- Decorative Accents
- Artificial Flowers & Plants
- Decorative Objects
- Screens & Room Dividers
- Wall Shelves
- About Houzz
- Houzz Credit Cards
- Privacy & Notice
- Cookie Policy
- Your Privacy Choices
- Mobile Apps
- Copyright & Trademark
- For Professionals
- Houzz vs. Houzz Pro
- Houzz Pro vs. Ivy
- Houzz Pro Advertising Reviews
- Houzz Pro 3D Floor Planner Reviews
- Trade Program
- Buttons & Badges
- Your Orders
- Shipping & Delivery
- Return Policy
- Houzz Canada
- Review Professionals
- Suggested Professionals
- Accessibility
- Houzz Support
- COUNTRY COUNTRY
Local Carpenters in Khabarovsk
Location (1).
- Use My Current Location
Popular Locations
- Albuquerque
- Cedar Rapids
- Grand Rapids
- Indianapolis
- Jacksonville
- Kansas City
- Little Rock
- Los Angeles
- Minneapolis
- New Orleans
- Oklahoma City
- Orange County
- Philadelphia
- Portland Maine
- Salt Lake City
- San Francisco
- San Luis Obispo
- Santa Barbara
- Washington D.C.
- Khabarovsk, Khabarovsk Krai, Russia
Professional Category (1)
- Accessory Dwelling Units (ADU)
- Reach out to the pro(s) you want, then share your vision to get the ball rolling.
- Request and compare quotes, then hire the Carpenter that perfectly fits your project and budget limits.
Carpenters are highly skilled craftsmen who specialize in working with wood and other materials to create, repair, and install a wide range of structures and items.
- Build custom furniture pieces, such as tables, chairs, and cabinets, tailored to your specific needs and preferences.
- Construct and install frameworks for buildings, including walls, floors, and doorframes.
- Undertake renovation projects, such as installing new doors and windows or repairing damaged wooden structures.
By using their expertise, carpenters bring your design ideas to life and ensure precise measurements, high-quality craftsmanship, and attention to detail in every project.
If you are choosing between hiring a carpenter vs contractor in Khabarovsk, here is an overview of these two professional types:
- A carpenter is a skilled worker who specializes in working with wood. They excel at tasks like cutting, shaping, and installing wood materials.
- On the other hand, a contractor is more like a project manager who oversees the entire construction process. They handle budgeting, hiring the right people for the job, and ensuring that the work is done properly.
So, if your project primarily is working with wood, such as building custom furniture or installing wooden fixtures, a carpenter is the best choice.
However, if your project is larger in scope and involves multiple tasks, such as renovating an entire space or managing a construction project, a contractor might be more suitable. They will take charge of coordinating different tradespeople, managing the budget, and ensuring that everything runs smoothly.
BUSINESS SERVICES
Connect with us.
IMAGES
VIDEO
COMMENTS
Here are a few key wood boat repair products you should know about: Fix Repair Putty. Bonding not only to wood, but also to fiberglass, glass, and even concrete, this repair putty—once cured—can be sanded, drilled, tapped, screwed, and painted. That makes it an essential item in any basic boat repair kit, especially for those boat owners ...
Draw inspiration for your own projects as you watch shipwrights, pro boat builders and seasoned mariners tackle their own wooden boat repair and restoration projects. Get a personal lesson from a master caulker, learn the ins and outs of refastening or follow the restoration of classics from Herreshoff S-Boats to a Grand Manan wooden lobster boat.
This way, there is no exposed wood to allow moisture into the deck. Similarly, if you make a large hole, such as for a hawsepipe, in a plywood deck, coat the exposed wood with epoxy. For a cored deck, scrape out a ring of core from between the two laminates and fill this area with thickened epoxy. With proper treatment, deck laminate ...
need of repair. Using the manual Wooden Boat Restoration & Repair approaches a repair project in several phases. Section 1 provides guidelines for assessing the feasibility of repair and restoration, provides an overview of problems typically encountered in wooden boats and explains the major uses of epoxy in repair.
Here are some easy tips for boat restoration and questions to ask yourself if you are considering buying an old sailboat. "A sailboat is a big hole in the ocean that you throw money into." That is the saying. It is a cautionary tale of the passionate lover of sailboats that has his intellect overpowered by a dream.
Easily followed instructions are enhanced by detailed drawings, making Wooden Boat Restoration & Repair an essential guide for wooden boat enthusiasts. This 80-page softcover manual is available for purchase through your local WEST SYSTEM Epoxy dealer, by ordering directly from us at 866-937-8797 or for FREE download here.
#sailfromhome #boatmaintenance #lockdown #sailfromhome #toptips #sailing#covid19 http://www.rya.org.ukhttp://www.gp14.org
Plus we can install and repair shore power systems and their control panels. Wood repair. Our team of wood boat experts has 150 years of woodworking experience. We'll take a good look at the issue and give you a free estimate of what it will take to make things right again. You can feel confident about putting your beloved boat in good hands.
David Johnson explains the 3 key steps you need to take for a successful wooden boat repair and restoration job, using WEST SYSTEM® epoxy.
Cut smaller pieces to fill the larger gaps, and then spread thickened resin over the entire area using a flexible spatula, forcing it into the remaining hair line cracks. Allow to cure. Use 60-80 grit on an orbital sander (or a disk grinder with a very light touch) to sand the new core smooth.
Still, wooden rails give a sailboat an admirably classic look, even when left unfinished to weather naturally, and can be a lot less work to maintain than people realize. Repairing wooden rubrails and toerails is also very simple, requiring nothing more than a couple of hand tools—as I learned when I repaired some sections of rail on my long ...
Wooden Boat Restoration Services. Timeless Boatworks offers wooden boat restoration services on small wooden boats up to 20 ft in length. Typical restoration services include, but are not limited to: frame (rib) repair and replacement including steam bent frames, laminated frames, or sawn frames. plank repair (carvel and lapstrake planking) and ...
Strategies and techniques for common wooden boat repairs. This is a two-week course ending Friday. The repairing and rebuilding of wooden boats is a journey that can provide great personal satisfaction. In the process, you'll become familiar with your boat's intricate construction details, and come to appreciate the careful craftsmanship ...
General Principles for Wooden Boat Repair. Repairing and maintaining wooden boats involves many variables and procedures. We offer the following brief commentary as a very general introductory guide, and some comments regarding the use of preservatives, resins and coatings, and about the products we sell. Our Research Lab….
In addition to restoring wood boats, we also service and repair classic glass boats, outboard boats, and service and repair engines, interiors, and trailers. Our first restoration project was a 1958 Chris Craft Silver Arrow #16. Only 92 of these boats were ever produced. After that project, we restored another Silver Arrow #20, which we still ...
Clean, lint-free rags. STEP 1 - PREPARE THE WOOD. Start with a clean, dry surface. Solvent wipe with acetone to remove dust and contaminants. In areas of deep rot, drill a series of holes in the decayed wood. STEP 2 - MEASURE AND MIX THE RESIN & HARDENER. Mix only as much as you can apply in 20 minutes.
Fill small cracks above the water line with Capt. Tolley's Creeping Crack Cure. Top rear crack sealed and painted. 7. Last, re-apply ablative paint or a polyurethane topcoat to match the rest of the rudder or hull. If you keep your sailboat in the water, ablative paint can minimize algae growth.
Sailboat DIY And Repair Tips Know-how: From Ballast to Berths Our Open 60, NV, was originally designed, built, and raced by Hungarian sailor Nándor Fa in the singlehanded around-the-world races Around Alone and the Vendée Globe.
Khabarovsk ship-building factory. 1 Suvorova Street, Khabarovsk, Russia 680003. Tel: (7-422) 513-394. Fax: (7-4212) 552-529. Khabarovsk Shipbuilders is the region's leading producer of surface vessels and ships. The shipyard is situated at the meeting point of major transport arteries serving the Russian far east.
Shipbuilding is a developed industry in Russia. The main short-term plan of the industry is the Complex Program to Advance Production of the Shipbuilding Industry on the Market between 2008 and 2015, which was approved by the Russian Government in October 2006. It envisages the establishment of a scientific center at the Krylov Institute, two ...
To accommodate these changes, the Wood Street Parking Garage will be enforced 24/7 between May 14 and Aug. 9. Free after-hours or weekend parking will be unavailable in this location over the summer. Parking Facilities staff are available until 4:30 p.m. Monday through Friday at 765-494-9497 or [email protected] , with the lobby at 700 Ahlers ...
Carpenters are highly skilled craftsmen who specialize in working with wood and other materials to create, repair, and install a wide range of structures and items. They can: Build custom furniture pieces, such as tables, chairs, and cabinets, tailored to your specific needs and preferences.