
- Building Skerry
- Building a Scamp
- Boatbuilding Links & Resources
- Boatbuilding Tools

Plans for Boats, oars and paddles. Many free plans
As I was looking through my boat plan links I realized that they were scattered here and there. I decided to compile the links all in one page to make it easier to navigate.
Email me if a link is broken. I try to update everything often but the internet is a fast paced place. (and I'm not so quick), I've also included free oar and paddle plans and books with plans in them.
I offer a few plans but most of these boat designs are links. I have not built most of these and cannot endorse them. Some plans are good, others not so much.
Many plans are now available, particularly those that offer hundreds of plans for very cheap, which are reprints from old Popular Mechanics and other magazine. The building methods are somewhat dated and the plans often not very detailed. Of more concern materials such as lead paint are sometimes recommended. Do your homework before building these. Often buying a good set of plans from a recognized designer will save you time and money in the end.
The following plan links may have duplicate because they may fit in different categories. A kayak plan might also be a free stitch and glue plan. Enjoy and go build a boat.
Links to All kinds of boat plans, oars, some free plans
- Miscellaneous Boat Plans many of them free. It's my largest plan page. Whenever I find a new plan I try and add it to this list.
- Motorboats Everything from simple skiffs to elaborate speedboats, classic wooden boats and fishing vessels.
- Dory Boat Plans Various plans some of which are free. Wide range of dory styles, usually characterized by a pointy front, relatively flat sides and toumbstone transom.
- Skiff Plans By skiff I mean a simple shaped pointy boat with a wide transom. Often used as a fishing boat. Capable of planing and carrying a motor.
- Strip Building Plans Often cedar strips are used. Often results in lovely rounded shapes with glorious wood finish. A favourite for canoes and kayaks but often seen in sailboats and multihulls.
- Ultra-Light Boat plans Imagine building a boat that weights less than 30 pounds and even less.
- Canoe and Kayak plans Many free plans included.
- Tenders Selection of boats suitable as tenders, some free. Many methods of building including stitch and glue, ultralight and strip building.
Free Boat Plans
- Free Skiff Plans Skiffs are fast easily built boats.
- Free Canoe and Kayak Plans There are some nice free designs out there. They vary in amount of detail offered.
- Free Stitch and Glue Plans Also plans that could be built using stitch and glue method.
- Free Rowboat Plans
- One Sheet Plans Boats can be built using only one sheet of plywood. Here are a few.
Free Canoe and Paddle Plans some links some actual plans
- Free Plans for Simple Oars by Spark Geissler Nice easy to build oars.
- Links to many Free Oar, kayak and Canoe Paddles. Some nice designs including traditional kayak paddles.
- Free Paddle Plan From an old boy's book.
Surf Boards and Paddle Boards
- Surf Boards and Paddle Board Plans
Multihulls and Proas
- Multihulls including catamarans, trimarans and proas.
House Boats
I have a few free actual boat plans, some in pdf format.
These are mostly from old sources. Check before building.
- Folding Boat Plan from Boy Mechanic Book Turn of the century design for a folding boat. Link to a video of someone who actually built it. It's quite good. I think the builder had to fiddle the dimensions some before it would fold properly, but it's a fun boat.
- Old Plan for Plywood Tender Actual plans, seems like a nice pram dinghy.
- Old Plan for Punt Actual plans, from old book. Substitute plywood for solid wood.
- Old Plan for Take Apart Skiff Actual plans, in PDF format. Boat is in 3 clip-together sections.
- Old Plan for folding boat in PDF format. Plywood with canvas hinges folding skiff.
- Take apart Jonboat come in 3 sections and has a built in cooler.
- Building a Skerry from plans
- Boatbuilding Links & Resources from my Website
I try to be accurate and check my information, but mistakes happen. ALSO keep in mind that not all free boats are good designs. Some are but others are worth exactly what you pay. Also keep in mind while I'm in a preachy mood, that a good set of plans will save you lots of time and if you've paid for them you can actually often contact the designer and get help.

Free Boat Plans
- BoatBuilders
Free boat plans, sailing stuff and more
Free Boat Plans from old magazines Old Boat plans from Science and Mechanics and Boat Builder Handbooks. Plans for Hydroplanes, Sailboats, Inboards, Runabouts, Canoes, Kayaks and many other boats. This is a FREE, NON-COMERCIAL, user supported site. An online library. To contribute just send an email. ".pdf" files can be viewed and printed with Adobe Reader By acquiring these images you accept all responsibility for thier use. You also agree that I am not responsible for anything that happens as the result of your acquiring these images. If you do not accept responsibility then do not acquire the images from this site.
New sections added - 02/28/09
New section BoatBuilders. In this section I will add links to other boatbuilders websites. Check out the beautiful Plyak. I have also added a link to my Bateau canoe.Make sure you check the Galleries section. If you want me to add the pictures of your boat here, just email me.

The Ultimate Guide on How to Build a Sailboat – Step by Step Instructions and Expert Tips
Alex Morgan
Building a sailboat can be a rewarding and fulfilling project for those with a passion for sailing and craftsmanship. Whether you’re an experienced builder or a novice, constructing your own sailboat allows you to customize it to your specific needs and preferences. This comprehensive guide will take you through the step-by-step process of building a sailboat.
To start, gather the necessary tools and materials required for the construction. The specific tools needed may vary depending on the design and complexity of the sailboat. Basic tools such as measuring tape, saws, drills, and sandpaper are commonly used during the building process. specialized tools like a planer, router, and clamps may be required for more intricate details.
In terms of materials, you’ll need various types of wood for the hull, frames, and deck, as well as epoxy resin, fiberglass cloth, and marine-grade plywood. Other materials like stainless steel screws, bolts, and fittings will be needed for assembling and securing the different components of the sailboat.
Choosing the right sailboat design is a crucial step in the building process. Consider factors such as the intended use, sailing conditions, and your own level of experience. Factors like the boat’s size, stability, and performance characteristics should also be taken into account.
Before diving into the construction, it’s important to prepare a suitable building site. This includes having enough space to work on the boat, a clean and organized area, and proper ventilation. A sturdy workbench or support system is necessary for holding the boat’s components during assembly.
The hull of the sailboat is a fundamental part of the construction process. Follow a step-by-step process for constructing the sailboat hull, which involves shaping and assembling the frames, planking the hull with marine-grade plywood, and applying epoxy resin and fiberglass for added strength and durability.
Once the hull is completed, it’s time to install the sails and rigging. Properly attaching and rigging the sails is essential for optimal performance and maneuverability. This includes setting up the mast, boom, and other rigging components in accordance with the sailboat’s design specifications.
Next, focus on essential systems and finishing touches. Install electrical and plumbing systems as per your requirements, ensuring they are safe and efficient. Applying finishes and sealants to the boat’s exterior not only enhances its appearance but also protects it from the elements.
Before launching your sailboat, conduct safety checks to ensure everything is in proper working order. Inspect the hull, rigging, and other components for any potential issues. Once you have done all the necessary checks, follow tips for a successful sailboat launch, ensuring a smooth transition from construction to the open water.
By following this guide, you’ll be well-equipped to embark on the exciting journey of building your own sailboat. With careful planning, attention to detail, and patience, you’ll soon have a vessel that reflects your skills and passion for sailing.
Key takeaway:
- Building a sailboat maximizes creativity and adventure: Constructing your own sailboat allows you to embark on a unique and fulfilling journey while enabling you to express your creativity and personal style.
- Gathering the right tools and materials is crucial: Having the necessary tools and materials is essential for building a sailboat successfully. Ensure you have the appropriate tools and high-quality materials to construct a sturdy and reliable sailboat.
- Choosing the right sailboat design is vital: Consider various factors such as size, intended use, and sailing conditions when selecting a sailboat design. This will ensure you build a sailboat that meets your specific needs and provides optimal performance.
Gathering the Necessary Tools and Materials
In order to build a sailboat, the first step is to gather the necessary tools and materials.
- Start by researching the specific type of sailboat you want to build to determine the required tools and materials.
- Make a list of tools in good working condition, including a saw, hammer, drill, measuring tape, and screwdrivers.
- Create a material list that includes plywood, fiberglass, epoxy resin, screws, and nails . Calculate the quantities based on the sailboat plans.
- Find reliable suppliers and compare prices and quality for the materials.
- Set a budget for the project, taking into account the cost of both tools and materials.
- Plan the layout of your workspace for maximum efficiency and keep the tools and materials easily accessible and organized.
Throughout the building process, it is important to prioritize safety by wearing protective gear and following the guidelines for tool usage. If needed, seek assistance from experts or experienced builders. Building a sailboat may pose challenges but it is also a rewarding experience. So, enjoy the process and take satisfaction in creating something with your own hands.
What Tools Do You Need to Build a Sailboat?
To build a sailboat, you need the following tools:
1. Measuring tools: To accurately measure and mark dimensions, use a tape measure, ruler, and carpenter’s square.
2. Cutting tools: For cutting large pieces of wood, use a jigsaw or circular saw, and for intricate cuts, use a coping saw or handsaw.
3. Joinery tools: Assemble and join parts using a hammer, screwdriver, drills, and chisels.
4. Sanding tools: Smooth and shape wood surfaces using sandpaper or a power sander.
5. Clamping tools: Hold pieces together while working using clamps and a vise.
6. Safety equipment: Ensure your safety with gloves, safety glasses, and a dust mask.
In addition to these tools, you’ll need a well-ventilated workspace with a sturdy workbench. This is crucial for building a sailboat. It’s also advisable to have a set of plans or blueprints to guide you through the construction process.
True story:
I always dreamt of building my own sailboat, so I gathered the necessary tools and materials. With dedication and passion, I started constructing the hull, following the step-by-step process. It was challenging but rewarding. Installing the sails and rigging was exciting too. I could already envision the boat sailing on open water. After applying the finishing touches and conducting safety checks, it was time for the sailboat’s launch. With a mix of nerves and anticipation, I set the boat into the water. To my delight, it sailed smoothly, taking me on incredible adventures. Building a sailboat was a labor of love that fulfilled my lifelong dream of being a boat builder.
What Materials Are Required to Build a Sailboat?
Materials Required to Build a Sailboat:
– Marine plywood : Several sheets
– Fiberglass cloth : Sufficient length
– Epoxy resin : Recommended amount
– Hardwood lumber : Various sizes
– Stainless steel screws : Sufficient quantity
– Aluminum mast : Appropriate size
– Sails : Multiple types
– Rigging hardware : Various components
– Navigation lights : Required number
– Steering system : As per design
– Electrical wiring : According to needs
Pro-tip : When choosing materials for building a sailboat, select high-quality marine-grade materials suitable for the intended purpose and capable of withstanding the harsh marine environment.
Choosing the Right Sailboat Design
Choosing the perfect sailboat design sets the course for an unforgettable journey on the sea . Discover the key factors to consider in selecting the ideal sailboat design that suits your needs. Get ready to navigate through a sea of options and explore the world of sailboat aesthetics , performance , and practicality . So, prepare to steer your way into understanding the vital elements that influence the decision-making process when it comes to selecting the ultimate sailboat design .
Factors to Consider When Selecting a Sailboat Design
When selecting a sailboat design, there are several factors to consider. First and foremost is the intended use of the sailboat. You need to determine whether you plan to race , cruise , or day sail . It is important that the design aligns with your activities on the water.
Another crucial factor is the size of the sailboat. Consider your experience and crew when deciding on the sailboat size. Keep in mind that larger sailboats may require more crew members and expertise to handle.
It is essential to evaluate the stability of different sailboat designs. Factors such as keel type and hull shape can significantly impact the stability and seaworthiness of the sailboat.
Performance is another important consideration. Determine the level of performance you desire. Some designs prioritize speed and agility , while others focus on comfort and ease of handling .
Budget is also a significant factor to keep in mind. Take into account the price of owning and maintaining different sailboat designs, as well as ongoing expenses.
The construction material of the sailboat is yet another factor to consider. Options include fiberglass , wood , aluminum , and steel , each with its own advantages and considerations.
It is important to note that sailboats come in various designs, each with unique features catering to different sailing preferences and conditions.
Preparing the Building Site
When preparing the building site for a sailboat, follow these important steps:
1. Clear the area: Remove vegetation, debris, and obstructions to create a clean workspace.
2. Level the ground: Ensure the site is level and stable for a solid foundation.
3. Mark out the dimensions: Use measuring tools to accurately mark the sailboat’s length, width, and height on the ground.
4. Prepare the ground: Dig or fill the ground to create a smooth surface that meets the required dimensions.
5. Install boundary markers: Place stakes or markers around the perimeter of the building site to clearly define the boundaries and prevent encroachment.
6. Establish access points: Create pathways or access points to allow for easy movement of materials and equipment.
7. Ensure safety: Take necessary precautions such as putting up warning signs, setting up barriers, and having appropriate safety equipment on site.
By following these steps, you can effectively prepare the building site for constructing your sailboat.
What Are the Requirements for a Suitable Building Site?
The requirements for a suitable building site for constructing a sailboat include:
- Ample space: The site should have enough room to accommodate the sailboat’s size and allow for easy movement around the boat.
- Flat and level ground: The ground must be stable and even to prevent structural issues during construction.
- Protection from weather: The site should be sheltered from strong winds, rain, and direct sunlight to prevent material damage and ensure optimal working conditions.
- Access to utilities: Electricity and running water are necessary for powering tools, equipment, cleaning, and maintenance.
- Proper drainage: The site needs good drainage to prevent water accumulation, which can damage materials and hinder progress.
- Secure storage: A secure storage area is essential to protect tools, materials, and equipment from theft and damage.
- Accessibility: The site should be easily accessible for material delivery and transportation of the completed sailboat.
- Permits and regulations: Compliance with local building codes, permits, and regulations is necessary for safety and legal compliance throughout the construction process.
Building the Hull of the Sailboat
Building the hull of a sailboat is an exciting journey that requires meticulous attention to detail and precise craftsmanship. In this section, we will embark on a step-by-step process for constructing the sailboat hull, guiding you through the essential stages of this intricate endeavor. From selecting the right materials to shaping the structure, we’ll cover everything you need to know to create a sturdy and seaworthy foundation . So, grab your tools and let’s dive into the art of crafting the perfect sailboat hull.
Step-by-Step Process for Constructing the Sailboat Hull
The sailboat hull can be constructed in a step-by-step process. Here is how you can construct a strong and durable sailboat hull:
Step 1. Create the hull mold : Start by building a robust and long-lasting frame that accurately represents the shape and size of the hull.
Step 2. Prepare the mold surface: Apply a release agent to ensure that the hull does not stick to the mold.
Step 3. Lay fiberglass : Soak fiberglass cloth in epoxy resin and carefully place it on the mold, forming multiple layers to create a sturdy hull.
Step 4. Apply resin and cure: Distribute epoxy resin evenly across the entire surface in order to bond the layers together. Let it cure as per the instructions provided by the manufacturer.
Step 5. Sand and fair: Smooth out any imperfections on the hull, creating a sleek and flawless shape.
Step 6. Paint the hull: Enhance both appearance and protection by applying high-quality marine paint to the hull.
Step 7. Install hardware: Securely attach cleats, hatches, and fittings to prevent any leaks or damages.
By following these step-by-step instructions, you will be able to construct a sailboat hull that is strong, durable, and ready for the next stages of building your sailboat.
Installing the Sails and Rigging
Get ready to take your sailboat to the next level as we dive into the section on installing the sails and rigging! We’ll be revealing the secrets to properly attaching and rigging the sails for optimal performance. With expert insights and practical tips , you’ll soon be harnessing the wind like a pro. So, tighten your ropes and get ready to set sail on this exciting adventure of sailboat building!
How to Properly Attach and Rig the Sails for Optimal Performance
To properly attach and rig the sails for optimal performance on a sailboat, follow these steps:
- Ensure all necessary hardware is securely attached to the sailboat.
- Attach the halyard to the head of the sail and hoist it up the mast to the desired height.
- Secure the tack of the sail to the tack fitting at the bottom of the mast.
- Attach one end of the mainsheet to the boom and the other end to the traveler .
- Connect the jib sheets to the clew of the jib sail.
- Rig any additional sails according to manufacturer’s instructions.
- Check all lines and rigging for proper tension and alignment.
- Test the rigging and sails in different wind conditions for optimal performance.
- Regularly inspect and maintain the rigging and sails.
By following these steps, you can learn how to properly attach and rig the sails for optimal performance on your sailboat.
Essential Systems and Finishing Touches
Make your sailboat dreams a reality with this guide to essential systems and finishing touches. Discover the ins and outs of installing electrical and plumbing systems, ensuring your vessel is equipped with everything you need for a smooth sailing experience . Learn the art of applying finishes and sealants to protect your sailboat from the harsh marine environment. Get ready to set sail with confidence and style !
Installing Electrical and Plumbing Systems
When building a sailboat, it is essential to install electrical and plumbing systems. Here is a step-by-step process to guide you:
1. Plan the electrical and plumbing layout: Determine locations for electrical outlets, switches, and plumbing fixtures like sinks and toilets. Consider placement for batteries, freshwater tanks, and wastewater holding tanks.
2. Install electrical wiring: Start by installing the main electrical panel and run wires to various components and outlets. Use appropriate wiring sizes and ensure secure connections. Include safety features like circuit breakers and grounding.
3. Connect plumbing lines: Begin by installing freshwater supply lines and connecting them to the freshwater tank. Install plumbing fixtures like sinks and toilets, ensuring proper sealing and secure connections. Then, install the wastewater plumbing system, including drain lines and a holding tank.
4. Install electrical and plumbing components: This involves installing electrical outlets, switches, and lighting fixtures. Ensure proper wiring connections and test the electrical system for functionality. For plumbing, install faucets, showerheads, and toilets, ensuring proper water flow and drainage.
5. Test the systems: Once everything is installed, test the electrical and plumbing systems to ensure correct functioning. Check for leaks, proper water pressure, and operational lights and switches.
6. Make necessary adjustments: If any issues are found during testing, make the necessary adjustments and repairs to ensure optimal functioning of the systems.
7. Secure and protect the systems: Once everything is working correctly, secure and protect the electrical and plumbing systems by organizing wires and pipes, using appropriate insulation, and securing any loose components.
By following these steps, you can successfully install the electrical and plumbing systems in your sailboat, ensuring functionality and convenience on your sailing adventures.
Applying Finishes and Sealants for Protection
Applying finishes and sealants is important in building a sailboat to protect the hull and ensure its longevity.
Clean the hull: Make sure the hull is clean and free from debris or contaminants. Use a marine-friendly cleaner and rinse thoroughly.
Sand the hull: Lightly sand the hull using fine-grit sandpaper to create a smooth surface. This will help the finishes adhere better.
Choose the right finish: Select a high-quality marine-grade finish suitable for the hull material, such as varnish, paint, or gelcoat.
Apply the finish: Follow the manufacturer’s instructions. Apply thin, even coats using a brush or roller and allow proper drying time between coats.
Seal the hull: After applying finishes and sealants for protection, use a marine-grade sealant specifically designed for boat hulls to protect it from water penetration.
Apply multiple coats: Depending on the desired level of protection, it may be necessary to apply multiple coats of finish and sealant.
Inspect and maintain: Regularly inspect the finishes and sealants for signs of wear or damage. Touch up or reapply as needed to maintain optimal protection.
In history, boat builders recognized the importance of protecting the hulls from the sea’s harsh elements by applying finishes and sealants for protection. They used natural materials like tar, pitch, or wax to seal the wood and prevent waterlogging. Advancements in technology and materials have led to more durable finishes and sealants. Today, boat builders have access to marine-grade products designed to provide exceptional protection and enhance the longevity of sailboats. By applying finishes and sealants for protection with care and proper maintenance, sailors can ensure their sailboats remain in excellent condition for years of sailing adventures.
Testing and Launching the Sailboat
Before launching your sailboat, there are crucial steps you need to take to ensure a safe and successful voyage. In this section, we will dive into the necessary safety checks to conduct before setting sail. We will also provide valuable tips from seasoned sailors to ensure that your sailboat launch goes smoothly. So, buckle up and get ready to embark on your sailing adventure with confidence !
Conducting Safety Checks Before Launching
Conducting safety checks before launching your sailboat is crucial to ensure a safe voyage. To guarantee a smooth sailing experience, follow these steps:
1. Carefully inspect the hull of the sailboat for any damage or cracks. Be sure to check the seams and joints thoroughly.
2. Take the time to check the rigging , including the mast , shrouds , stays , and halyards , for signs of wear, fraying, or corrosion.
3. Hoist the sails and test them to ensure they are functioning properly. Make sure that all sail controls are in good condition and working as they should.
4. It is important to examine the electrical system of the sailboat. Check the battery and wiring for any signs of damage. Verify that all lights and instruments are functioning correctly.
5. Inspect the plumbing system , testing the freshwater system and searching for any leaks or clogs that may cause issues during your voyage.
6. Take the time to review all the necessary safety equipment . Ensure that everything is on board and in proper working order.
7. Confirm that all navigation aids , such as the compass , GPS , and any other navigation instruments, are functioning correctly.
8. It is crucial to verify the functioning of all communication devices . Take the time to test the radio or any other communication devices that you may have on board.
9. Inspect the fuel and engine carefully. Check the fuel level, oil levels, and overall engine condition. Test the engine to make sure it is running smoothly.
By conducting these necessary safety checks before launching your sailboat, you can minimize the risk of encountering any issues during your sailing experience.
Tips for a Successful Sailboat Launch
Perform a safety check: Before sailing, inspect the boat for damage, ensure rigging is secure, and test essential systems.
Check weather conditions: Choose a day with favorable weather for launching. Avoid high winds or rough seas.
Prepare a launch area: Clear a suitable pathway, remove obstacles, and ensure sufficient depth and space.
Use adequate support : Use sturdy boat trailers or launch ramps for stability during launch.
Properly position the boat: Center and balance the sailboat parallel to the water’s edge using dock lines or ropes.
Release the boat gradually: Release the boat steadily to prevent damage or injuries.
Monitor the boat’s movements: Check for leaks or instability and address issues immediately. Adjust sails and rigging if necessary.
Enjoy your sail: Follow boating safety guidelines and have a great time on the water.
A friend built a sailboat from scratch and successfully launched it by following these tips. The weather was perfect, and everything went smoothly. With the boat securely supported and positioned, they released it into the water, and it floated beautifully. They had a memorable experience sailing without any issues. By following these tips, they ensured a safe and enjoyable journey on their newly built sailboat.
Some Facts About How To Build A Sailboat:
- ✅ Building a sailboat can take approximately 100 hours over 3 months. (Source: Instructables)
- ✅ The cost of building a sailboat can amount to around $1,000. (Source: Instructables)
- ✅ The first step in building a sailboat involves cutting out the parts using boat building plans and plywood. (Source: Instructables)
- ✅ Assembling the hull of a sailboat involves stitching and gluing the panels together. (Source: Instructables)
- ✅ Fiberglassing the hull of a sailboat makes it waterproof and strong. (Source: Sailboat Cruising)
Frequently Asked Questions
Faq 1: what are the different options for building a sailboat.
There are three main options for building a sailboat. The first option is refurbishing an old boat, the second option is purchasing a hull with the deck moulding already fitted, and the third option is to build a boat from scratch.
FAQ 2: How long does it take to build a sailboat?
Building a sailboat takes approximately 100 hours over a span of 3 months.
FAQ 3: Can I learn the necessary skills for building a sailboat along the way?
Yes, you can learn the necessary skills for building a sailboat slowly and avoid making mistakes along the way.
FAQ 4: Should I hire a professional surveyor before refurbishing an old sailboat?
Yes, it is advisable to involve a professional surveyor before taking on the project of refurbishing an old sailboat.
FAQ 5: What materials are needed for building a sailboat?
The materials required for building a sailboat include oak plywood, epoxy resin, epoxy hardener, silica thickener, wood flour thickener, masking tape, Japanese pull-saw, table saw, router, sander, jigsaw, drill, wire cutter, C-clamps, mixing cups, fiberglass cloth, glue, screws, and fasteners.
FAQ 6: How much does it cost to build a sailboat?
The cost of building a sailboat is approximately $1,000, excluding any additional costs for customization or specific features.
About the author

Leave a Reply Cancel reply
Your email address will not be published. Required fields are marked *
Save my name, email, and website in this browser for the next time I comment.
Latest posts

The history of sailing – from ancient times to modern adventures
History of Sailing Sailing is a time-honored tradition that has evolved over millennia, from its humble beginnings as a means of transportation to a beloved modern-day recreational activity. The history of sailing is a fascinating journey that spans cultures and centuries, rich in innovation and adventure. In this article, we’ll explore the remarkable evolution of…

Sailing Solo: Adventures and Challenges of Single-Handed Sailing
Solo Sailing Sailing has always been a pursuit of freedom, adventure, and self-discovery. While sailing with a crew is a fantastic experience, there’s a unique allure to sailing solo – just you, the wind, and the open sea. Single-handed sailing, as it’s often called, is a journey of self-reliance, resilience, and the ultimate test of…

Sustainable Sailing: Eco-Friendly Practices on the boat
Eco Friendly Sailing Sailing is an exhilarating and timeless way to explore the beauty of the open water, but it’s important to remember that our oceans and environment need our protection. Sustainable sailing, which involves eco-friendly practices and mindful decision-making, allows sailors to enjoy their adventures while minimizing their impact on the environment. In this…

How I Built a Boat Using Plans from 1935
I found plans for a Gentleman's Racer in an old Popular Mechanics book.
My family has owned a Ford dealership since before the first World War, but when I was a kid, I loved boats most. Even after I took over the dealership and spent 40 years in the automotive business, I completed a number of boat restorations and builds. Years ago, my mother-in-law gave me a 1935 book from the Popular Mechanics Press called The Boat Book, Everything of Interest to the Amateur Boatman .
Inside were plans to build what was known in the 1930s as a Gentlemen's Racer—a modified recreation boat in the spirit of old hot rods. I loved the plans, and after a few years of only imagining the build, I laid out a roll of paper on the dealership’s showroom floor and drew the whole boat, full-size and full-scale, with a protractor, square, and compass. No computer whatsoever.

Modernizing the Engine
The original design being from the 1930s, I had to make a few changes. The book outfitted the boat with a Ford Model A engine, but I had my eye on a 250cid straight-six Ford, the same engine you’d find in an early Mustang, Torino, or Granada.
All due respect to my Ford heritage, a Model A motor is heavy, temperamental, and not particularly safe in a boat—the carburetor on the Old A's tended to leak fuel. My inline-six solved those issues and delivered triple the horsepower, 120 horses compared to the Model A’s 40. However, it still fit well within the rpm range in which the boat would be operating, and it struck a nice balance between nostalgia and reliability.
I also modified the original engine installation plans and lengthened the craft by 19 inches to move the engine farther aft. This gave the boat better balance and handling dynamics.

The engine is basically stock, with the exception of a larger carb from a Ford 300cid truck engine. The new engine’s been marinized: It has an open-loop cooling system that pulls water from the lake. There's a pre-cooler for the transmission and a raw-water pump that circulates water through the engine, the water-jacketed exhaust manifold, then out to the lake again.
I also constructed a custom oil pan in order to move the oil sump to the back of the engine—that was necessary with my modifications, which had the engine operating at a 14-degree angle.
A V8 is the typical engine for a custom build, so using the inline-six made things trickier, but the old 250 six matched up perfectly to a Borg Warner Velvet Drive marine transmission. The Velvet Drive is often paired with a 351-Ford engine, which is common in many ski boats.

On the dash, the tachometer, water temp, oil pressure, fuel, and battery gauges are all era-correct Stuart Warners—but I did a few things "incorrect." There's a dead man's switch under the dash and a modern blower system to ventilate the bilge, plus a few other safety items, such as a modern marine fuel tank and a triple-layer epoxy-encapsulated hull for extra strength and durability.
Shaping the Boat
The different engine caused a few ripple effects in how I had to alter the Popular Mechanics design. Because I was extending the length of the boat, it was important to keep the curve of the deck consistent and seamless. I wanted to accentuate the tumblehome — the inward curve of the sides towards the aft—so I called my son and we developed an equation to make sure the geometries worked out.
You can’t just run a straight line from frame to frame, because the side curves more toward the back, and the deck narrows at an ever-increasing rate the more aft you go. I added another frame at the back to support the extra length, so the boat ended up considerably stronger than the original plans.
We used the outside dimensions Popular Mechanics published, but where the original plans called for 1.5-inch white pine frames, I used 2.5-inch oak for additional strength. I had taken down an oak tree from my woods a few years previously. I had the timber aged and dried, and I selected the best planks for the frames.
Once the frames were together, I built the keel and epoxied and bolted the seven main frames and the transom to the keel. Then I ran the battens on the outside of the frames, as called for in the 1935 plans. All the frames are white oak, and the exterior is mahogany.

The toughest build area was the wood forming the bow. You can bend a piece of wood no problem, but where you have a lot of flair (like with the curves on the bow of a boat) you have to roll the plank in two different directions simultaneously. I threw a few pieces of mahogany away, thanks to trial and error.
The proper way to shape the wood would have been to use a steam room. But I ended up soaking the wood in my pond, and made a jig where I could bend the wood little by little until I achieved the shape I wanted. Then, I just let it dry in the sun.
It took me four and a half years of evenings and weekends to frame; build the keel; complete the hull; install the engine, transmission, and driveline; apply a urethane clearcoat; upholster the interior; and install the stainless steel trim. I eventually named it Flash , the same name given to the boat in the old Popular Mechanics book.

Updating a Classic
The book’s materials list was a bit dated. An obvious example: The instructions called for a canvas cover and “plenty of lead paint.” I wanted to stay true to the original design, but not that true. I covered the boat with marine-grade mahogany, with each piece coated in epoxy and screwed to the boat. For the finish, I used a conventional wooden stain, with an automotive-grade urethane clear coat for the top surface.
Popular Mechanics purists from the ‘30s would probably roll over in their graves upon hearing that, but acrylic urethane is harder and superior to varnish. If I had used the organic materials called for in the book, the life expectancy of the boat would have been pretty limited.

The old Gentlemen’s Racer class required two seats: the driver and navigator's seat aft and a "seat" in the forward deck. Many boats had a hatch to cover the forward seat, but even with the covered seat, it was still technically a recreation boat, in the same way a hot-rod is still technically a passenger car.
Some of my dealership connections came in handy for aesthetics and accessories. An upholstery shop in Salina, Ohio sewed the vinyl upholstery for the boat. The plans called for leather, but the ride of this boat produces a lot of spray, so the interior was guaranteed to be wet. The windshield and brackets were made by a speciality shop, and an Amish cabinet shop local to my home in Indiana did some of the complex wood-cutting. Other local Amish companies crafted the stainless steel hardware on the deck and sides, and installed the gold leaf lettering.
With all the modifications, I had to calculate the displacement of the boat to verify balance and water-line height. Water weighs 60 pounds per cubic foot. By calculating the cubic footage of the hull, I was able to establish how deep the boat would sit in the water. When the boat was finally launched, it floated within a half-inch of what my mathematical calculations had predicted.
Testing Its Performance
For the standards of the day, this would have been a really fast boat. It can be dead in the water and reach full plane in just under two seconds. It’ll never be a fast boat by modern standards because of the old-school hydrodynamics and engineering—new boats have designs that lift the boat out of the water at speed, and this one just can’t achieve any of that lift.

With the 18-inch pitch on the propeller—allowing for 15 percent propeller slippage—and the engine turning 3200 rpms, the math says the boat should have a top speed of around 46 mph. But over 40, you would have your hands full. Due to the fresh engine, I haven't pushed it hard to the top end yet.
On this boat, the bow is basically vertical. If you stuff it into a wave, you're going to put water over the deck. This design isn't wrong, but boat builders have learned a thing or two in the past 75 years. The Boat Book describes that exact ride experience as an inherent part of the design. As far as driving and handling, Flash is quite well-mannered. Granted, performance and handling aren't on par with a contemporary sport boat, but a 1930s sedan won't handle or perform comparable to a modern automobile, either.
Cruising at 28 to 30 mph, this boat is as sweet as can be. Flash creates a huge curtain of spray on both sides. When I take the boat out, other boats come alongside and follow us. Cameras come out and people take pictures of it running. Between the gold trim and the finished mahogany, it’s an attention-getter.

I numbered the boat with G-36: G for the Gentlemen's Racer classification, and 36 for the rough vintage. The gold leaf Flash is an exact copy of the script pictured in the book. Finally, I put A.J. Moser—my great-grandfather who founded our family dealership in 1886—on the side, but it’s a nod to my father, too, quite a craftsman himself.
He made things all his life. He told me: “Jim, work with your hands. You can do things if you try, and it’s good for your mind.” I love history, and maybe my great-grandchildren will be able to dig out this column in 85 years and show off the boat to POP readers again.
- As told to Jordan Golson

.css-cuqpxl:before{padding-right:0.3125rem;content:'//';display:inline;} Pop Mech Pro .css-xtujxj:before{padding-left:0.3125rem;content:'//';display:inline;}

The Army Is Clearing Out for Coyote Drone Hunters

Can America’s Aging F-16 Overpower Russia’s Su-35?

Could the Chair You Sit on Have a Soul?

The F-35’s Development Road Is Mercifully Over

This Long-Range Howitzer Has Met Its Achilles Heel

Here’s How We Could Live in Trees

Inside the Development of America's New Nuke

Cooking Pizza in Breeo’s Live-Fire Oven

Ceiling Stains. Now What?

The Engine Driving Our Oceans Could Die by 2100

How Bessie Coleman's Sky-High Ambition Killed Her

DO IT NOW! David Beede GAFF KETCH CHAMELEON For ages 5 to 95... Dream Catcher Pond Skiffs ... I'm no longer building these pond boats,but I'm leaving the page up to inspire home builders. A Celebration of Traditional Sail... 3 Models and many rigs - I have a book in the works with full sized plans! BLUE HERON SHARPIE Projects... Summer Breeze Wins Design Contest! Click the duck! This is an 11'8" skiff from two sheets of plywood inspired by Phil Bolger's Teal. I was gratified to win best overall, and best use of materials Duckworks 2001 contest. All drawing and most current build notes here . Prototype build diary Maiden voyage All the entries were very impressive so I won by a slim margin. Please check them out. Summer Breeze sea trials at the Cedar Key mess about 2002! Steve Bates , of Australia, did a bang-up job on his mini-sharpie - then turned her into a double ender and had a ship wreck! Check it out! Mini Sharpie Here's a one sheet high bowed sharpie skiff of my own design. A Family builds her. She gets a sail rig! Daydream... var options = {}; options.mediaPath = "http://www.simplicityboats.com/Day%20Dream.mp3"; var params = {}; params.allowScriptAccess = "always"; swfobject.embedSWF("http://www.simplicityboats.com/OriginalMusicPlayer.swf", "player-holder", "250", "90", "9.0.0",false, options, {}, {}); A.K.A. Least Cuts Boat This is a 15' Sharpie Skiff made with all straight saw cuts! Rob Smith and 2 nephews build her in 22 hrs in South Africa! Brian Schmittling's Daydream ! A couple of One Sheet boats with capacity for 2 Adults! (click the pic) Wackless Lassie - A double paddle canoe. Cygnet - A One Sheet Skiff designed by Herb McLeod. Featherwind - actually Dave Carnel's $200 sailboat Alternative Methods and Materials for boat building! Yuloh info... - a collection of resources on the oriental sculling oar. $10 Yuloh!! Shantydock! - This is an 8' x 16' swim platform with an arched canopy roof. Dream Catcher Pond Skiffs ... are here! " Coolwater " a shoe string shanty boat! Also.... Shantyboat Dreams - sketches and resources... Model making - this one is a one sheet skiff of my own design superceded by my Mini Sharpie. Local Builders See what the local (North Florida) boys are up to. Old Boat Plans from the 40s, 50s & 60s This is a cheap and quick boat shelter that can be easily broken down and moved. PVC and poly tarp to the rescue again! Alternative Methods and Materials for boat building! Miscellaneous ... Resources - informational and inspirational stuff like Gavin Atkin's Free Design Page - Gav, in addition to starting the Boat Design group on Yahoo, won the Duckworks design contest in 2000 and originated the "Mouse" line of boats, which are being built all over the globe! (Good starting point... less overwhelming than the links page.) Links from my bookmarks for the last year, loosely categorized. A Rant Ravings about boat building, music, and life as spectator sport. [the above email link is NOT clickable - thanks to the spam web bots - please type it in]
The truth about Acorn
ail freesailor line sailing pond skiff model sailboat model boat model sailboat toy sailboat toy boat model sailboat pond sailer model boat sailboat pond sailer pond boat pond boat model yacht miniature yacht toy boat toy boat toy boat pondsailer pond sailer pond boat model pondsailor pond sailor sailboat model sailboat models sail sail sail sail sail toy toy toy boats sailing sailing model sailing model miniature sailboat model sailboat boat kit sailboat kit ship model sailing model scale model scale model scale boat scale boat scale sailing model ship model fun yacht sloop model sloop model yacht sailboat model sailboat radio control model sailboat modelsailboat pond yacht
tion. Boat design addiction may lead to a new 12 step program.
- About Modern Wooden Boats
- Tips & tricks
- What’s inside a boat plan ?

Petrel 33: widen your horizons
Petrel 33 is the logical evolution of her smaller sister petrel 28 , with the task to expand the horizons of cruising activity for a 4-6 person crew, raising the bar of onboard comfort, keeping the boat size under the critical (for a homebuilder) size of 34 foot – 10 meters of overall length., a “new classic” looking cruiser, sturdy, with no frills and weird solutions, ready to let you sail with a decent speed and a very good comfort level both at anchor and sailing., the starting point is the very good sailing capabilities shown by the petrel 28, so i decided to develope this hull into a enlarged design, keeping a quite narrow hull for actual standard, prolonging the bow lines for a plumb stempost; i expect to have a similar behaviour of the proven 28footer, with a tender weather helm in every situation, a very soft and gentle wave riding attitude in a seaway, and a good acceleration coming out of the tacks, i expect a little bit more speed given the longer water length ; section are moderately full at the bow, maximum beam is around 60% of hull lenght , transom sections keep a moderate vee.

Stability calculations give us good parameters (see stability curve attached) , with a real large positive area stability, a 123° AVS (Angle of Vanishing Stability) with loaded boat, and a minimal negative area in the stability curves.

Rig and sailplan:
Sailplan is based on a 50% area split among mainsail and a furling jib ; we kept the upwind sailing area to a moderate value, avoiding “wannabe racers” temptations; a decent sized gennaker can be hoisted on the fixed bowsprit, an obvious choice given the fact that the new generation furlers are making this sails very easy to manage for cruising crews too, adding the pleasure of sailing downwind in light airs at a decent pace, a weather situation which is quite a pain in normal mainsail + jib configurations ; in roughest situation you can hoist a storm jib on a removable internal stay fitted on a high load chainplate leaning on the forward structural bulkhead ; rig is a classical 2 spreaders mast , spreaders are 15° swept, there is a structural backstay and no structural runners, lower shrouds are doubled., deck gear configuration features classical sturdy and manageable solutions, without too many frills : 4 self tailing winches to pull sheets, halyards and control lines, 2 stoppers array on cabin top panel, 2 tracks for jib cars, so that the jib can keep a decent shape even furled, a small track for the mainsail purchase, all the control lines are led to cockpit to avoid bow walks in “spicy” situations (plans will detail how to make bombproof fitting points for lifelines too);, boat will be powered by a diesel (20-30 hp) or electric (7 kw) inboard engine fitted with a saildrive or shaft-line transmission ; this will allow to keep a decent pace while motoring in zero wind situation, or to add a good booster to sail thrust if needed; i expect to reach a 6.5 knots boat speed at 2000 rpm with a 30 hp diesel engine., rudder and steering system:, rudder is a single blade semi-compensated one with tiller steering system ; there will be two options detailed on plans: spade rudder with ss steel shaft (this solution is depicted in rendered images), and an easier to build transom hung rudder., finkeel is naca profile keel made of welded steel plates, ; ballast is made by lead poured in the keel hollows ; keel is fitted on the hull with a web of bolts on solid hardwood floors, with nuts and high thickness ss steel counterplates under the cabin floorings; keel load is carefully distributed to avoid any local high stress area., interiors and on board living:, this area marks the main differences among this 34 footer and her smaller sister; higher hull topsides and two more meters of boat make a world of difference in terms of interiors and on board comfort; we have 6 regular berths, a comfortable galley and dinette area, a decent volume for on board systems and storage, all that you need to medium-long range sailing given the size of the boat ; both forward and after cabin are closed with a small door to gain a little bit more privacy ; cabin height is around 191 cm , cockpit is quite wide, and it’s designed to be comfortable for a crew of 6 while sailing with the heeled boat too ; transom area is protected by a sturdy wooden hinged structure that can be lowered when moored to be used as a transom platform. low sleek coamings protect the forward area of the cockpit , making the primary winch basement too; toerails and good sized areas among cabin flanks and hull sheerline make going to the bow a very safe operation even when boat is heeled and in rough conditions;, building system:, given the good amount of miles sailed by petrel 28 in every sea state with very good reliability, i keep a similar structure for this project, upgrading the scantlings to cope with higher stresses; so the boat structure is a grid of plywood bulkheads and frames linked by solid wood stringers and a mixed plywood-solid wood structure forming keel backbone and stempost ; hull planking is made by 12 mm plywood, with the radiused area made by two layers of 6 mm plywood panels , all glued to the underlying structural grid , in a reliable , sturdy and easy to build system called “radius chine” ; cabin , cockpit and deck surfaces are made by 10-12 mm plywood panels stiffened by a grid of secondary stringers, solid beams and other structural elements; the hull bottom is further stiffened by a number of solid wood floors , tightly spaced in the centerboat area, where they bear the finkeel loads. all critical areas and structural bondings are strengthened and stiffened by epoxy resin laminated glass fabric and epoxy resin liquid joinery and structural bondings. this building system is definitely suited to be realized by home builders or small boatyards, with a basic level of wood craftmanship , in a decent amount of time given the size of the boat., in my view this will allow a small boatyard to build and offer a highly customized top level sailboat keeping the final prize to a reasonable level, which is basically the main concern when it comes to manage a small boatyard..

Building plans and study plans: project Petrel 33 is is completed : now I’m starting the long and meticulous process of drawing the building plans; complete plans will be available approximately at the end of spring at this link , anyway if someone is so committed to long for an immediate start of construction he can purchase plans starting from now, a first batch of drawings (hull parts , assembly scaffold and hull structures) will be delivered within a week so that he can start building, the rest will follow as scheduled within half of June 2018; study plans and bill of materials will be available approximately within the end of April 2018 and will be downloadable form this page for free, as usual. Stay tuned !!!
Plans price: 900 € for paper sheets, 840€ for pdf format drawings, 350 € for cad engraving files (required if you want to cut all the plywood parts with cnc machinery, includes keel steel plating shapes) ; plans will be made approximately of 27 drawings and a 25 pages booklet with assembly sequence, tips and tricks, plans can be purchased here, a discount will be available for the first buyer ., petrel 33 specifications, hull length: 9,90 m (bowsprit included), overall length: 9,90 m, maximum beam: 3,03 m, prismatic coefficient: 0,53, sink rate: 170kg/cm, canoe body wet surface: 18 m2, draft at design displacement: 1,80 m, vacant ship diplacement: 3400 kg (all gear up, no water and food, no fuel), design displacement: 4050kg (crew of 4 + luggage, 50kg fuel, acqua 150 liters water, 100 kg extra), maximum displacement: 4500 kg (crew of 6 + luggage, full fuel, full water), ballast: 1300 kg: fixed keel, upwind sail area : 47,3 m2 , mainsail 23.2 m2, jib 24 m2, staysail on removable babystay: 6.5 m2, gennaker: 65 m2, mast height on dwl: m 13,3, performance parameters : sa/displ^0.66 = 19.5 , sa/wet surface = 2.6 (canoe body only), engine: diesel inboard with saildrive or shaftline transmission, 20-30 hp, 50 liters fuel tank , electric engine specifications on plans, accommodations: 6 fulls sized (1,90 m or more) berths, 1 v berth at bow, 1 double berth on transom , 2 galley berths, interiors: charting table with main electric panel, vhf radio and chart plotter area, galley with stove, sink and 30 liters fridge, enclosed toilet with wc sink and shower, central table in dinette with foldable wings. 190 cm height in the whole galley area., systems: 12 v and 220 v wiring scheme, fresh water and black water plumbing scheme, 200 or more liter freshwater tanks.; two service batteries and a engine dedicated battery, ce label : possible b6/c10 , data to be required as extra item..
- plans: 900€ for paper version, 840 for PDF version , 350 for CNC cutting files , can be purchased here

By continuing to use the site, you agree to the use of cookies. more information Accept
The cookie settings on this website are set to "allow cookies" to give you the best browsing experience possible. If you continue to use this website without changing your cookie settings or you click "Accept" below then you are consenting to this.
- General FAQ
- Privacy Policy
- Copyright Terms
- Testimonials
- How to Pay with CC
- DOWNLOAD HELP
- USB FLASH DRIVE DELIVERY OPTION
- COMPLETE Wood Plan Packages
- Shed Plans - DOWNLOAD
- Gazebo Plans - DOWNLOAD
- Tattoo Flash - DOWNLOAD
- Boat Plans - DOWNLOAD
- Jungle Gym Plans - DOWNLOAD
- Dog House Plans - DOWNLOAD
- Furniture Wood Plans - DOWNLOAD
- Outdoor Wood Plans - DOWNLOAD
- Workshop Wood Plans - DOWNLOAD
- More Wood Plans - DOWNLOAD
- Small Home Project Plans
- Old Time Radio Shows
- Magazines and Books
- Unique Downloads
- Classic Woodworking Books
- DOOMSDAY PREPPING - Downloads
- Hentai Manga Wallpaper
- Educational
- War and Bombing
- Parks and Fairs
- Advertising and TV
- Social Guidance
- Cars and Transportation
- Communications
- Railroad Maps
- Feature Length
- Classic Literary Audio
- Gift Certificates
- Free Articles - How To Guides
- New Products
- Model: DL-ADV-BTS-165
Please Choose:
Download-boats-01, download-boats-02, download-boats-03, download-boats-04, download-boats-05, download-boats-06, download-boats-07, download-boats-08, download-boats-09, download-boats-10, download-boats-11, download-boats-12, download-boats-13, download-boats-14, download-boats-15, download-boats-16, download-boats-17, download-boats-18, download-boats-19, download-boats-20, download-boats-21, download-boats-22, download-boats-23, download-boats-24, download-boats-25, download-boats-26, download-boats-27, download-boats-28, download-boats-29, download-boats-30, download-boats-31, download-boats-32, download-boats-33, download-boats-34, download-boats-35.
Current Reviews: 1
Customers who bought this product also purchased...
Shopping cart - more, reviews - more, articles - how to guides.
Link to us, get 20% off! Sell us your original wood plans, get $$$ paid Free Shed & Wood Plans: Free Gable Shed Plans Part 1 - 2 - 3 Free Garden Storage Shed Plans Part 1 - 2 Free Outdoor Kitchen Pavilion Wood Plans Part 1 - 2 Free Backyard Garden Shed Plans Free Garden Gazebo Plans Part 1 - 2 Free Simple Shed Plans Free Swim Raft Wood Plans Free Wood Cabin Plans Free Picnic Table Plans Free Wood Plans - Building a Wood Table Free Doghouse Plans Free Jungle Gym Tree House Plans Free Tree House Tower Plans Free Wood Swimming Ladder Plans Free Canoe Boat Rack Plans Free BBQ Cart Wood Plans Free Outdoor Shower Wood Plans Free Elegant Poster Bed Plans Free How To Guides: Planning a shed Shed Plans Glossary Understanding Blueprints Laying out a shed Shed Site Evaluation Shed Foundation Options Concrete Slab Foundations Choosing Lumber Ordering Shed Material Nails and Fasteners Building a Wood Shed Part 1 Building a Wood Shed Part 2 Introduction to Framing Structural Loads Free Wood Painting Tips Achieving a smooth finish Veneer and Varnish Short Guides: Storage Shed Plans Wood Sheds Metal Shed Plans Shed Designs Free Shed Plans Finding the Right Shed Our Gazebo Plans Woodworking Plans Shed Plans Guide Garden Shed Plans Intro to Woodworking Social Guidance Films Browse All Articles
March / April Issue No. 297 Preview Now

Plans & Kits
If you’re in the market for a boat to build, this directory of Boat Plans & Kits is a fine place to start. And if your company sells plans or kits, we invite you to list your offerings here. There is no charge for listing, but the featured boats must be built of wood. To refine your search of this directory, use quotation marks. If you search Nutshell Pram Kit, you’ll receive all the listings that include the words Nutshell, Pram, and Kit. To refine your search, enter “Nutshell Pram Kit”; you’ll then see only the results for Nutshell Pram kits.
Post Your Boat Plans & Kits
Post Your Plans/Kits login or register
Search plans & kits.
To refine your search, add quote marks. If you search Nutshell Pram Kit, you will get all the listings which include Nutshell, Pram, and Kit. To refine, search “Nutshell Pram Kit” and you’ll see just Nutshell Pram Kit results.
715 Results

Sailboats - Cruising
Design no. 165.
A development from our very successful and popular Design No.

Oar / Paddle
A small and very simple tender to fit inside a station wagon or on a roofrack, this little plywood dink will suit some one wanting a tender for their small yacht or motorboat.

17' 0" Nomad
The Nomad is long, sleek, easy to plank and easier to paddle.

Northeaster Dory
The Northeaster Dory is small enough to be rowed singly, but big enough for tandem rowing with two adults. Even four adults have comfortable seating. Performance rowers may add a sliding seat.

Pilot Schooner 28
Swansea Pilot Schooner, flush-decked cruiser, based on the earliest type (late 18th/early 19th century). This vessel is intended for open ocean cruising.

11' 2" Shellback Dinghy
This beautiful 11′ 2″ dinghy is similar in construction to the Nutshell Pram, although it is slightly larger, with a pointed bow.Construction: Glued-lapstrake plywood.Alternative construction: Traditional lapstrake.No lofting is required.Plans include 5 sheets.

Sailboats - Daysailers
Paper jet 14.
Paper Jet 14 plywood stitch and glue sailing skiff

25' Bassboat
Safe, dry, fast, and seaworthy V-bottomed inboard powerboat designed for carvel planking.
Construction: Carvel planked over sawn frames.
Alternative construction: Strip
Lofting is required.
Propulsion: 6 cylinder 350 cubic inboard.
Plans include 6 sheets.
 profile")
10' 2" OUGHTRED Acorn (Puffin)
Resembling her 8′ cousin more than the sleeker 12′ Acorn, this chunky dinghy will be a good load carrier for her length—and she looks very, very British.Oughtred saves you from guess work by showing precisely how her planking should be lined off.Construction: Glued lapstrake plywood.Alternative c

Sharpie 24 Hampton Flattie
24′ Chesapeake Bay Hampton FlattieL.O.A.: 24′ 2″L.W.L.: 22′ 8″Beam: 7′ 9″ Draft: 2′ ½″/3′ 9″Sail Area: 263 sq ftWeight: 2,500# (approx)Proportionately, this is the largest sharpie type known, and shows the maximum beam ratio successfully used in the sharpie type.
Share your boatbuilding plans or kits today.
Login Sign up
From the Community

1957 Ted Carpentier 47' Ketch with 11' Beam 7' Draft. Hull is strip-planked tongue and grooved. Customer built for CEO of United Airlines
This vessel was built by Naval Architect Ted Carpentier who also worked as an engineer for Hughes

Custom Larson 40

Lowell Type Coast Guard Dory
2020 Tawas dory, a Lowell type Coast Guard dory described and drawn in John Gardner’s THE DOR

17' Whitehall Rowboat - $8,500
17′ Whitehall Rowboat - Traditionally built by Doug Cooper of Falmouth, MA;.Cedar planking on oak
From Online Exclusives

Whiskey Plank

Anchor Windlasses

Varnishing Basics

Thicker Than a Coat of Paint
Two Chesapeake Skiffs
Drawn by Howard I. Chapelle and Reuel Parker Commentary by Mike O'Brien
Chesapeake Bay sailing crab skiffs can, with little alteration, make fast and able daysailers. These skiffs first appeared on the big estuary during the last years of the nineteenth century. The type — perhaps we should say "types" — varied wildly from creek to creek. Depending upon local conditions and prejudices, an observer at the time would have found single- and two-stick rigs, with or without headsails. Deadrise amidships (amount of V to the bottom) ranged from 0 degrees to about 12 degrees. Hulls were double-ended or transom-sterned. In fact, the diversity in skiff design allowed watermen to identify a boat as the product of a particular county, if not a particular builder.
In addition to serving as their name suggests, the skiffs earned their keep in general waterfront transportation and by handling odd jobs. Although these boats went extinct half a century ago (at least as working watercraft), many of their characteristics survive in contemporary Chesapeake outboard-powered skiffs. Cross-planked bottoms, strong sheerlines, and sharp forward sections still can be seen in the working powerboats at public landings along the Bay's convoluted 5,000-mile shoreline.
The 16-foot 8-inch sailing skiff shown here must be one of the most handsome of the old boats. According to Howard Chapelle, who wrote about her in the June 1943 issue of Yachting magazine, this striking deadrise hull was hammered together by a builder named Simmons in 1910 at Cambridge, Maryland. Mr. Chapelle took the lines off the old boat on September 11,1942 in the same town. We're told only that the hull construction was "of the usual Bay deadrise type." This suggests a V-bottom cross-planked in herringbone fashion with little internal framing. Although he might have shaped a "chunk" forefoot from a single timber, Mr. Simmons more likely accomplished the considerable deadrise up forward by staving the forefoot. (That is, he filled the space between the backbone and chines with short, thick planks fashioned to the required twist.)
With its 3%-inchby 3%-inch keelson and 1-inch bottom planking, this is not a light hull. Good, old-fashioned inertia will make the boat steadier to work in the notorious Chesapeake chop and will give it the power to punch through now-ubiquitous powerboat wakes. No matter what miracle goops and goos we might employ in building this skiff today, I'd suggest not taking too much weight out of its structure.
We're told that most of the Cambridge boats shared the springy sheer, considerable deadrise, flared sides, and raking ends seen here. Chapelle suggests that the rough water often found at the mouth of the Choptank River provided ample incentive to build able skiffs. Unlike some flat-bottomed skiffs, these deadrise hulls tend to maintain headway when coming about; they don't pay off excessively before settling in on a new tack. (The habit of falling off before heading up to a new course constitutes a potentially dangerous character flaw in half-decked boats. Unless the sheets are carefully tended, a nearly stationary skiff can be knocked down as the wind fills its tightly strapped sails. Builders sometimes fitted flat-bottomed Bay skiffs with substantial foregripes to lessen the risk.)
This Cambridge skiff's rig is fairly representative of those seen elsewhere on the Bay. Its sprit-boomed leg-o'-mutton sails provide their usual advantages: They are self-vanging (the angled foot of the sail tightens and prevents the boom from lifting). They can live with light booms and simple sheeting arrangements. Draft in the sails can be controlled, to a degree, by adjusting the tension in the snotter (the line that secures
Two Chesapeake Skiffs the boom to the mast). Sail twist can be varied by changing snotter tension and/or by sliding the snotter up or down the mast.
Although the curve drawn into the foot of each sail looks fine, our sailmaker will know to cut the bottoms of the sails dead straight to better handle the tension. While we're at it, let's ask him to cut the mainsail somewhat fuller — and with the point of maximum draft farther forward — than he would for, say, a tautly strung sloop . Because the mizzen often will be sheeted closer than the mainsail, among other reasons, it ought to be sewn relatively flat.
At the size we're discussing, these rigs need no ready-made hardware. Absolutely none. Dumb sheaves (well faired and lined holes worked through the sticks near their heads) will substitute for halyard blocks. The single-part sheets need only a bowline at one end and a figure-of-eight knot at the other. Rope snotters do the work of stainless-steel or bronze gooseneck fittings — and then some.
/h The Sharpie Book (International Marine, Camden, Maine, 1994), Reuel Parker gives us drawings for classic designs that have been adapted for sheet-plywood construction. Here is a fine single-sail skiff, Parker's variation on Figure 115 from Howard Chapelle's American Small Sailing Craft (W.W. Norton & Co., New York, 1951). The old boat is believed to have been built on Hoopers Island about 1906. Chapelle took the lines off her at Crisfield, Maryland, in 1943. This hull's shallow, almost flat-bottomed, forefoot allowed Parker to sheathe its virtually unaltered lines with sheet plywood. (The deeper, sharper forefoot of the Cambridge skiff would, most likely, have demanded some fancy on-the-spot laminating in order to mate with a sheet bottom.)
We might note that this skiff and the Cambridge boat have their centerboards located far forward by yacht standards, and the boards are slightly smaller than expected. This arrangement has obvious advantages in working skiffs, and the added cockpit room will be appreciated in the daysailing derivatives. The happy configuration is made feasible by the forward bias of the sail plans' geometrical centers and by the far-aft lateral plane offered by large skegs and rudders.
Before dropping the rig from the old skiff into the new skiff, Parker lopped about 20 inches off the mast. As indicated by the vertical dashed line drawn on the sail, he added a traditional vertical slab-reefing system that was sometimes used for larger sharpies. Details of this arrangement can be found on page 66 of Chapelle's book, Boatbuilding (W.W. Norton & Co,, New York, 1941).
Casual inspection of the contemporary waterfront suggests that too many raceboats masquerade as day-sailers — their shallow cockpits fouled by nests of lines, and nary a seat in sight. Old skiffs from the Chesapeake offer secure and comfortable alternatives.
Plans for the Simmons Cambridge skiff, as drawn by Howard I. Chapelle, can be obtainedfrom Ship Plans, NMAH 5010/MRC 628, Smithsonian Institution, Washington, DC 20560. Ask for CBCSplan No. 4.
Plans for Reuel Parker's version of the Hoopers Island skiff are available from Parker Marine Enterprises, P.O. Box 4102, Key West, PL 33041. Ask for the 18-foot modified sharpie skiff.
Particulars Cambridge Skiff
LOA 16'8" Beam 4'8" Draft l'l" Sail area 110 sq ft
A sharp forefoot will keep the Cambridge skiff quiet at anchor and help it settle in quickly on a new tack.

Continue reading here: Rowing and Sailing Skiff
Was this article helpful?
Recommended Programs

Myboatplans 518 Boat Plans

Boat Alert Hull ID History Search

3D Boat Design Software Package
Related Posts
- Tortured Plywood Boat Plans
- Designs by Karl Stambaugh and Philip C Bolger Commentary by Mike OBrien
- Designs by Weston Farmer and Howard I Chapelle Commentary by Mike OBrien
- Nesting Dinghies - Boat Designs
- Design by Philip C Bolger Commentary by Mike OBrien
- Commentary by Mike OBrien Bls
Readers' Questions
What is the difference between a sharpie and a skiff?
A Sharpie is a brand of writing instrument, whereas a Skiff is a type of small boat. A Sharpie is used to write or draw, while a Skiff is used for transportation on water.
Who built pvc skiffs on kent island?
The original builder of the popular PVC skiffs on Kent Island was a man named Ed Payne. He started building them in 1970 and continued until his death in 2000.
How to build a hoopers island skiff?
Building a Hoopers Island Skiff is a complex process that requires woodworking skills and access to specific tools and materials. Here is a high-level overview of the process: Gather your materials: You will need marine-grade plywood, epoxy resin, fiberglass cloth, screws, nails, paint, and varnish. Obtain plans or a kit for the Hoopers Island Skiff to guide you through the construction process. Prepare the work area: Set up a clean, well-ventilated workspace large enough to accommodate the skiff's size. Construct the skeleton: Start by building the skeleton of the skiff, known as the frame or ribs. This involves carefully cutting and assembling the ribs according to the plans. Use marine-grade plywood and attach them securely to the keelson and chines. Install the keel and chines: Attach the keel, a long center plank running from bow to stern, and the chines, which run along the bottom edges of the skiff. Use epoxy resin and screws to secure them in place. Build the bottom panels: Cut and shape the bottom panels using marine-grade plywood. Attach them to the keel and chines, ensuring a tight seal with epoxy resin. Fit the side panels: Cut and shape the side panels to match the skiff's hull shape. Attach them to the frame using epoxy resin. Use screws or nails for added strength. Finish the structural work: Install the stem (the forwardmost part of the skiff) and transom (the stern) using plywood. Strengthen the joints with epoxy resin and fiberglass cloth. Fiberglass the hull: Apply multiple layers of fiberglass cloth to the bottom and sides of the skiff. Use epoxy resin to saturate and bond the cloth layers. This provides additional strength and increases the skiff's water resistance. Apply finishes: Sand down the entire skiff to smoothen any rough edges or imperfections. Apply paint or varnish to protect the wood and enhance its appearance. Consider using marine-grade products for added durability. Install hardware: Attach necessary hardware such as cleats, oarlocks, and other fittings according to the skiff's design and intended use. Launch and test: Once the skiff is complete, carefully transport it to the water and launch it. Test the skiff's stability and integrity before using it for boating activities. Remember, this is just a general overview of the building process, and more specific instructions are available in detailed plans or a kit for the Hoopers Island Skiff. It is recommended to seek expert advice or consult experienced boat builders during the construction process to ensure safety and quality.
How to bulid a chesapeake deadrise skiff?
Building a Chesapeake deadrise skiff requires a significant amount of woodworking skills, knowledge of boat building, and access to the necessary tools and materials. Here are some general steps to guide you through the process: Research and gather information: Familiarize yourself with the characteristics, dimensions, and construction techniques of a Chesapeake deadrise skiff. Study boat plans, books, and online resources to understand the design and building process. Acquire the plans: Purchase or download a set of Chesapeake deadrise skiff plans. These plans will guide you through the construction process, providing detailed measurements, instructions, and diagrams. Gather materials and tools: Obtain the necessary materials for the boat construction. This would include plywood for the hull and deck, solid wood for frames, stringers, and other structural components, fiberglass cloth and epoxy for the hull coating, screws, nails, and other fasteners, and marine-grade paint and varnish. You will also need various woodworking tools such as saws, drills, planes, chisels, clamps, and sanding equipment. Lofting and cutting the parts: Transfer the dimensions from the boat plans onto full-size layouts called "lofts." From the lofts, you will create templates, or patterns, of various parts, including the hull panels, frames, and faired battens. Cut the parts according to the templates. Assemble the hull: Begin by constructing the backbone and fitting it into a strongback, a long stable frame used to support the boat during construction. Attach the frames and reinforce them with stringers on top. Fit and fasten the pre-cut plywood panels to form the hull, ensuring proper alignment and fair curves. Use epoxy and fiberglass cloth to seal the seams and reinforce the hull. Building the deck and interior: Construct and fit the deck beams, carlins, and other supporting structures. Install the plywood deck and secure it to the frames and hull. Add cockpit bracing, flotation, and any other necessary structural components. Create and install seats, storage compartments, and other interior features as desired. Finishing touches: Smooth out any imperfections on the hull and deck by filling and fairing with epoxy putty or fairing compound. Sand all surfaces to achieve a smooth finish. Apply suitable marine-grade paint and varnish to protect the wood and provide a polished appearance. Note that these steps provide a general overview of the building process. It is highly recommended to consult and follow the specifics outlined in your chosen set of plans. Additionally, consider enrolling in woodworking or boat building classes or seeking guidance from experienced builders to ensure a successful build.
How to build a crab skiff?
Start by purchasing the materials you’ll need to build a skiff. The materials will depend on the size and design of the skiff. Consider the size and weight of the skiff, and purchase the necessary wood, fiberglass, and epoxy to complete the build. Cut the wood pieces for the skiff according to the design plans. Generally, skiff hulls are made from plywood panels or strips, and will require precise cuts. Use clamps to hold the wood in the precise shape as you cut it. Assemble the plywood pieces to form the hull of the skiff. Secure the pieces with screws and epoxy. Once the frame of the skiff is complete, lay cloth over it and secure with staples or glue. Make sure to protect the edges with tape to prevent them from getting damaged. Saturate the cloth with epoxy, making sure to fill any gaps between the cloth and the wood. Let the epoxy cure overnight. Sand the skiff to remove any rough edges. Attach handles and other hardware to the skiff. Try to position them so that they are not difficult to reach when a person is seated in the boat. Apply paint or a sealer to protect the surfaces of the skiff. Launch your skiff and enjoy! Make sure to inspect the boat regularly and repair any damage as necessary.
Where to get chesapeak deadrise plans?
You can find Chesapeake Deadrise plans through classic boat plans, The WoodenBoat Store, and Chesapeake Marine Design.
How to make a cheasepeake bay skiff?
Start by designing your skiff. Consider the size, materials, and weight you want to use. Make sure that proportions and lines look correct when viewed from the front, side and rear of the boat. Mark and cut the parts for your skiff. Commonly used materials forChesepeake Bay skiffs are marine-grade plywood, cedar strips and fiberglass resin. Assemble your skiff. Use epoxy to join the parts and permanently adhere the pieces together. Shave, sand, and shape the hull. Use power sanders and other tools to make the exterior smooth and appealing. Install the flooring, decks and other components. Use screws and epoxy to attach these components to the bottom of the hull. Finish and seal the hull. Use a quality paint or polyurethane to give the skiff a nice finish. Outfit the skiff. Install any navigation lights, anchors, and other equipment necessary for a successful trip.
How to plank the forefoot portion of a dead rise work boat?
Clean the area thoroughly to remove any dirt, rust, or loose material. Measure the area that needs to be planked and cut the planks to the appropriate size. Apply the appropriate adhesive to the underside of the plank, such as epoxy or an adhesive caulk. Place the plank in the desired position on the boat and secure it with clamps. Drill holes through the plank and into the boat's substrate to secure the plank in place. Insert screws through the holes and into the substrate and tighten them until the plank is firmly secured. Seal the planks and screws with a sealant or epoxy to prevent water from seeping in.
Where is the 32 ft. chesapeake deadrise boat located now?
It is not possible to answer this question without more information. Where the 32 ft. Chesapeake Deadrise boat is located will depend on who owns it and where they have chosen to keep it.
How to cross plank a skiff?
Prepare your skiff by making sure the hulls are clean, there are no items in the skiff and any lines or riggings are removed. Position two support stands on opposite sides of the skiff, with one close to the bow and the other close to the stern. Adjust the stands so they are level with the gunwales. Place a strong plank across and on top of the two stands. The plank should be made of a sturdy material, such as 3/4 inch plywood. Make sure the plank is longer than the skiff's length. Place a 2x4 underneath each gunwale, making sure that it is centered on the gunwales and is firmly against the plank. Secure the 2x4s to the plank by drilling four evenly spaced pilot holes and screwing in at least eight screws. Repeat the same process for the other side of the skiff. Once both sides are secure, check the plank for any tight spots or gaps between the plank and the 2x4s. If needed, adjust and retighten the screws. Finally, place a skid or roller bar made of PVC pipe underneath the plank to help protect it from damage, and you should be ready to cross plank the skiff.
Boat Profile
The Wittholz Catboat
A classic adapted for plywood
From Issue February 2021
T he catboat is a beamy, monohulled sailboat descended from a line of working watercraft. No one is sure of the origin of the name “catboat.” Some said the boat was as fleet as a cat. Or, the name might have been inspired by dock cats that greeted returning fishermen. Catboats fished, hauled freight, and ferried passengers along the U.S. Eastern Seaboard as early as 1850. Their spiritual home is Cape Cod, Massachusetts, where generations of the Crosby family built catboats, determining their shapes with hand-carved models.
The beam of a catboat is typically half its length. Such generous beam afforded room for a fisherman to work. A single mast, stepped far forward, has a forestay but generally no shrouds. The rig is a single sail, often a gaffer. Fishermen made headroom by furling the rig then hiking it high overhead with one of the halyards. Because catboats worked in shallow waters, most have shoal draft and a centerboard. Catboats have a characteristic barn-door rudder, hung proud of the stern and steered with a tiller.
Working watermen eventually adopted steam and gasoline. But a new kind of sailor, the pleasure boater, adopted the catboat, which retains a loyal following to this day.
Naval architect Charles W. Wittholz of Silver Spring, Maryland, designed boats ranging from 11’ dinghies to 85′ replica ships. In his career, Wittholz designed several catboats, but it was the 17-footer that he himself sailed on the Potomac River. Built in 1967, he named his boat GOOD OMEN and sailed her for more than 20 years.
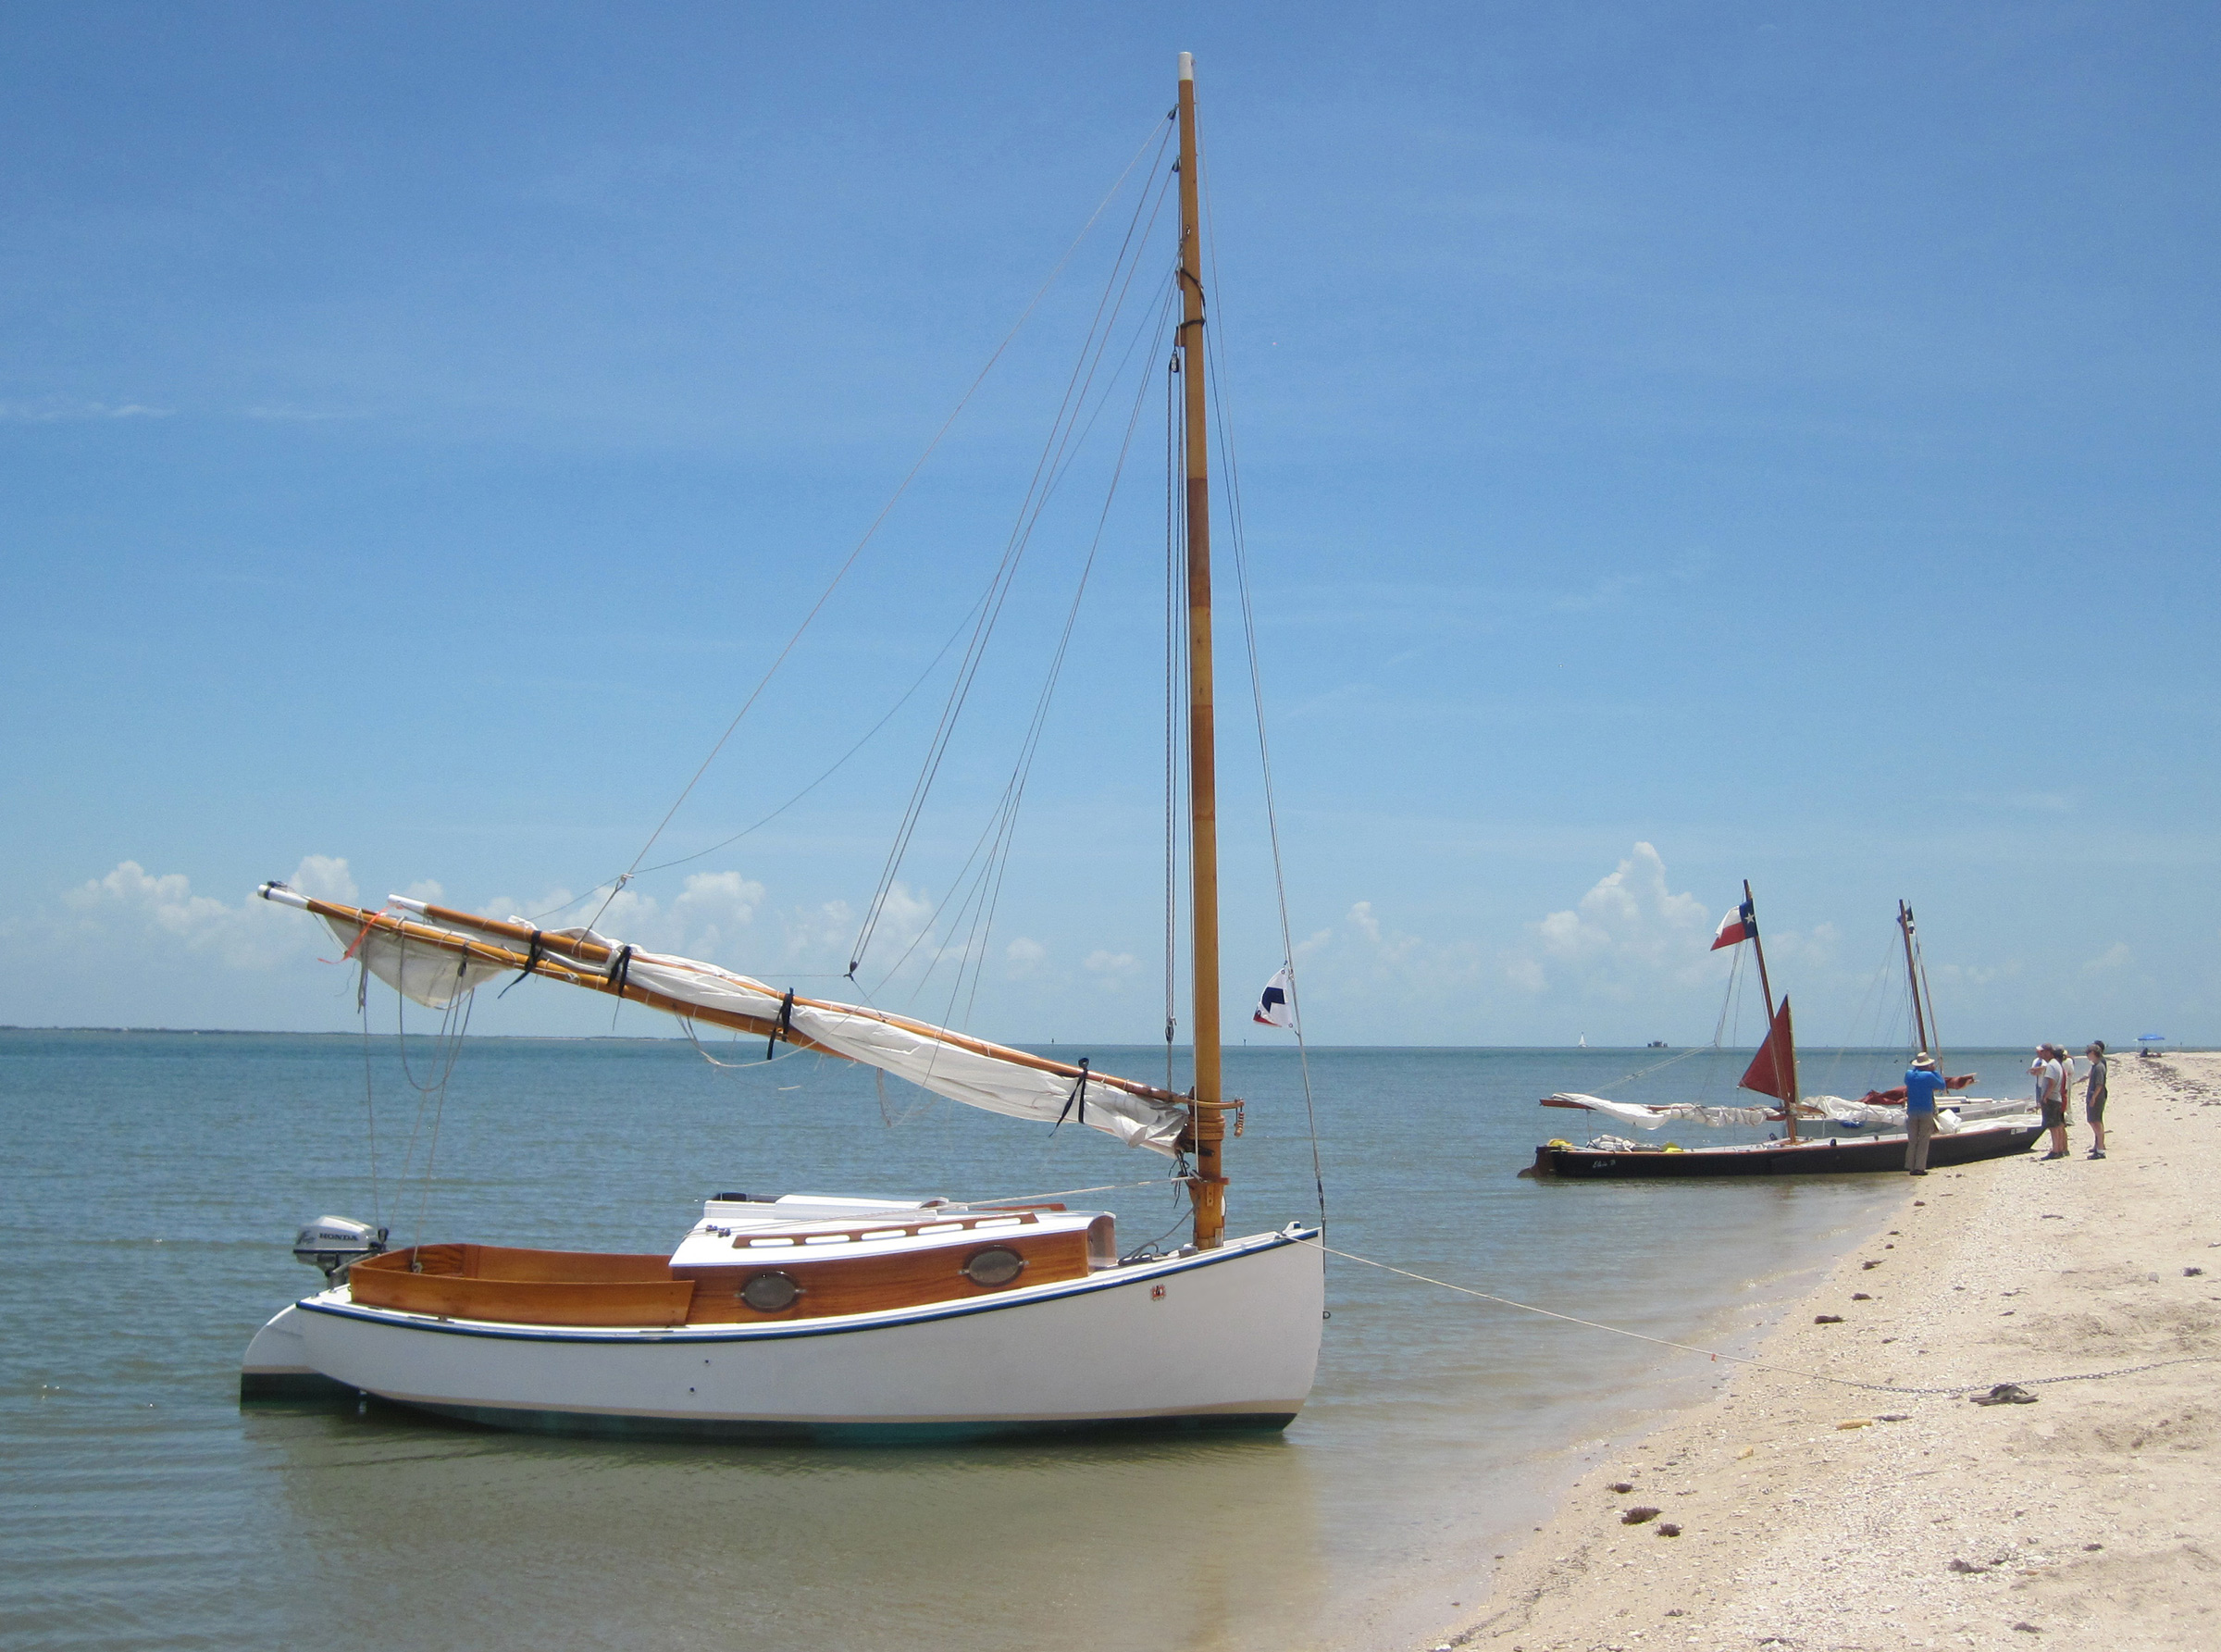
The keel version of the Wittholz 17 catboat has its greatest draft 13-1/2′ back from the stem, so it can be brought fairly close to shore. The bundled boom and gaff have been hiked up by the peak halyard to provide more headroom in the cockpit.
T he plans for the 17′ 1″ plywood catboat include 11 sheets with good construction detail: materials, dimensions, fastening schedules, notes, and comments. Several alternatives are included: self-bailer instead of deep cockpit, lead-ballasted full keel instead of a centerboard, open cockpit instead of a cabin, gaff or marconi sailing rig, optional anchor-handling bowsprit, and an optional inboard engine. The plans date to the early 1960s, so some of the suppliers mentioned have long been out of business.
The Wittholz 17 requires lofting from the plan’s offsets. Drawing the body plan (the end-on view) requires a 6′ x 10′ drawing surface and is critical to loft accurately as it provides the full-sized patterns for the frames. The 6′ x 6′ side-view lofting of the stem provides patterns for the stem/forefoot assembly. The lofting for this catboat is not complicated; Greg Rössel’s book, Building Small Boats , covers lofting nicely.
Hull construction is straightforward: assemble the oak stem, the 1/2″ plywood transom, and the nine frames of mahogany or oak with 1/2″ plywood gussets. Set those elements on a level building jig, upside down, with the frames 22″ apart. Fit the mahogany or fir sheer stringers and chines, and the mahogany keelson to the frames.
The hull sides and bottom are 3/8″ plywood. The plans suggest a layer of fiberglass cloth on the ply for extra durability. I know from personal experience that if you get the catboat sideways to the wind and ram the dock, you can crack some plywood along the sides. The most vulnerable areas are between the frames forward of amidships, aft of the forward bulkhead. I suggest adding oak blocking between frames about 12″ above the waterline and heavy-duty fiberglass-epoxy on the inside of the plywood in these areas.
In my experience, fir and Aquatek plywoods check and crack if painted only, so they must be covered on both sides with fiberglass cloth set in epoxy. If you do cover plywood in fiberglass, do it after cutting pieces to shape, before installation, while they are still flat. This is so much easier than fiberglassing an assembled boat. High-quality okoume plywood is nice stuff: no voids, many plies. Okoume, when used for parts of the boat other than the hull, benefits from a barrier coat of unthickened epoxy on both sides, but it does not require fiberglass cloth.
This boat will always have a little water in the deepest part of the bilge. Seal this area with several coats of epoxy resin.
Get the sides from 5′ x 20′ panels (two sheets 5′ x 10′ scarfed). Attach the sides first. Get the bottoms from 4′ x 20′ panels (4′ x 8′ sheets scarfed). The bottom panels overlap the side panels most of the way then transition to a butt seam forward. Fit the keel to the keelson before turning the hull over.
T he sail plans include both marconi and gaff rigs. The gaff-rig mast I built is solid spruce: 5-1/4″ in diameter, 25′ long. The gaffer requires a single forestay but no shrouds. The hardware called out in the plans is all from Merriman Yacht Specialties, a company no longer in business. Most parts have readily available equivalents, but if gooseneck hardware is hard to find, try wooden jaws. See William Garden’s article, “The Right Jaws for your Gaff and Boom,” in WoodenBoat No.59 .
The gaff rig’s solid mast is too heavy and awkward to step handling it solely from the foredeck. Lacking a crane, it requires a person on a low bridge or atop a neighboring houseboat to steady the mast while a crew of two lifts/lowers on deck. Spare halyards from two neighboring sloops would also work to step this mast.
Those wanting a trailer-sailer will look to the marconi rig then make modifications for folding. The builder will have to design the modifications, because the plans say nothing about folding. The marconi mast is a 5-1/4″ x 4-1/4″ hollow rectangle, 32′ 3″ long. This mast requires a forestay and two shrouds that belay aft of the mast partner.
The gaff rig peaks up higher than is usual for a center of effort similar to the marconi. Build either sail with two sets of reefpoints as shown on the plans. The second reefpoint has a calming effect in 40-knot winds.
The optional bowsprit is not for a jib, as a jib of any kind would unbalance the boat. The bowsprit is for anchor handling, equipped with a chock to guide the chain and rode.
The Wittholz catboat has a centerboard, as catboats commonly do. Draft with centerboard up is 21″, down 4′ 3″. The centerboard case is 6′ long, most of it in the cabin, with 19″ extending aft into the cockpit. The centerboard itself is 3/8″ galvanized steel. There are 500 lbs of movable ballast in the form of lead pigs under the cabin and cockpit floorboards.
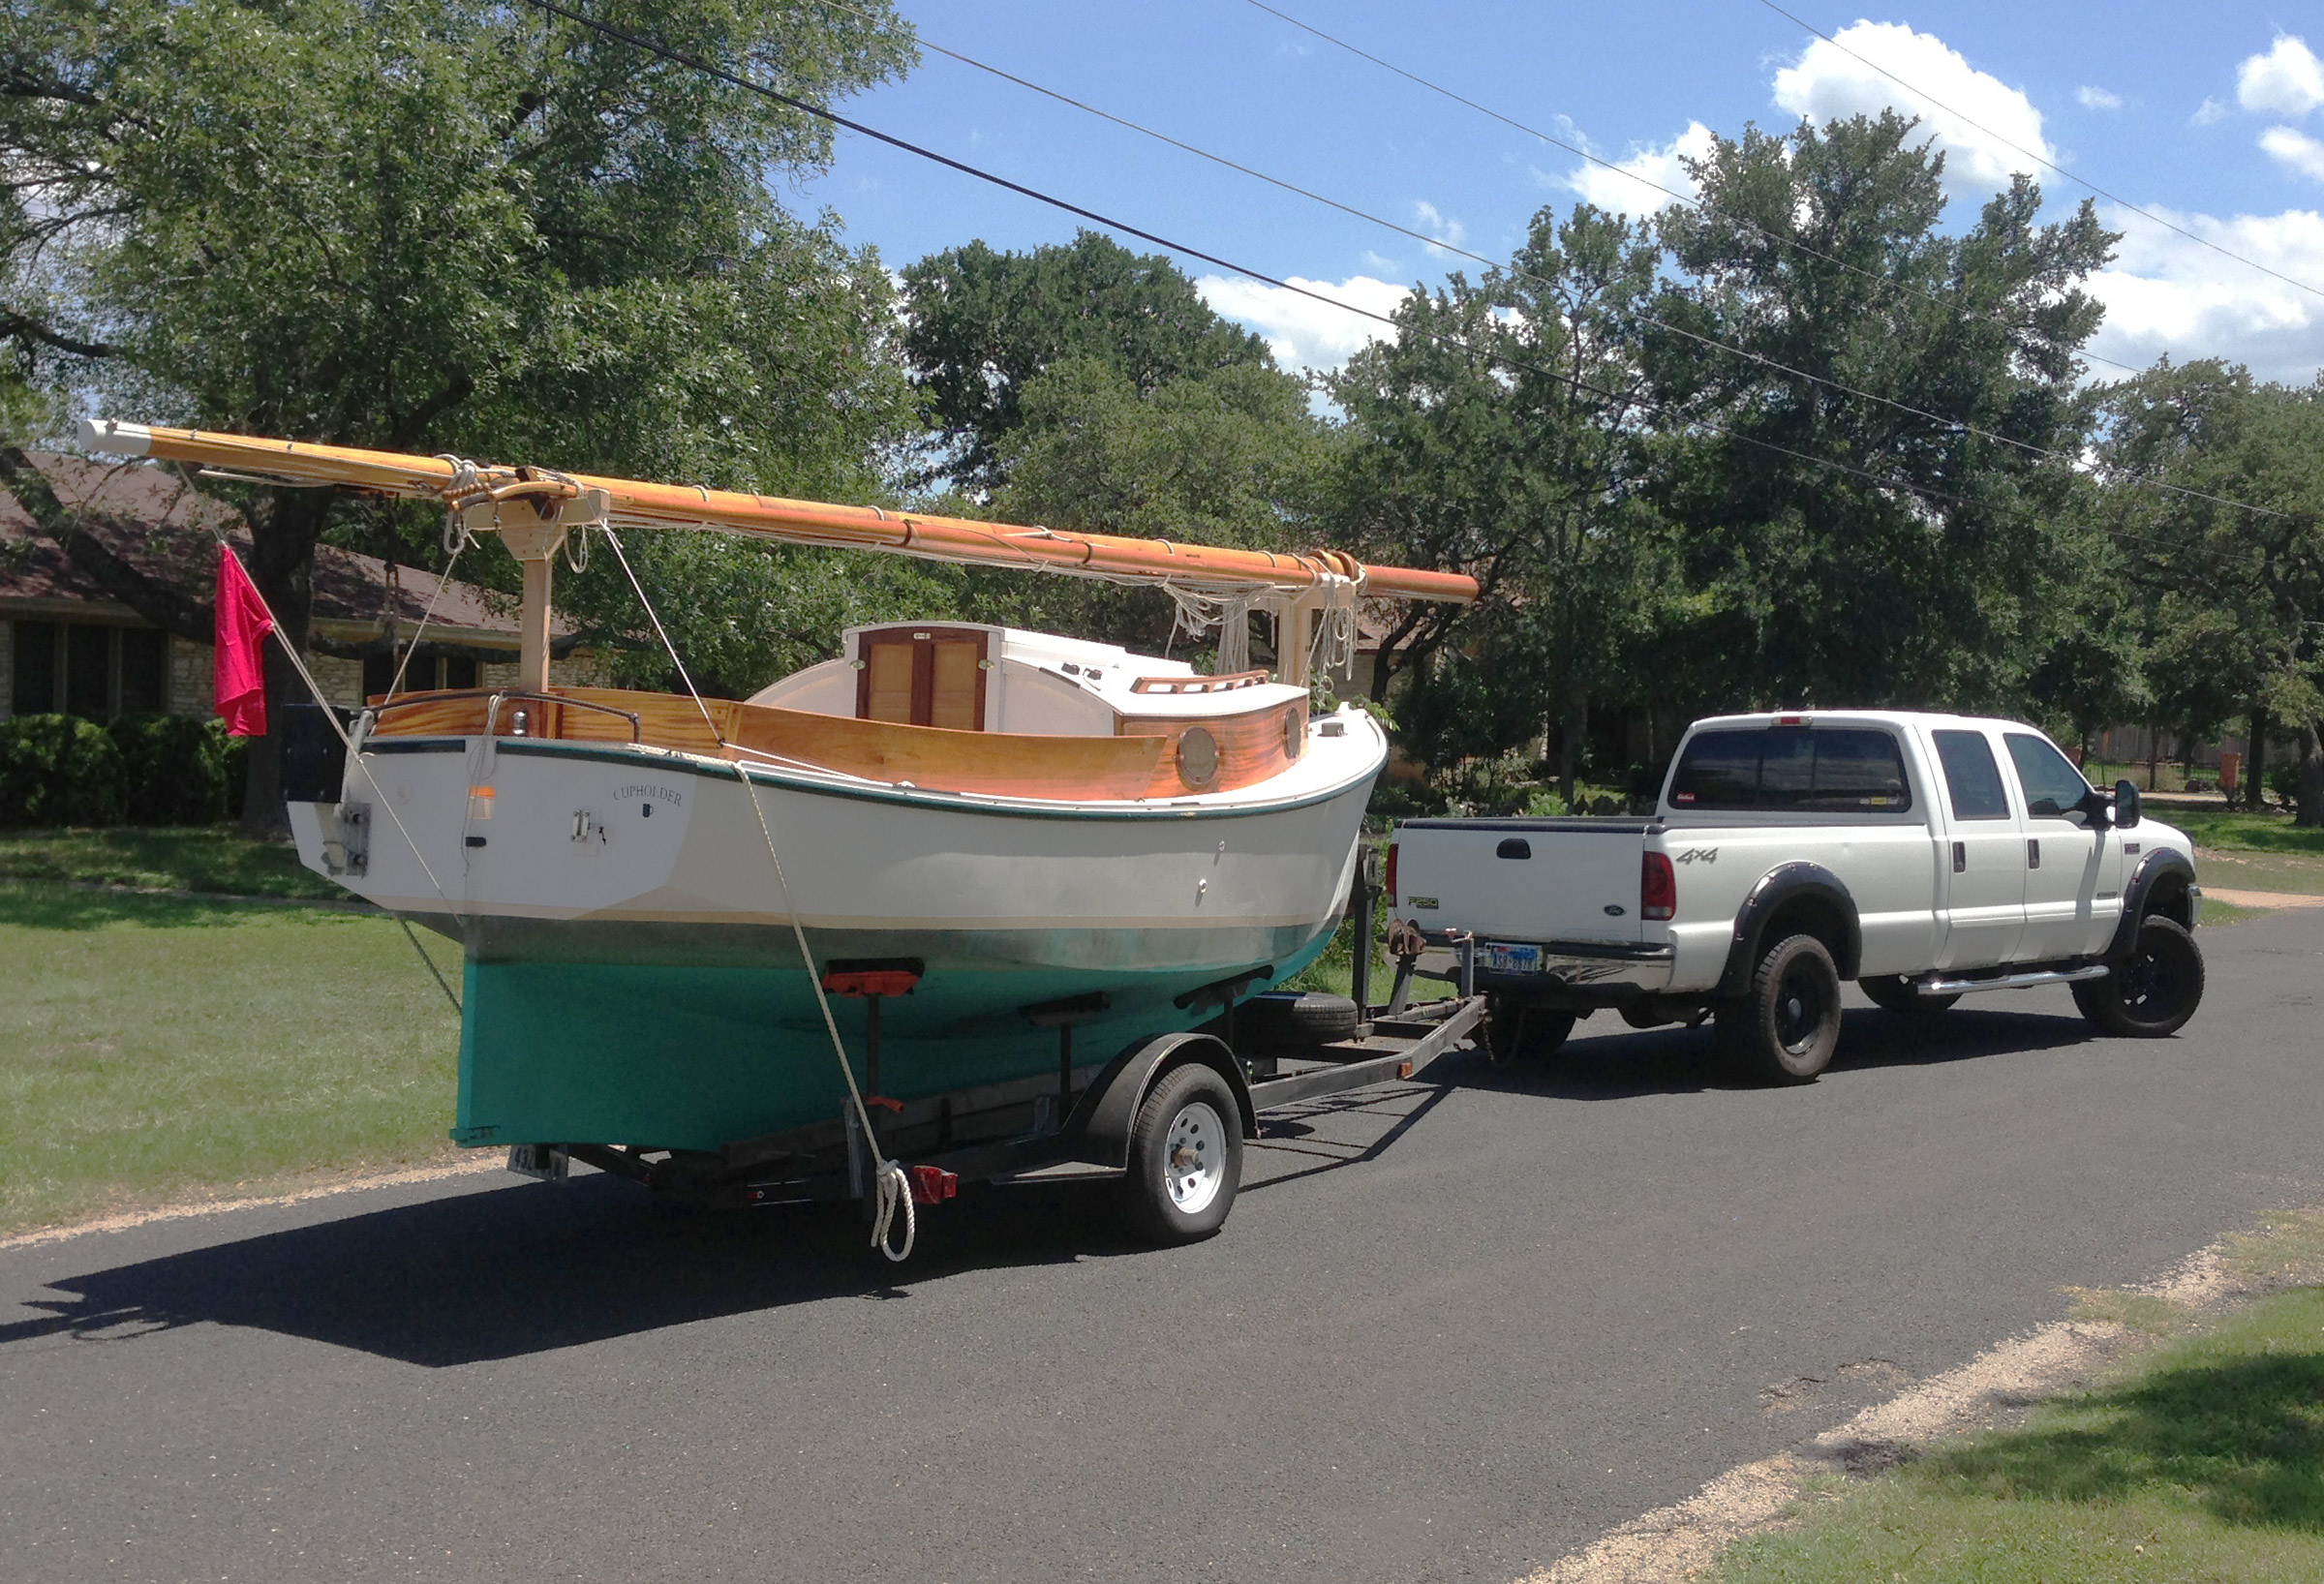
The trailer for this keelboat version of the catboat is fitted with screw pads to steady the hull while the weight of the boat is supported beneath the keel. The centerboard version could slide onto a trailer equipped with bunks.
The plans include an option for a full ballast keel, as seen in the catboat pictured here. The draft of the full-keel version is 28″. The builder must make a mold to pour 600 lbs of lead shaped to fair with the deadwood in the keel. The mold requires lofting, too; refer to the Bud McIntosh book, How to Build a Wooden Boat , for a simple explanation.
Either model weighs about 2,200 lbs, including the ballast. The trailer for it could be a bunkboard arrangement, but a trailer with boat stands is better. When trailering, the boat must rest on its keel, not its garboards.
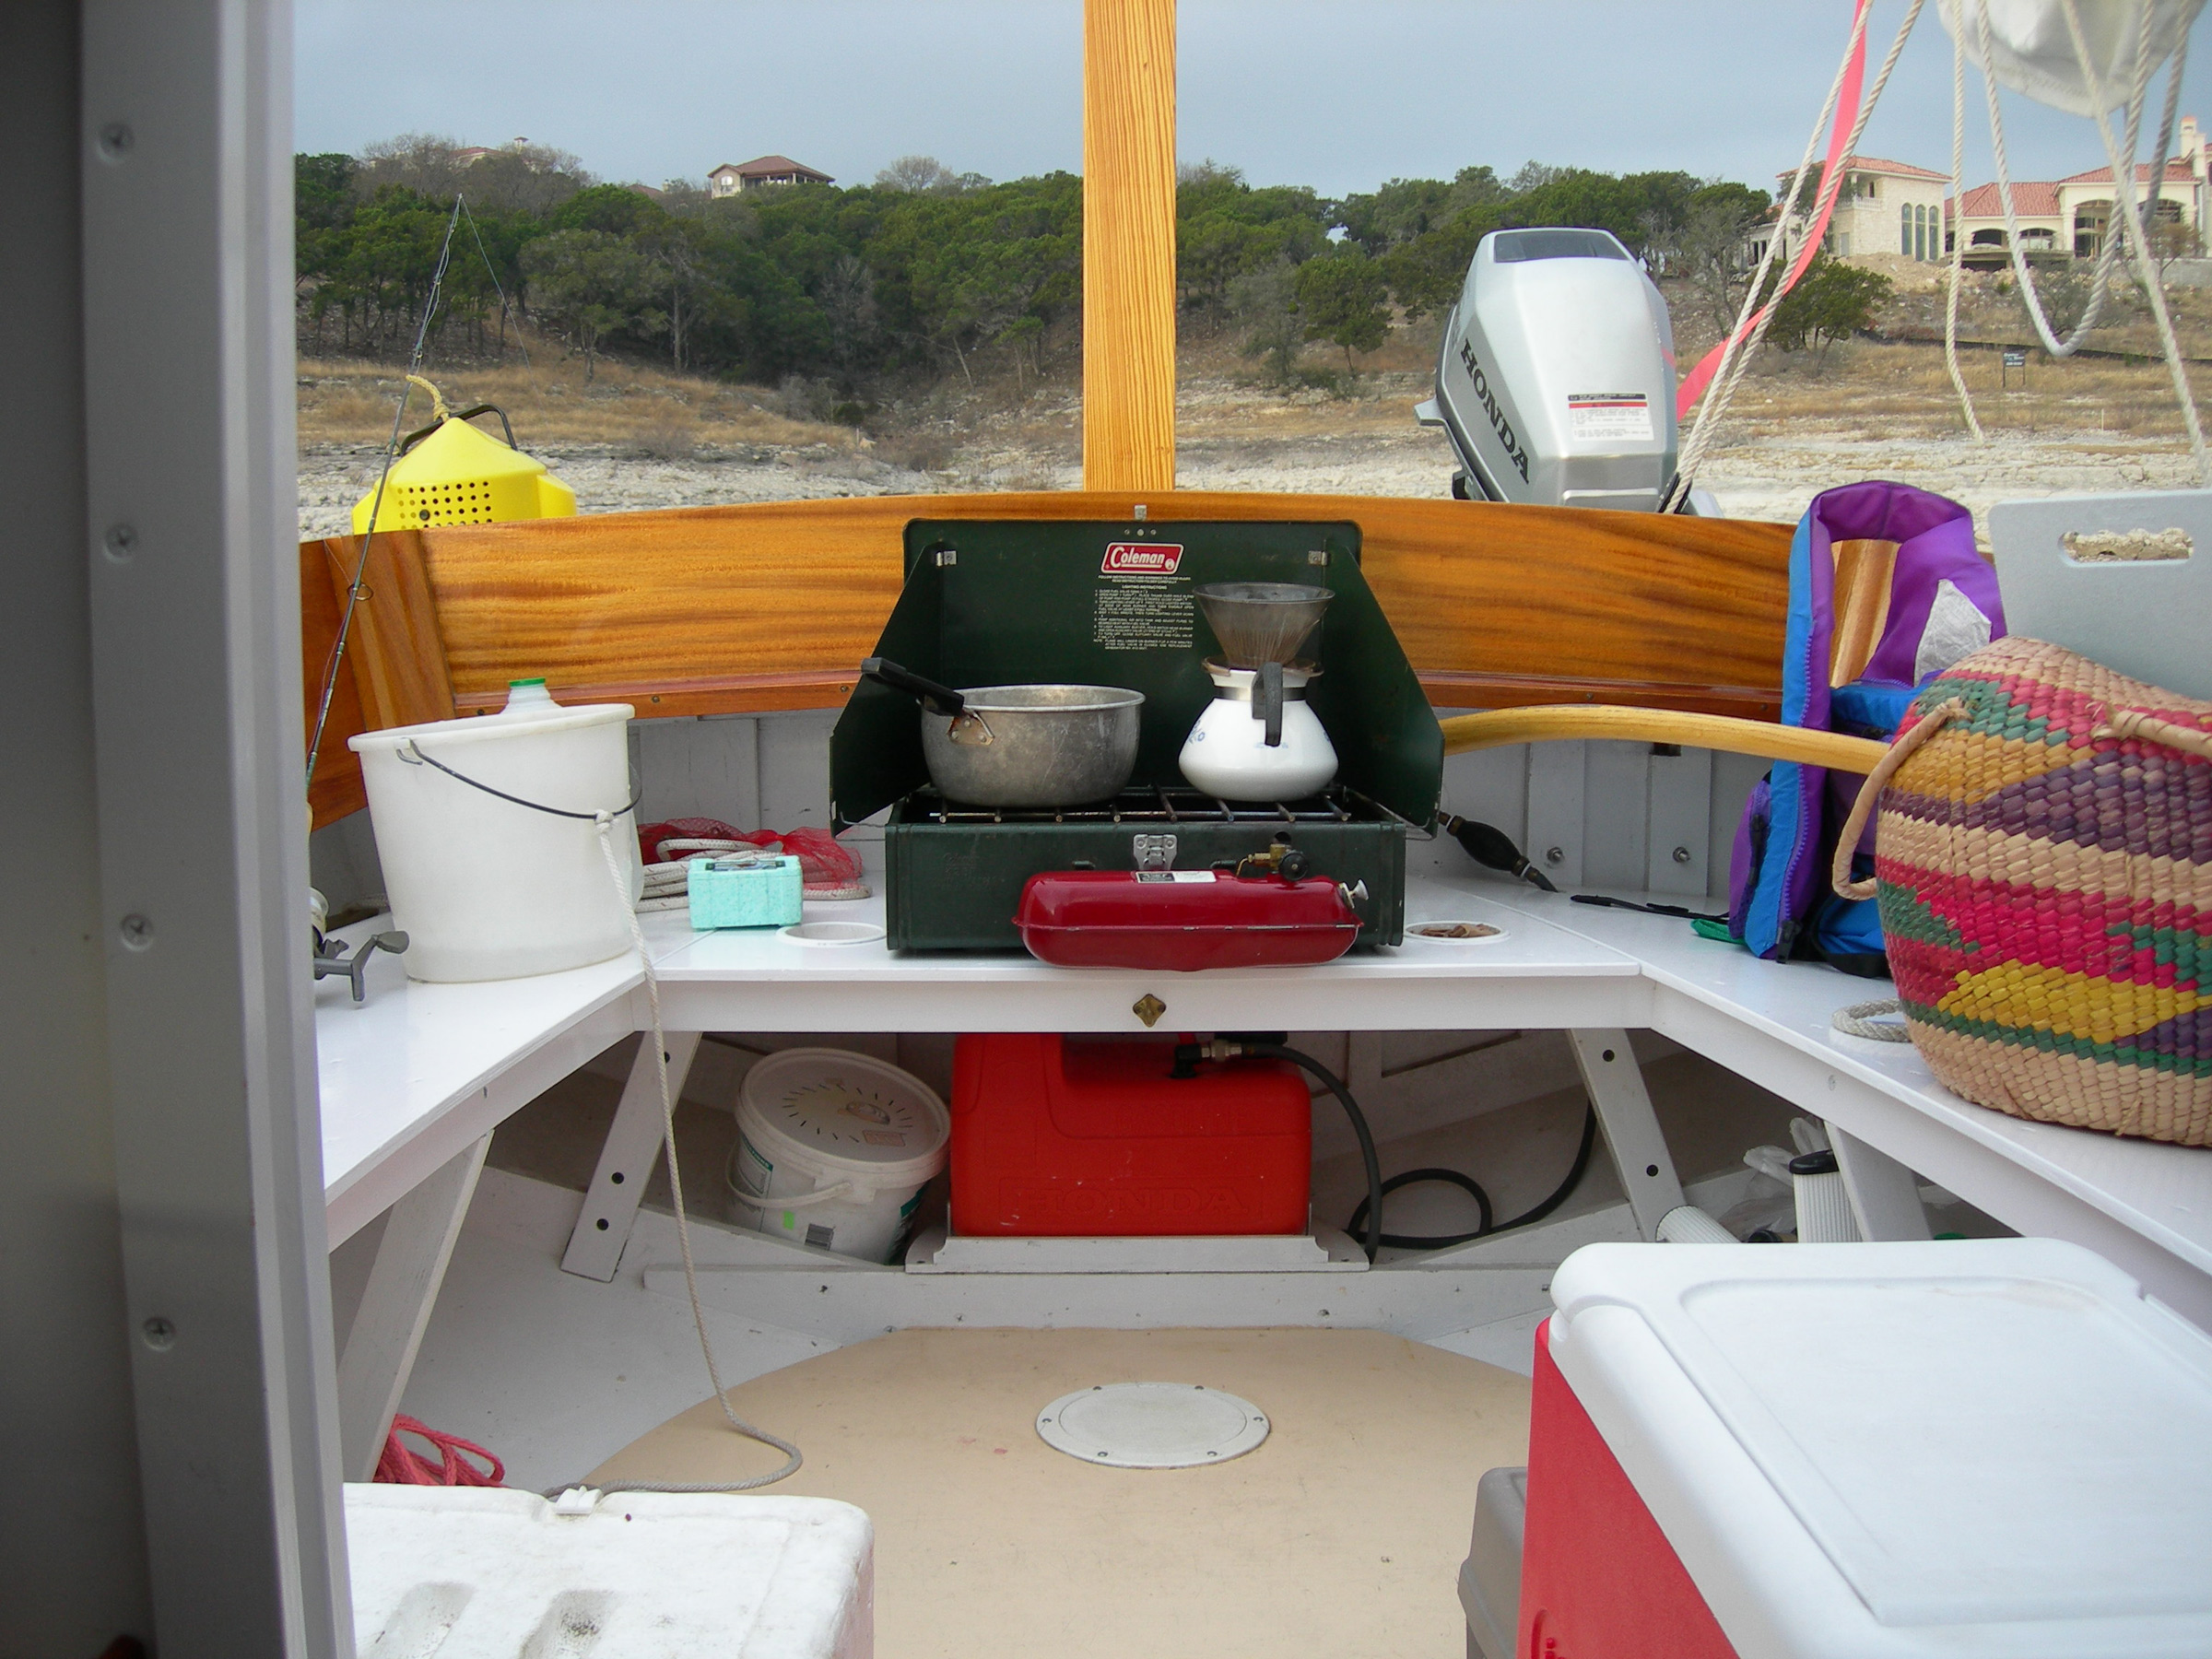
With the tiller swung to port, there’s room for the stove when the cockpit is pressed into service as the galley. The plans call for an engine box, which would occupy the center of the cockpit. A transom-mounted outboard motor frees up that space for the crew.
T he cockpit is seriously spacious. Sloop sailors often walk by and exclaim, “Look at all that room!” The cockpit can easily accommodate six people. The seats have a comfortable slope, and the coamings are tilted as backrests should be. The footwell is deep but not self-bailing. Water will sump to the deepest part of the bilge where a reliable pump awaits. For a self-bailing cockpit, see the plans; there is a sheet for that. The high sheer up forward keeps the cockpit dry in most conditions.
At anchor, it is a fine thing to hike up the sailing rig for standing headroom in the cockpit. On the gaffer, do this by furling the sail, lashing boom to gaff, and hauling on the peak halyard. For the marconi rig, modify the wire topping lift. Its upper end is fixed to the top of the mast, so modify the bottom end with 1/4″ rope, blocks, and a cleat on the boom to adjust it.
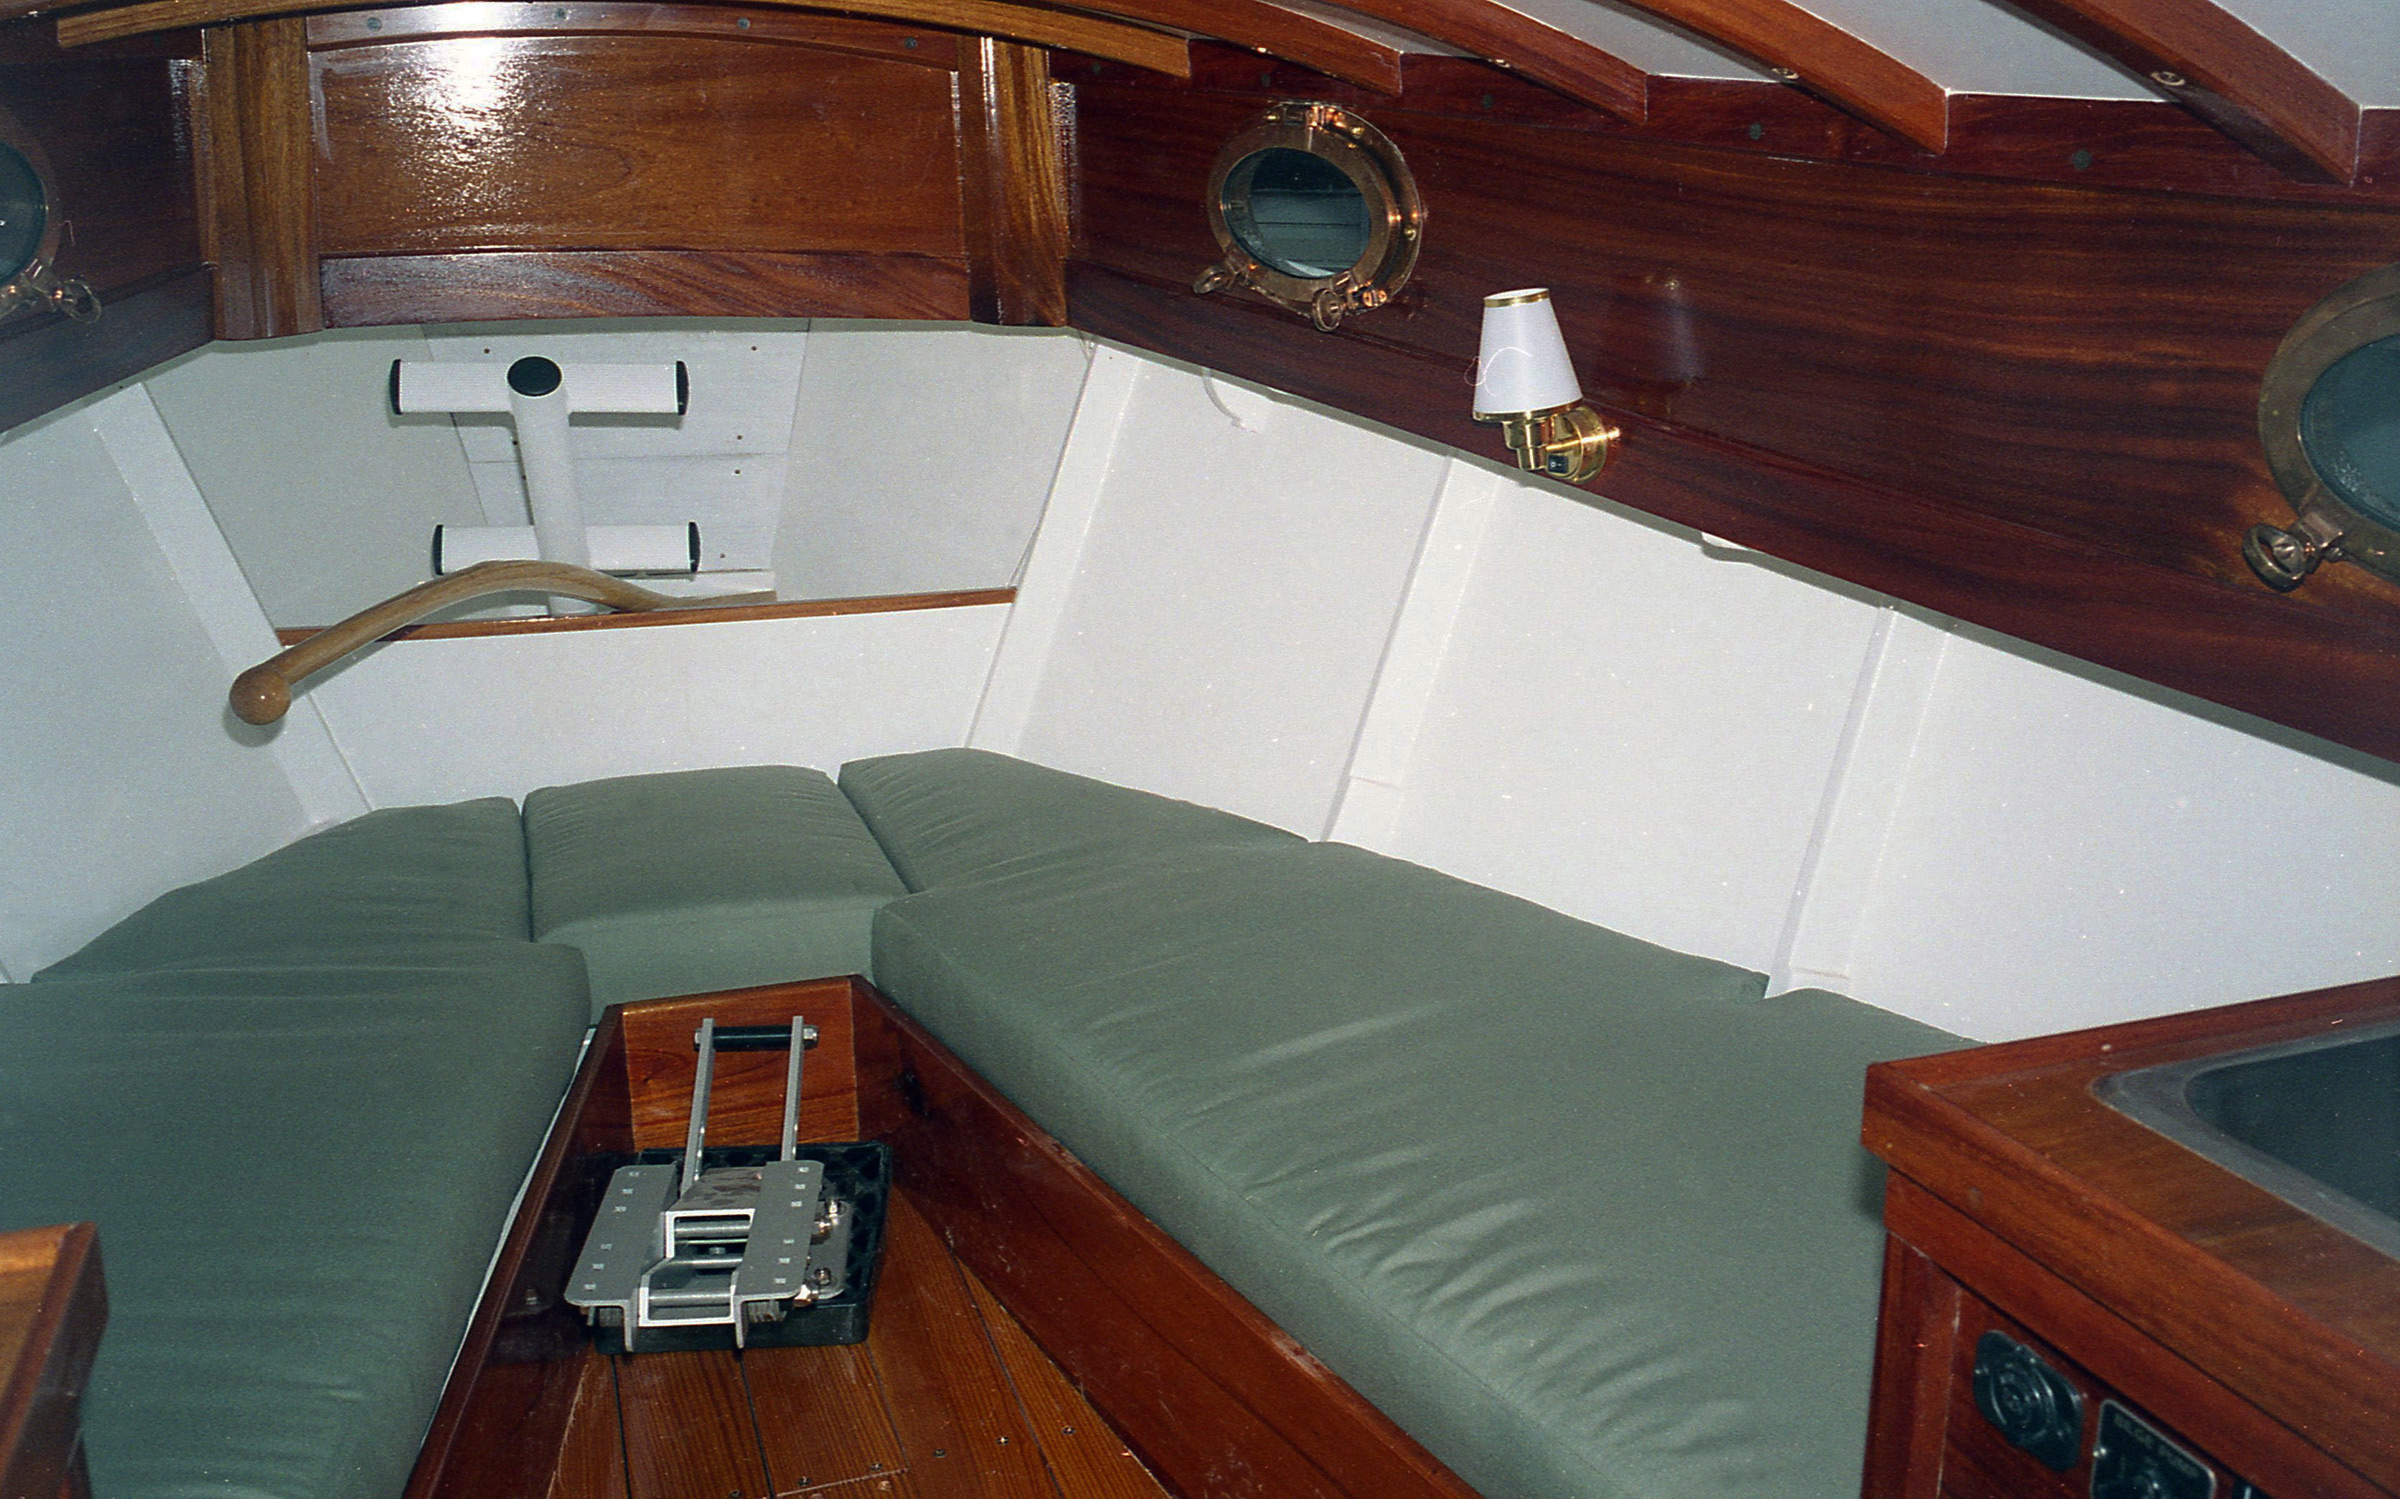
The plans for the cabin include two berths and cabinets aft of them, one equipped with a sink, the other a two-burner stove. The keelboat version, seen here, leaves the space between the berths unobstructed by a centerboard trunk.
In the cabin, there is sitting headroom on berths port and starboard. The two lockers amidships are sure to be customized by the builder. At anchor, a Coleman stove works well in the cockpit aft, so the two-burner alcohol stove in the cabin shown in the plans may not be required. The drawings show a head up forward, but it flushes straight into the sea. Better find a place for a porta-potty, either forward or perhaps amidships port or starboard. When it comes to building the cabin, How to Build a Wooden Boat is again a good companion to the plans.
The plans show where to fit a small inboard engine, but a 5-hp, four-stroke, long-shaft outboard motor serves well as an auxiliary. The plans also show an option for stowing an outboard under a hatch set in the cockpit floor. On smooth water, the outboard will push the boat at 6 knots. Mount the outboard to a bracket on the transom, but keep it clear of the big rudder. Add framing in the transom for attaching the bracket to the boat. The bracket should be adjustable up and down to keep the propeller in the right amount of water, no matter where the passengers are. Most 5-hp outboards come with a propeller suitable for light craft or inflatable dinghies. For a boat of this size and weight, select a propeller with less pitch so that engine rpms are high enough to avoid lugging the engine.
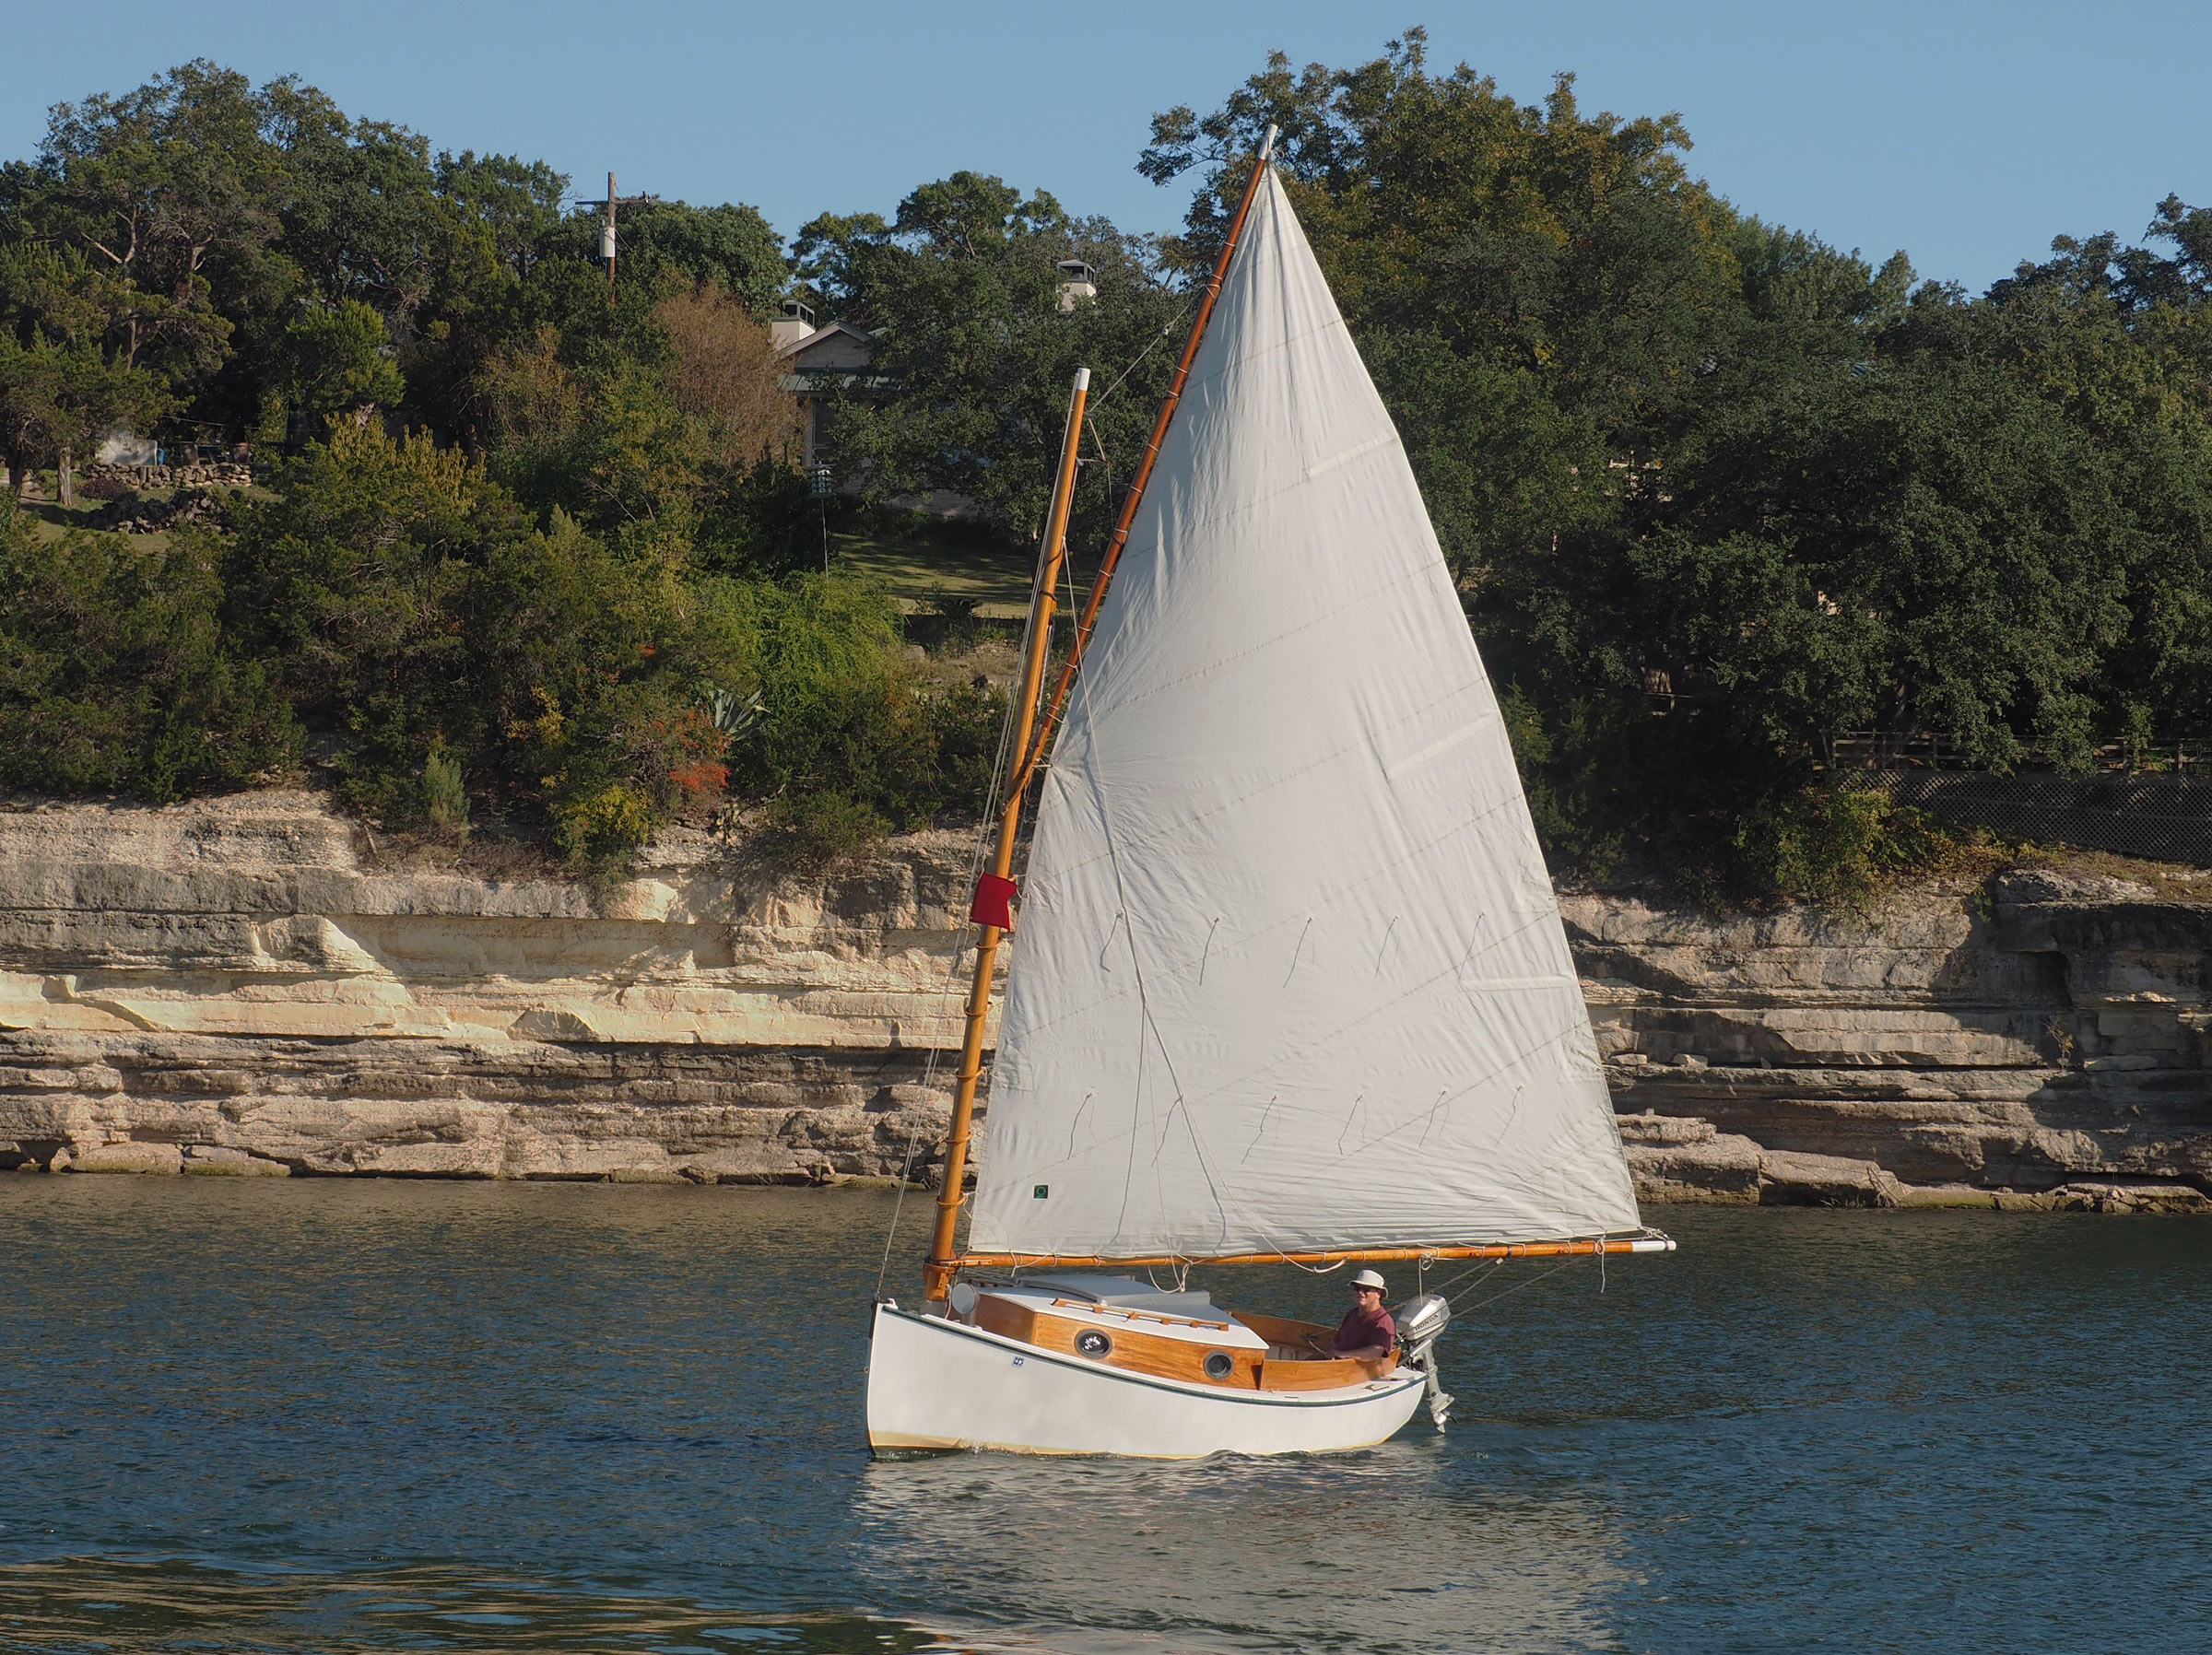
The 220-sq-ft sail here is held to the mast by hoops and lashed to the gaff and boom. The plans not using sail track along the boom.
I n good conditions, expect this boat to sail to windward at 45 degrees off the wind. A sloop, with its two sails and narrower beam, might sail closer, but the catboat sailor specializes in his one mainsail and strives to get the most from it. The peak and throat halyards of the gaff rig provide control over sail shape. A three-part boom outhaul for either rig is useful to control the belly of the sail. The position of the crew greatly affects overall trim. Move crew aft or to windward to reduce weather helm, something catboats have in abundance. On this boat in particular, moving crew leeward can help push the hard chine underwater, so the side acts like a leeboard.
It is best not to oversheet a catboat. When hauled hard, the boom should be over the stern quarter of the boat. Hauled any harder, the boat slows down and crabs to leeward. Best to let out the sheet, find the wind, then adjust by looking for the sweet spot. On gusty days, do not cleat off the sheet; instead, wrap just enough turns around so it will slip when hit by a strong gust. On a reach, 15 knots of wind will move this boat at 6 knots. In stronger winds, reef the sail to match, preferably sooner than later.
At the helm, keep the tiller in one hand and the sheet in the other. One can sense immediately how the combination affects boat speed and trim.
Monte Copeland grew up in a lumberyard along the Ohio River, but never connected wood with water until after moving to Austin, Texas. Now retired from computer programming, Monte and his wife Sheila sail on Lake Travis. In his shop is an old Shellback dinghy getting ready for new paint.
Wittholz Catboat Particulars
Length/17′ 1″
Load waterline/16′ 6.6″
Beam/7′ 9.5″
Centerboarder draft, hull/21″
Centerboarder draft, board down/4′ 3″
Keelboat draft/28″
Displacement/3,080 lbs
Gaff sail area/220 sq ft
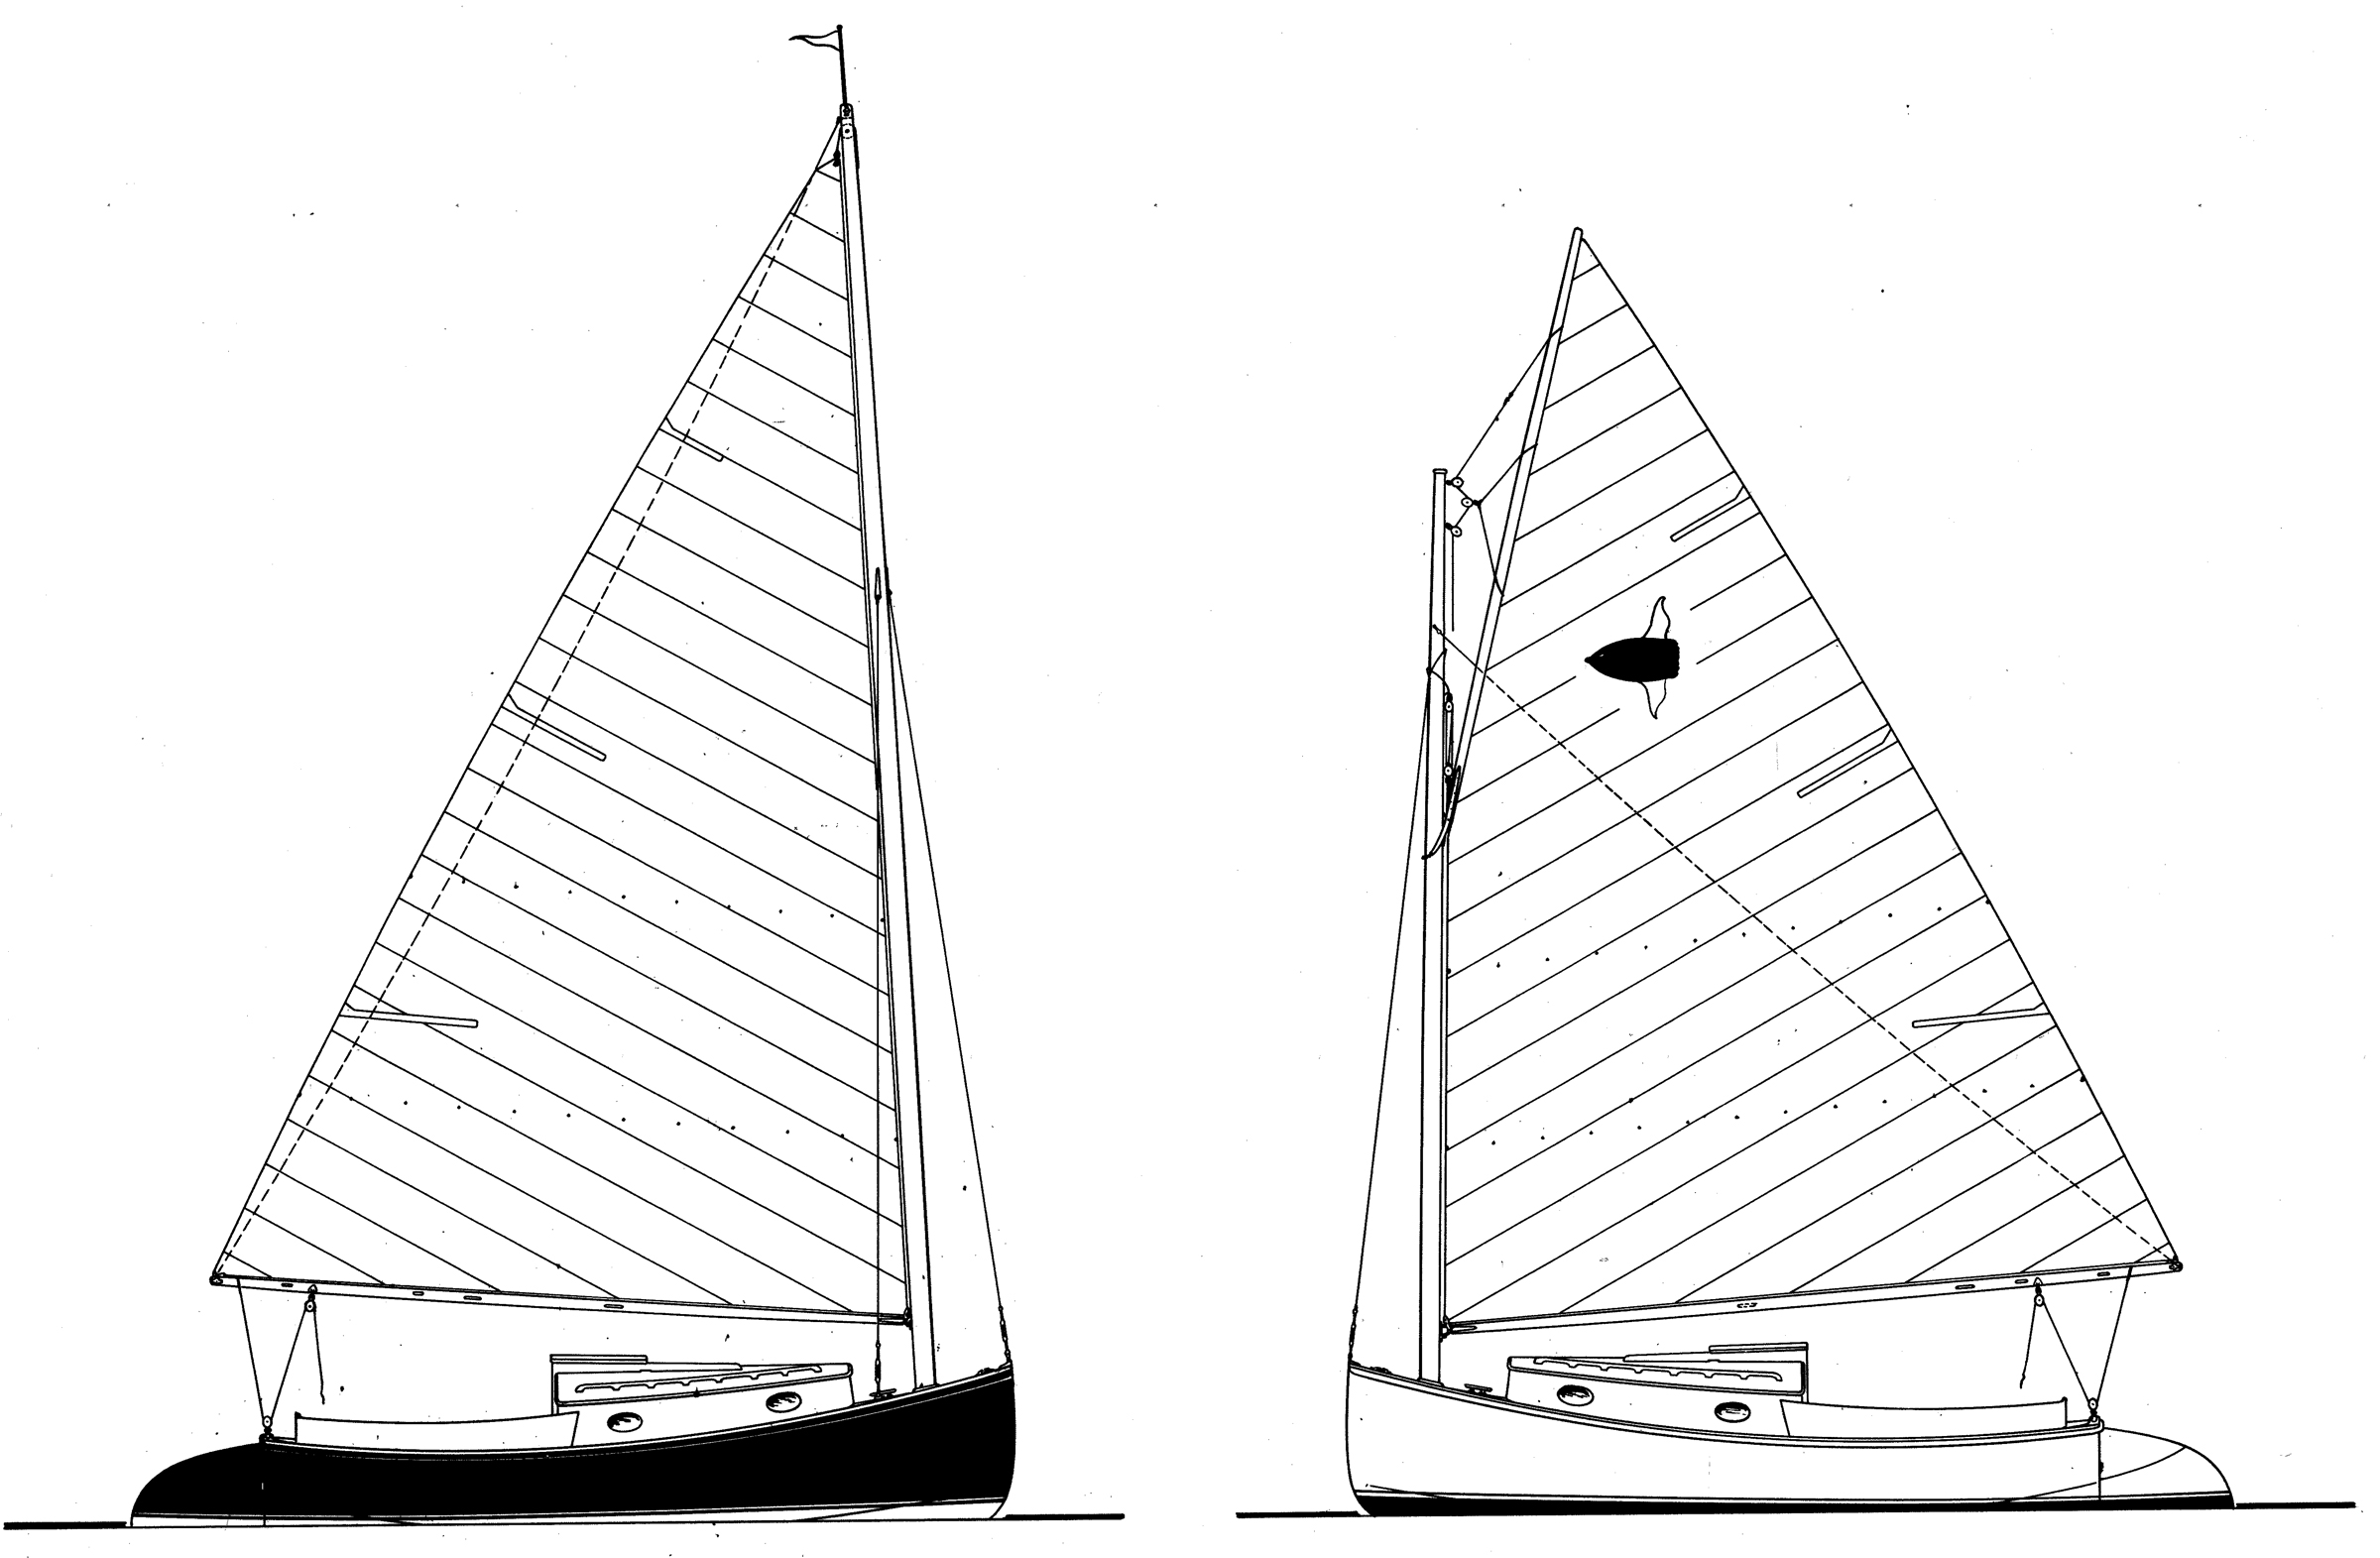
Thanks to reader Dick Lafferty for suggesting we review the Wittholz catboat—Ed.
Is there a boat you’d like to know more about? Have you built one that you think other Small Boats Magazine readers would enjoy? Please email us!
Share this article
Join The Conversation
We welcome your comments about this article. If you’d like to include a photo or a video with your comment, please email the file or link.
Comments (17)
Thank you very much for this article. I’ve built 2 wooden boats so far, one clinker and one stitch-and -glue plywood. I’ve looked many times at the lines of the Wittholz 17 and admired her beauty. You’ve brought her to life for me and provided a lot of food for thought.
Cheers, -Dick-
Mr Wittholz knew how to make a graceful boat! My first new boat, purchased in 1967, was a Chrysler Marine Lone Star 13. I had owned a $300 Philip Rhodes Penguin for just a month and sailed on White Rock Lake in Dallas. I quickly fell in love with the Lone Star 13s. What hooked me were two things: 1) their graceful, perfectly drawn sheer, and 2) the curling bow wave that the hollow in their forward section formed. I was sailing the Penguin one day when an LS13 came alongside and the skipper told me he had a customer who was looking for a Penguin and asked if I’d be interested in trading mine for an LS13. I (foolishly) assumed he meant a straight-up trade and gave him my phone number. He called that night and offered me $300 for the Penguin, but also offered to help me finance the LS for $30/month. I took him up on it and my only regret is that I didn’t keep that little Lone Star.
Great article. The Wittholz 17 has been on the top of my “someday” projects for a long time.
Re Fiberglassing flat plywood panels. Be aware that plywood with fiberglass is a lot stiffer than a bare piece of plywood. Some designs feature significant conical development and a fiberglassed panel will resist the conical bend. If you find yourself with this problem, the only solution is to remove the fiberglass with a heat gun, install the panel, and then fiberglass in place.
A lot of amateur boatbuilding is figuring out how to correct mistakes!
You raise a good point about flexibility of a fiberglassed panel. Other drawbacks to applying fiberglass to panels before use are that you miss the opportunity to span seams for reenforcement and cutting and planning the edges is hard on tools.
It’s with great interest that I read the article on the Charles Wittholz 17-1/2′ catboat. I own a fiberglass version of this boat, built in 1974 by Cape Cod Shipbuilding, in Wareham, Massachusetts, in 1974. Sailing the Atlantic coast of Nova Scotia is beautiful, but demanding territory for a small craft, but this design is totally up to the task! In the four years I’ve owned this boat, I’ve come to trust its ability to handle open water, and its ability to gunkhole in and around bays and islands, with its shoal draft, and retractable centerboard. My boat has the original gaff-rigged mainsail, with two sets of reef points. I have rigged single-line reefing system, as I single hand the boat, and led the lines back to the cockpit. I have added a boom gallows in place of the removable boom crutch. This also allows for tackle to be rigged to help raise and lower the 6-hp four-stroke outboard on its folding bracket. Other upgrades include cabin-top hatch for ventilation, bulkhead-mounted compass, and marine head. Planned future upgrades include installation of a tabernacle to enhance the trailer-ability of the boat. I would love to hear from readers with plans/photos of how to do this. I would encourage your readers to consider this time-proven design, as a salty, capable, pocket cruiser that’s well worth the time and effort to build!

I live in Portland Oregon, turned 80 in November and own a 17ft. Whitholz/Herman Cat. It needs some small attention anyone wanting to share information or look at my little project feel free to contact me*. Just read the article about Whitholz. I just saw the photo of Sandy Shaffer’s boat in your magazine and it would be nice to talk to her.
*Leave a comment here. We’ll forward it. —Ed.
The article about the Wittholz 17′ Catboat naturally interested me. In my opinion, it is the best looking and most useful of any 17’ boat I have ever seen. It is just good to look at; Wittholz had the nautical eye. To achieve a good-looking boat in something so short and squatty is a miracle. It is the mark of a real artist. I think his little 17-footer answers all of the desiderata. And for me, it even satisfies my love of engines, in having an inboard diesel. But it is also my eye that is pleased. I love the perfection of his retroussé bow. It is just right. I met Charles W. Wittholz. He was unpretentious, just a boat guy who had great talent. Conversation was easy with him. My buddy Tony used to have a catalog of his steel boat plans. Sadly, Tony threw that catalog away. I wish I had it. The catboat would not have been included in those plans. And because I had seen that catalog long before I had seen my own catboat and long before I met Wittholz, I associated him with steel yachts. Tony loved his 42’ketch. He thought of building it or having it built by Dennis Schreiber. We were visiting Schreiber in St. Augustine at the time when Wittholz just happened to stop by to talk with Schreiber, who was building one of his steel boat designs at that time. Wittholz was a normal-sized man, wearing shorts and just a plain short sleeved shirt and looking like an everyday guy. He wore glasses. His hair was dirty blond. You could see how much he loved boats in every word he said. He quizzed Shreiber on whether his plans needed any reworking. He asked questions on some technical issues of construction. What was obvious is that Wittholz not only wanted his plans to produce a beautiful boat, he wanted the technicalities of construction to be good. Strength, convenience, maintainability, and practicality of construction, were all concerns of his. You could see he did not approach boat designing casually. The very construction of the boat was a matter of importance. I can’t remember for sure, but it is possible that Schreiber told him of some small little tricks he had come up with to deal with a special aspect of the construction. Working with steel, of course, is a lot different than working with wood. And oddly, many of Wittholz’s designs could be built out of wood as well as steel. For example, my friend Tony has both the wood plans and the steel plans for Wittholz’s 42-footer Cutter/Ketch yacht. This babe is everything a man could want in a yacht. It was Wittholz’s answer to the SPRAY. Want to sail the Magellan Strait? It could do it. Until meeting Wittholz, I had always imagined a naval architect as being a very formal man, on the order of Phillip Rhodes or Nat Herreshoff. But in Wittholz, I was seeing a man who could be out there in the boat yard painting his boat. But once he started to talk, you knew you were dealing with the real thing. Surely, he is among the truly talented boat designers. I do value it highly that I met Charles W. Wittholz.
Great advice about reefing. Sailing a Herreshoff America 18 in Florida’s intracoastal, I would take in one reef before leaving the somewhat sheltered dock and shake it out when I reached open water if the breeze was light. That was much easier, single handed, than the other way around.
A beautiful boat, a true pocket cruiser. Excellent write up. I, too, have pored over the plans for many an hour; now, if we did not already own two catboats….
I would offer this as a possible approach to hinging your mast: you may wish to read Dave McCulloch’s article in which he uses three 1/4” SS plates with bolts and pins on his 4” diameter Marsh Cat mast. He has a similar system on his Kingston Lobsterboat. See WoodenBoat #237 M/A 2014 page 38 “A Simple In-Mast Hinge.” Note that he added side stays. I have seen his installation; it is clean and neat. He brought the boat to a Mid-Atlantic Small Craft Festival to much acclaim. You may wish to check with David regarding plate size for taller masts. I have a set of plates all cut out but can’t bring myself to saw my mast in half. Bill Rutherford CACTUS WREN
Could Bill Rutherford put me on to Bill McCulloch? I am building a Marsh Cat and plan to use a tabernacle for the mast. After much noodling, l’ve reinforced the deck from underneath using a piece of an old 4″D bird’s-mouth mast perched on the oak mast step and an oak deck pad. The tabernacle design is still in the works. Cheers, Robert Hale PS: I cruised on a steel Wittholz Departure 35 from Guatemala to Gulfport, Miss. Good sea boat.
I recently got an early Ted Herman version of the Wittholz 17, with the Marconi rig.
I recently restored my ’71 Herman 17 with a Marconi rig. I’m concerned with the mast bend I get in the upper portion at the diamond shrouds when close hauled under full sail. Being a sloop sailer for years, I am not familiar with tuning this setup. Diamand shrouds are not adjustable but possibly have stretched?
I am in the process of buying a 1973 Wittholz/Cape Cod Shipbuilding Catboat, so Monte Copeland’s article is very valuable. As a fellow Austinite, I would love to meet or speak with him.
Chris, I always look forward to the 1st of each month and the new issue of Small Boats Magazine . The ARCHIVE feature is an incredible bonus, especially for those of us of a “certain age,” since we can read again those articles of a few years back that seem as new as the latest issue!
I’m looking to build the 14′ or 17′ Wittholz cat boat and wondering what would be involved in using cedar strip and instead of plywood to get the rounded lines?
I built a Wittholz 17′ cat at around the same time as Monte Copeland and have been sailing it in Belfast Lough (the original one in Northern Ireland) for some 14 years now. I was able to exchange a few emails with Monte at the time we were building, which helped a lot to encourage me to keep going! I also had great advice from Dan Whiteneck who was building one near Boston, but I have unfortunately lost touch with him. The boat attracts admiring looks and compliments from all who see her and has become part of my life. Looking forward now to the summer for leisurely and surprisingly quick sailing in my unique Wittholz cat.
Leave a Reply Cancel reply
Your email address will not be published. Required fields are marked *
Stay On Course
More From This Issue

From The Editor
“Not because they are easy”
The president’s declaration led to Neil Armstrong making the first footprint on the lunar surface less than seven years later. And getting to that point was hard, even for a…

Designed to be light, the Savo 650D’s keelson, gunwales, and frames are made of pine or spruce. The fully equipped boat weighs in at just over 100 lbs. The length…
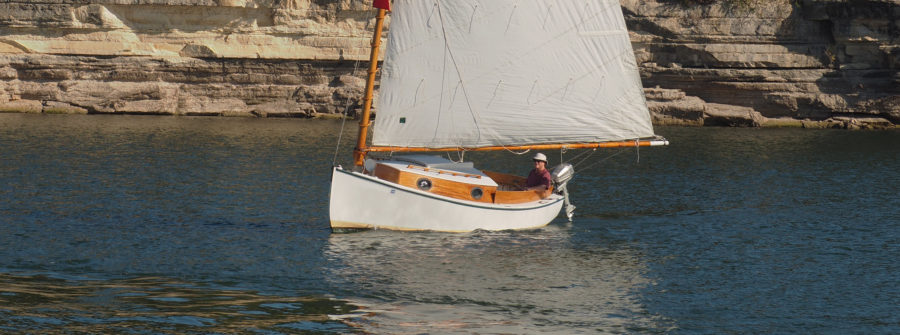
The plans for the 17′ 1″ plywood catboat include 11 sheets with good construction detail: materials, dimensions, fastening schedules, notes, and comments. Several alternatives are included: self-bailer instead of deep…
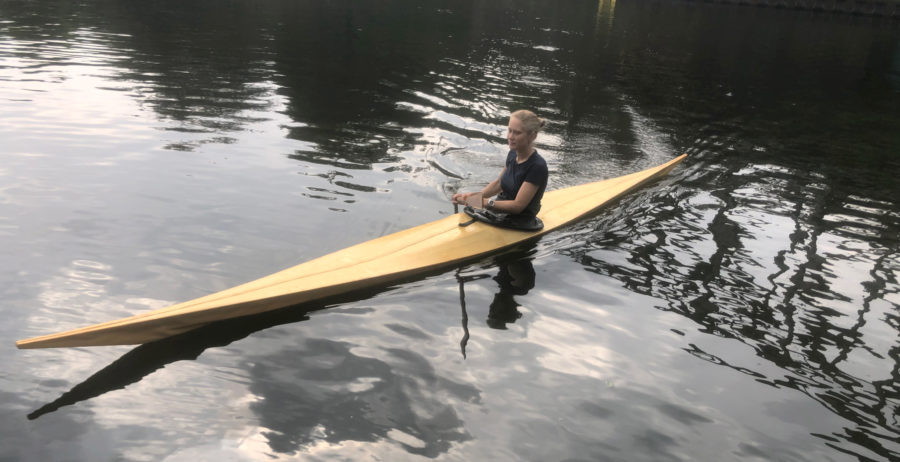
Don’t Tell Me I Can’t
“A little too big” came back to me as I stood in a lumberyard collecting the first of the materials for building a Greenland skin-on-frame kayak, but the echoes of…
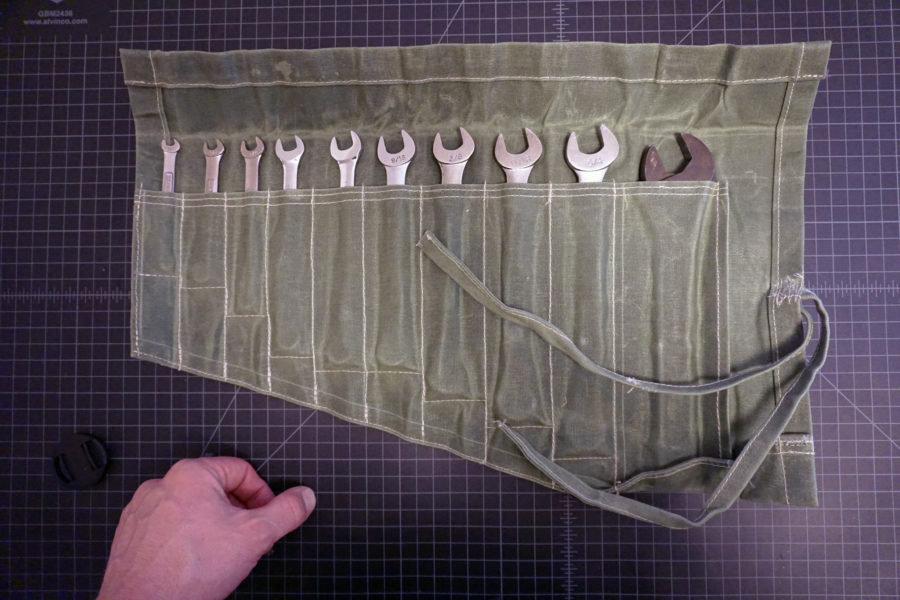
Waxed Canvas
DuraWax comes in two grades: light, which is treated with paraffin wax, and heavy, treated with beeswax. Both have the same underlying 12-oz cotton-duck fabric and, in both, the added…
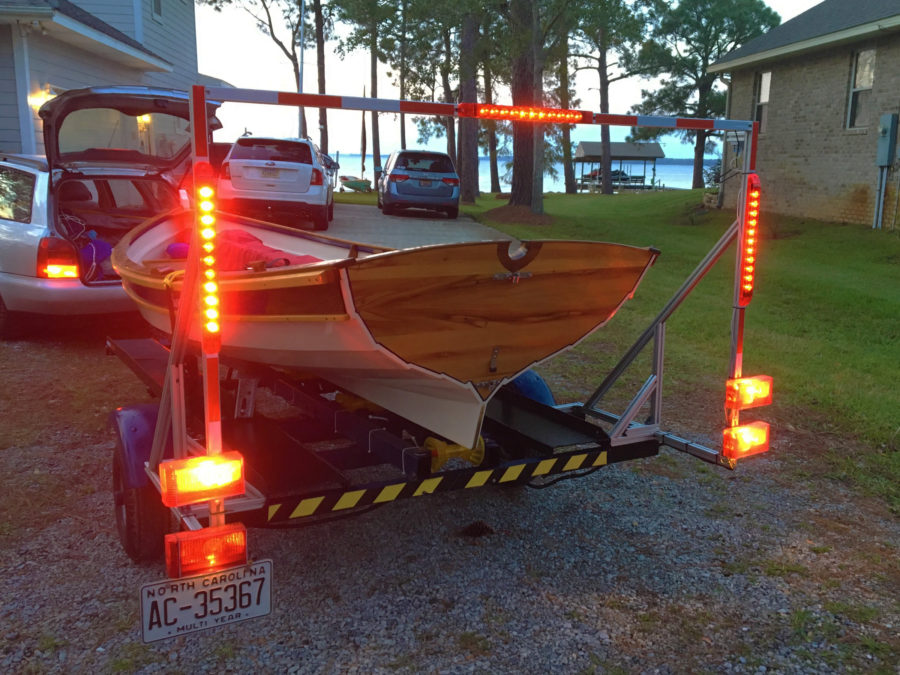
Product Reviews
LEDs for Trailers
LEDs, light-emitting diodes, provide bright lighting for trailers, much brighter than incandescent bulbs, making trailer lights more visible even during daytime towing. This is especially important with tail lights tucked…
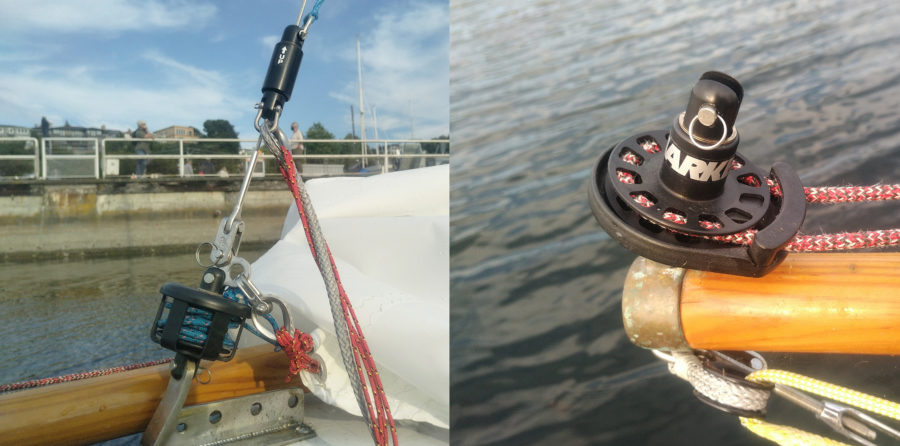
Harken Roller Furlers
I'm very happy with the performance of these furlers on my boat. Managing the headsails has become so easy that I rarely motor into or out of my mooring, opting…

KATHI LENETTE
Two years after being given the kit, Dave was ready to start and pulled the plywood pieces out of the box they’d been shipped in. The visions of his dream…
More Boat Profile
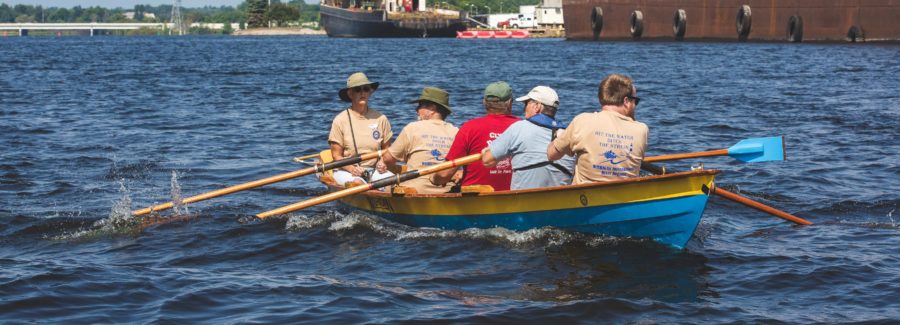
CLC’s Team Dory
While the boats are designed for four rowers and a coxswain, we take the Team Dories out with only two rowers and a coxswain. We balance the boat with one…
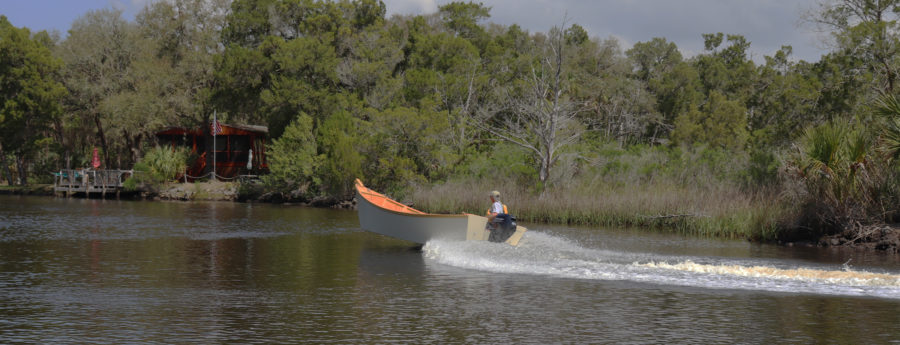
Carolinian Carolina Dory
I came across Spira International’s website on a random internet search. I was intrigued by some of the designs and happily surprised that the boats could be built using construction-grade…

Inlet Runner
Any serious angler knows the need for fresh bait for a day of fishing; being able to catch your own and not having to depend on a bait-and-tackle shop is…
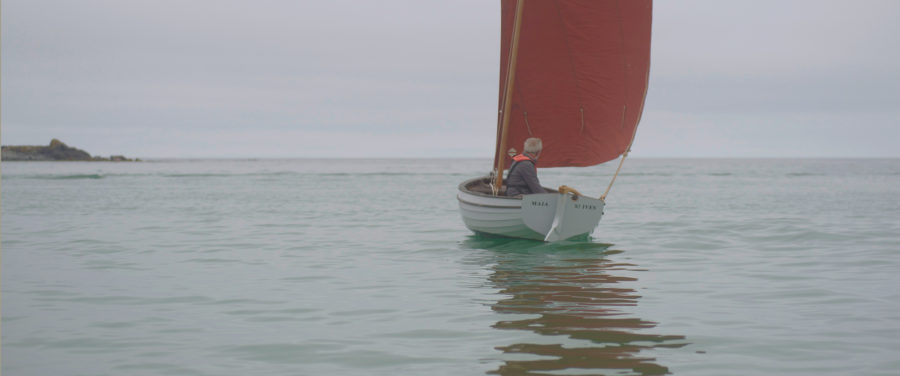
St. Ives Punt
Jonny built the first St. Ives sailing punt for Pete in 2014, followed by a second boat (with a slightly taller mast) for Scott in 2015. Good-quality larch wasn’t available…
Subscribe Today!
Become a subscriber today and you’ll recieve a new issue every month plus unlimited access to our full archive of backlogged issues.
Already a subscriber? Sign In
Subscribe For Full Access
Flipbooks are available to paid subscribers only. Subscribe now or log in for access.
LIST of WOODEN BOAT PLANS – By Michael Storer
Plywood boat plans and wooden canoe plans. sailing dinghy . power . row . paddle . overnight, a boat building course in a book.
Click on an image for more information about our inexpensive, highly detailed boat plans and wooden canoe plans
Viola 14 Sailing Canoe Boat Plan
A sailing canoe to make dinghy sailors happy – 75lbs and for a simple boat, beautiful beyond belief – visit page.
Viola 14 Sailing Canoe is fun and exciting. But easier than a sailing dinghy to transport and store.
Canoe performance and Dinghy stability. 14ft – 75 pounds (34kg)
Viola is extremely stable allowing the crew to stand up and step and unstep the lug rig mast while on the water. Try that in a symmetric paddling canoe hullform! If righted correctly she is almost dry after capsize.
Three Sailing rigs with two piece masts 4.7 and 6.0sqm full batten rigs. 6.3m balance lug with three reefs for distance sailing. 75lb hull. Four sheets 4mm plywood.
More about the Viola 14 Sailing Canoe Plan here
Kits For Viola 14 Canoe Europe – Viola 14 Sailing Canoe Precut Plywood and Timber Kits Americas – Viola 14 Saling Canoe Precut Plywood and Timber Kits
16ft Kombi Sail and Paddle Canoe Plan
A 50/50 Sail and Paddle Canoe for one or two with more stabililty for sailing – visit page
The Kombi Canoe is a development of our recent sailing canoes to bring paddling ability up equal to the sailing ability.
Great for families as it can be used as a pure paddling canoe, but also sail well with one or two adults aboard.
More about the Kombi Sail and Paddle Canoe here.
NEW Plan – Mini Outriggers for Adding stability to sailing canoes and small dinghies
The Mini Outriggers are to add stability to a sailing canoe or small dinghy and aid stability to reduce the risk of capsize on other relatively slender boats.
They are set above the water to allow a sailing canoe or narrow dinghy to be sailed normally .
More about the Mini Outriggers here.
Taal Stand Up Paddleboard in Plywood
Both speed and stability at the same time.
A beautiful plywood Stand Up Paddleboard designed for distance paddling.
The user feels the stability, the water thinks it is a low drag pintail. 12ft
We created a board that hits the numbers for a good canoe or rowboat. Less wetted surface with a stable midsection and excellent weight carrying.
12ft and Stable for beginners but with the low drag of a kayak/pintail type hull (see the stern photos).
More about the Taal Touring Stand Up Paddleboard Plan here
Goat Island Skiff Sail Boat Plan
Simple, modern performance and famous worldwide.
Justifiably famous.
Simple to build but light, fast, pretty. Fast with 1 to 4 adults
Rows and Motors and will sail rings around other character boats. 15.8ft
More information about the Goat Island Skiff Plan Facebook Group for asking questions about the Goat Island Skiff
Quick Canoe 155 – build in 2 weekends
Very simple plywood canoe that handles well and looks right.
Quick DIY wooden canoe that works better than most flat-bottomed canoes and many fibreglass ones.
Even looks good on the beach. 15.5ft
First one took the builder 4 1/2 hours to get on the water – but most take 2 weekends. Half the weight of many fibreglass canoes. Lighter than most plastic. 55lbs from big store plywood. Another took 5 1/2 hours .
It has been designed to be as easy to build as possible while keeping most of the qualities of a nice paddling wooden canoe.
In particular the ability to track – excellent first boat plan. Click here for a comparison between our fast and our classic paddling canoe plans
More Information about the plywood Quick Canoe Plan
Eureka Canoe – Classic Plywood Canoe Plan
Light and lovely to paddle. simple plywood boat plan.
Light on the land, Prettiest Plywood or wooden Canoes anywhere. 15.5ft
Excellent distance touring boats.
15’6″, simple construction for a wooden canoe. 32 – 45lbs (15 to 20kg)
Click here for a comparison between our paddling canoe plans.
Click here for more information about the Eureka Plywood Canoe
Quick Canoe Electric Cargo Canoe Plan
Wooden cargo canoe for electric trolling motor 34lbs thrust.
5 to 6mph using a 34lb thrust Minn Kota or other electric trolling motors. DIY plywood canoe for fishing and roof racking.
Keeps the simplicity and low materials cost of the Quick Canoe Family. 15.5ft
Cartop transport. Very detailed Wooden Canoe Plans.
Click here for more information about the Plywood Quick Canoe Electric
Oz Goose Light Family and Club Sail Boat Plan
Low-cost family sailing dinghy, regattas and club training and learn to sail.
The Oz Goose is a small boat that is super easy to build.
Cruising or teaching with three adults or excellent club racing performance sailing with 1 or 2 in the boat. 12ft
The famous line is we can build 10 of these in the Philippines for the price of importing a single Laser sailboat. Boat speeds are very matched for excellent tactical racing when not heading off for a family picnic with two adults and a bunch of kids aboard
For training, the goose will carry an instructor and two adults to sail with good sensitivity and speed. In stronger winds, we commonly see downwind speeds of 10 to 13knots and sometimes much more.
Also, visit the Oz Goose Group on Facebook More information about the Plywood Oz Goose – see the website
“BETH” Sailing Canoe – Elegant plywood boat plan
Simple, brilliant performance – one person cartop – sailing canoe portability.
A touch of the 1870s but fast about as much fun as is possible on a plywood boat.
Yawl Rig with speed – a wooden canoe that can scare the Lasers at your local club .
Racing dinghy experience recommended!
A small boat for amateur boat building that is light enough for one person to roofrack 70lbs plywood canoe hull. Sailing Canoe boat plan
Click here for more about the plywood BETH Sailing Canoe Plan
Drop-in sail Rig Plan for Canoes and Kayaks
Convert a canoe or dinghy into a serious sailboat.
Convert most Kayaks or Canoes into an INSTANT SAILBOAT.
Everything removes as one unit except for the mast step
Also fits some rowing dinghies that are small or narrow.
Very cheap beginners plan.
Read more about the Drop-In Sailing Rig Boat Plan
Drop in Outrigger Canoe conversion Plan
Convert canoe, kayak or dinghy to a fast sailboat trimaran with amas..
Create a paddle or sailing outrigger canoe from a fibreglass or wooden Canoe or Kayak.
Even an elderly Grumman!
Convert your old canoe into an awesome sailing machine or fishing or diving platform.
Each component is under 10 pounds and everything removes cleanly from the boat apart from 4 small fittings and a mast step.
These Amas and crossbeams work for fibreglass and wooden canoes and dinghies, Fibreglass, Aluminium and some plastic canoes.
Performance sailing (see the video on the plan page ) or as a stable fishing platform or to make a super quick sailing multihull.
If you buy the plywood boat plan for the outriggers there is a free supplement available to set it up for sailing. Very cheap plan for a big boost in performance.
Find out how to convert your canoe, kayak or dinghy to a fast sailing outrigger canoe
Handy Punt – simple fishing punt Boat plan
Light cartop load, simple to build and stable – ideal first plywood boat plan.
Outboard motored Punts are the simplest plywood boats.
Good performance, easy construction, stable fishing platforms.
And lightweight for cartopping on roof racks.
An easy first boat plan for first-time boatbuilders.
6 to 8hp – 10 in some regions
Click here to find out more Outboard Punt Boat Plan
Russki Wave Ski, Surf Ski, Sit Down Paddleboard Boat Plan
Easy to build sit down paddleboard from two sheets ply.
Simple plywood waveski or paddleboard from two sheets of plywood.
Paint it and keep it on the car roof ready for use after work.
Small light boats usually are used more frequently than complicated and expensive boats.
Find out more about the Russki Plywood Wave Ski Plan
15 1/2 ft Storer Rowing Skiff Plan
Easy pretty plywood rowing skiff plan for oar.
Simple lightweight rowing skiff for one person and maybe a passenger based on the Goat Island Skiff.
Or Adult and a couple of kids.
Pretty and quick rowing boat on the water.
Simple lightweight rowing skiff for one person and maybe a passenger or a couple of kids. Based on the Goat Island Skiff. I used to get enquiries about using the Goat Island Skiff sailboat hull for rowing. It does row well but blows around too much.
This is much, much better. Pretty and quick rowing boat on the water.
Find out more about the plywood Rowboat Plan
Dayboat/Launches Boat Plan Bundle 23 plus 27ft (7/8.4m) Venezia
Boat plans for two simple prefabricated cruisers for low power outboard in one package – 23 and 27ft.
Picnic boat, party boat, river-cruiser, camp aboard, mini home-away-from-home.
Cuts through river and lake chop with zero bouncing and pitching.
Pack includes 23 and 27ft Dayboat versions in one plan pack includes Venezia below.
Simple plywood construction. 10 or 15hp 4-stroke for 8 to 10 knots. Venezia and Dayboat Launch Boat Plan Package
More about the 23ft Plywood Dayboat/Launch Boat Plan
“Venezia” 27ft trailerable canal boat
Stretched version of 23ft – both included in the plan above.
An 8.2m (27ft) boat for gentle cruising in rivers and canals.
Great appearance, sleeping accom., separate toilet – your layout.
10 to 15hp 4-stroke. 2 wooden cruising motor boat plans for the price of one – Venezia and Dayboat Launch Boat Plan Package
Read more about the 27ft Venezia cruiser canal boat plan
TC35 Riverboat – Prefab, Economical Liveaboard for Two
Minimal liveaboard plywood boat 35ft.
Very economical, near wakeless cruising motorboat.
Light on the gas and light on building materials.
Revised wooden boat plan for an extremely economical, efficient low horsepower riverboat.
35ft. 1 x 15hp or 2 x 10/15hp. Simple Prefab Plywood Construction.
Find out more about the TC35 River Cruiser Plywood boat plan.
OZ RACER – 8ft Sailing Dinghies.
Smaller versions of the 12ft oz goose sailing dinghy – 8ft for easier storage..
12ft Oz Goose for Capacity and Performance
- Same easy construction
- Same Sail and Foils
- Much higher performance
- Much larger capacity
OzRacer RV 8ft – General purpose version
OzRacer RV is the same small boat hull but with more space in the cockpit and is a slightly simpler build.
4 sheets plywood.
These Boat plans are a modern boatbuilding course in a book. Capacity 1 adult and one child or maybe 2 adults
Find out more about the OzRacer RV
OZ RACER Mk2 8ft – Race Version
OzRacer Mk 2 has a centreboard for more performance but a bit less room for extra crew.
Three sheets plywood. Simple Plywood Boat Plans. Capacity 1 adult and one child or maybe 2 adults
Find out more
Free plans Oars and Single Paddle & Double paddles.
Simplified paddles and oars based on classic designs – free plan.
- Free Plans for Wooden Oars
- Single Paddles
- Double Paddles.
I didn’t want to charge extra for nice paddles to go with our nice wooden Canoe plans
Download Free Oar and Paddle Plans from this page.
Tips and Tricks for Boatbuilding, Woodwork, Use of epoxy.
CLICK HERE for many helpful articles about the selection of materials, boatbuilding and boat repair techniques. All to help home boatbuilders.
The Master list of Articles we have written to explain and help out home boatbuilders
Blog Articles about a whole range of design, building, sailing technique articles.

12 Tips For Restoring an Old Boat: Costs, Time, And Expert Advice
Looking at restoring an old boat chris mccall shares his expert advice..

So, you’re thinking of buying an old boat and bringing her back to her former glory? Awesome! Get ready for hard work and frustration culminating in an ultra-rewarding experience.
Buying and refitting an old sailboat is totally worth it! You won’t build a ton of equity in the boat, but you will know every square inch of that vessel, and the skills you gain will be invaluable.
My wife and I just finished the three-year refit of our 1972 Nauticat 38, Drifter, and now live aboard in Portland Oregon. As soon as the weather cooperates, we plan to take him (Yep, Drifter’s a fella) south and begin cruising full-time.
Feel free to check out our progress along the way and the results of our labor; you can find us on YouTube at YouTube.com/SailingAdrift

As an Amazon Associate, we earn from qualifying purchases. We also earn from other affiliate programs. This means we may receive a small commission on products purchased through our links at no extra cost to you.
Here are my top tips to help with your refit. Most I followed; some I wish I would have.
During The Buying Process
Get one of the best knives for sailing
Before you buy your perfect renovation project boat, here are a few tips to follow so you don’t fall short at the first hurdle.
#1 Know what you’re getting into

Refitting a boat is not an easy undertaking, and the single biggest thing keeping you from success is your tenacity to see it through. There are so many boats for sale, half-finished, because the undertaking was a lot more than their owners predicted. So….
#2 Plan, Plan, Plan.
This post is a great place to start. Start taking notes and tour as many boats as you can to gather ideas.
Talk to people that know. Read books. Read articles. Watch YouTube refit videos. Join social media groups focusing on refits, interior design, electrical systems, electronics, and boat makes you’re interested in.
I know the excitement is high but take a beat and make sure you make a logic driven decision based on research. There will be time to fall in love later.
#3 Make a core list of what you want from restoring an old boat

List the makes, lengths, characteristics, and price range and stick to it.
Then make a list of “nice to haves” and look for boats that have as many as you can find. If you go in with a clear understanding of what you want, and the deal breakers associated, it’s much easier to make a smart decision.
#4 Let someone else take the depreciation if you can
If you’re going to be refitting, you’ll be taking on plenty of depreciation as soon as you start installing your new electronics, appliances, and equipment, so minimize it by finding a boat where the previous owner has installed as much of this stuff as possible.
New engine? Awesome! Just upgraded all the navigation equipment? Great. New refrigeration unit? That helps. Let the last guy take the hit for 50 cents on the dollar.
Wondering how much sailboats cost ? Get a rough idea here.
#5 Buy cheap and pay cash if you can

Boats are not like houses. There isn’t nearly as much competition for boats that need a fair bit of work, because you won’t build a bunch of equity refitting like you would flipping a home.
Don’t expect to save tons of money refitting the boat yourself. You may save yourself a little but the real value is in the knowledge of the vessel and the skills you’ll gain.
So be ready to offer significantly less than asking, and don’t be surprised if they take it.
#6 Include a survey contingency and evaluate your prospective project from top to bottom
Do you have to hire a surveyor? No. But if you don’t, get ready to learn all you can about the process, and go over every square inch.
Know someone super knowledgeable you can ask to help? DO IT! Do not be afraid to walk away. Getting attached leads to bad decisions.
Now That You’ve Got Your Boat Restoration Project

So you’ve found your dream boat (to be!) Here are the next steps in restoring an old boat.
#7 Create a conservative budget
Take your number and pad it by 30%. It is all too easy to let costs get out of hand. Do your homework. The more knowledge that goes into that budget, the less costs will surprise you. Front end work pays huge dividends.
#8 Come up with an educated guess at the timeline in total work hours
And then multiply it by 4 (If you know someone who does this work a lot, take their estimate and double it; they are faster than you)!
Then break it down into phases to make the overall project less daunting. Tracking your working time in hours keeps focus and doesn’t punish you for life getting in the way.
I made a game of it by tracking my active work-on-the-boat time in hours with an app called Toggl. If you’re at all competitive, this really pushes you to keep getting out there to beat your weekly and monthly bests. Celebrate the small victories; don’t punish the shortcomings.
#9 Build in expandability, especially in your electoral system (think battery space)

Make sure you have spare breakers on your panel and room in your conduits. Always install pull strings. No one in the 70s could have imagined the electrical needs of the modern boat, so don’t make the same mistake.
Future you will thank you.
If you’re reinstalling batteries then check out the best lithium marine batteries . Aim for a slightly bigger bank than you think you’ll need! ⚡ We highly recommend BattleBorn LiFePO4 batteries ⚡
#10 Experiment with clever ideas for maximizing your space
Keep what works. Tweak what needs adjusting. And scrap the flops. This is your opportunity to get creative. Test your original ideas.
Copy what others have done on their boats and modify what you find when researching tiny living and RV sources. Sometimes building a custom solution is the right way to go, but they often don’t work as expected.
If a production solution is available, it may cost slightly more but will save you more in time and headache.
As an example, we built our own propane alarm and on/off solenoid because the commercially available one seemed so expensive (and I thought it was ugly).
Finding all the components took hours and hours, and when I had collected them all, I’d only saved about 25%. Installing everything, and getting the sniffer, switches, and solenoid to all work together, was a huge headache. If I could do it all again, I’d just buy that ugly thing.
#11 Stick with it

The paradox of a major boat refit is that with little exception, every job sucks. Some suck a lot. You’ll have your head below your ass, sanding for hours, crammed in a tiny locker, but the satisfaction you’ll feel at the end of the day makes it all worthwhile.
Over the weeks and months of our old sailboat restoration, I experienced periods of high motivation where working on the boat was the only thing I wanted to do.
Things like eating, sleeping, and my day job just got in the way.
Other times, making myself get out there was like getting a 6-year-old to eat peas: damn near impossible. Motivational ebb and flow is a natural part of any long undertaking, but you have to push through it and keep going.
Don’t be another person selling a partially refitted boat. STICK WITH IT!
#12 Use perfection as the unachievable goal that it is

Instead, focus on safety and functionality. The goal is to get out there and enjoy your hard work, not worry away over every imperfection. You’re the only one that will notice anyway.
You’re never going to actually finish the boat refit; there will always be items on the to-do list. Once she’s fully functional and safe, go enjoy her. You can work on the never-ending list as you go.
Refitting Drifter was one of the single most rewarding undertakings I’ve ever done.
We live aboard, so every day I’m surrounded by the fruits of our labor. While there are flaws, the good far exceeds the bad. I know every system, and every nook and cranny. Get out there and find your opportunity. In the end, you’ll be so glad that you did!
Conclusion: Tips For Restoring an Old Boat
If you’re lucky enough to find an old boat that’s still in good shape, then you’re well on your way to having a great time out on the water. With just a little bit of elbow grease and know-how, you can have your boat sailing like new again.
Thanks for reading and we hope these tips helped!
Wondering what it’s like to live on a boat on land in a boatyard? Give this article a read to prepare you!

Chris and his wife Kelly bought their 1972 Nauticat 38 in April of 2017, and in May of 2019 went full steam ahead with an extensive refit in the driveway of their home in Portland OR.
They splashed and christened Drifter in the summer of 2022 and moved aboard full-time that September.
They are awaiting a weather window to tackle the wild west coast of the United States and begin cruising full-time starting with Mexico and Central America with the intent of continuing west.
Find their whole refit adventure documented along the way at YouTube.com/SailingAdrift. Feel free to contact them directly with any thoughts and questions through their website: www.SailingAdrift.com or by emailing [email protected]
Similar Posts

The Best Sails For Cruising Sailboats

Gill OS2 Jacket Review: Tried And Tested Offshore Gear 2024

Storm Sails: The Ultimate Guide

Can You Sleep While Sailing?

Sailboat Keel Types: Pros And Cons 2024

30 Beautiful Songs About Sailing 2024
One comment.
Should be able to pay moorage before launching and make the rest of us look like vagrants with 3 kids
Comments are closed.
Great Projects
Free building plans and fun projects.

Featured Plans

A shop press built from spare parts? Yep!

Mixing cement by hand is for the birds. These plans are for a small cement mixer.

Kids LOVE trains! So do you! Build a miniature train and train track in the backyard!

These plans are for a conveyor belt machine that is an elevator for hay and grain.
- Build a Hay Bale Loader Plans
- Build a Electric Cement Mixer Plans
- Build a Utility Cart like a Mule Plans

Post hole auger attachment for your tractor is needed. Build this.
Assembled from junk parts, this post-hole auger makes easy work of a tiresome job.
- Hand Crank Forklift For Small Tractor
- Grader or Scraper for Tractor
- Bizarre Garden Tractor Crafted From Wood! Plans

These plans are for an add-on dagger board and sail to convert a rowboat to a sailboat.
From the plans:
- Build a Dinghy Sail Boat
- Plywood Rowboat Plans
- Build a Small Sailboat Free Plans
All Our Vintage Projects Categories
Vintage projects.
All rights reserved, 2020 [email protected] Copyright, Safety and Legal Information Terms of Use - Privacy Policy Site Map
Discussion Forum
Ask questions, get answers, share stories in our discussion forum!
IMAGES
VIDEO
COMMENTS
"Boat Builder Handbook" and other very old magazines. Boat plans from Science and Mechanics and Boat Builder Handbooks. Plans for Hydroplanes, Sailboats, Inboards, Runabouts, Canoes, Kayaks and many other boats. This is a FREE user supported site. An online library. To contribute just send an "E-mail". There are a few plans that have CAD ...
If the plans specify 1/4" plywood, use 1/4" epoxy coated on all faces with epoxy resin only. For 3/8" ply, replace with 1/4" with either one layer of glass outside or one layer outside and one inside. For 1/2" ply, use 1/4" with one-layer biaxial glass 12 oz. each side.
Actual plans, from old book. Substitute plywood for solid wood. Old Plan for Take Apart Skiff. Actual plans, in PDF format. Boat is in 3 clip-together sections. Old Plan for folding boat. in PDF format. Plywood with canvas hinges folding skiff. Take apart Jonboat come in 3 sections and has a built in cooler.
When building a wooden sailboat, it is important to pay attention to every step, including the installation of the cabin and interior features. To install these features, follow the following steps: 1. First, measure and cut the materials for the cabin walls, floor, and ceiling. 2.
Introduction. The focal point of this page is the construction of an Old Shoe from plans purchased at Common Sense Designs. The purpose of this web page is to provide information on Lancaster Boat Works, and to provide a portal for access to on-line information on the Old Shoe and other boats designed by Phil Bolger.
Free boat plans, sailing stuff and more. Free Boat Plans from old magazines Old Boat plans from Science and Mechanics and Boat Builder Handbooks. Plans for Hydroplanes, Sailboats, Inboards, Runabouts, Canoes, Kayaks and many other boats. This is a FREE, NON-COMERCIAL, user supported site. An online library. To contribute just send an email.
To guarantee a smooth sailing experience, follow these steps: 1. Carefully inspect the hull of the sailboat for any damage or cracks. Be sure to check the seams and joints thoroughly. 2. Take the time to check the rigging, including the mast, shrouds, stays, and halyards, for signs of wear, fraying, or corrosion. 3.
These plans are for a small 15 foot knockabout sailboat. I like these plans for their ease. Building a smaller boat is a lot more attainable than a cabin cruiser! And these plans get right to the specifics of building. From the plans: ANY SAILBOAT fancier will like "Tramp," the trim, 15-ft. knockabout that's so easy to build in plywood.
Home. Classic wooden boat plans is a collection of established wooden boat designs ranging from the early 1900's to about 1970. Some of our own designs are Banshee, Custom Barrelback 19 and the Deep V inspired by the Donzi Sweet 16, Bantam. Other plans include Chris Craft, Hacker, Gar Wood, Riva, Switzer, barrel back, Baby Bootlegger, Flyer ...
These components are accessible by removing a floor hatch. With the 18-inch pitch on the propeller—allowing for 15 percent propeller slippage—and the engine turning 3200 rpms, the math says ...
Old Boat plans from magazines and books. Plans for Sailboats, Inboards, Houseboats, Canoes, Kayaks and other boats (Added: 27-May-2008 Hits: 60580) My Links | Rate | Cached | Visit Grandpa's Archive. HV Boat Projects Free boat plans and construction instructions. Lessons learned from some construction projects.
Old Boat Plans from the 40s, 50s & 60s ... Amateur boat building can be easy boat building and simple plans can help make it happen. There are many cheap plans or free plans available on the web as well as here on my site.Also lots of help if you'd like to design boats. Boat designing can be a life long pleasure.
Free Sample Plan. Free Sample Plan. Classic wooden boat plans is a collection of established wooden boat designs ranging from the early 1900's to about 1970. Some of our own designs are Banshee, Custom Barrelback 19 and the Deep V inspired by the Donzi Sweet 16, Bantam. Other plans include Chris Craft, Hacker, Gar Wood, Riva, Switzer, barrel ...
Boat will be powered by a diesel (20-30 HP) or electric (7 kW) inboard engine fitted with a saildrive or shaft-line transmission; this will allow to keep a decent pace while motoring in zero wind situation, or to add a good booster to sail thrust if needed; I expect to reach a 6.5 knots boat speed at 2000 Rpm with a 30 HP diesel engine.
Old Boat Plans - from PolySail International, Stuart. 1,632 likes · 5 talking about this. This page will feature old wooden boat plans gleaned from "How to Build 20 Boats" that were popular
This package, for immediate download, contains over 165 plans in PDF format for different styles and shapes of boats. This is our complete boat plan package. These are all the boat plans we sell! Row Boats, Canoes, Kayaks, Sailboats, and Utility Boats, Cabin Cruisers, Houseboats, Hydroplanes, Novelty boats, Paddle wheel boats, Inboards ...
Plans & Kits. If you're in the market for a boat to build, this directory of Boat Plans & Kits is a fine place to start. And if your company sells plans or kits, we invite you to list your offerings here. There is no charge for listing, but the featured boats must be built of wood. To refine your search of this directory, use quotation marks.
The old boat is believed to have been built on Hoopers Island about 1906. Chapelle took the lines off her at Crisfield, Maryland, in 1943. This hull's shallow, almost flat-bottomed, forefoot allowed Parker to sheathe its virtually unaltered lines with sheet plywood. ... Transfer the dimensions from the boat plans onto full-size layouts called ...
The plans for the 17′ 1″ plywood catboat include 11 sheets with good construction detail: materials, dimensions, fastening schedules, notes, and comments. Several alternatives are included: self-bailer instead of deep cockpit, lead-ballasted full keel instead of a centerboard, open cockpit instead of a cabin, gaff or marconi sailing rig, optional anchor-handling bowsprit, and an optional ...
There are 3 pages of construction notes, a 3 page article describing the construction of a boat, materials lists, and 12 pages of photos. Plans for all 3 skiffs are included - the original 16' LYS, the 16' LYSS, and the 20' LYS. You can order thru the web site, or you can give me a call at 508-349-2383 and order over the phone with a credit card.
Buy Canoe Plan - $75. Light and lovely to paddle. Simple Plywood Boat Plan. Light on the land, Prettiest Plywood or wooden Canoes anywhere. 15.5ft. Excellent distance touring boats. 15'6″, simple construction for a wooden canoe. 32 - 45lbs (15 to 20kg) Click here for a comparison between our paddling canoe plans.
Buying and refitting an old sailboat is totally worth it! You won't build a ton of equity in the boat, but you will know every square inch of that vessel, and the skills you gain will be invaluable. My wife and I just finished the three-year refit of our 1972 Nauticat 38, Drifter, and now live aboard in Portland Oregon.
These plans are for an add-on dagger board and sail to convert a rowboat to a sailboat. From the plans: Build a Dinghy Sail Boat. Plywood Rowboat Plans. Build a Small Sailboat Free Plans. Discussion Forum. Ask questions, get answers, share stories in our discussion forum! ...